Now launch ZipKing on your desktop. if you didn't download it, you can go to the ZipKing official site to download and install it.
Part 1: How to zip a file or folder with ZipKing
There are two ways to zip a file with ZipKing.
1.1 Guide to Zip A file by ZipKing
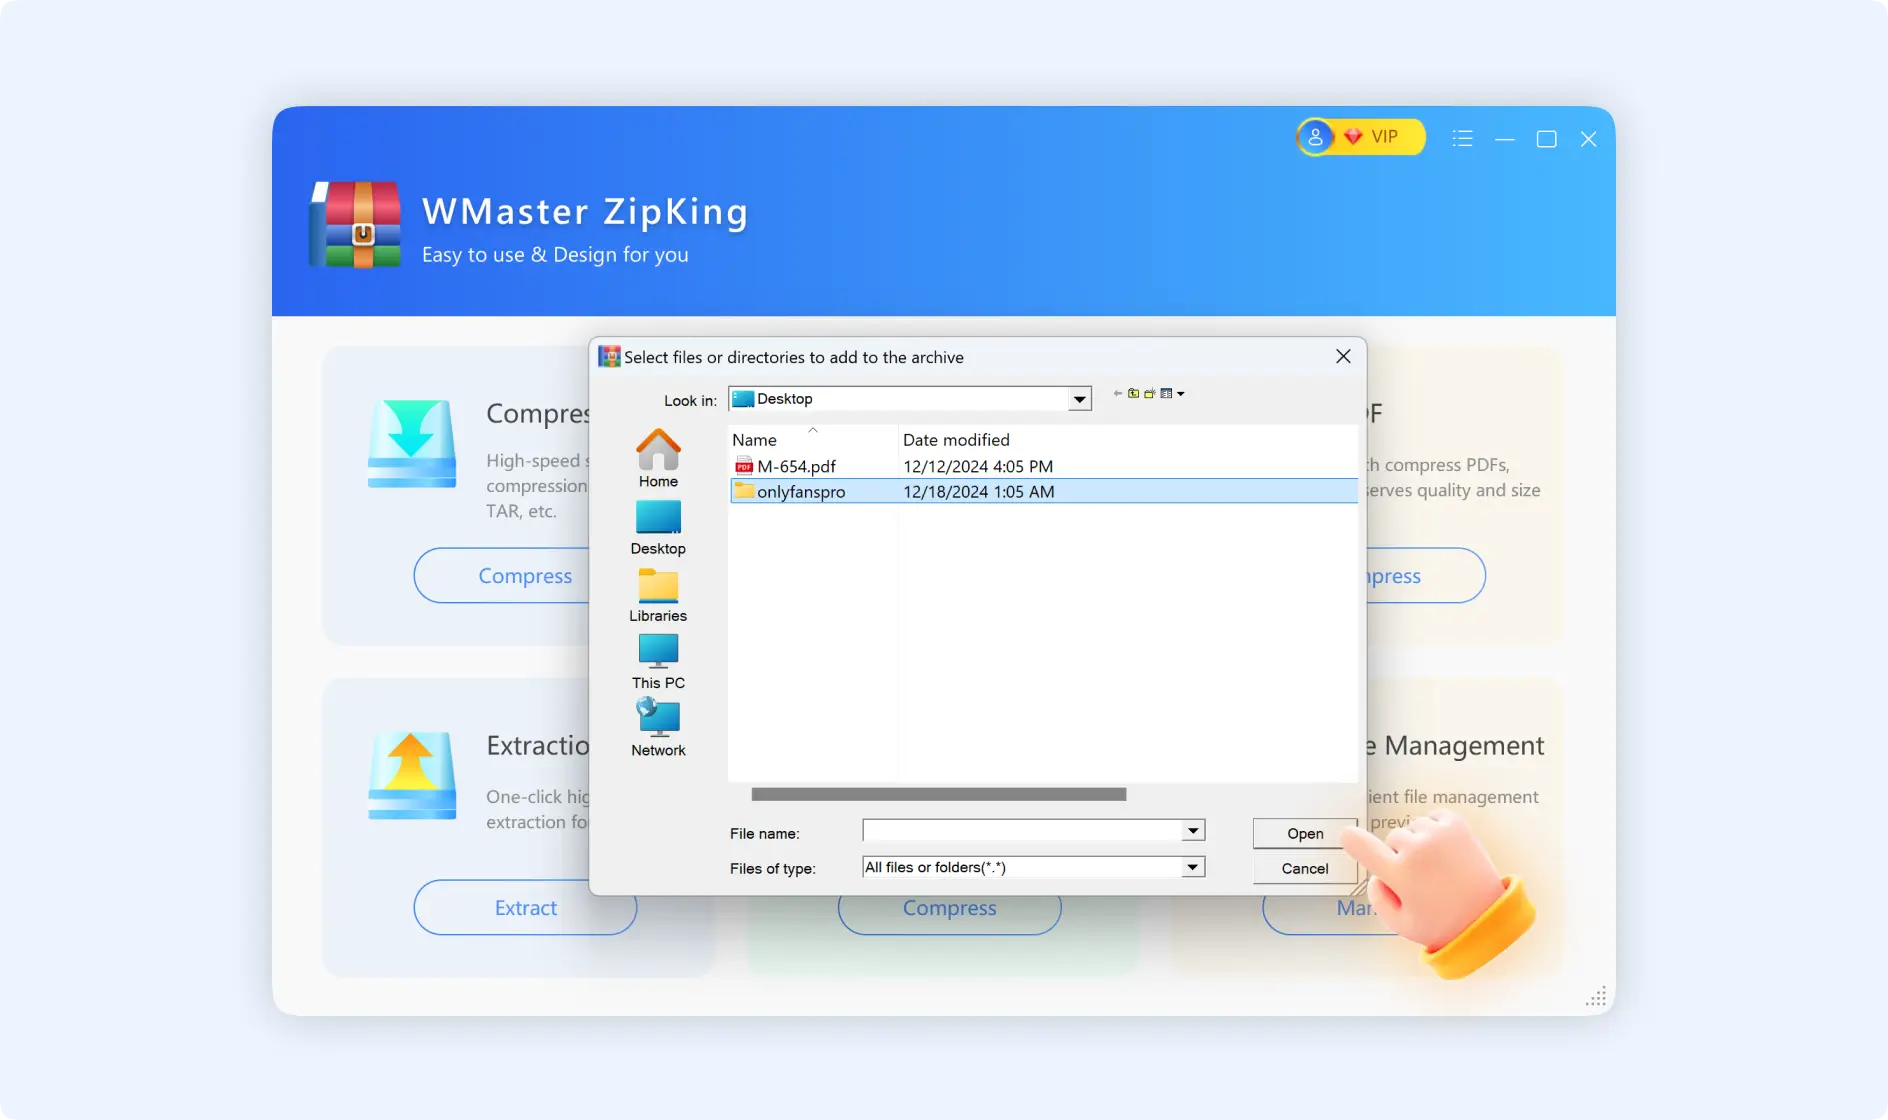
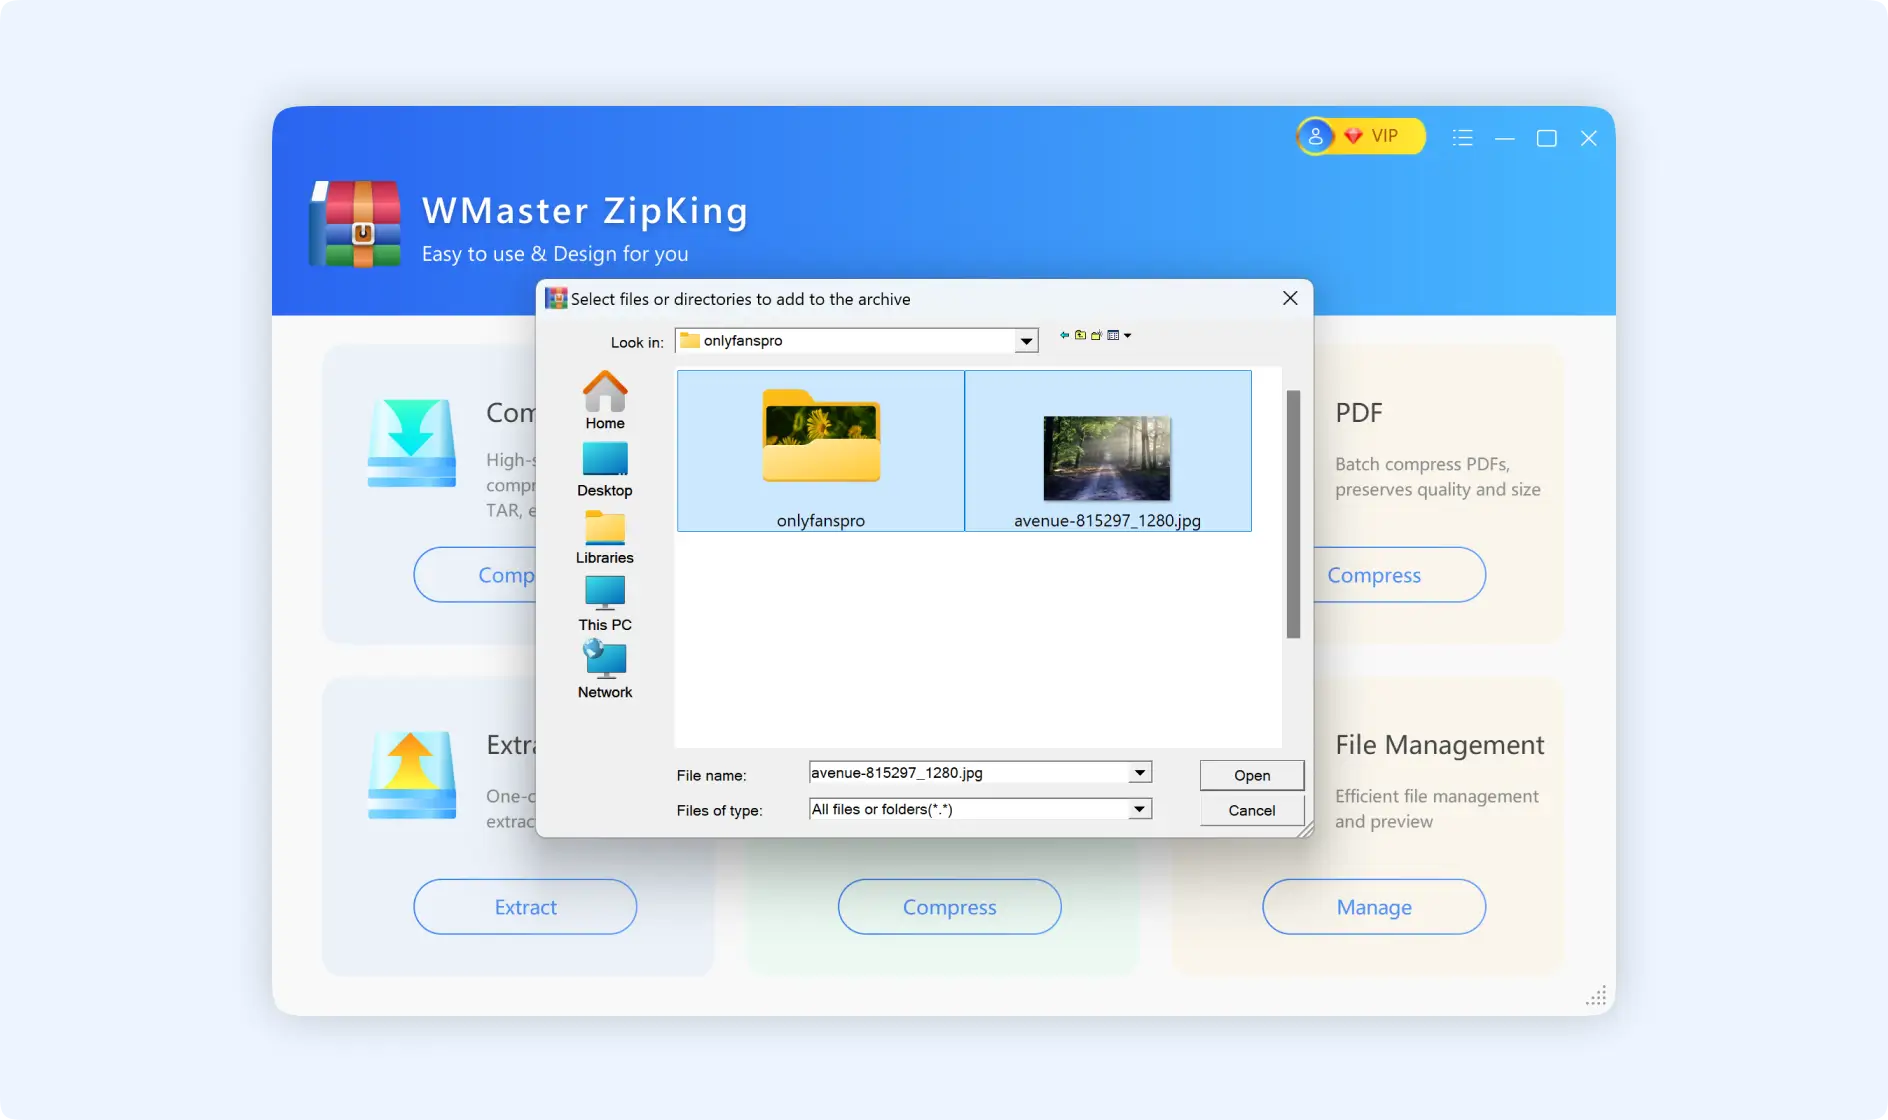
Step 1: Double-click to open ZipKing on your desktop, and select the “Compression” option.

Step 2: Choose your desired file or folder, then open it. ZipKing supports uploading all major file/folder formats.
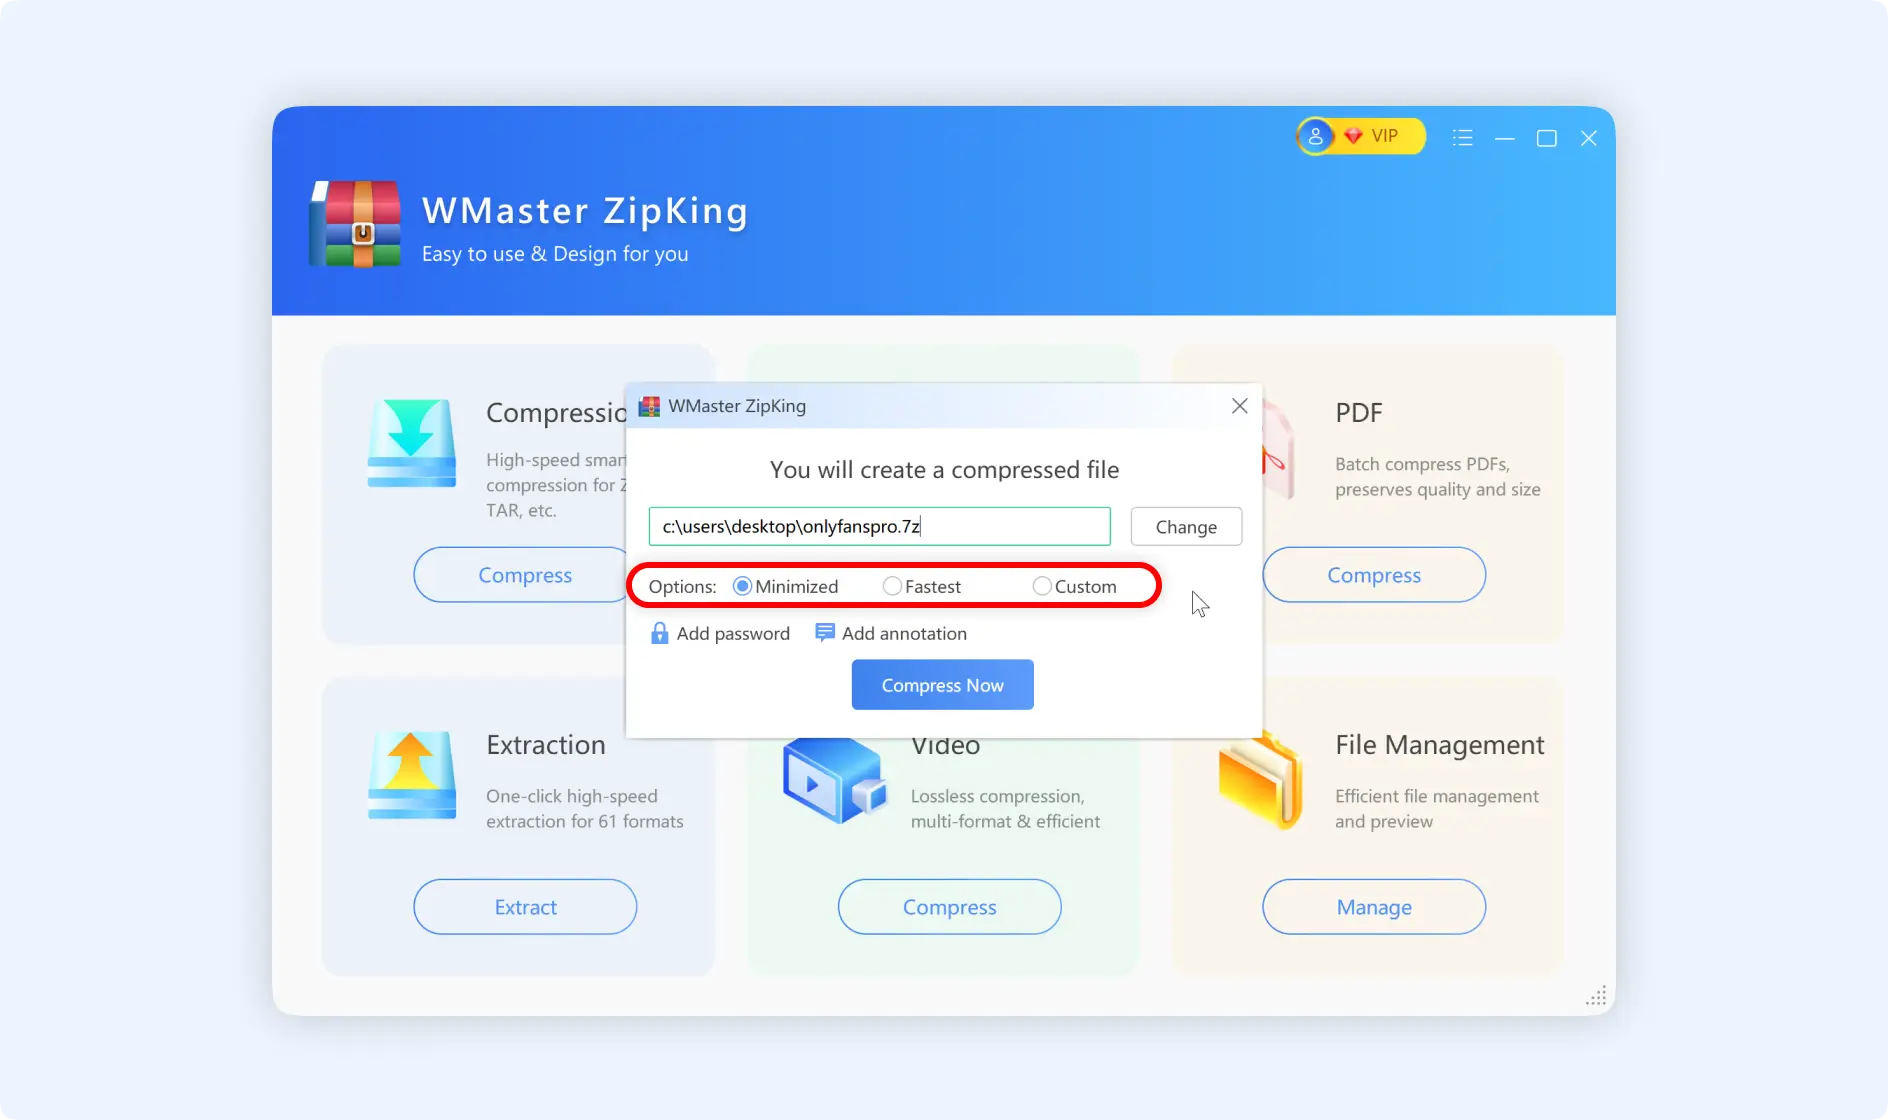
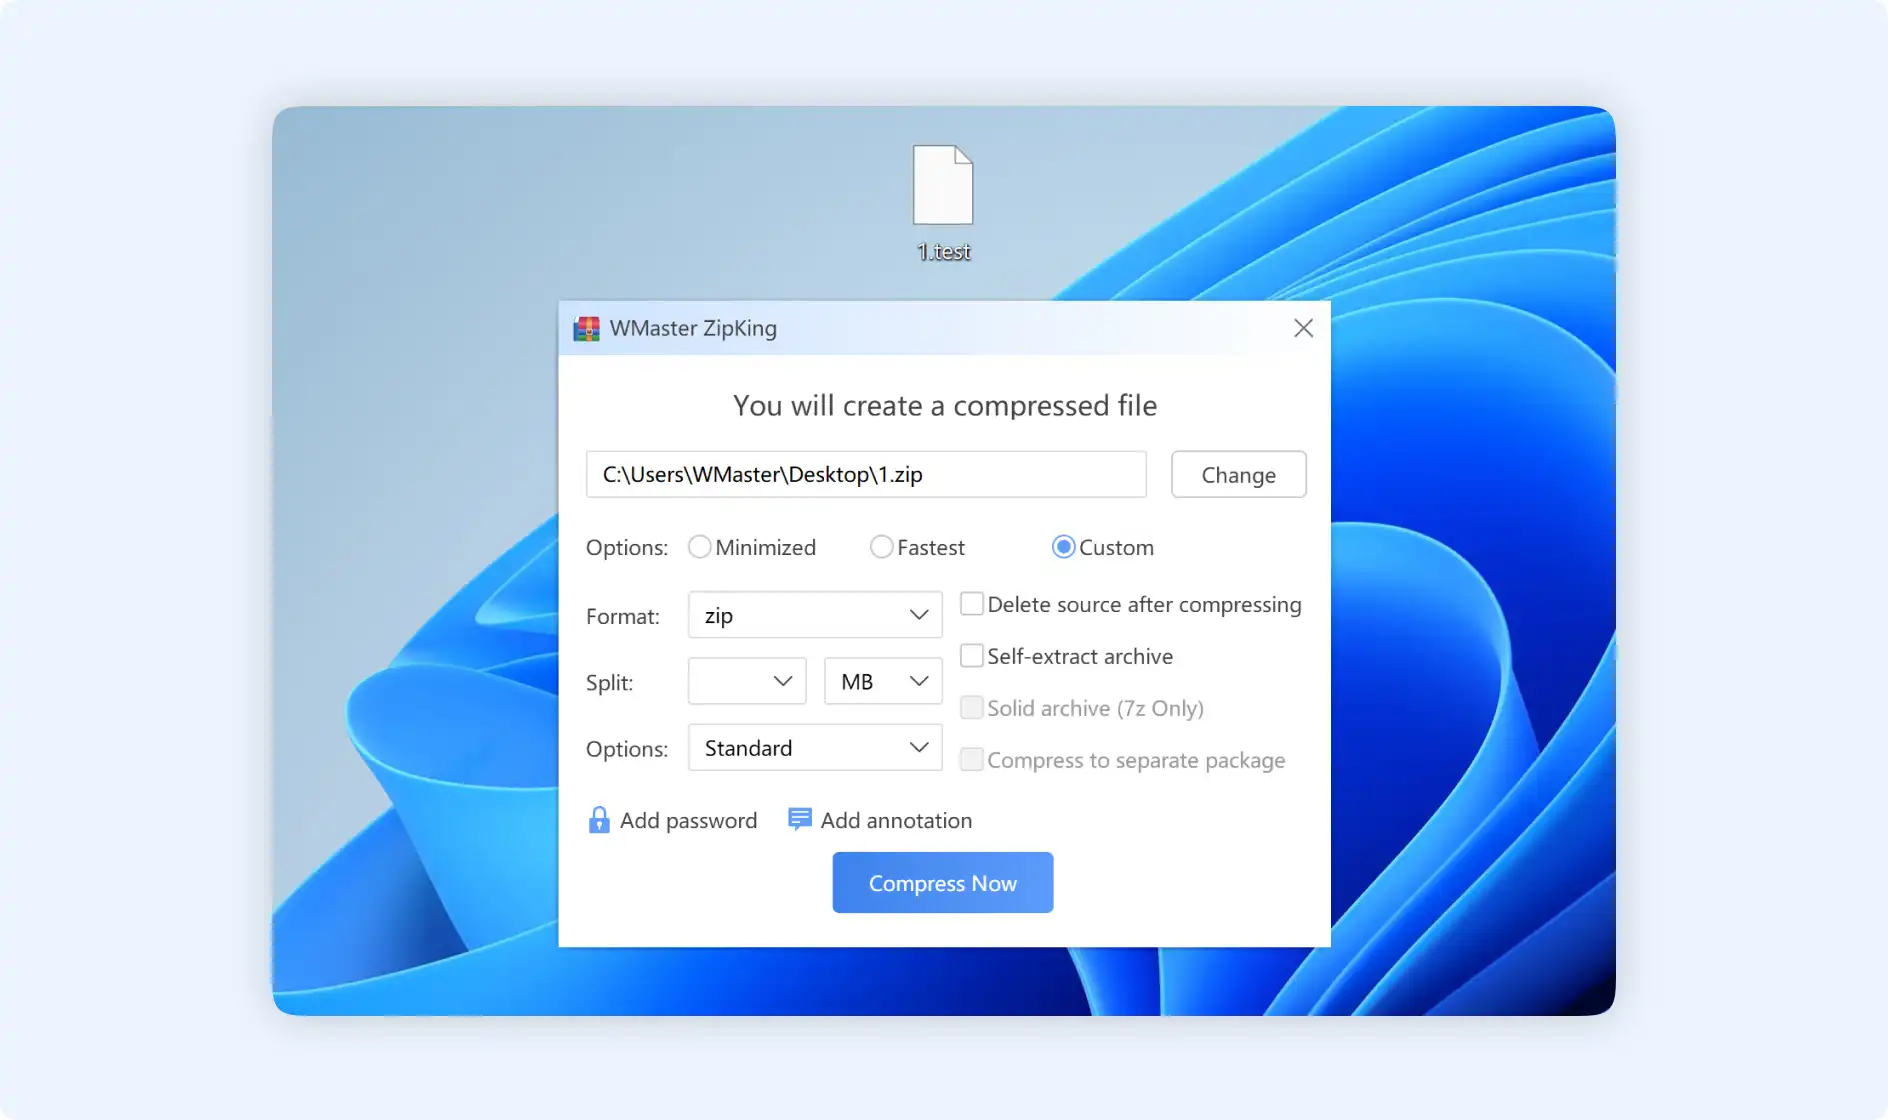
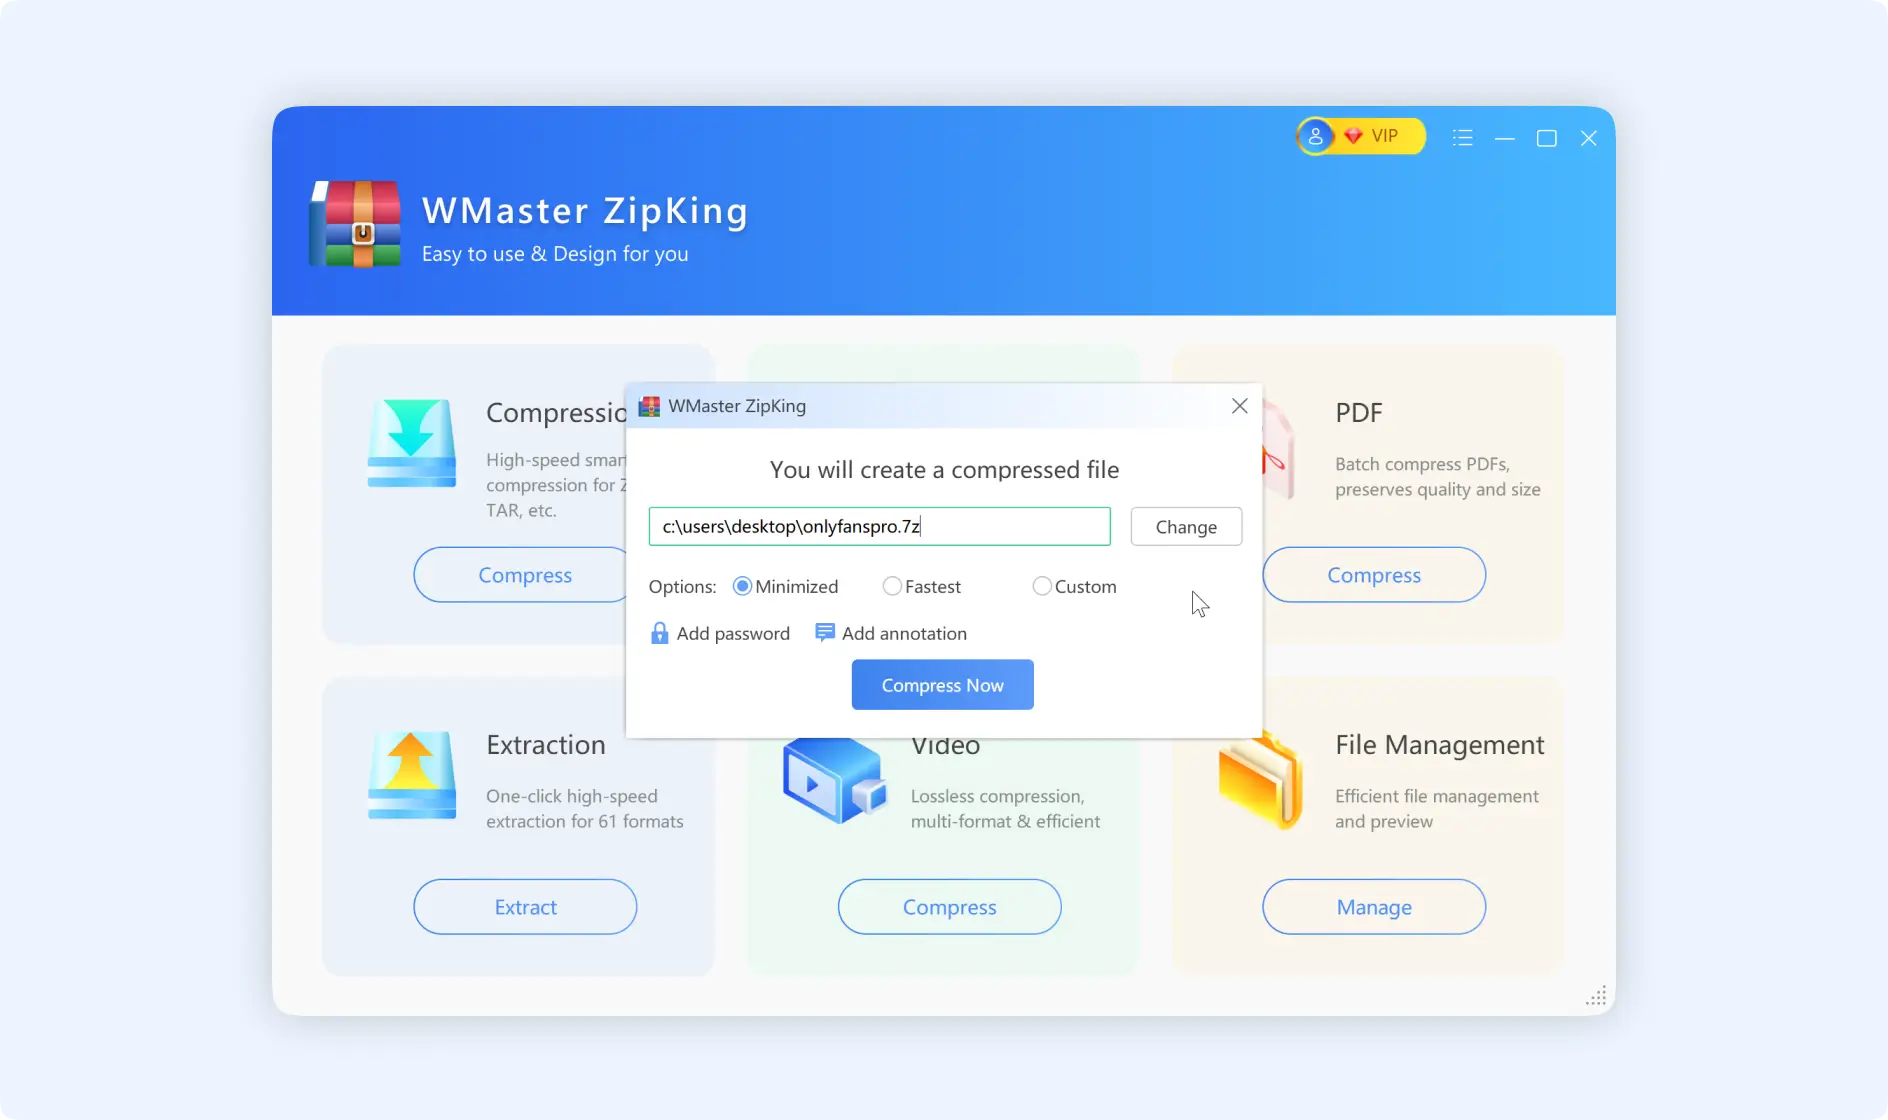
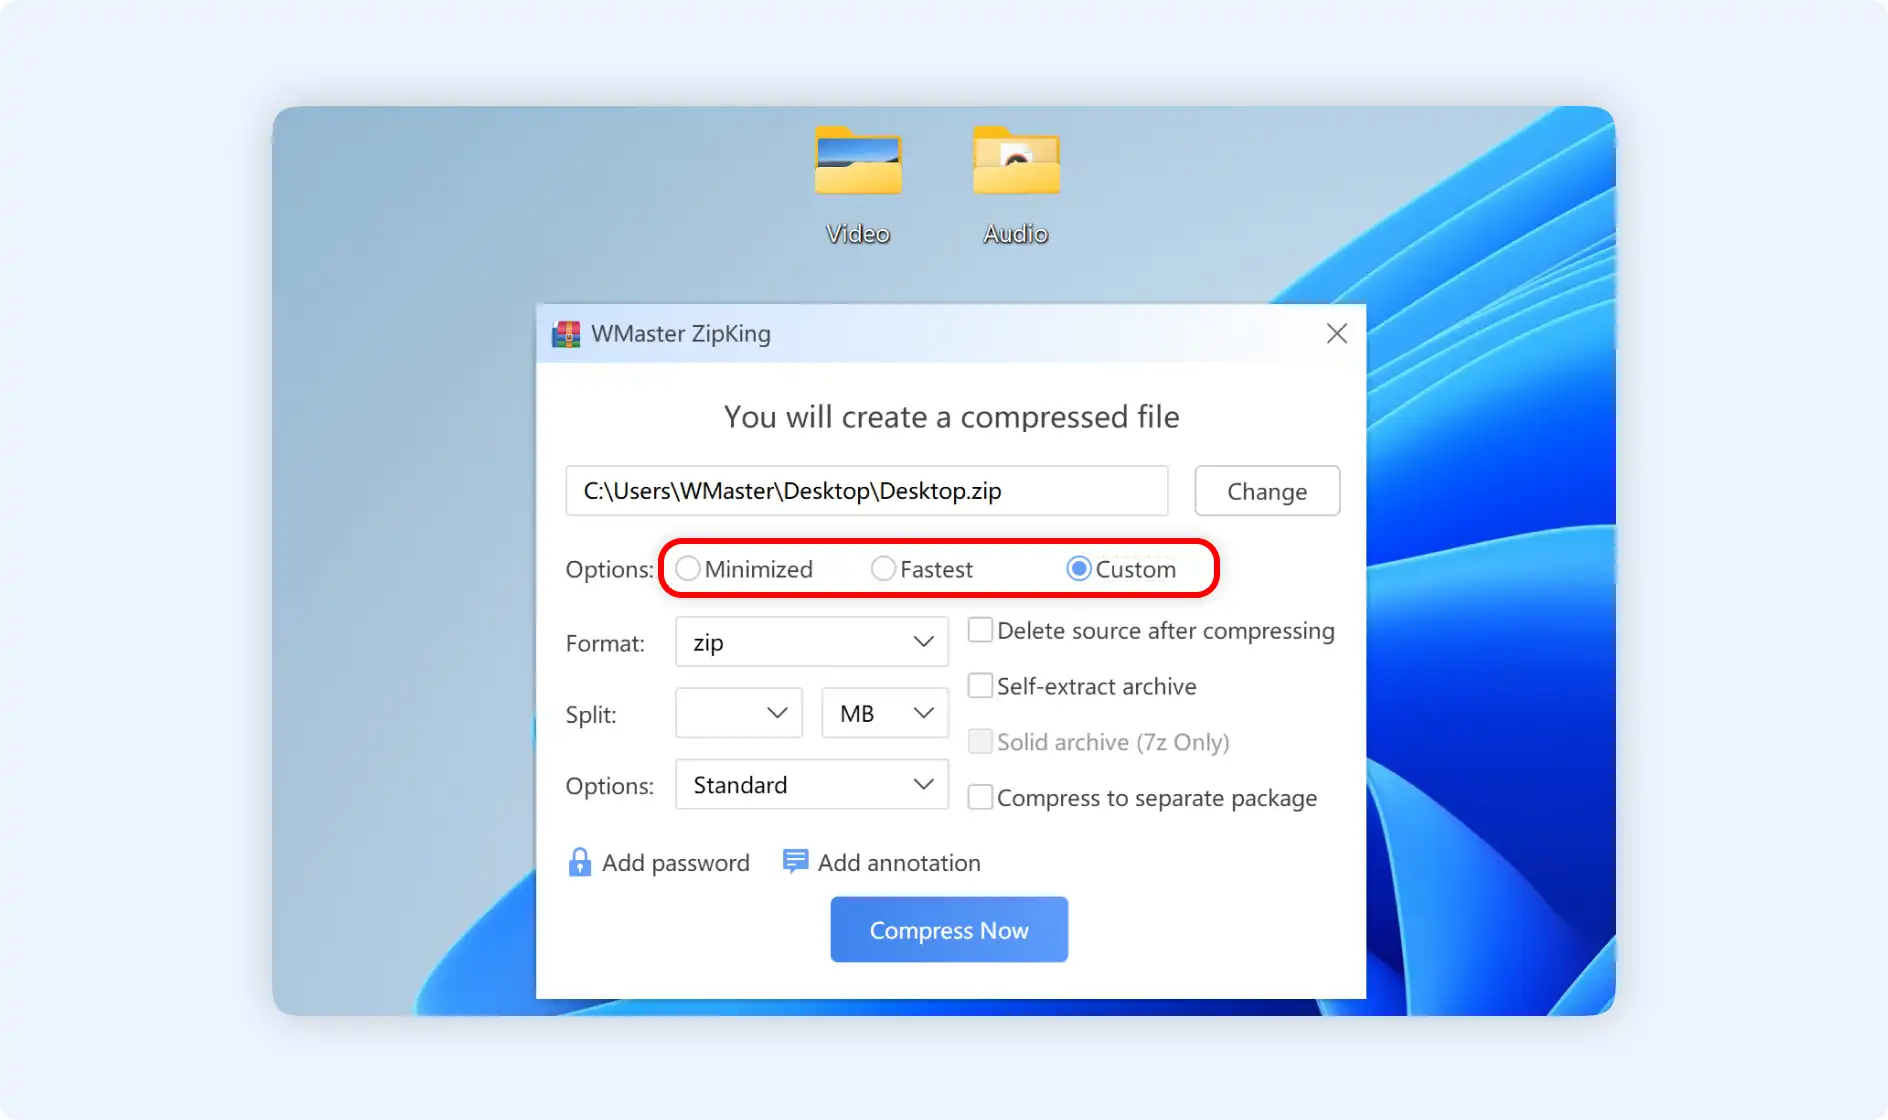
Step 3: There will be a pop-up window showing that you will create a compressed file, here you can change your storage path if you want.
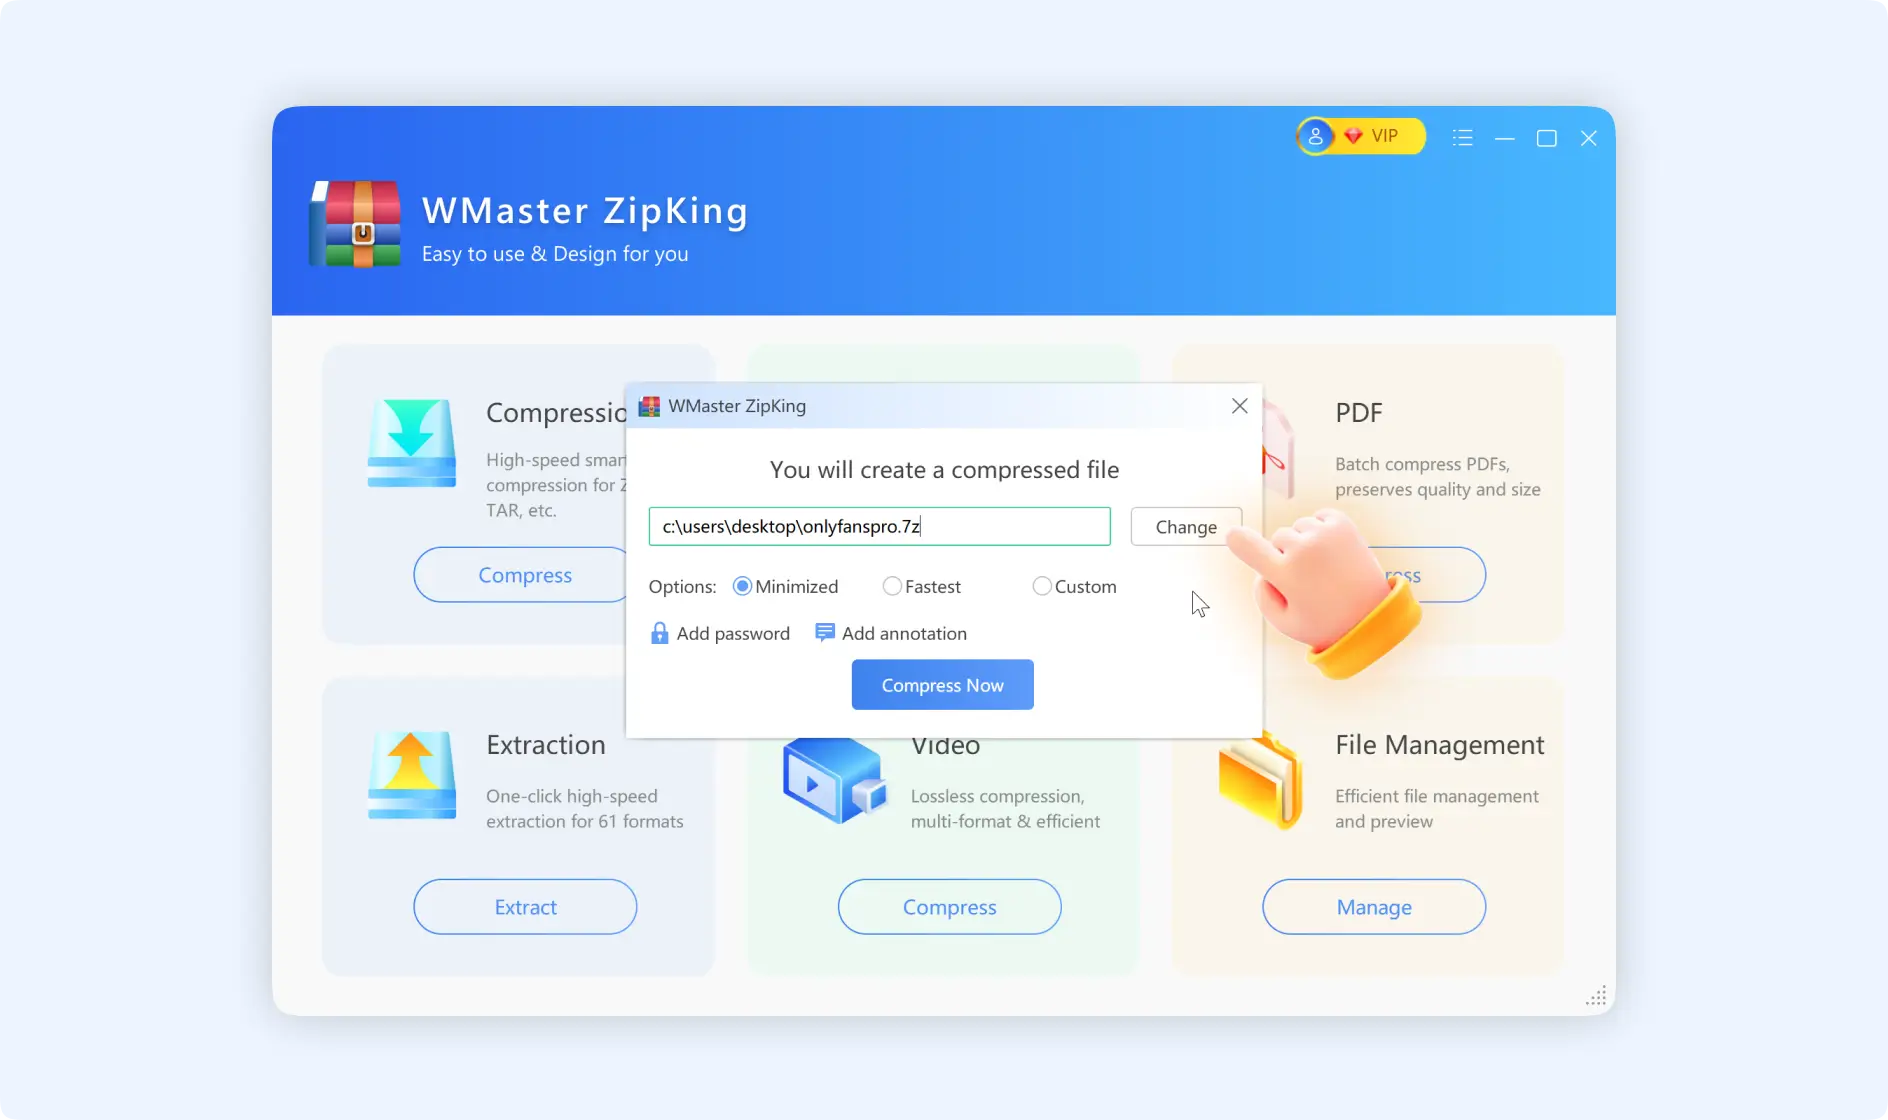
Tips1: When zipping a file, there are 3 options to choose from: “Minimized, fastest, and custom”.
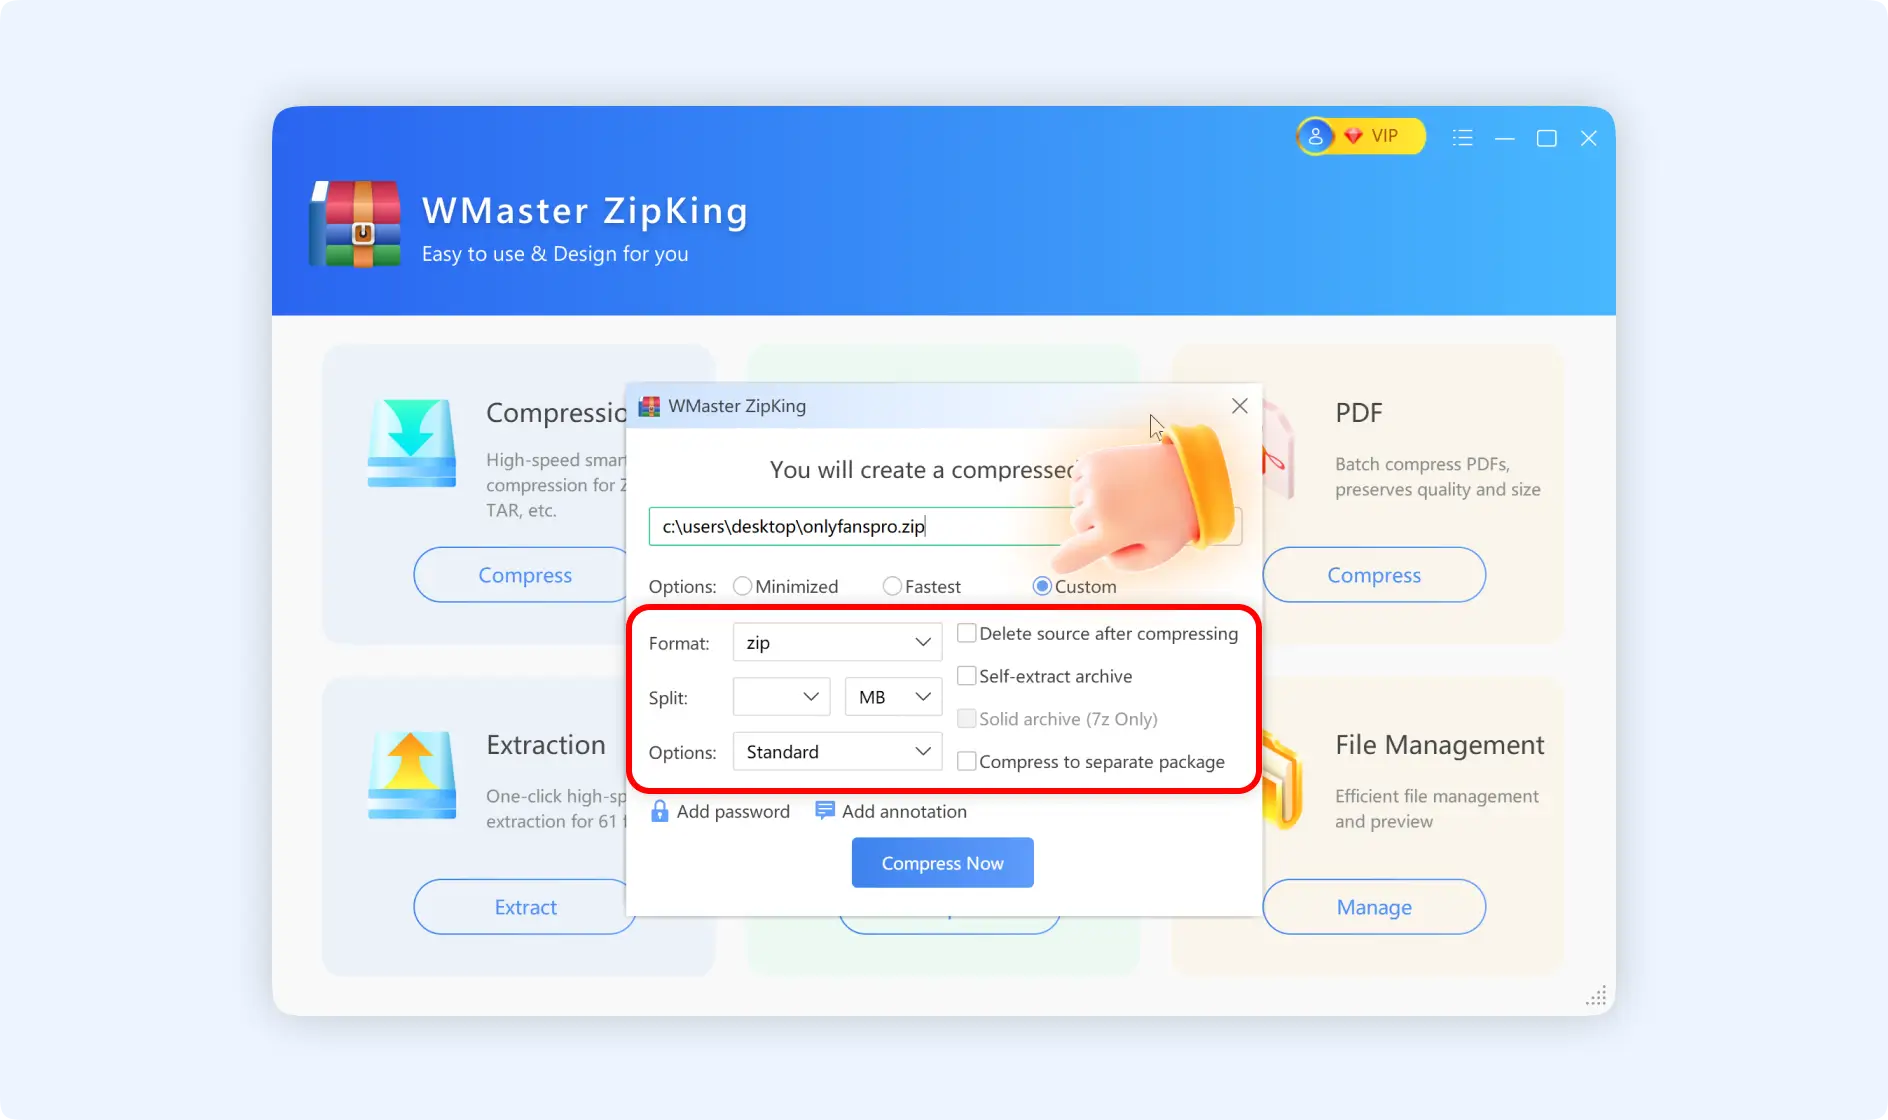
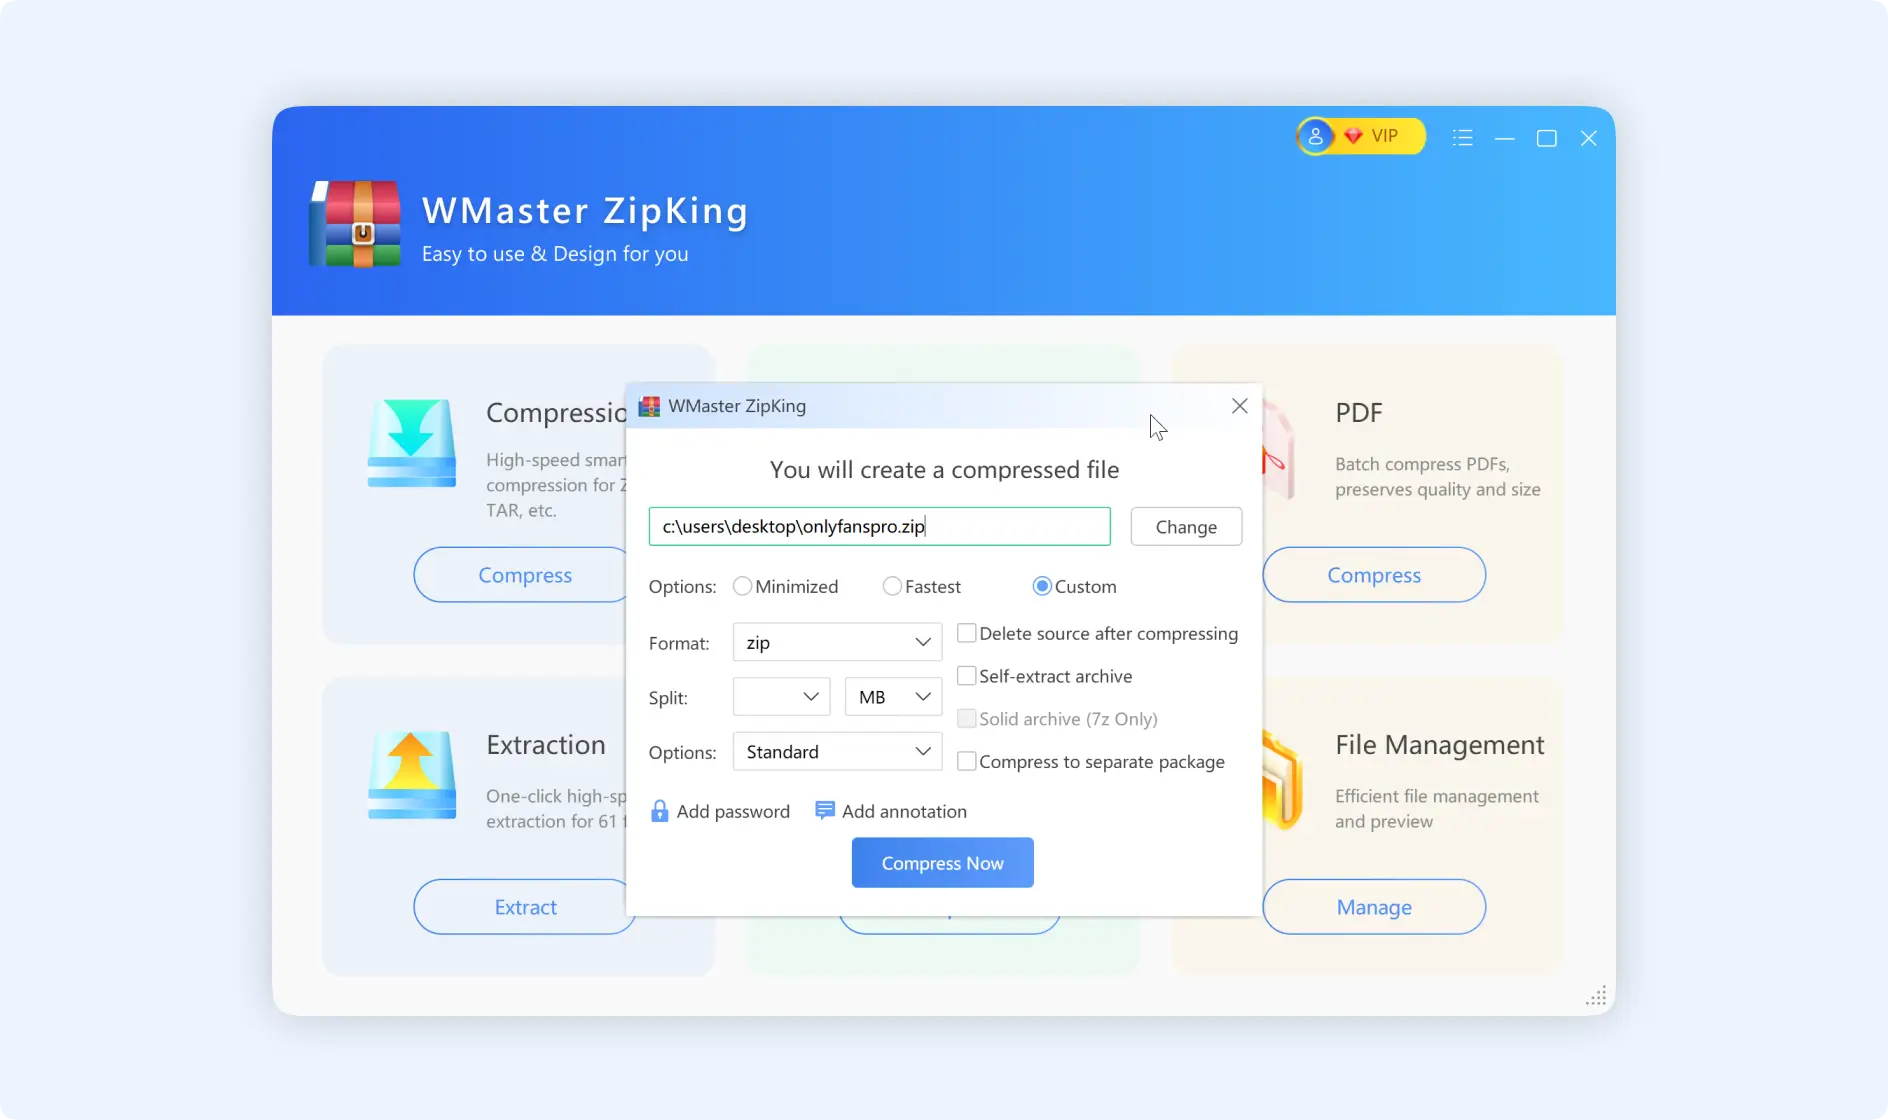
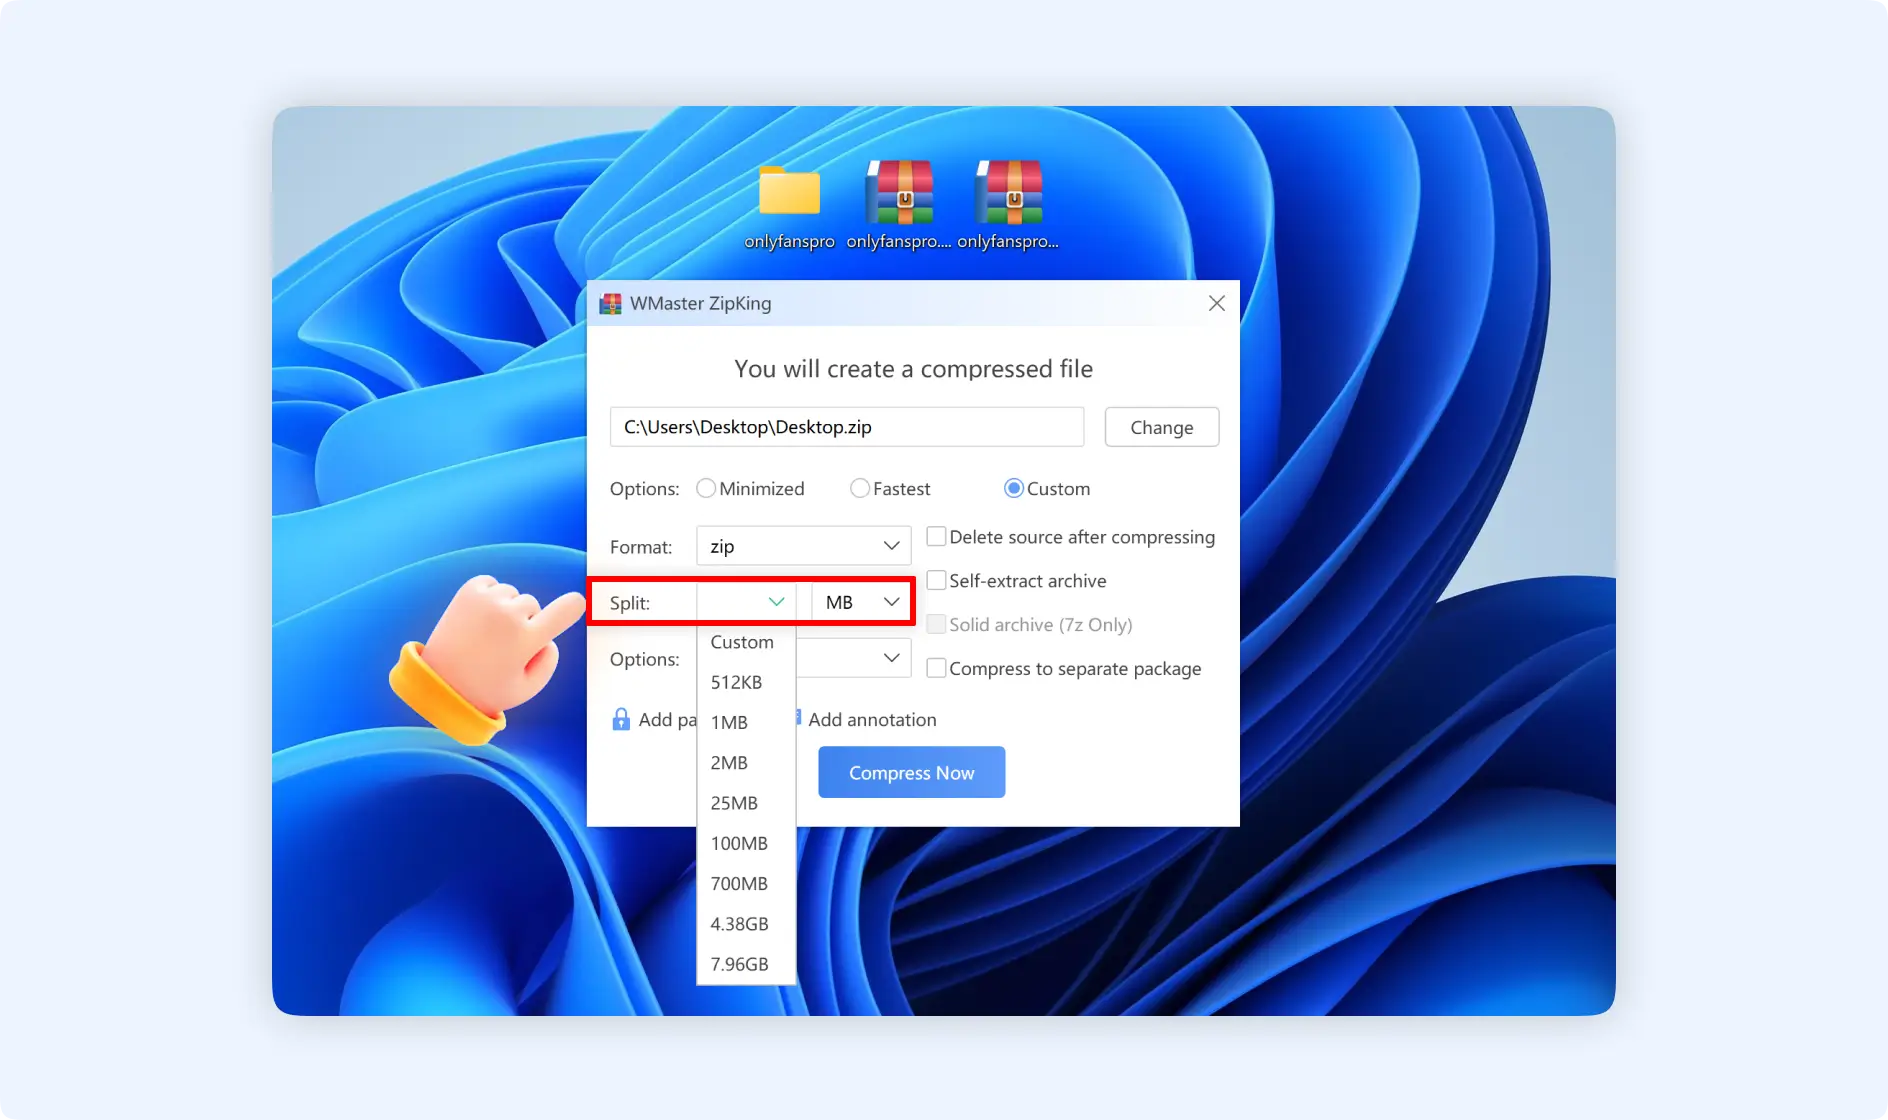
If you want to customize the compressed file, you can choose the “Custom” option. Below it, you can customize the file format, whether to split it into separate packages, and the compression types.
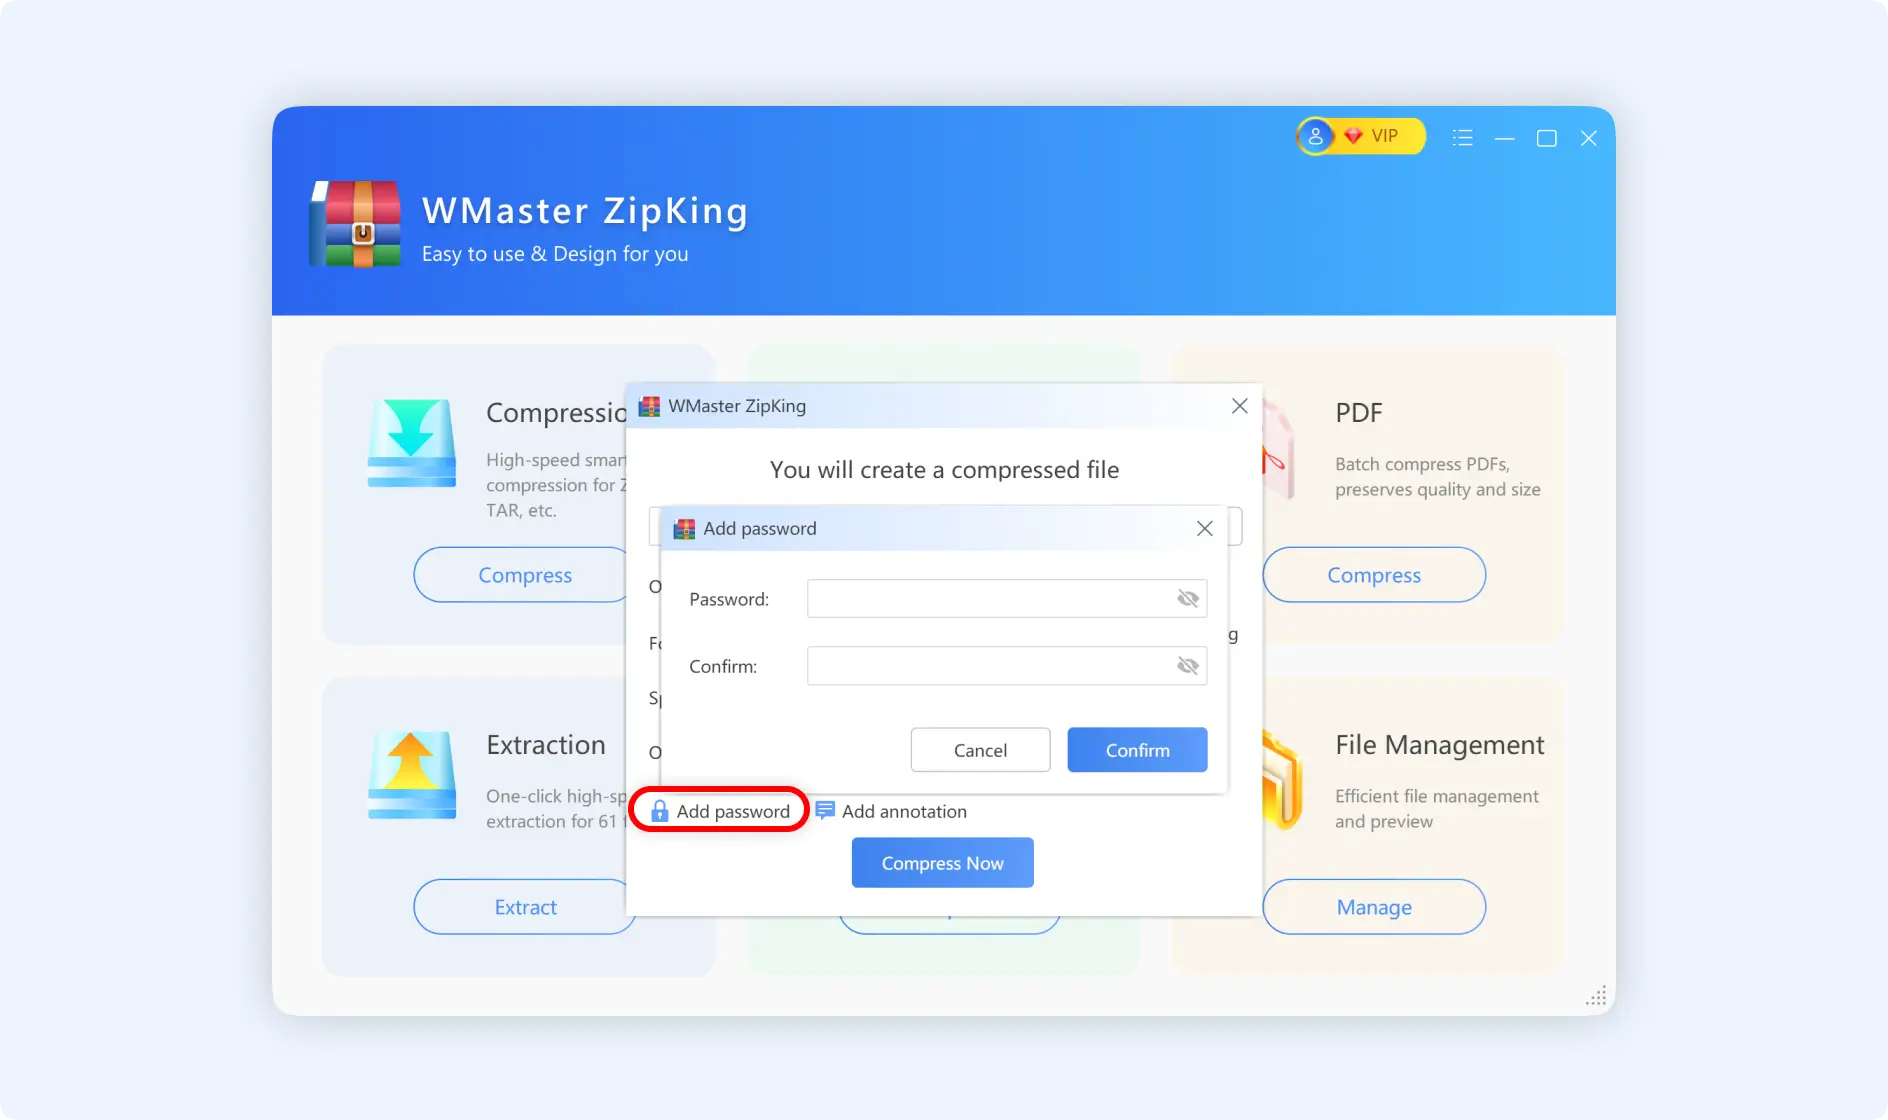
Tips2: If you want to secure your zipped file, you can choose to add a password to protect your compressed file.
Tips3: For the complex file type, you can also choose to add an annotation for a better understanding when sharing the compressed file with others.

1.2 Guide to zip a file with ZipKing Right-Click Options
If you don't want to launch ZipKing to zip a file, here is another method to do it. To zip a file without opening ZipKing, you need to make sure that you have installed ZipKing on your PC. And there are 2 situations to right-click for zipping a file.
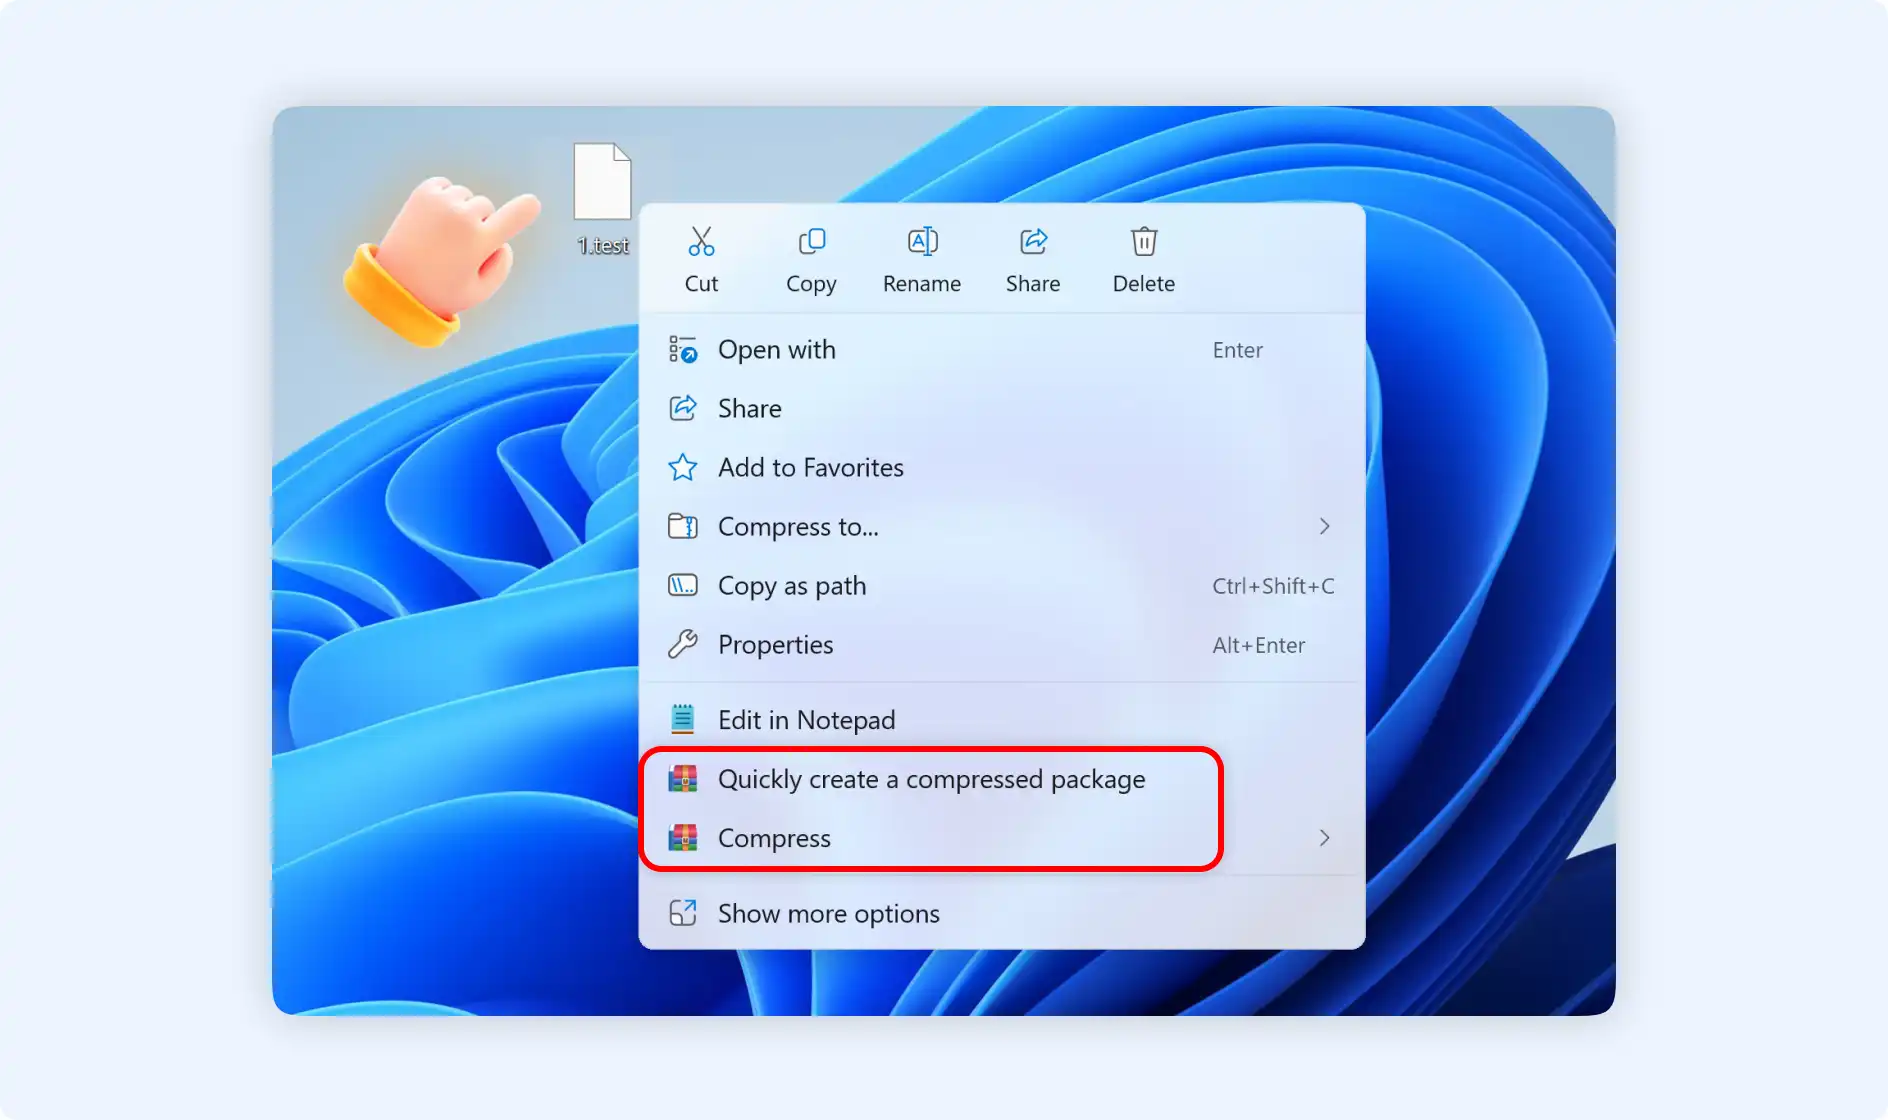
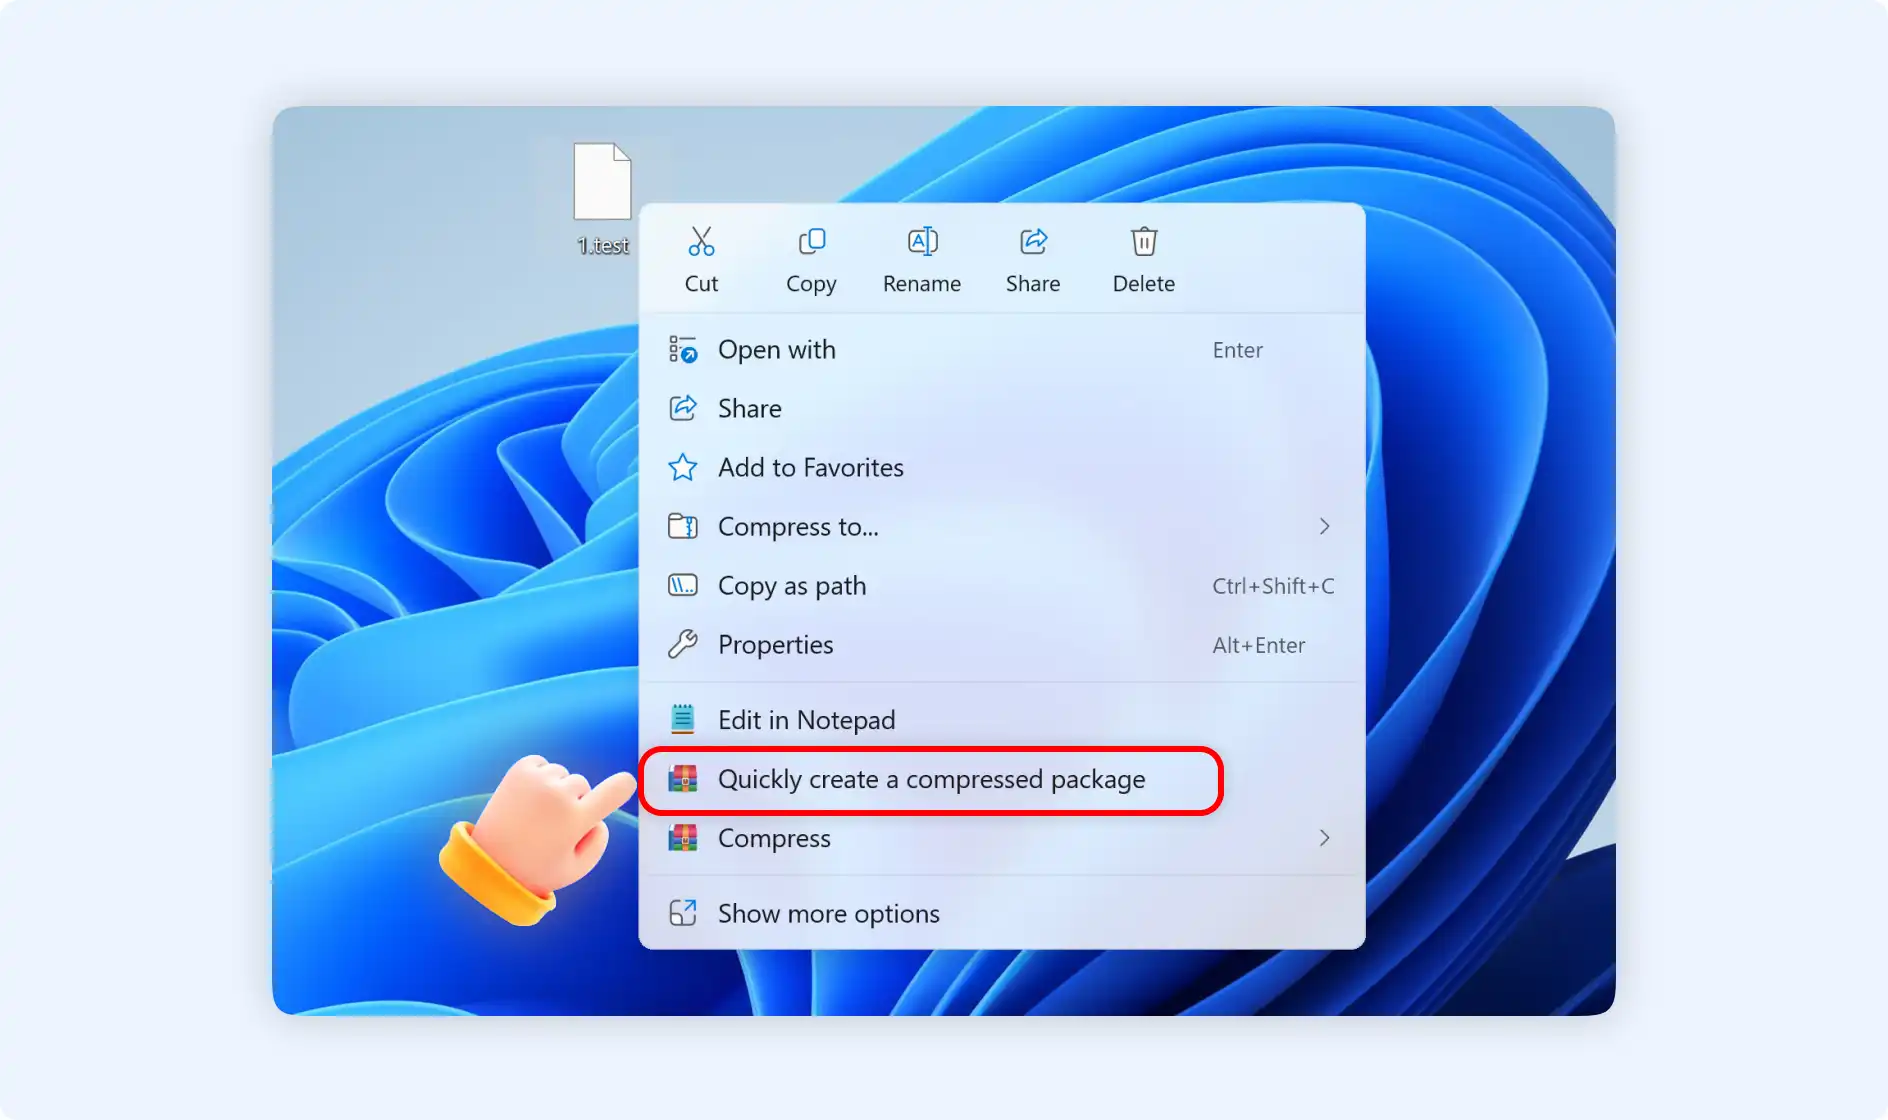
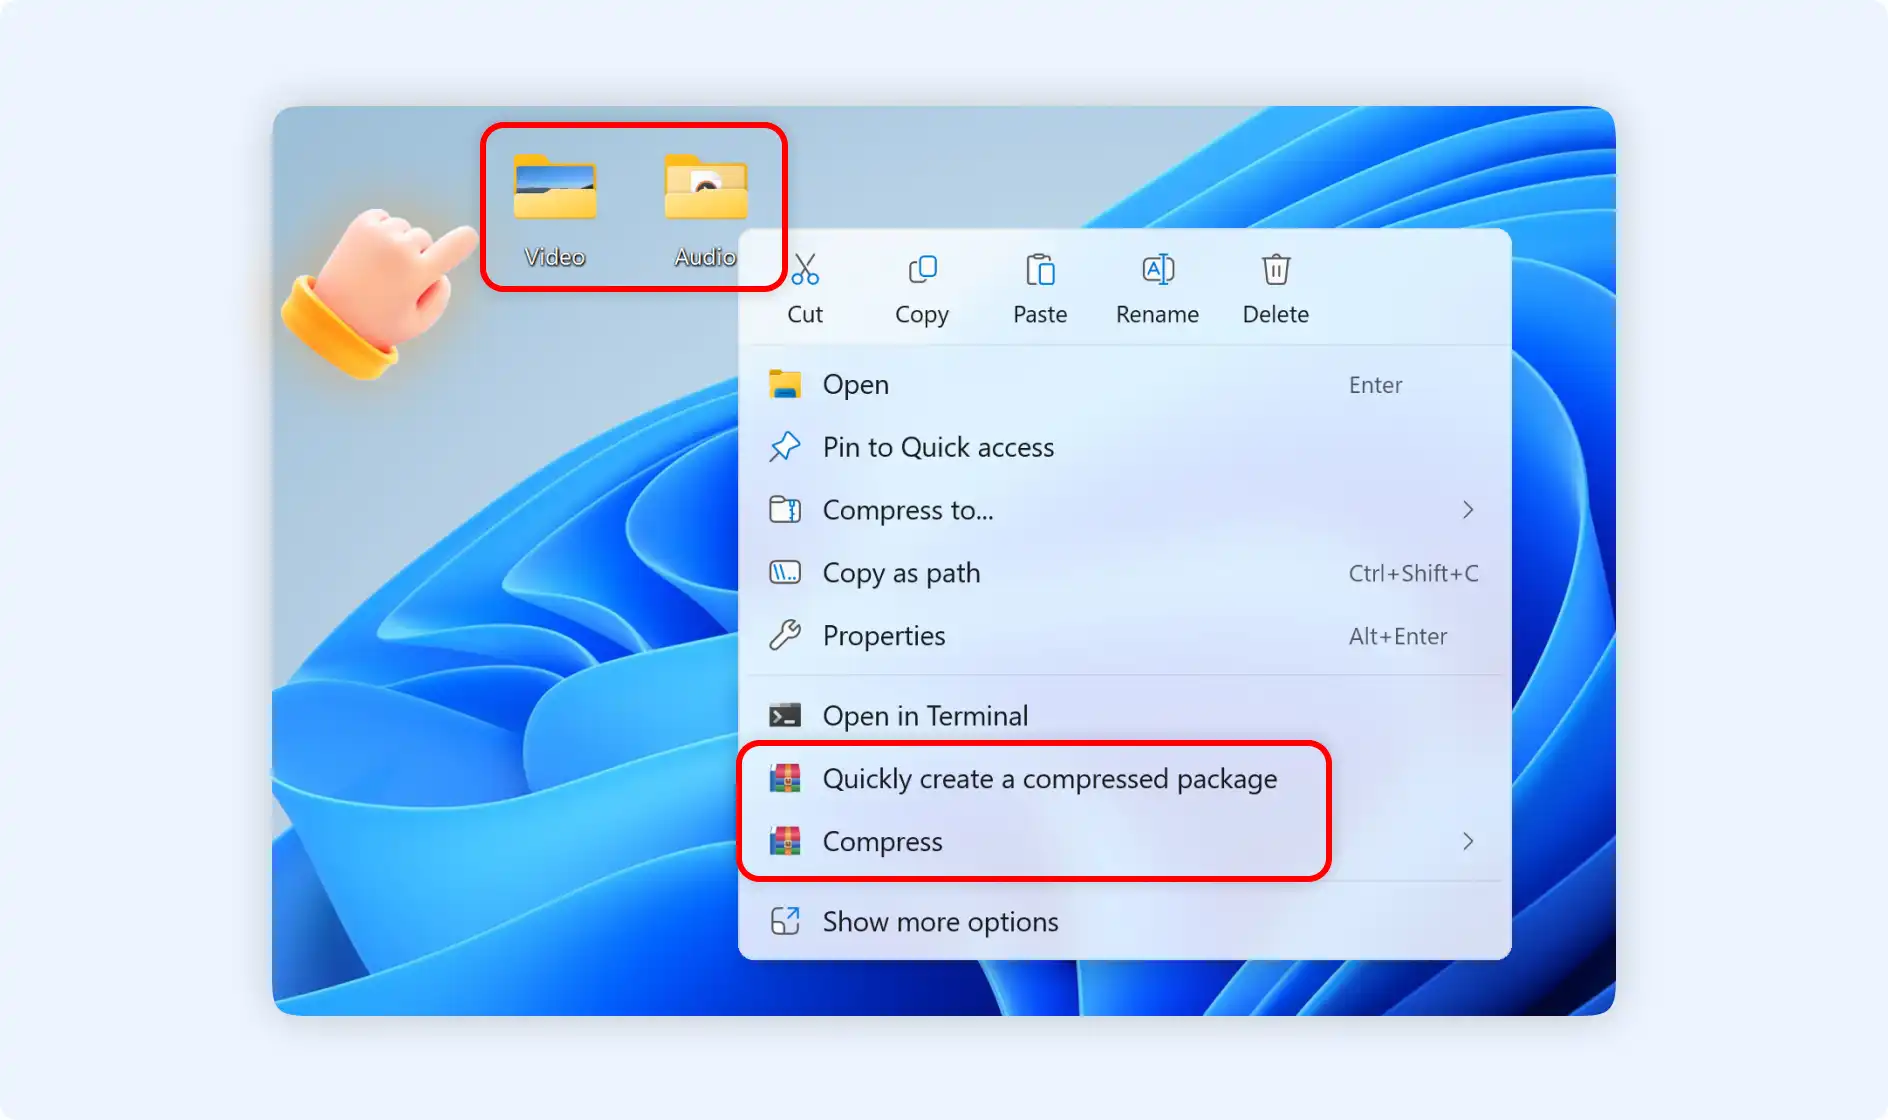
Situation 1: Right-click to choose"Quickly create a compressed package"
Step 1: Right-click your files, choose"Quickly create a compressed package".
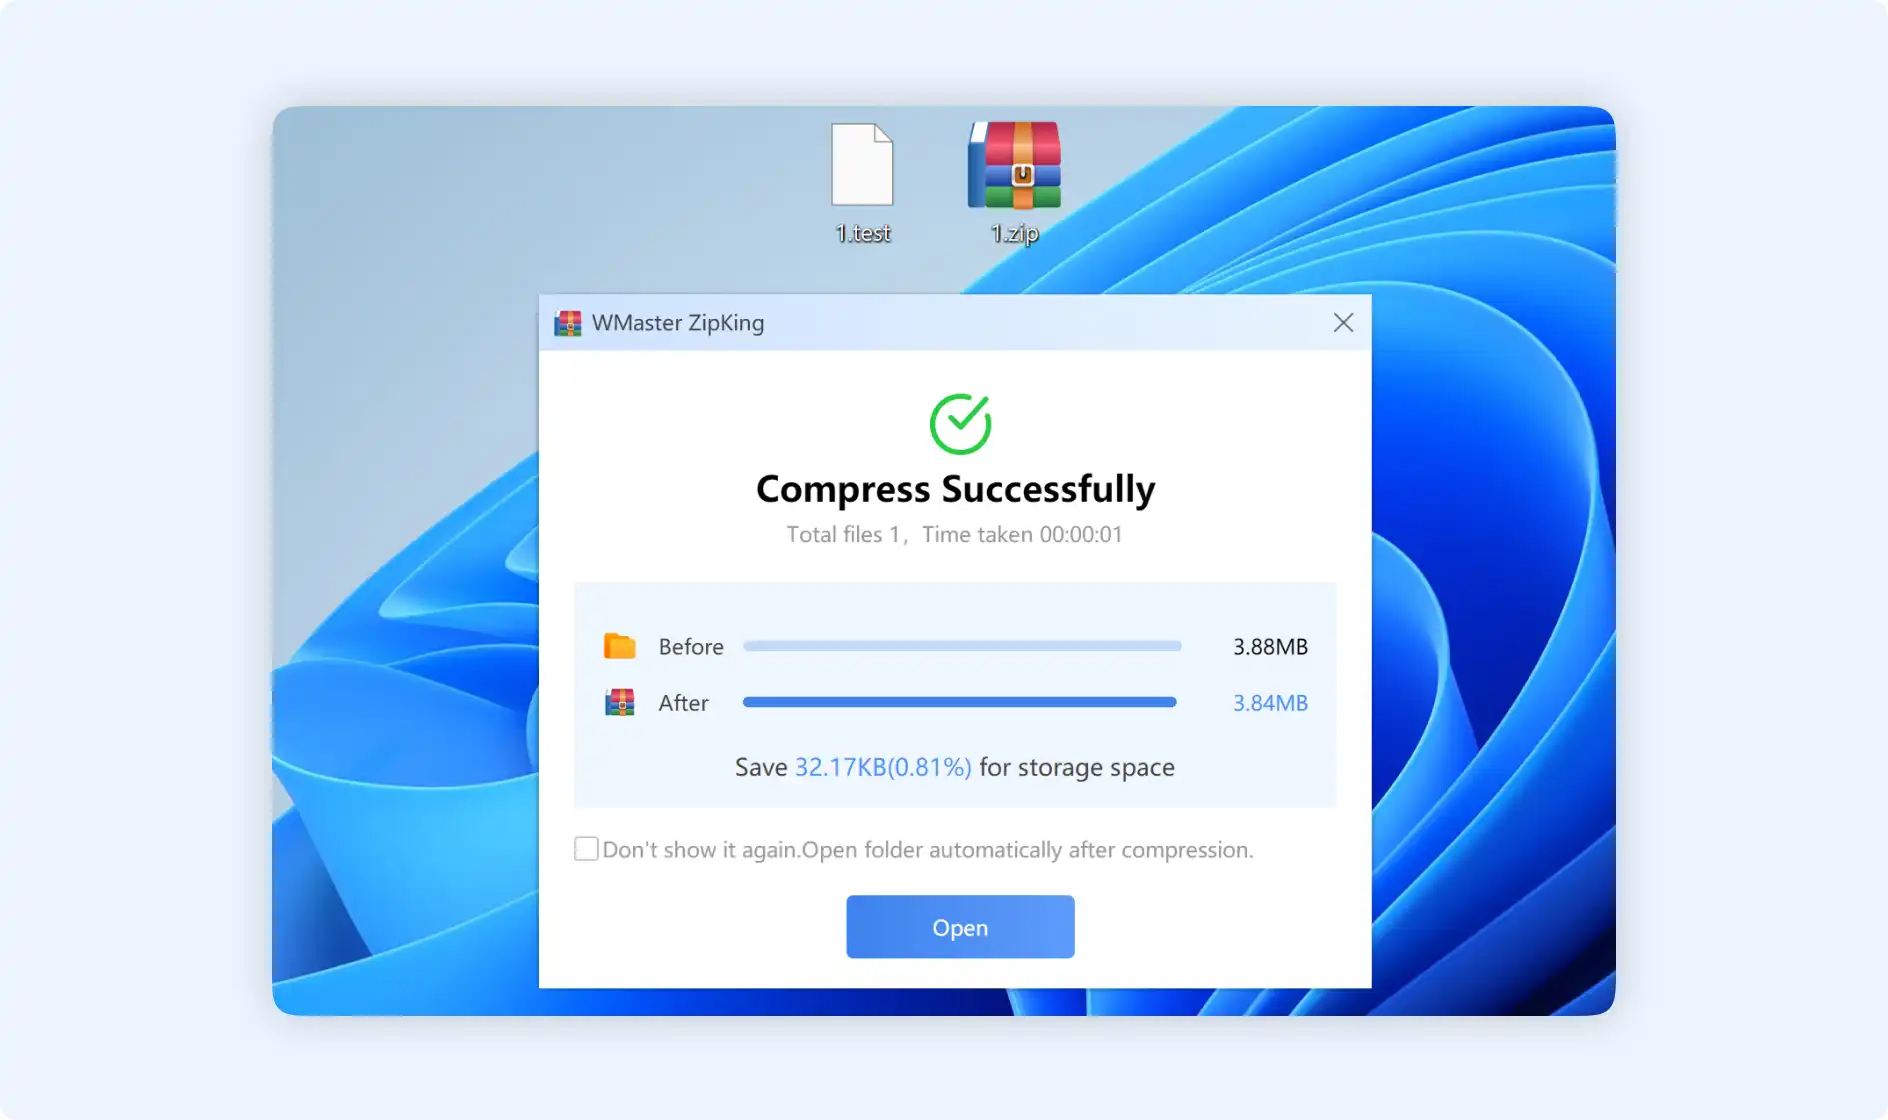
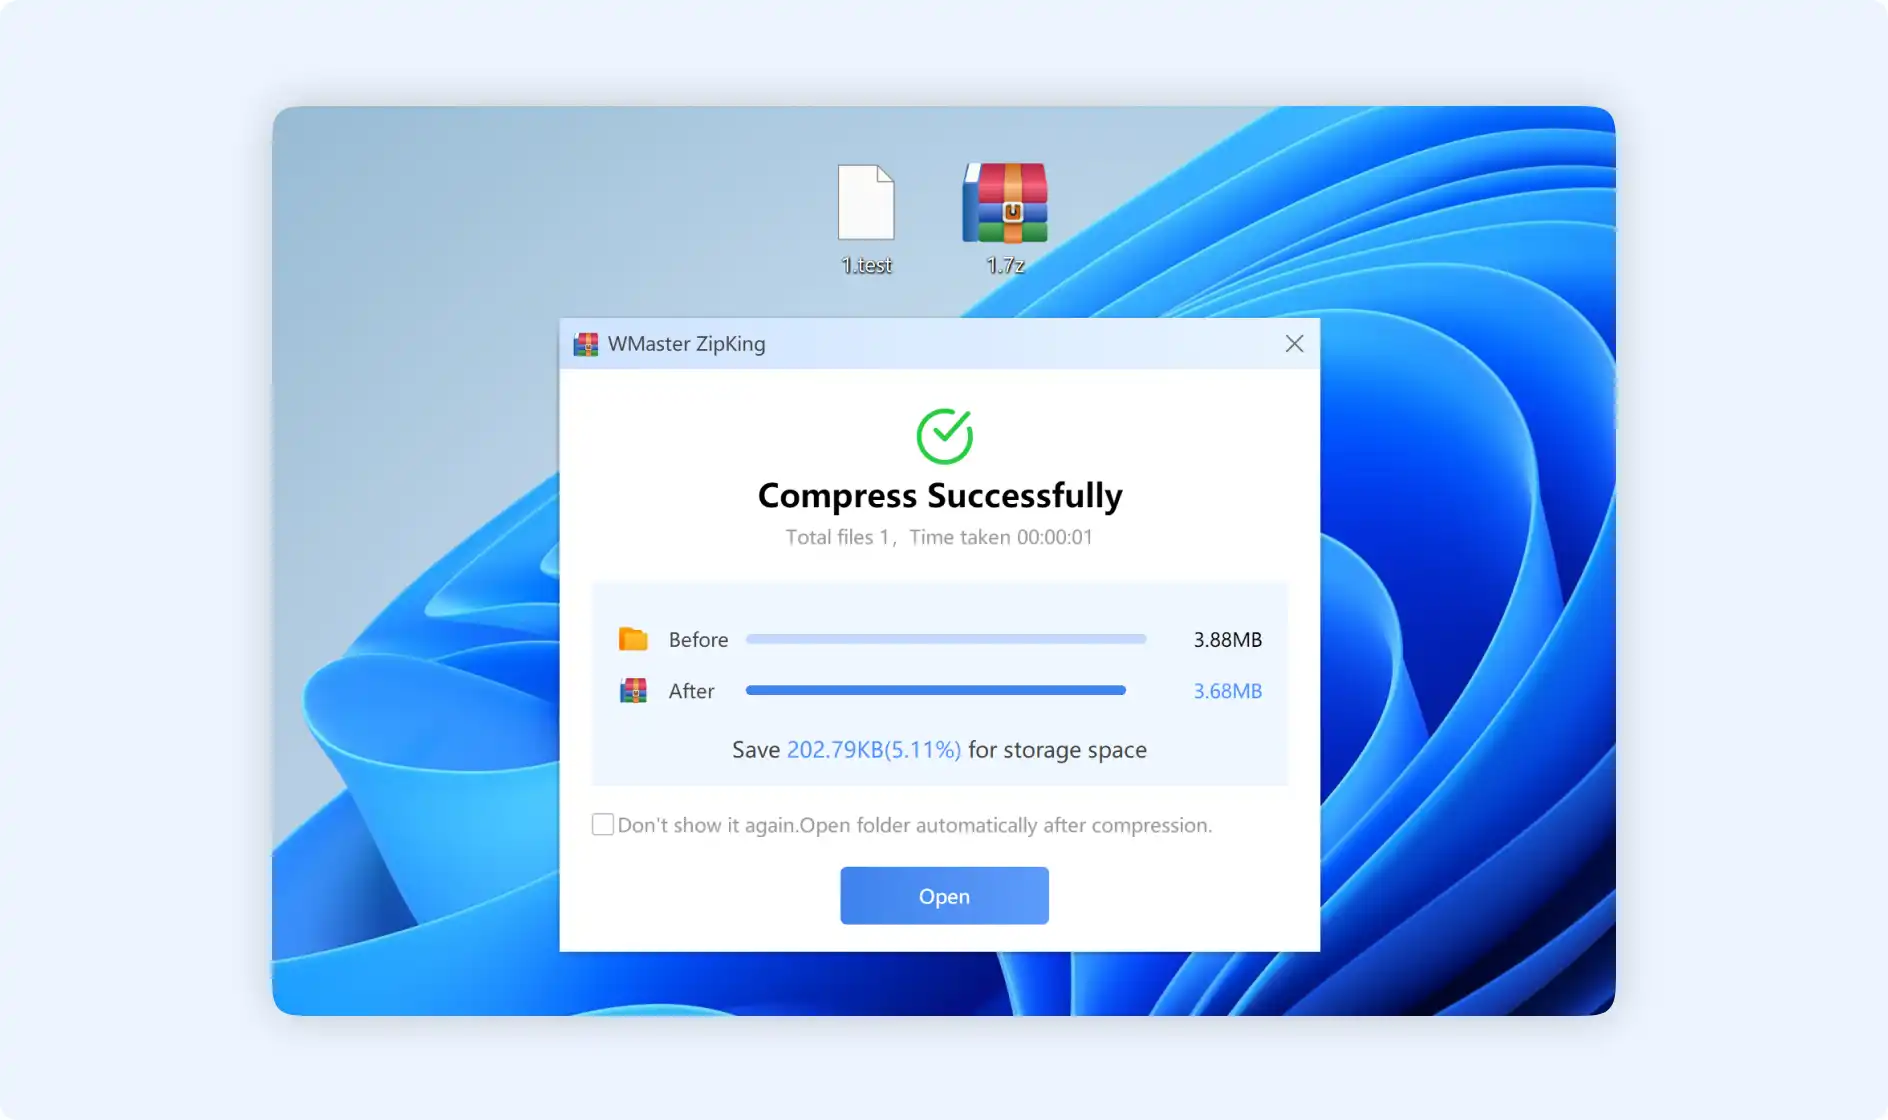
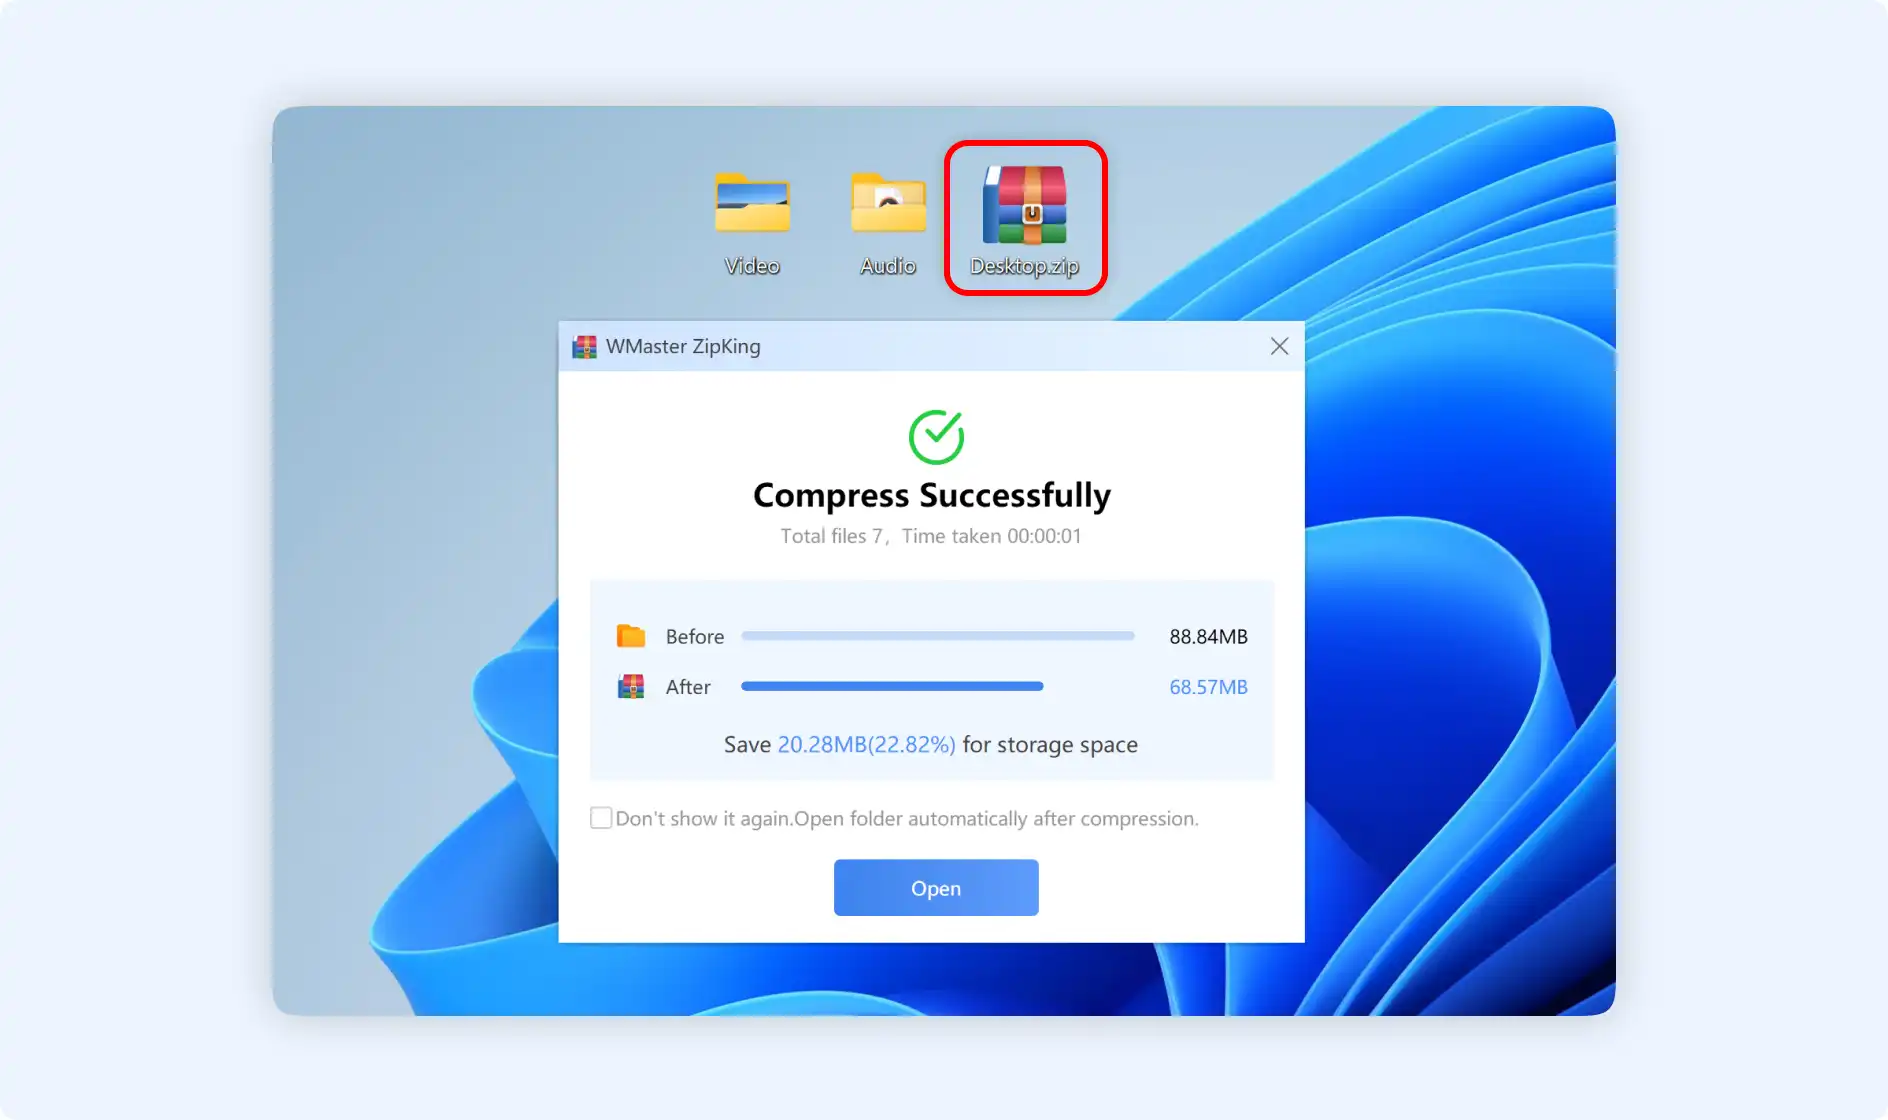
Step 2: Then ZipKing will zip files automatically and show you to open the package.
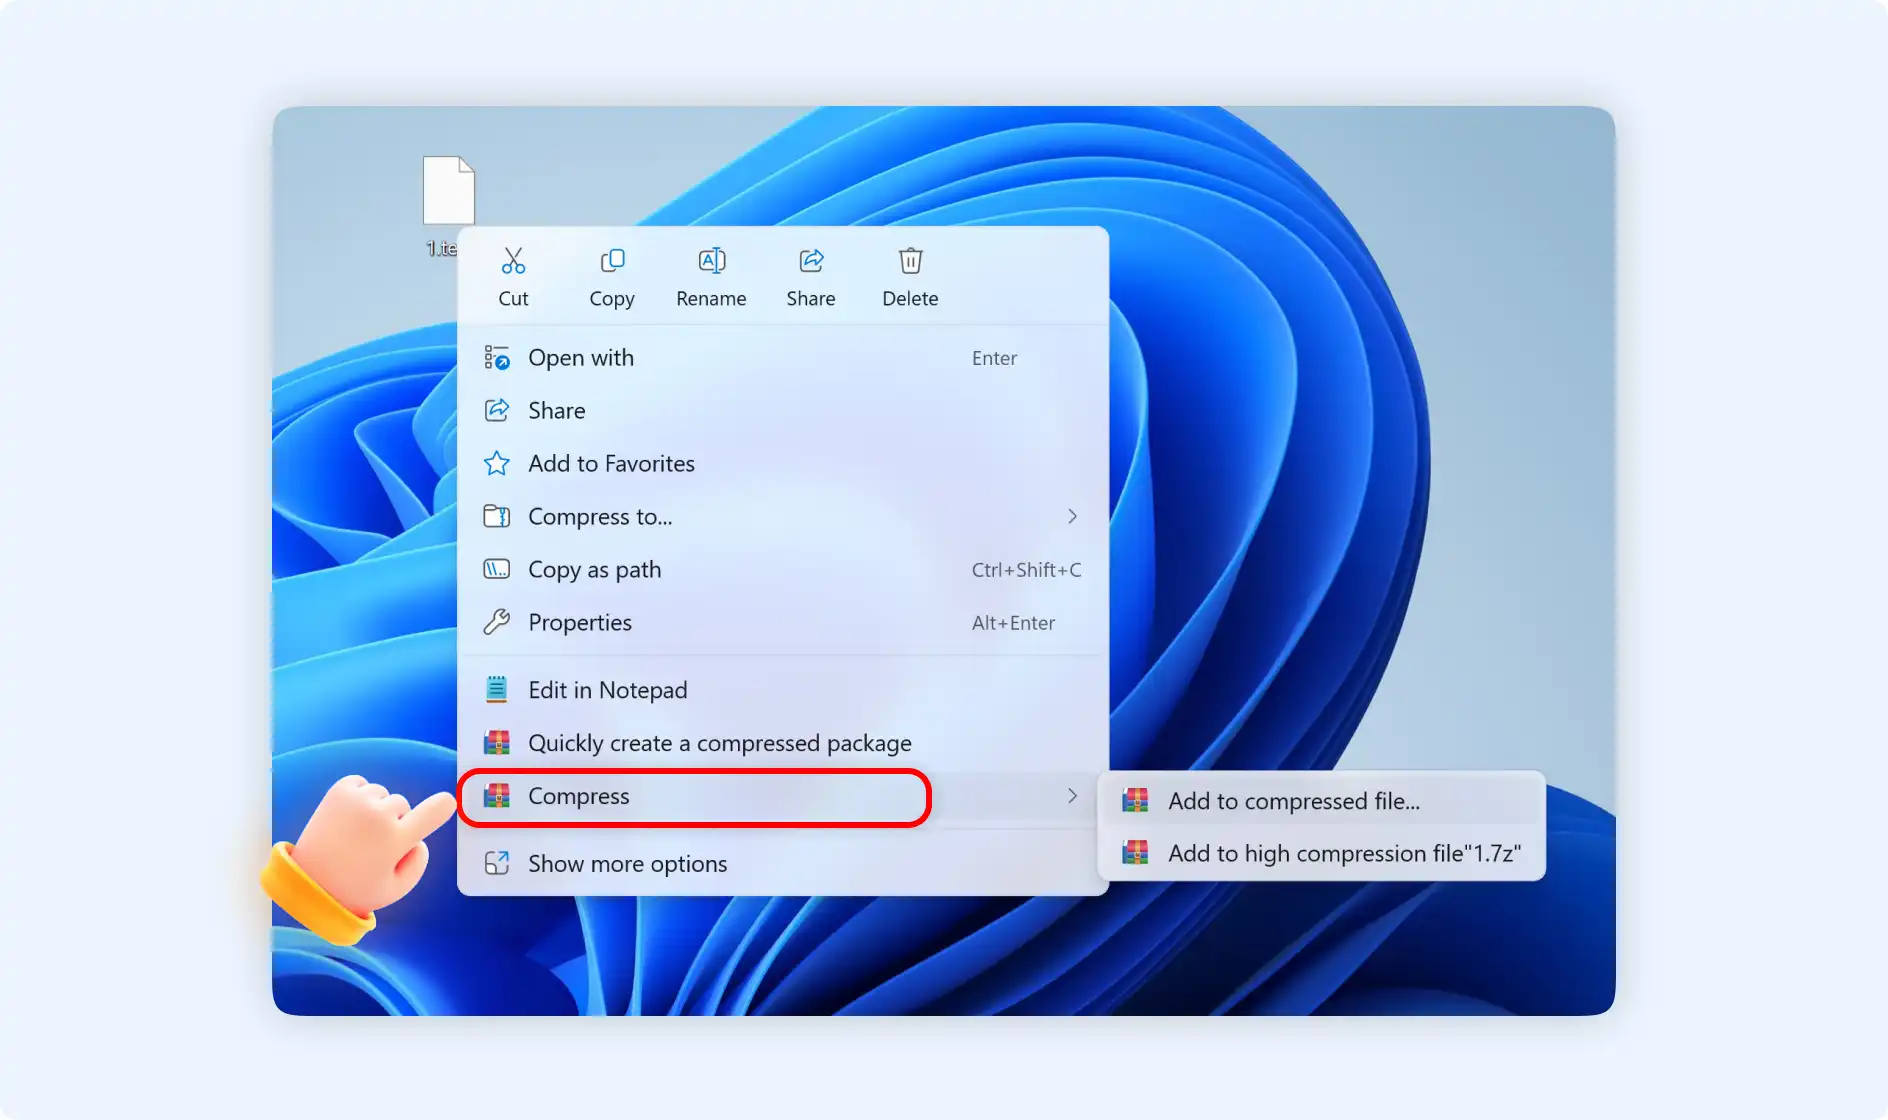
Situation 2: Right-click to choose" Compress"
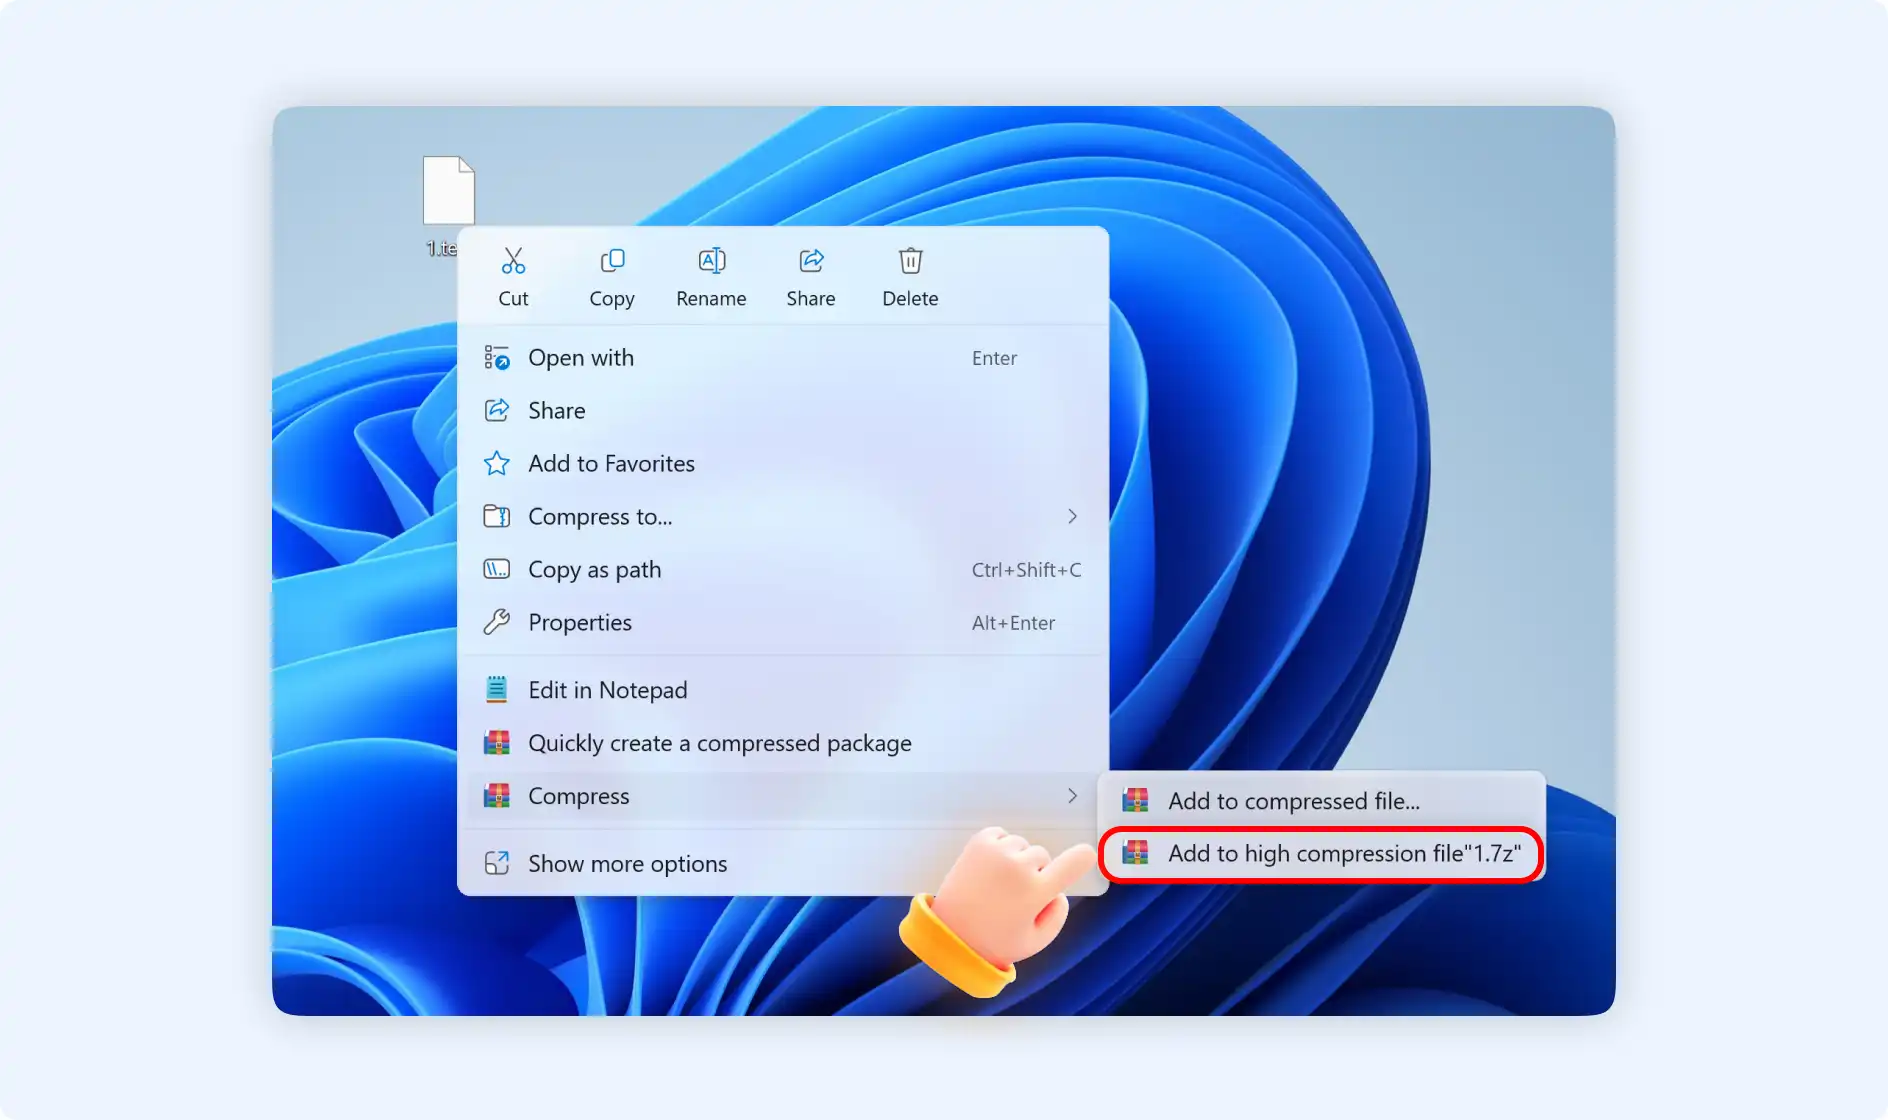
You will see that there are 2 options after right-clicking to choose"Compress".
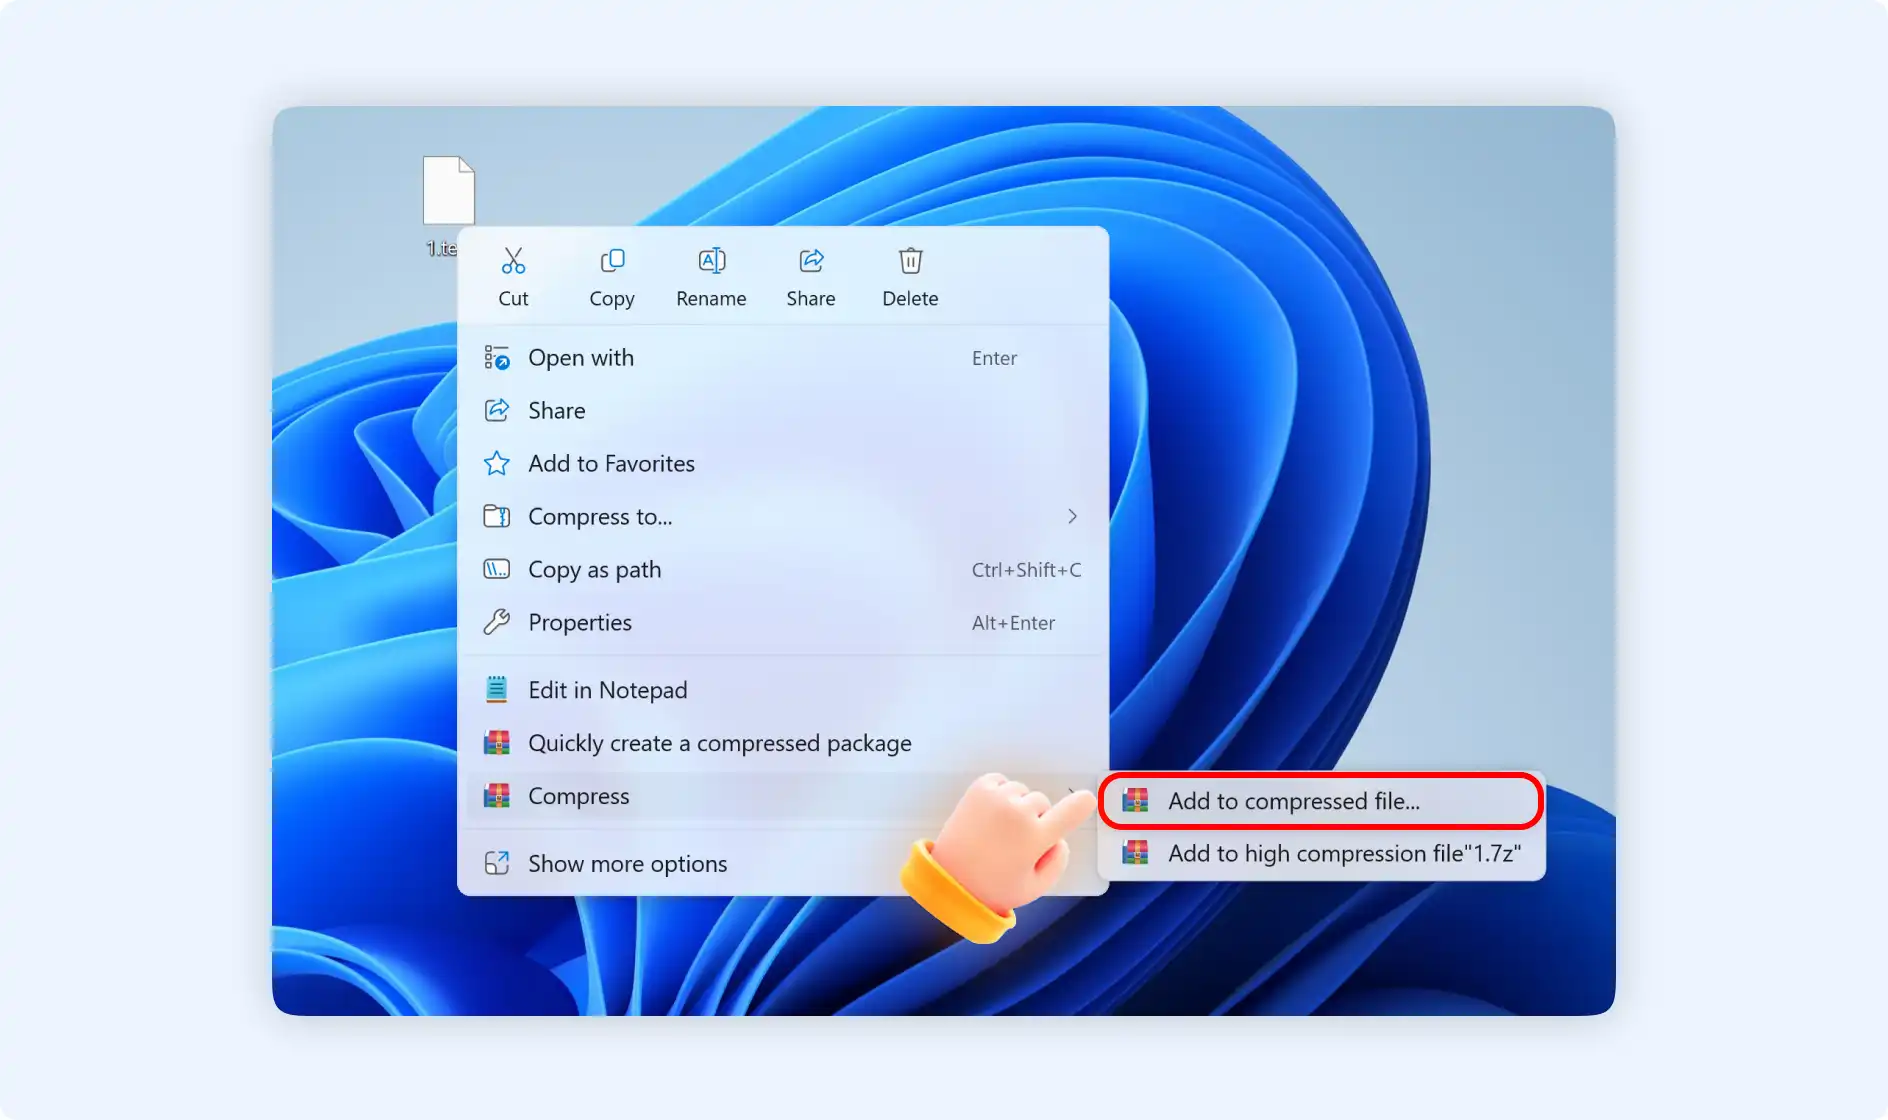
Option 1: Select "Compressed file", then a pop-up window will show you that you can customize your destination folder, compressed file name, and compression type, or add encryption and annotation.
Option 2: Select " Add to[file name].7z", you will find your compressed file appears in the default destination folder with the .7z format.
2.1 Guide to Zip Multiple Files or Folders With ZipKing
Step 1: Double-click to open ZipKing on your desktop, and select the “Compression” option.

Step 2: Choose your desired multiple files/folders or drag multiple files/folders here.
Step 3: There will be a pop-up window showing that you will create a compressed file, here you can change your storage path if you want.
💡Tips1: When zipping multiple files/folders, there are 3 options to choose from: “Minimized, fastest, and custom”. If you want to customize the compressed file, you can choose the “Custom” option. Below it, you can customize the zipped file format, whether to split it into separate packages, and the compression types.
💡Tips2: If you want to secure your zipped file, you can choose to add a password to protect your compressed file.

💡Tips3: For the complex file type, you can also choose to add an annotation for a better understanding when sharing the compressed file with others.

2.2 Guide to Zip Multiple Files/Folders With ZipKing Right-Click Windows
You can also use the ZipKing right-click option to zip multiple files or folders by the following steps.
There are also 2 situations when zip multiple files/folders by ZipKing right-clicking Windows.
Situation 1: Right-click folders to choose "Quickly create a compressed package"
Step 1:Navigate to the folders you want to compress, right-click to choose "Quickly create a compressed package".

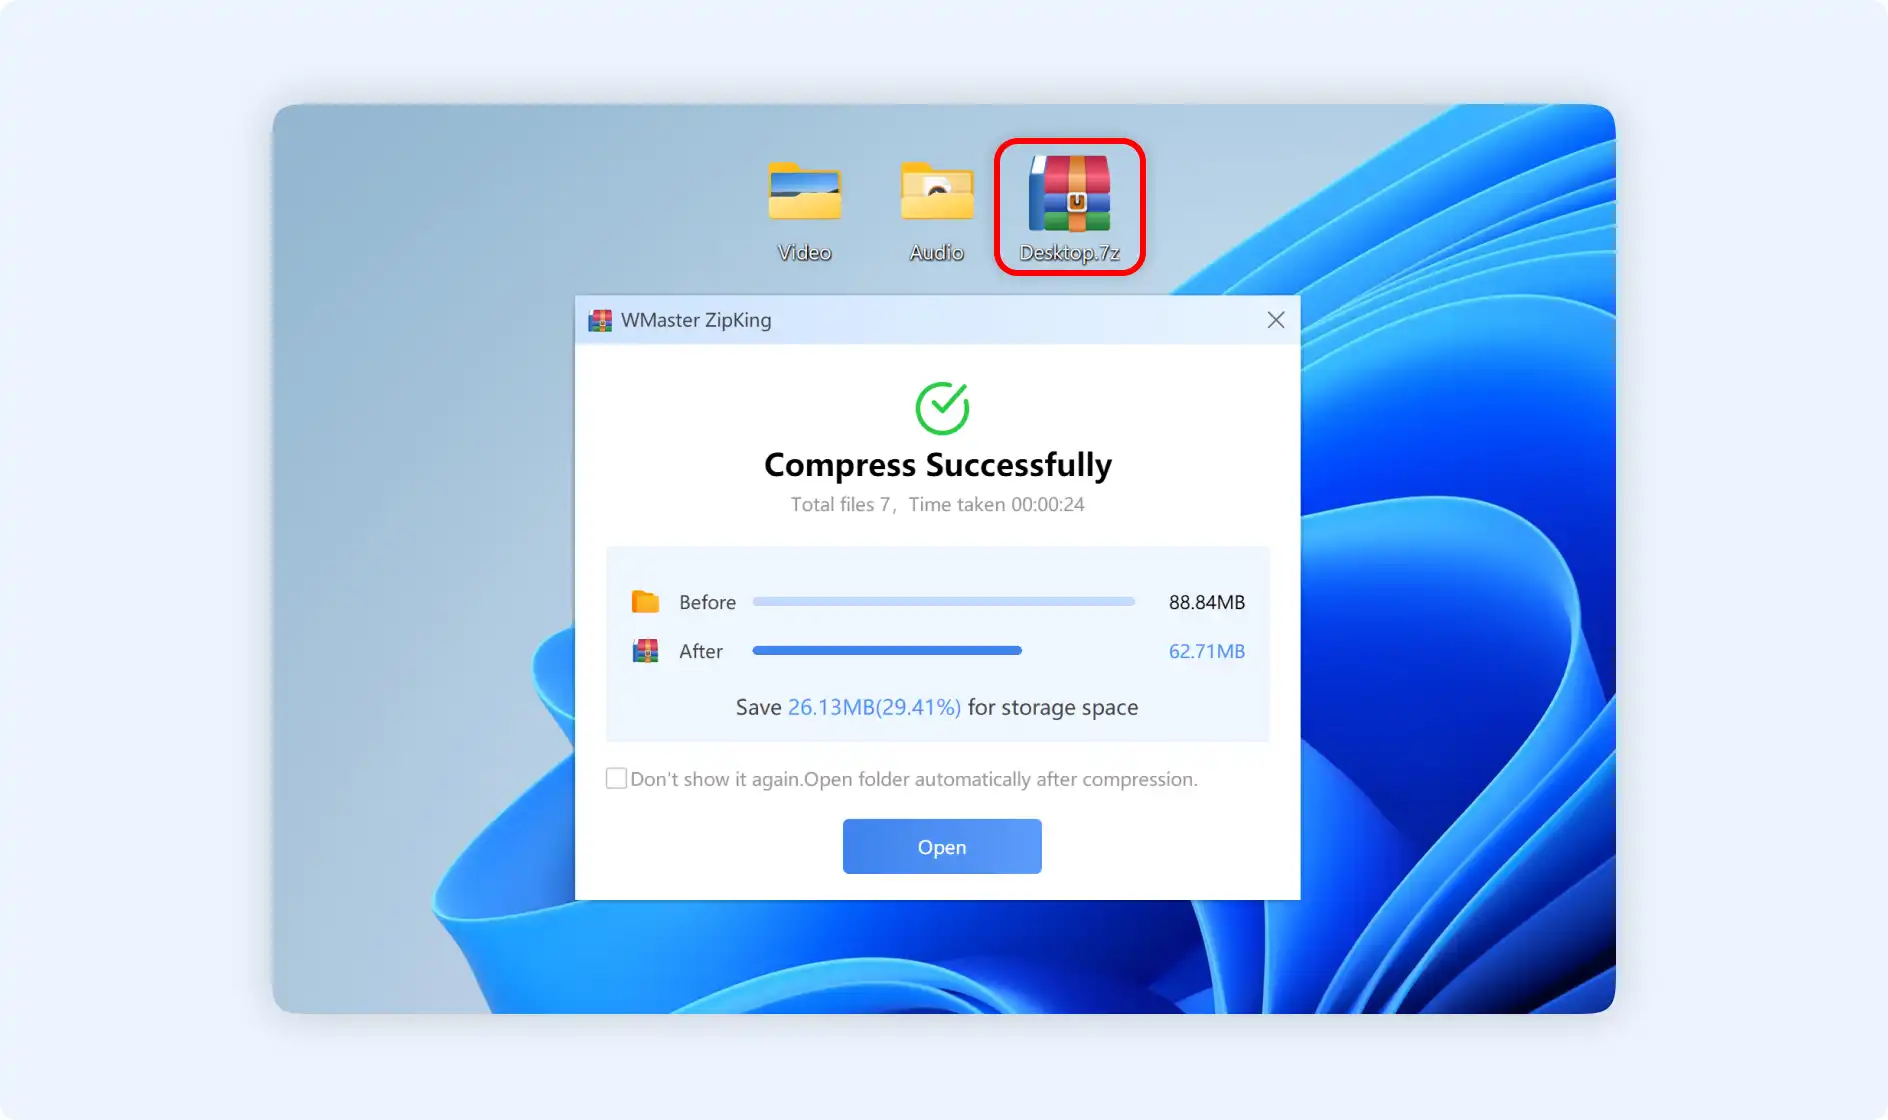
Step 2:Then ZipKing will compress the folders for you automatically and notice you that it has been compressed successfully. You can choose to open the archive place according to your wish.
Situation 2: Right-click folders to choose"Compress"
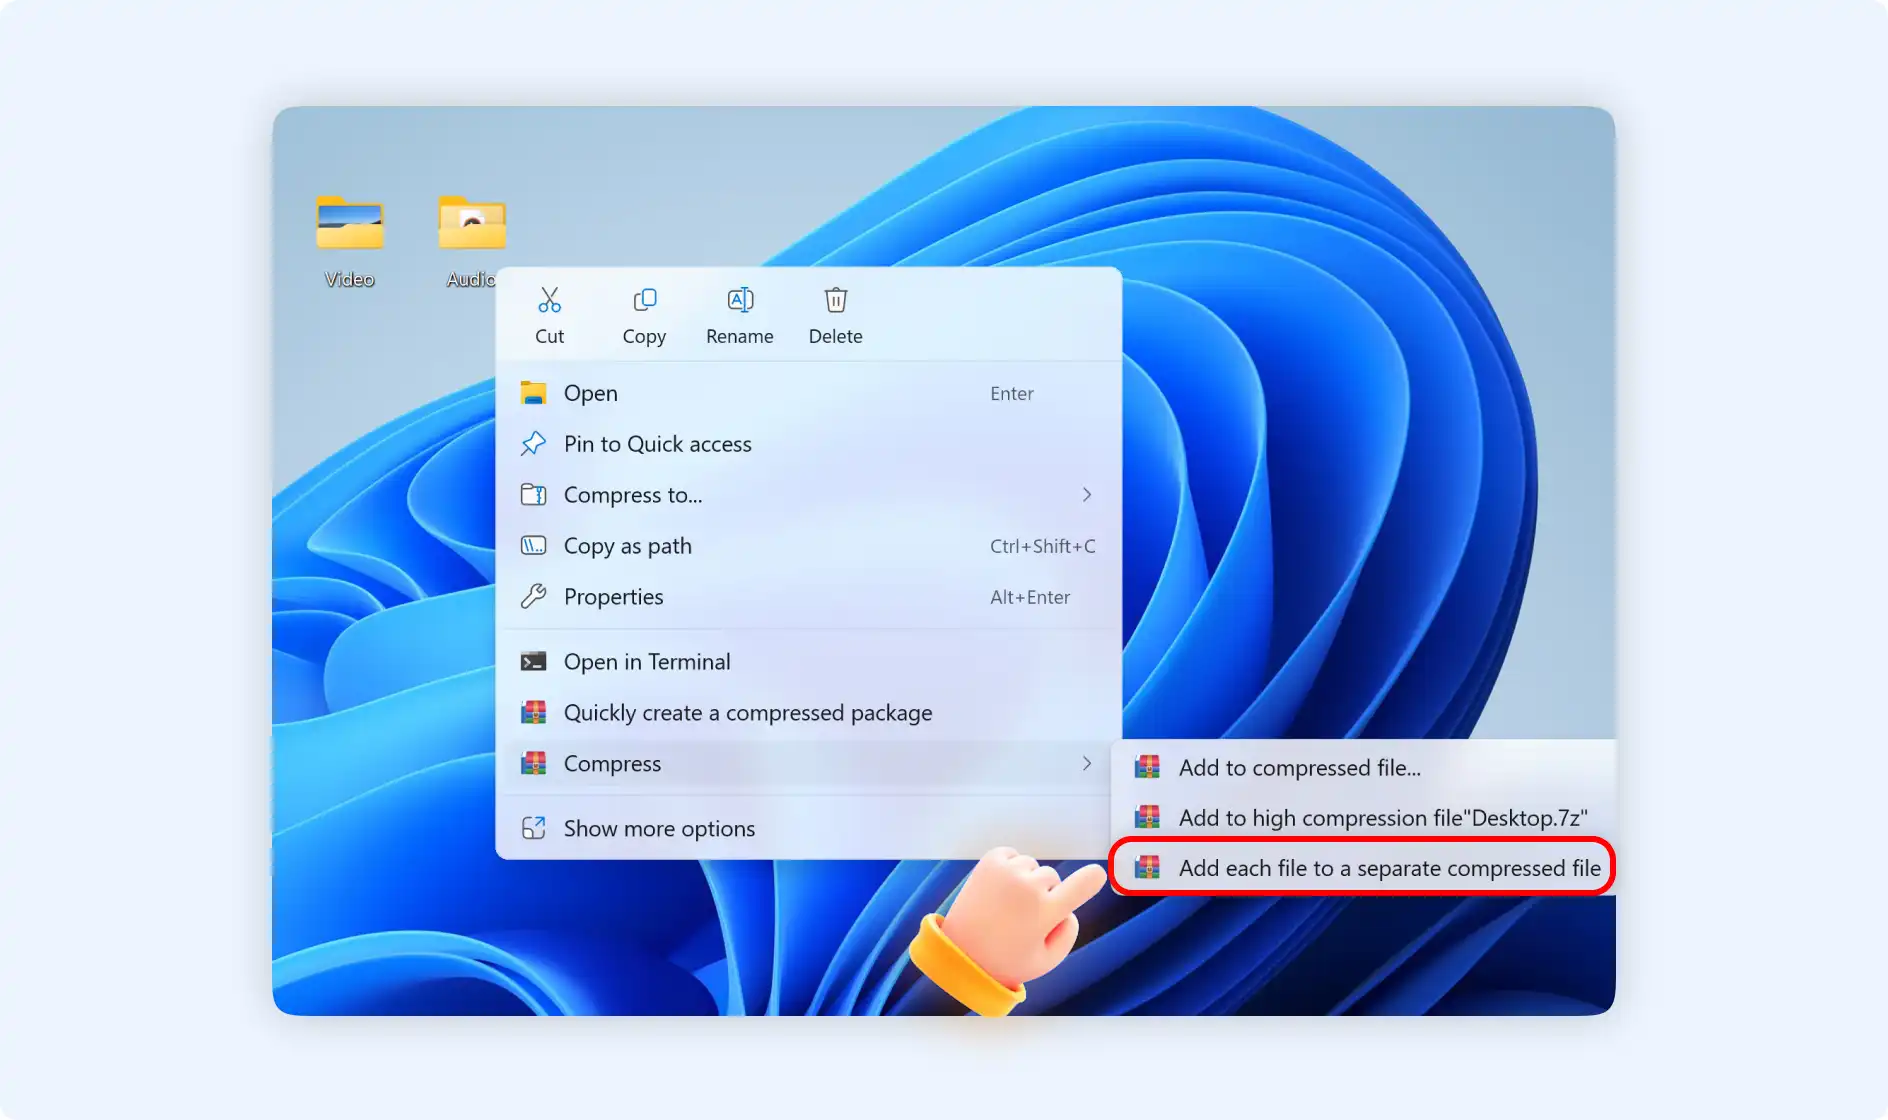
Here are 3 options if you choose to right-click folders then navigate to "Compress".

Option 1: Select" Add to compressed file". Then there will be a pop-up window showing you are going to create a compressed file, here you can customize your destination folder, compressed file name, and compression type, or add encryption and annotation.
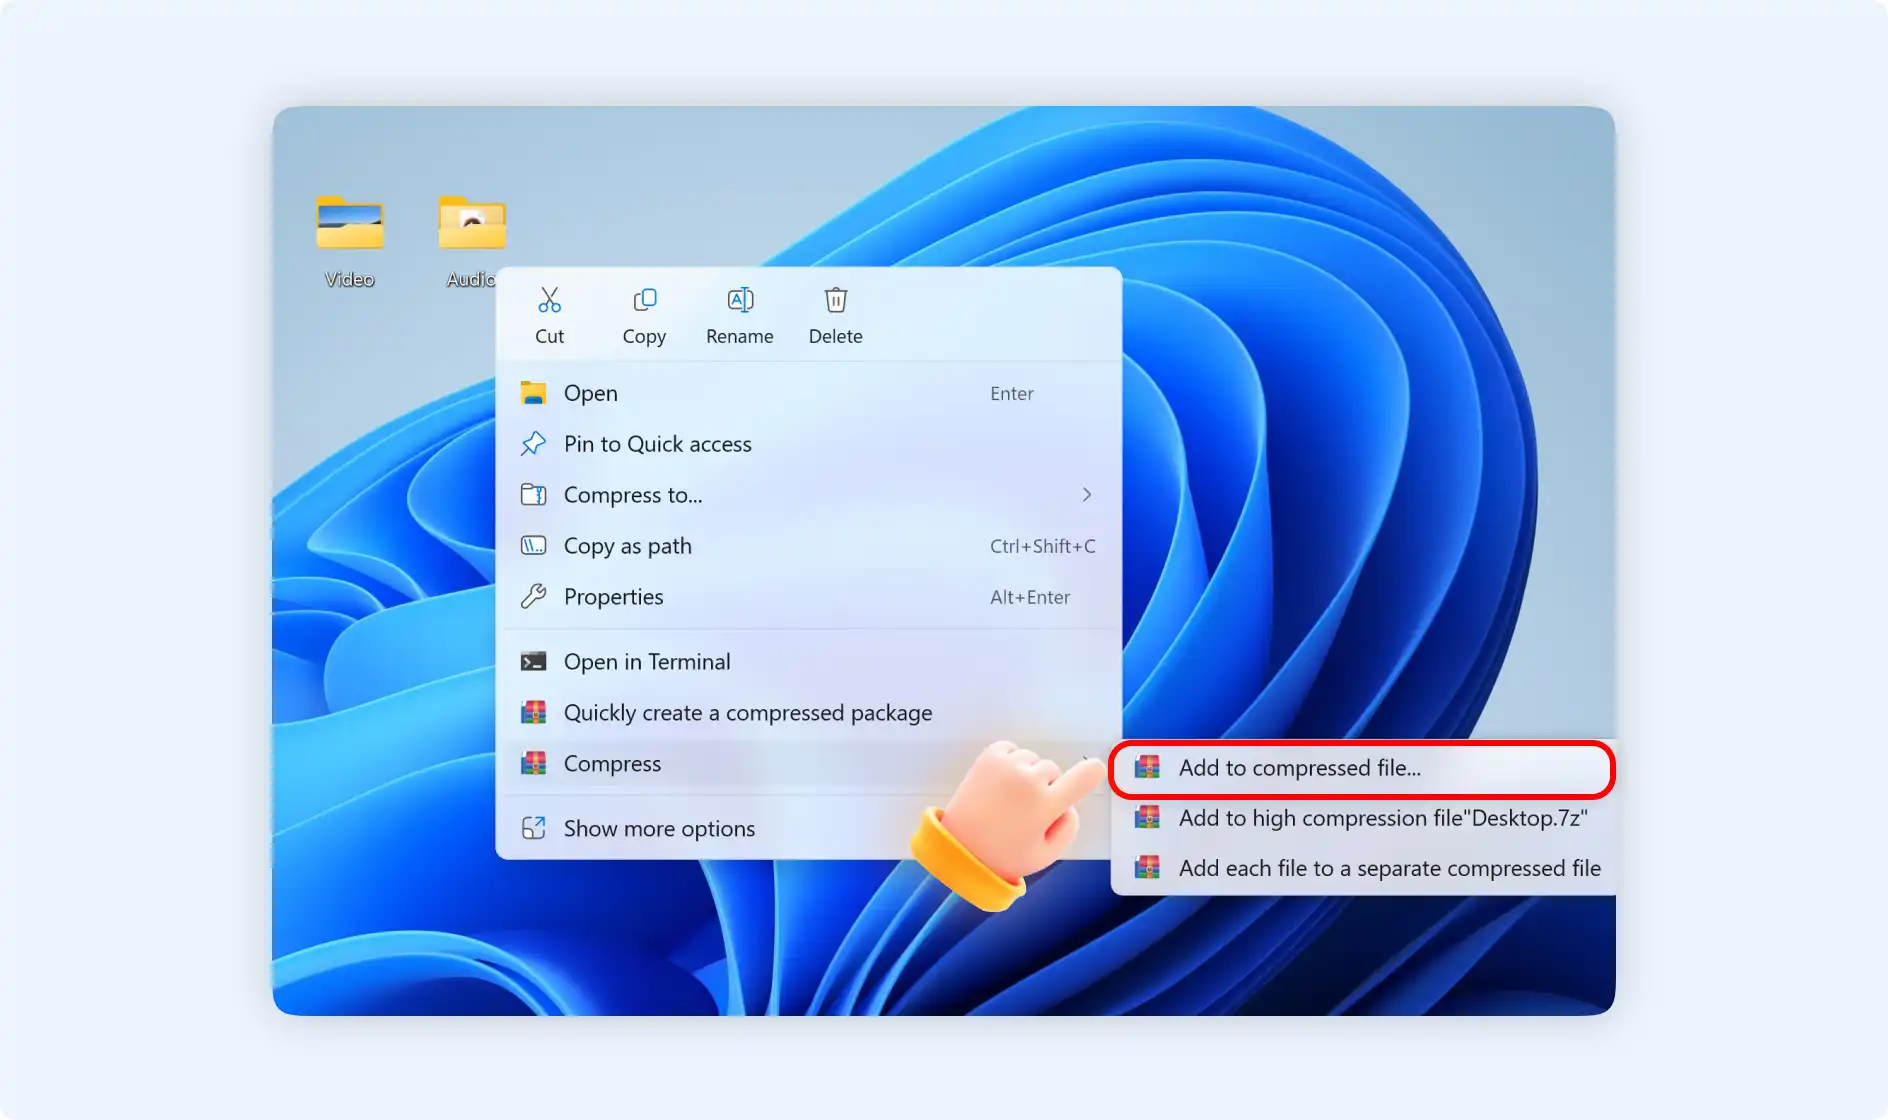
Tips: You can select split multiple files into separate packages/archives for multiple or different files/folder type compression. This feature will help you to better transmit and store your files.
Option 2: Select" Add to high compression file[file name].7z". You will find your compressed file appears in the default destination folder with.7z format.

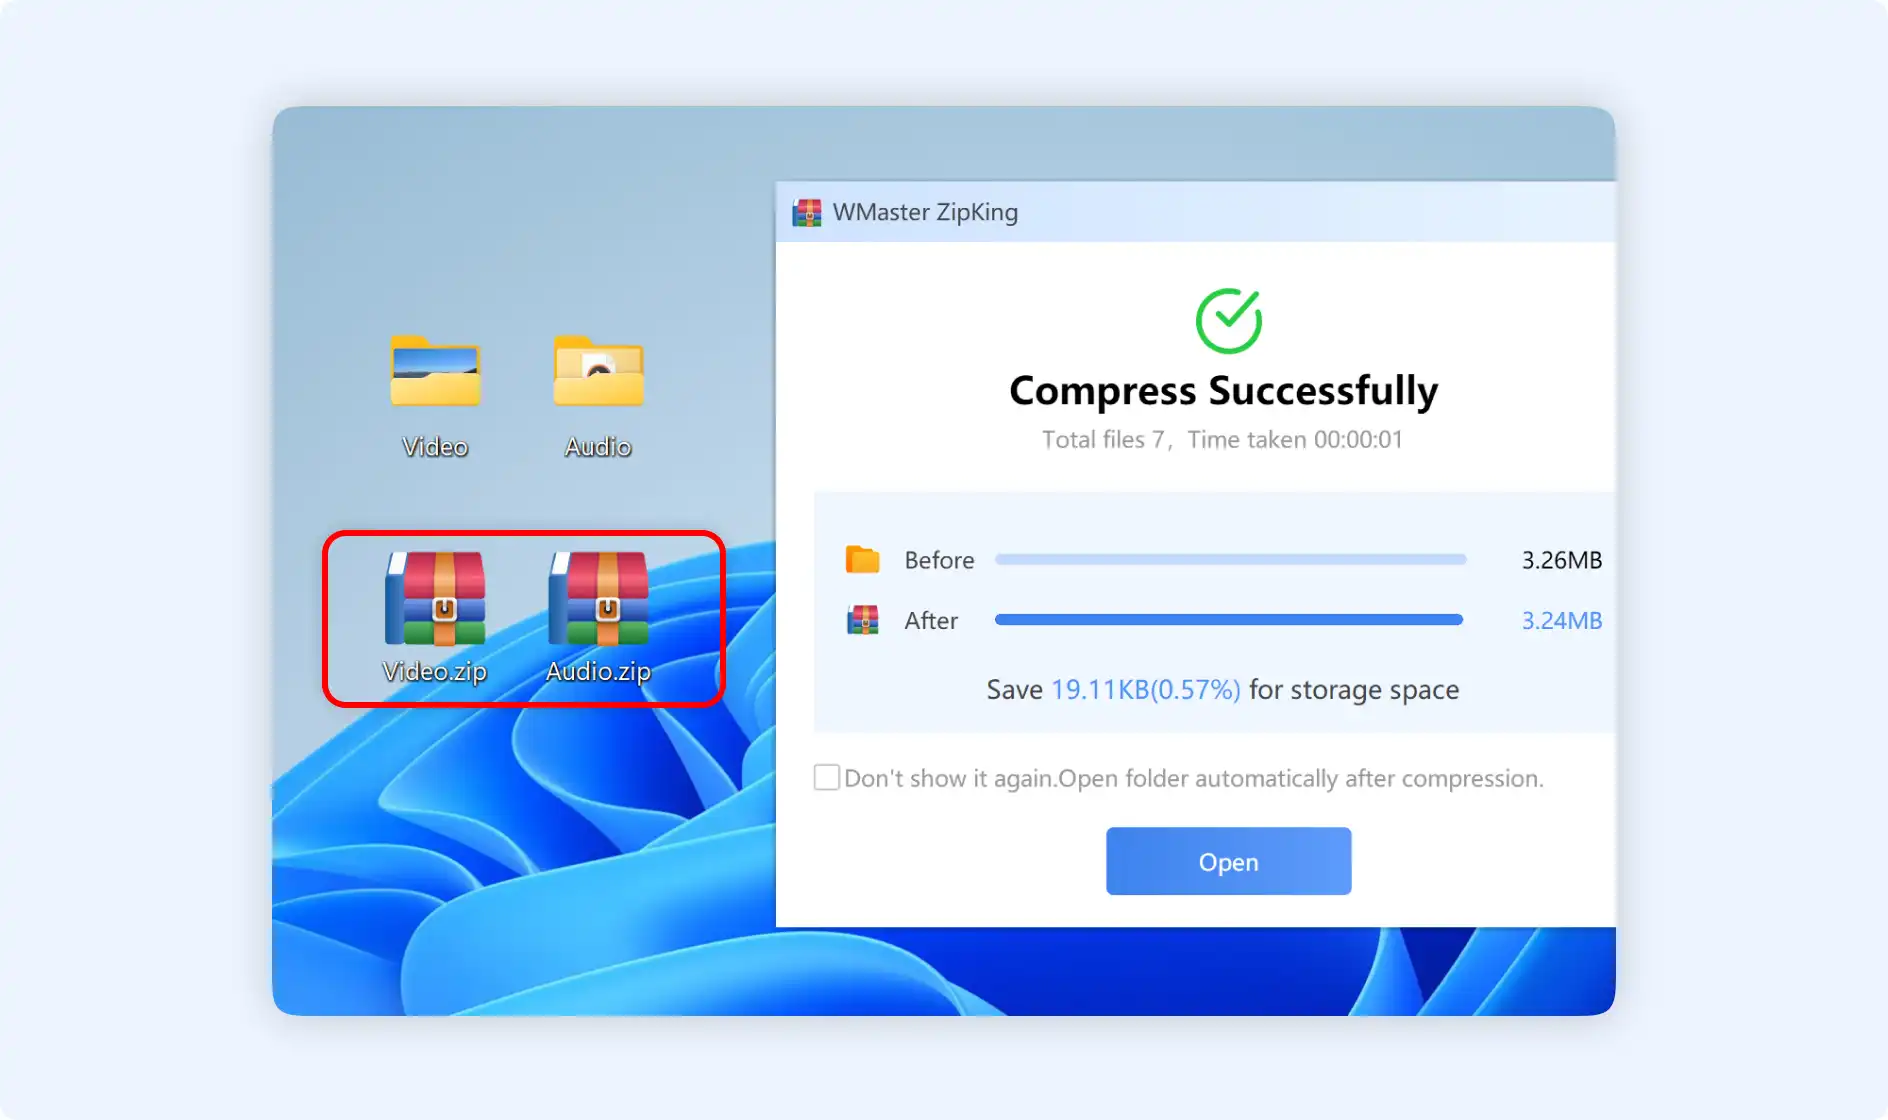
Option 3: Select" Add each file to a separate compressed file". Then ZipKing will create separate zip packages for each of your folders automatically.