Do you need more storage space to match abundant MP3 audio files? Do you need help with endless buffering and loading times when transferring your audio files across platforms? Whether for music creation, transmission, live performance, or audio compression, we always need help with such problems. To improve the clarity and overall quality of audio files, we suggest you use WMaster ZipKing to compress audio files.
How to Compress Audio Files by ZipKing
There are 2 methods to compress audio files with ZipKing software, to use them, you need to go to ZipKing's official site to download and install WMaster ZipKing firstly.
Method 1: Guide to Compress Audio Files with ZipKing Software
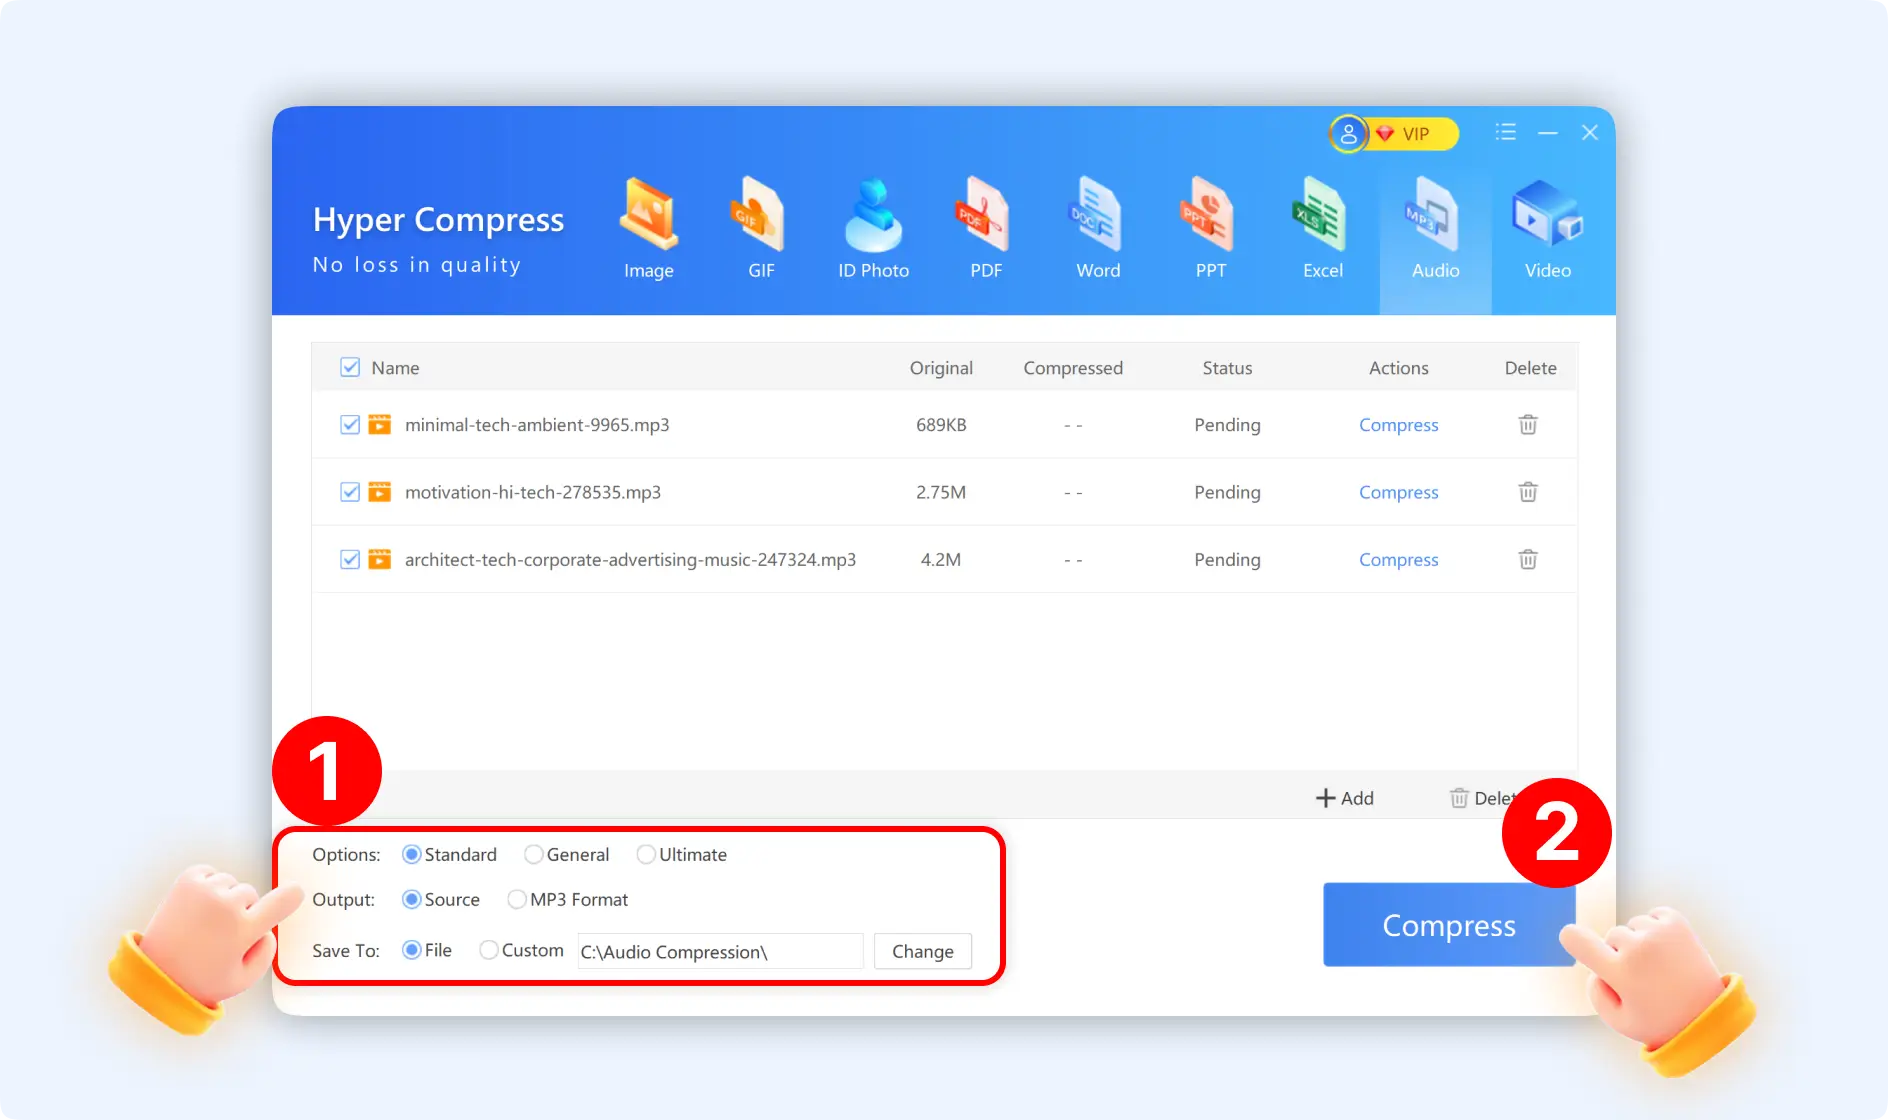
Step 1: Double-click ZipKing on your PC to enter into the main interface, then navigate to “Audio” Hyper Compress through one of the “Image”, “PDF” or “Video” panels.
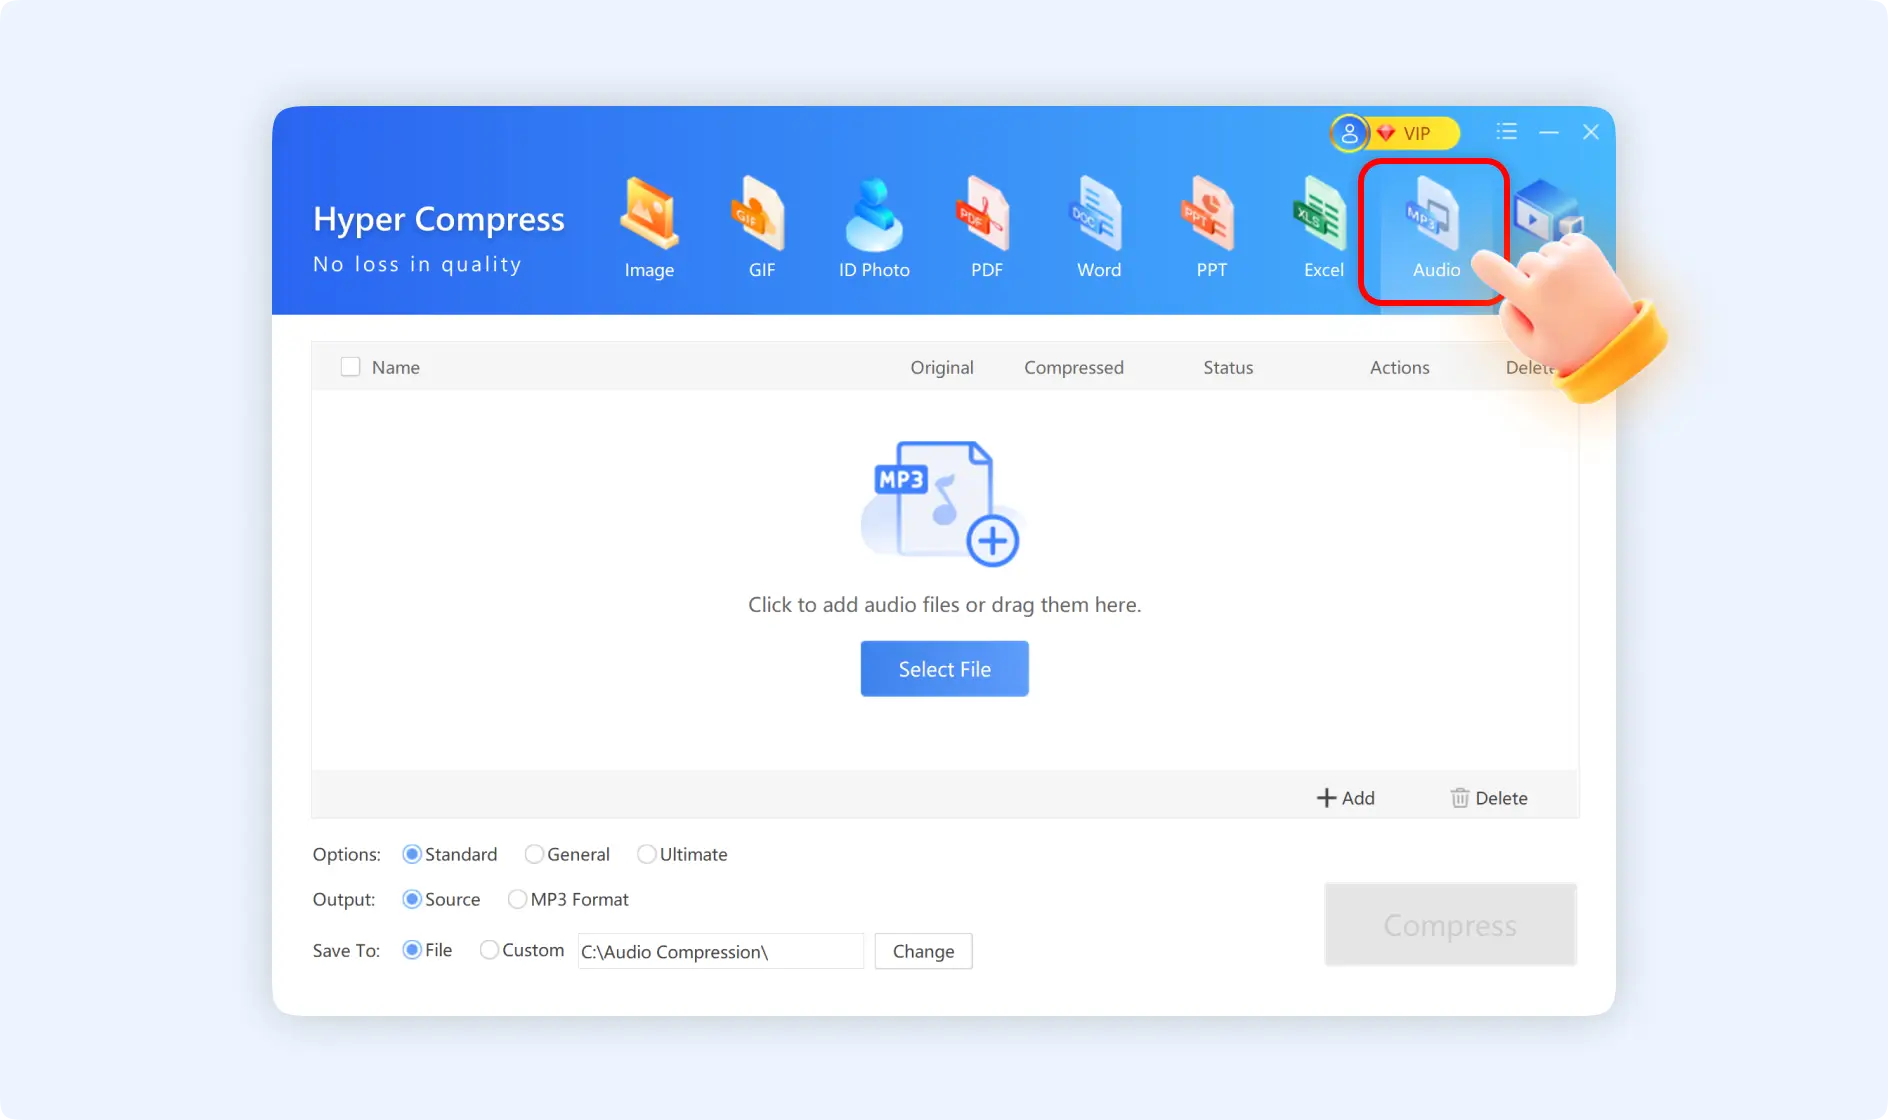
Step 2: Click“Select File” or Click to add audio files or drag and drop them to the panel. ZipKing supports upload .mp3、.wav、.ogg、.flac、.wma、.ac3 and .m4a formats.
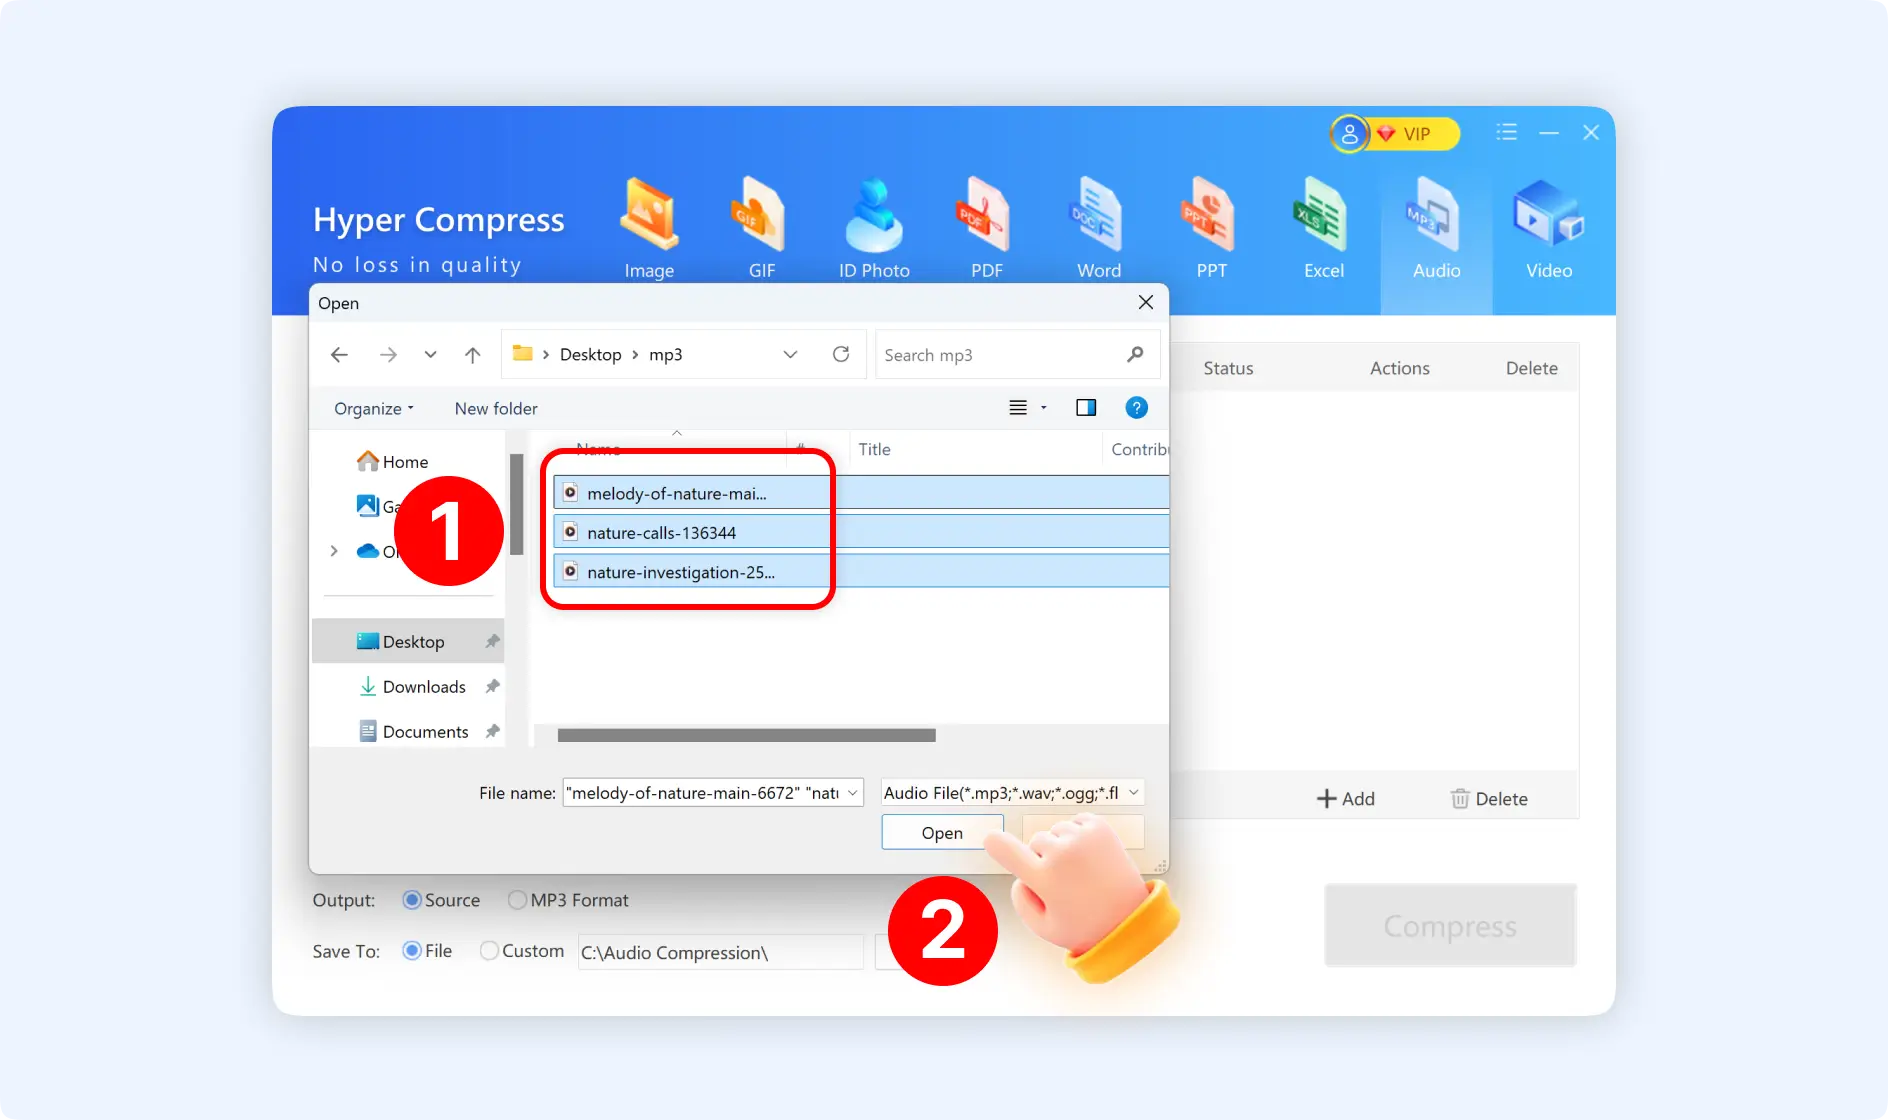
Step 3: If you want to set the compression method, output file format, or select the storage path, you can customize it, if not, just keep the default setting, then click“Compress”.
Method 2: Guide to Compress Audio Files with ZipKing Right-Click Windows
There are 3 different compression modes for the right-click Window when Compressing audio files.
Situation 1: Choose"Audio Compression"
Step 1: Find the audio files, right-click to select"Audio Compression".
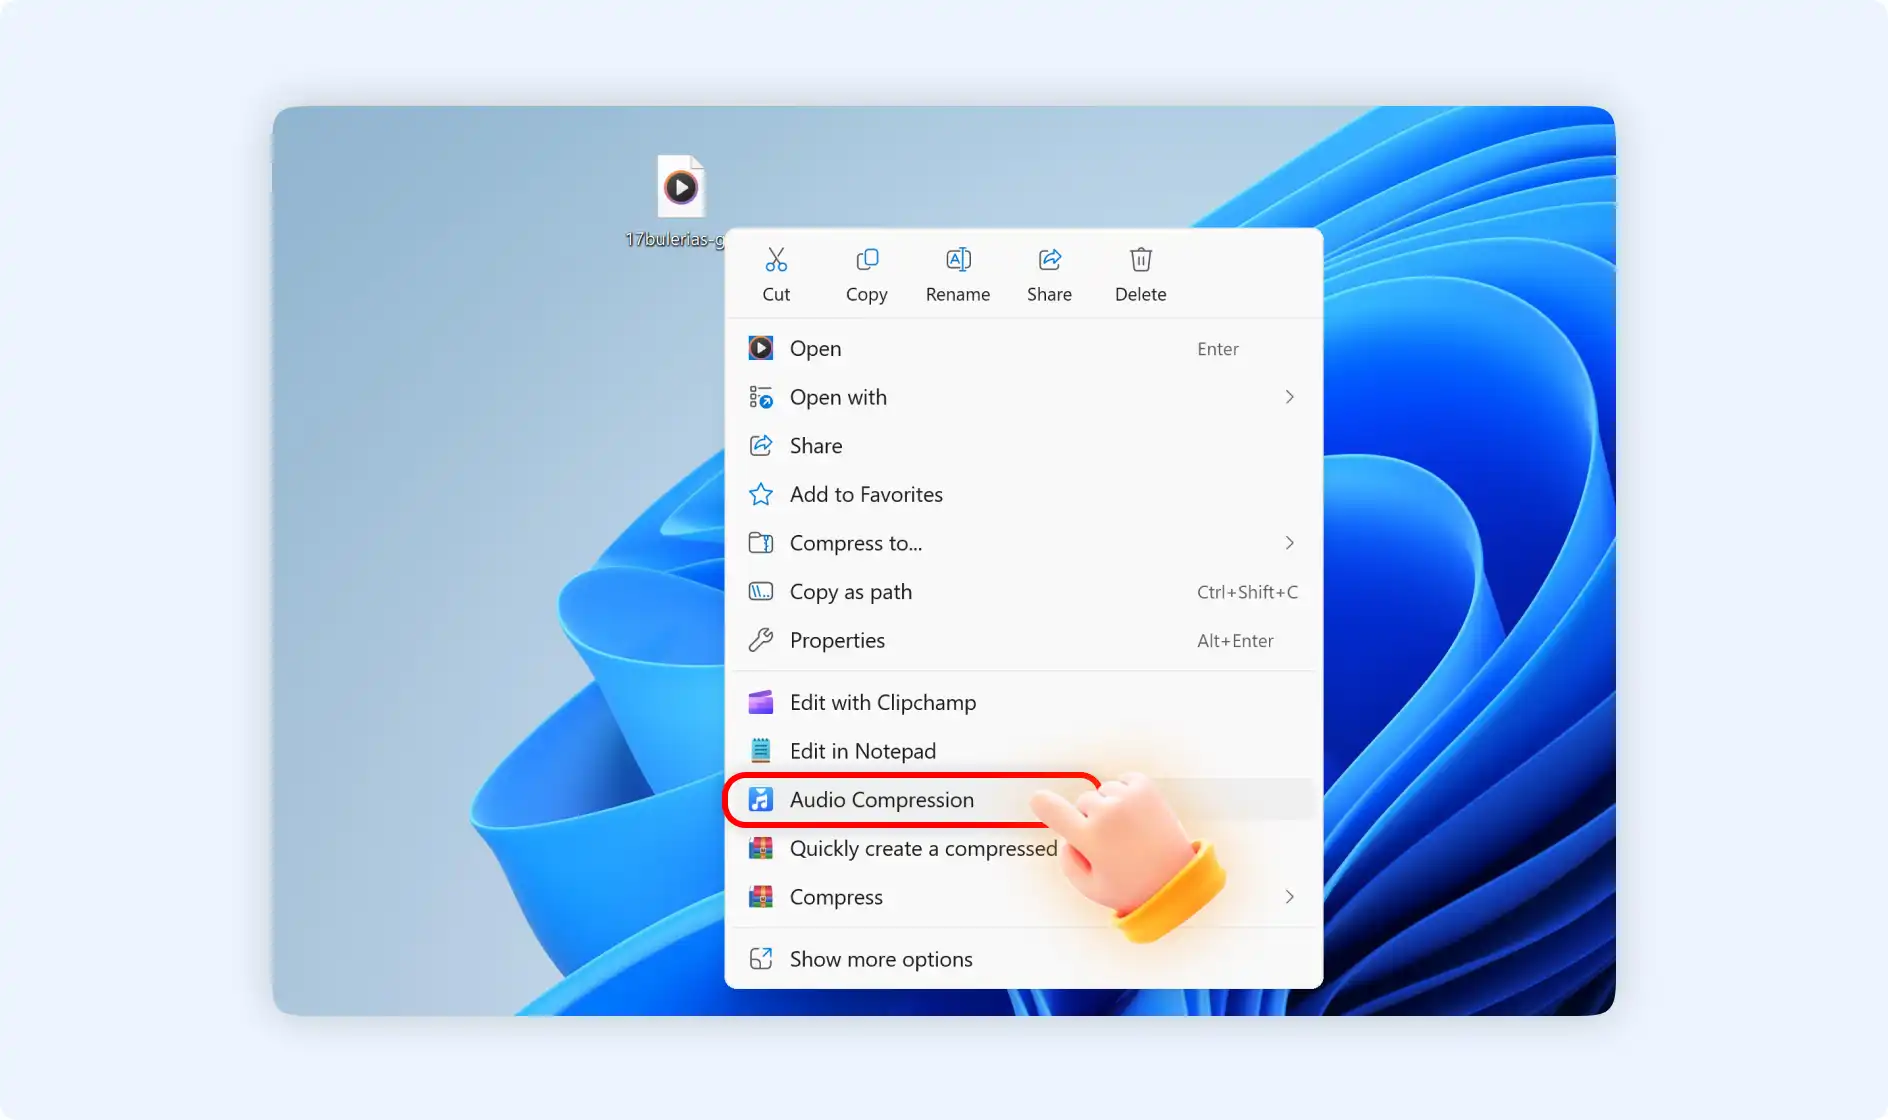
Step 2:You will directly enter into“Hyper Compress” mode for Audio. Here you can reduce audio file size directly. You can add more mp3 audio files or delete them, and even set the compression options like“Standard, General, and Ultimate”.What's more, you can customize the storage path for the compressed audio files.

Situation 2: Choose"Quickly create a compressed package"
Step 1: Locate the audio files, right-click to select" Quickly create a compressed package"
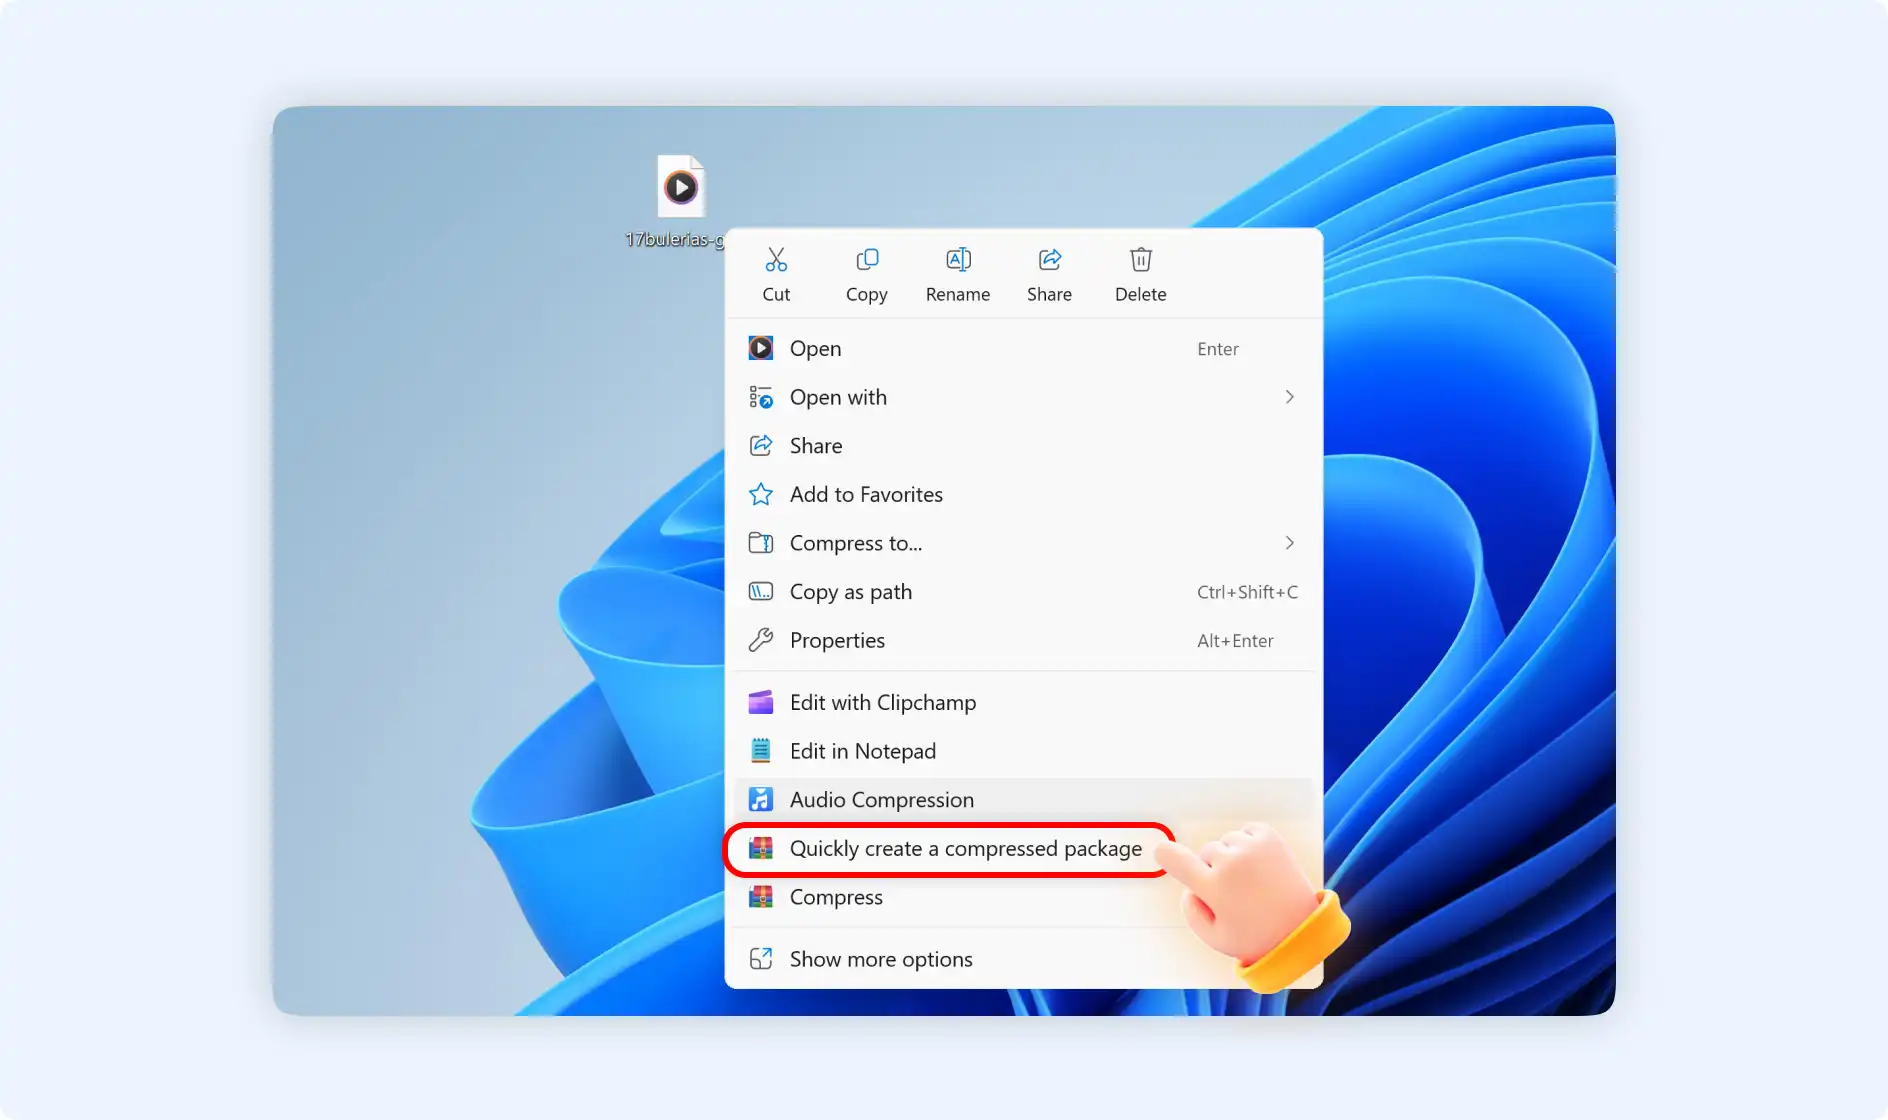
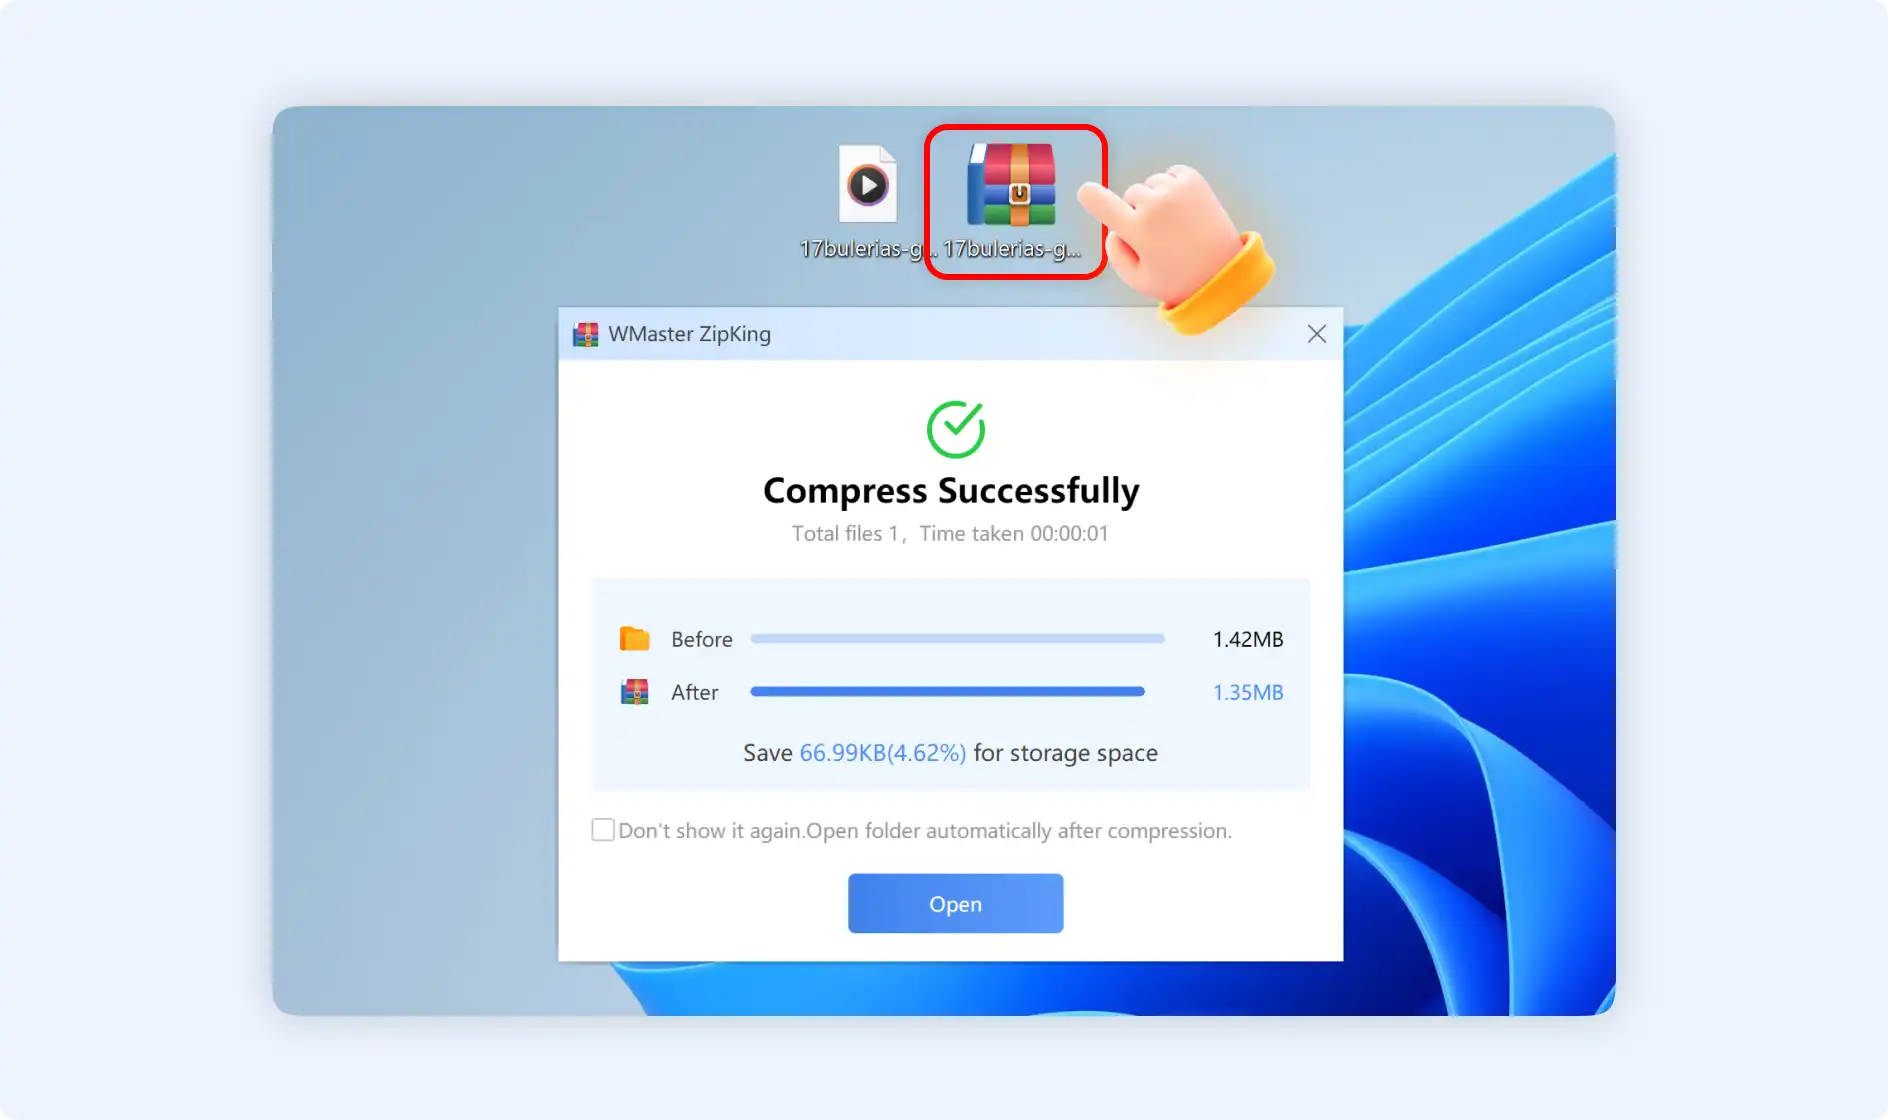
Step 2: Then you will enter into the smart compression mode, ZipKing will compress the audio files automatically then notice you "Compress Successfully", here you can see the"Before" and "After" compression size clearly.
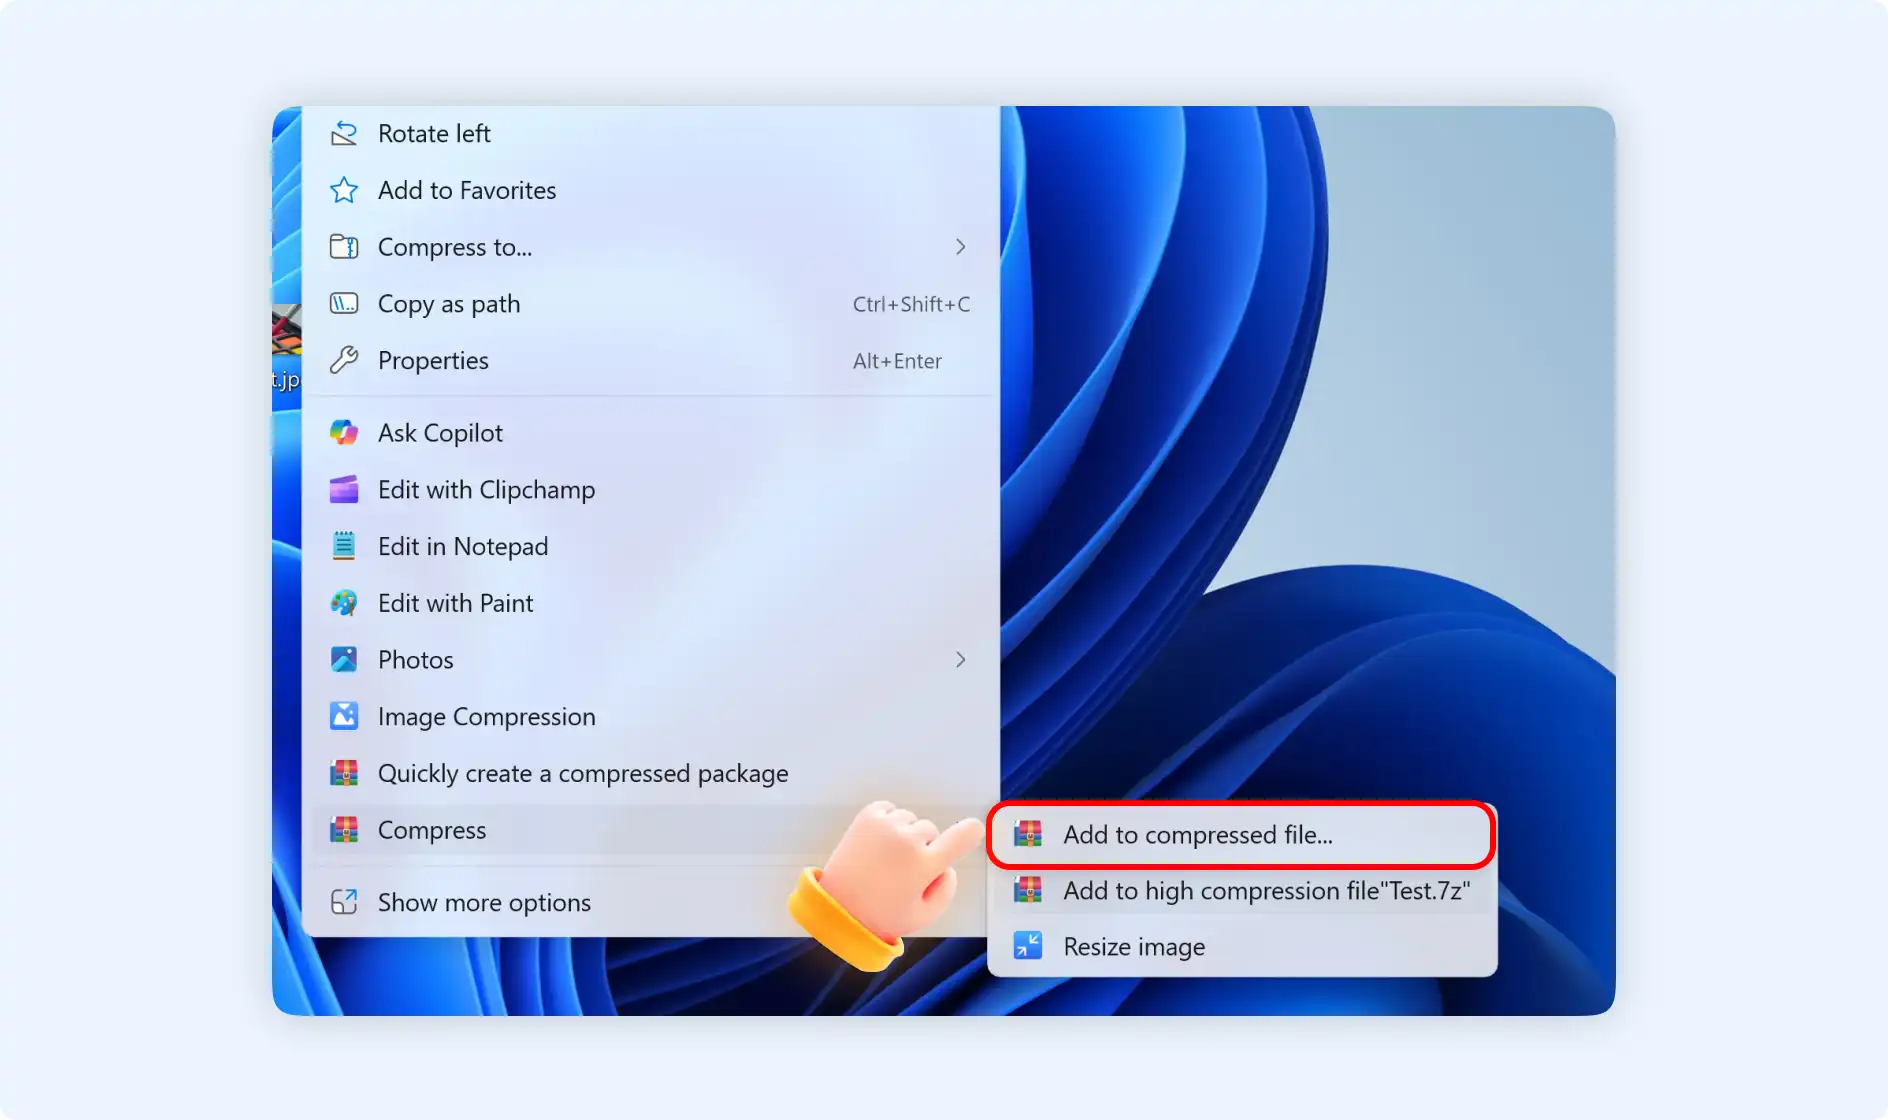
Situation 3: Choose "Compress"
If you choose the right-clicking mode of "Compress", there will be 2 options.
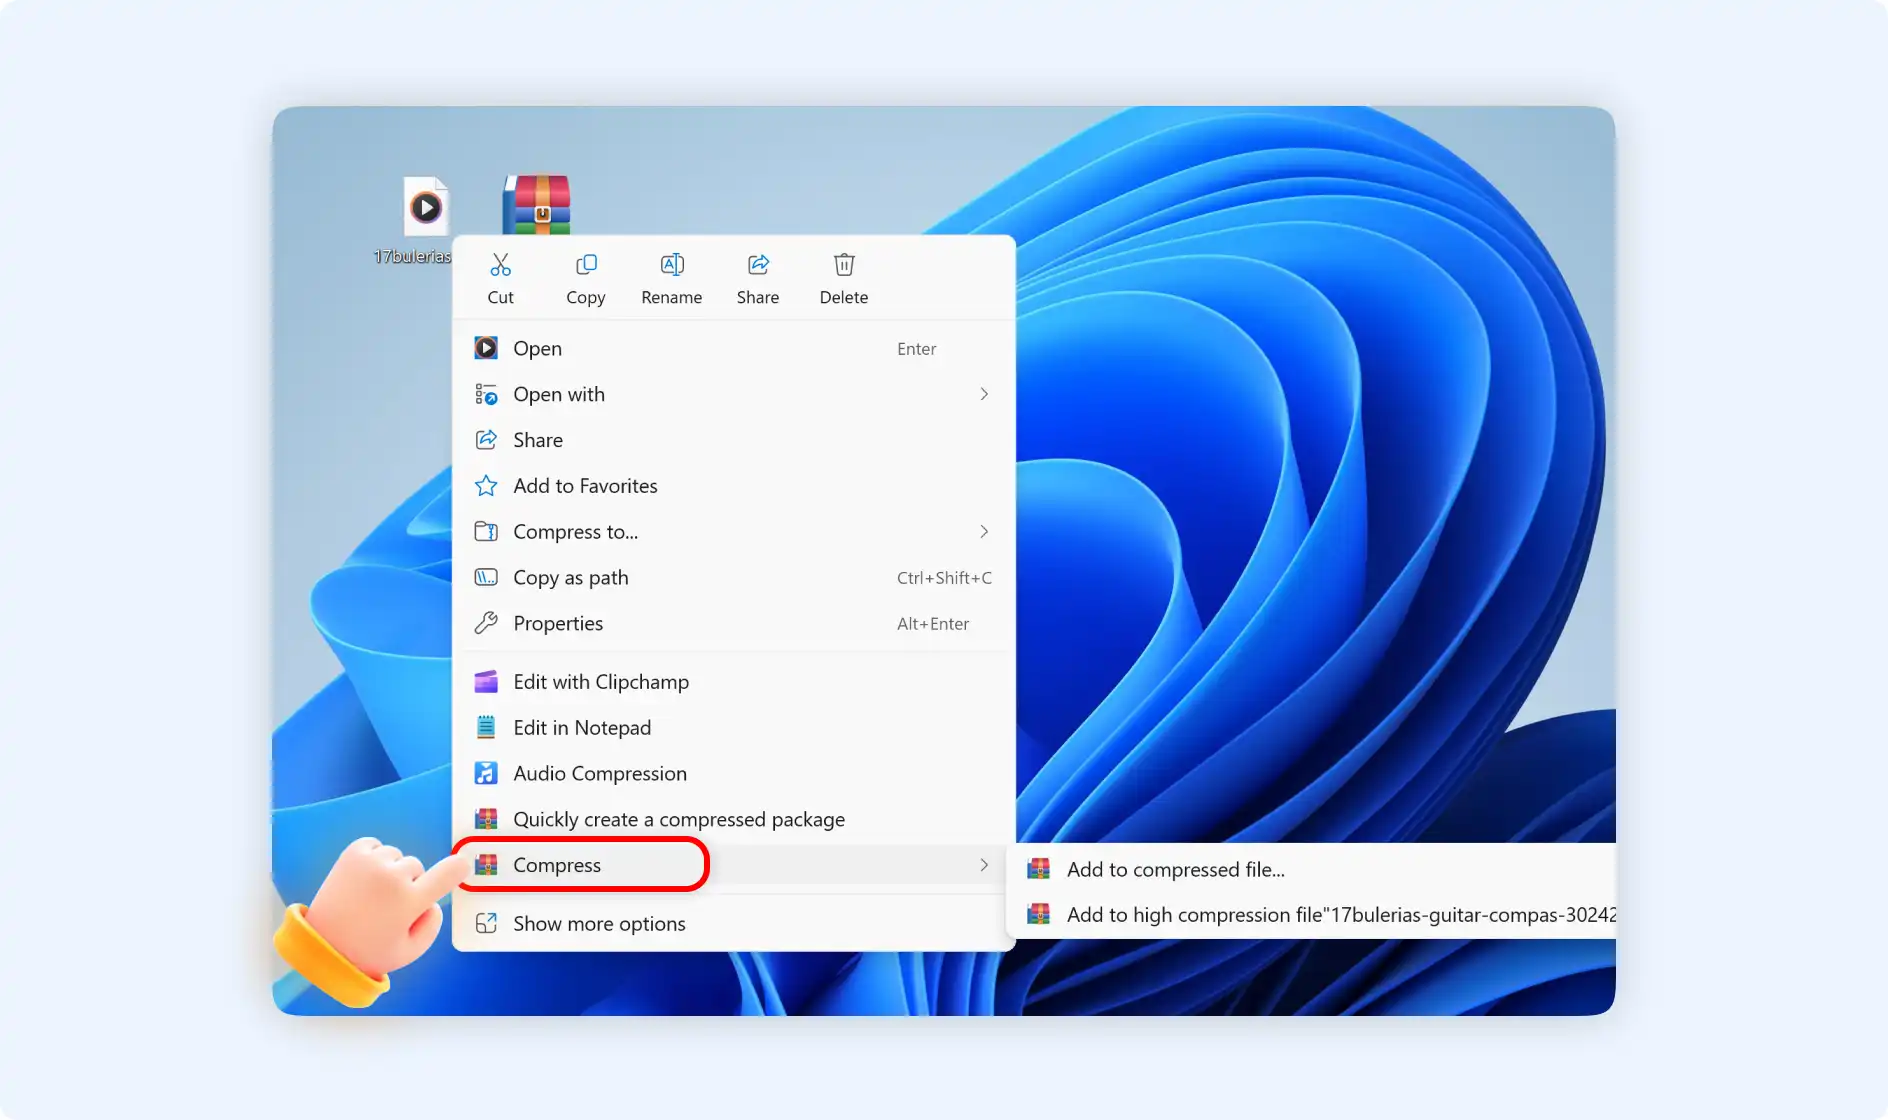
Option 1: Select "Add to compressed file..."
Step 1: Right-click the audio files, navigate to "Compress", then select "Add to compressed file...".
Step 2: Then a pop-up window will notify you that you will create a compressed file, the default format is.zip.
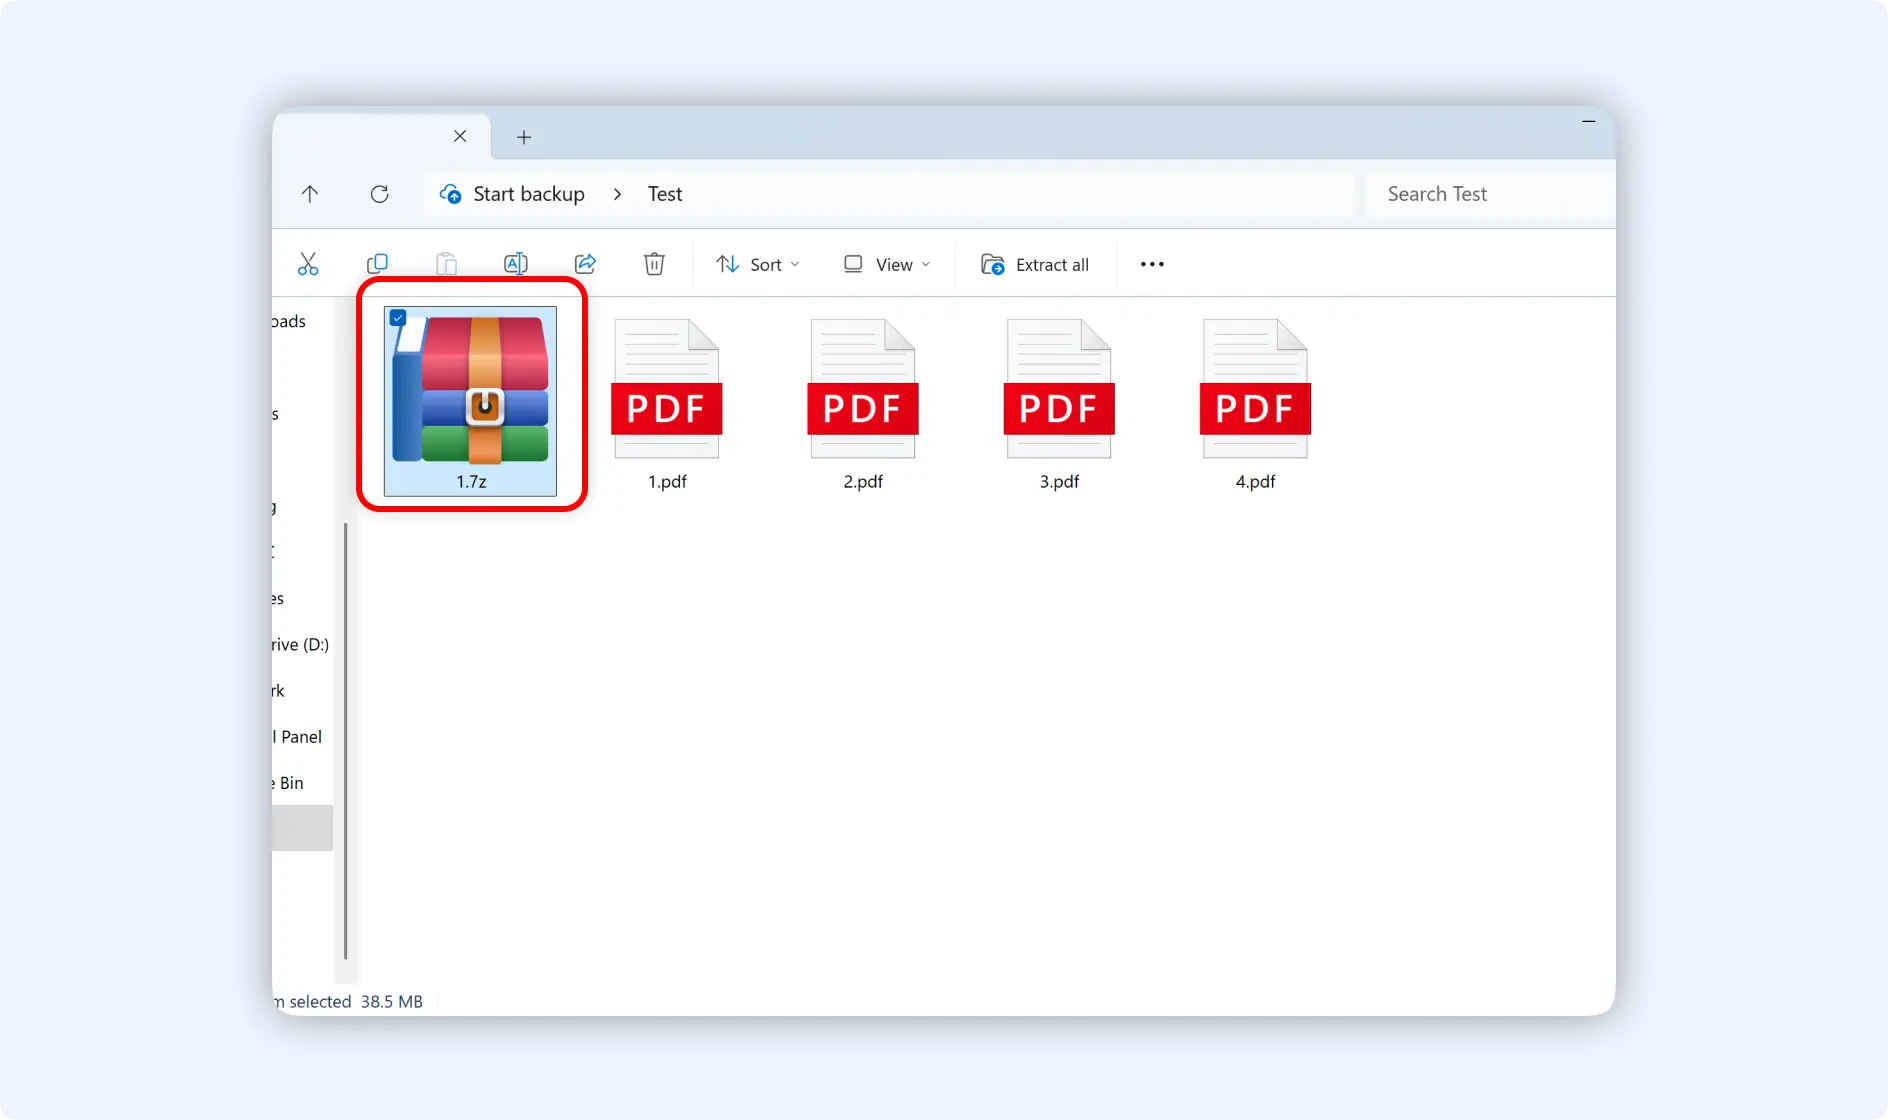
Option 2: Select"Add to high compression file[file name].7z"
Step 1: Right-click the audio files, navigate to "Compress", then select "Add to high compression file[file name].7z".
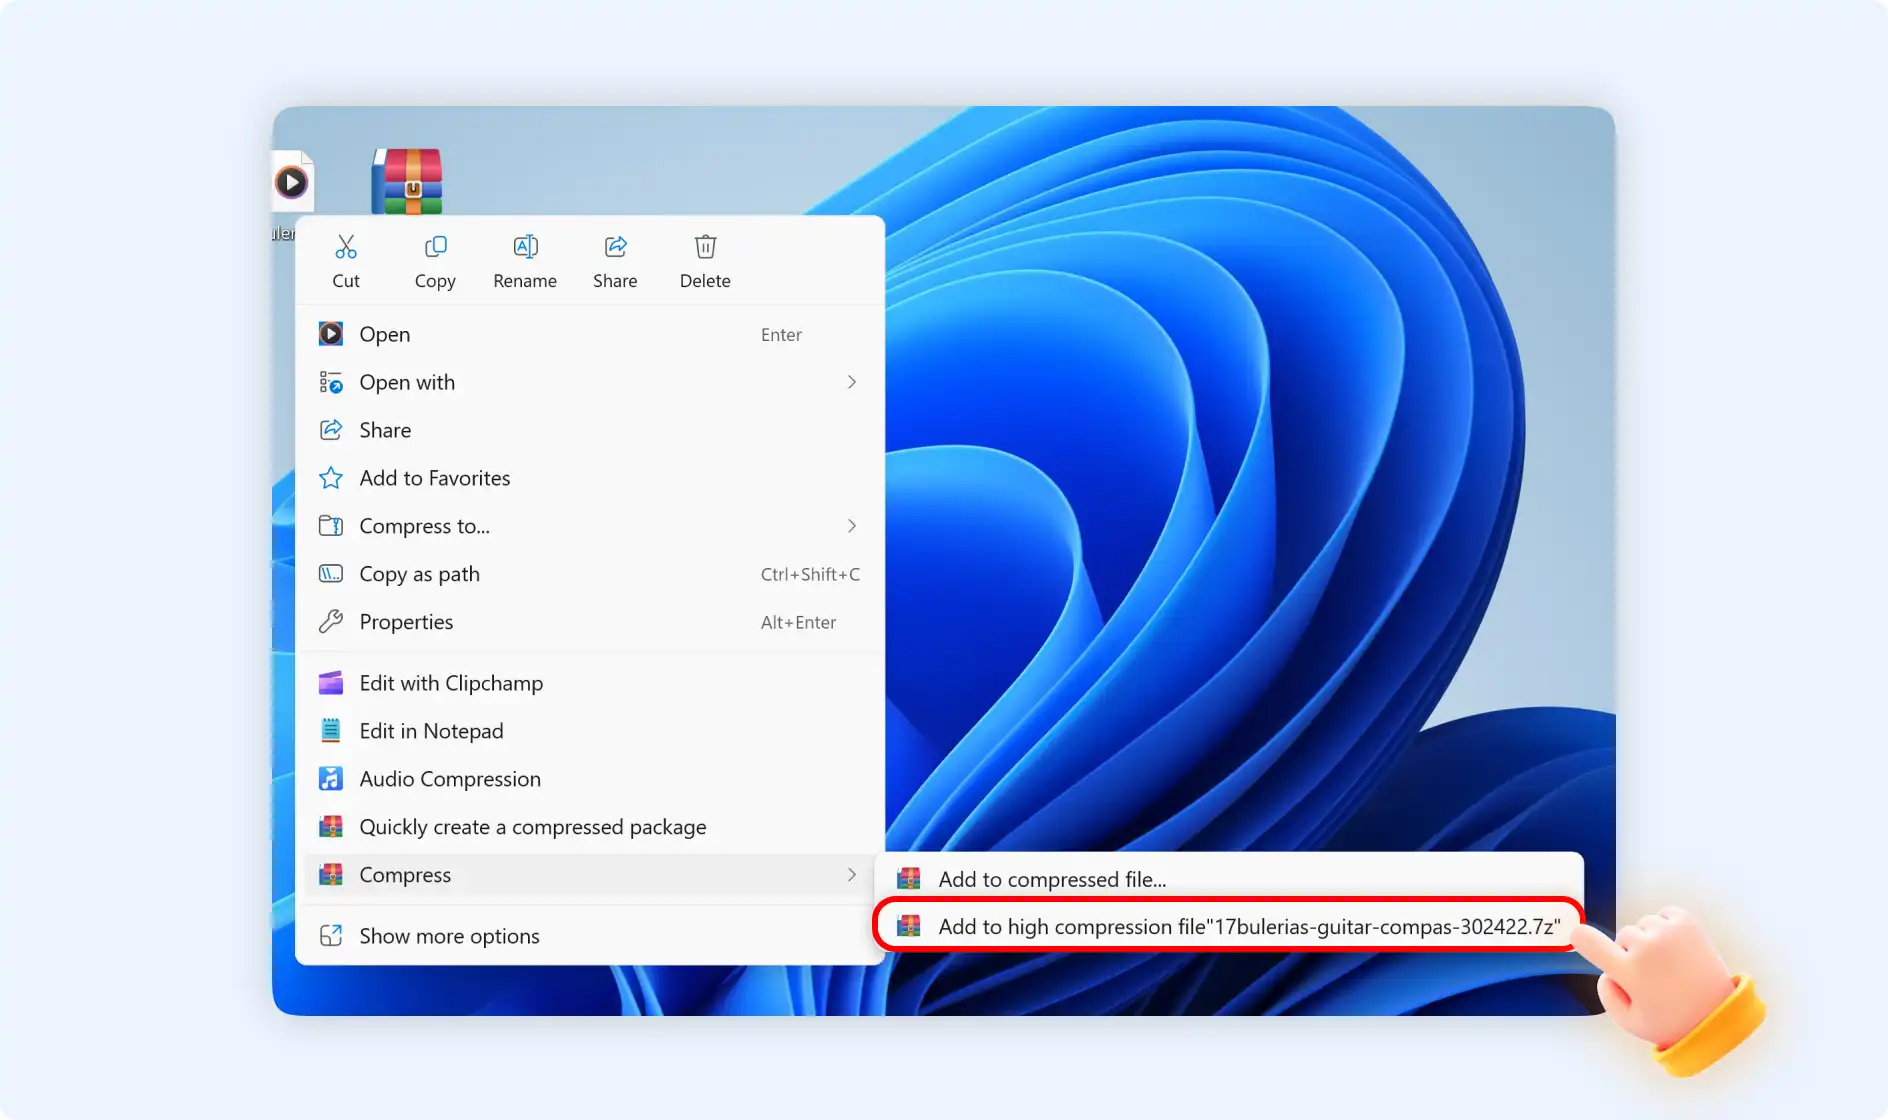
Step 2: You will create a 7z archive for these compressed audio files. .7z package is the smallest file size package.