GIF picture is widely used in daily life animation and it usually takes a large file size for storage. And if you use it on your website, it will dramatically impact your website performance. So you need to reduce GIF file size so that it can speed up your site performance. The below guide will teach you how to compress a GIF with ZipKing.
Guide to Compress A GIF With ZipKing
Here are 2 ways to compress a GIF by ZipKing, no matter which way you choose, remember to download and install WMaster ZipKing on your computer.
Method 1: Guide to Compress A GIF With ZipKing
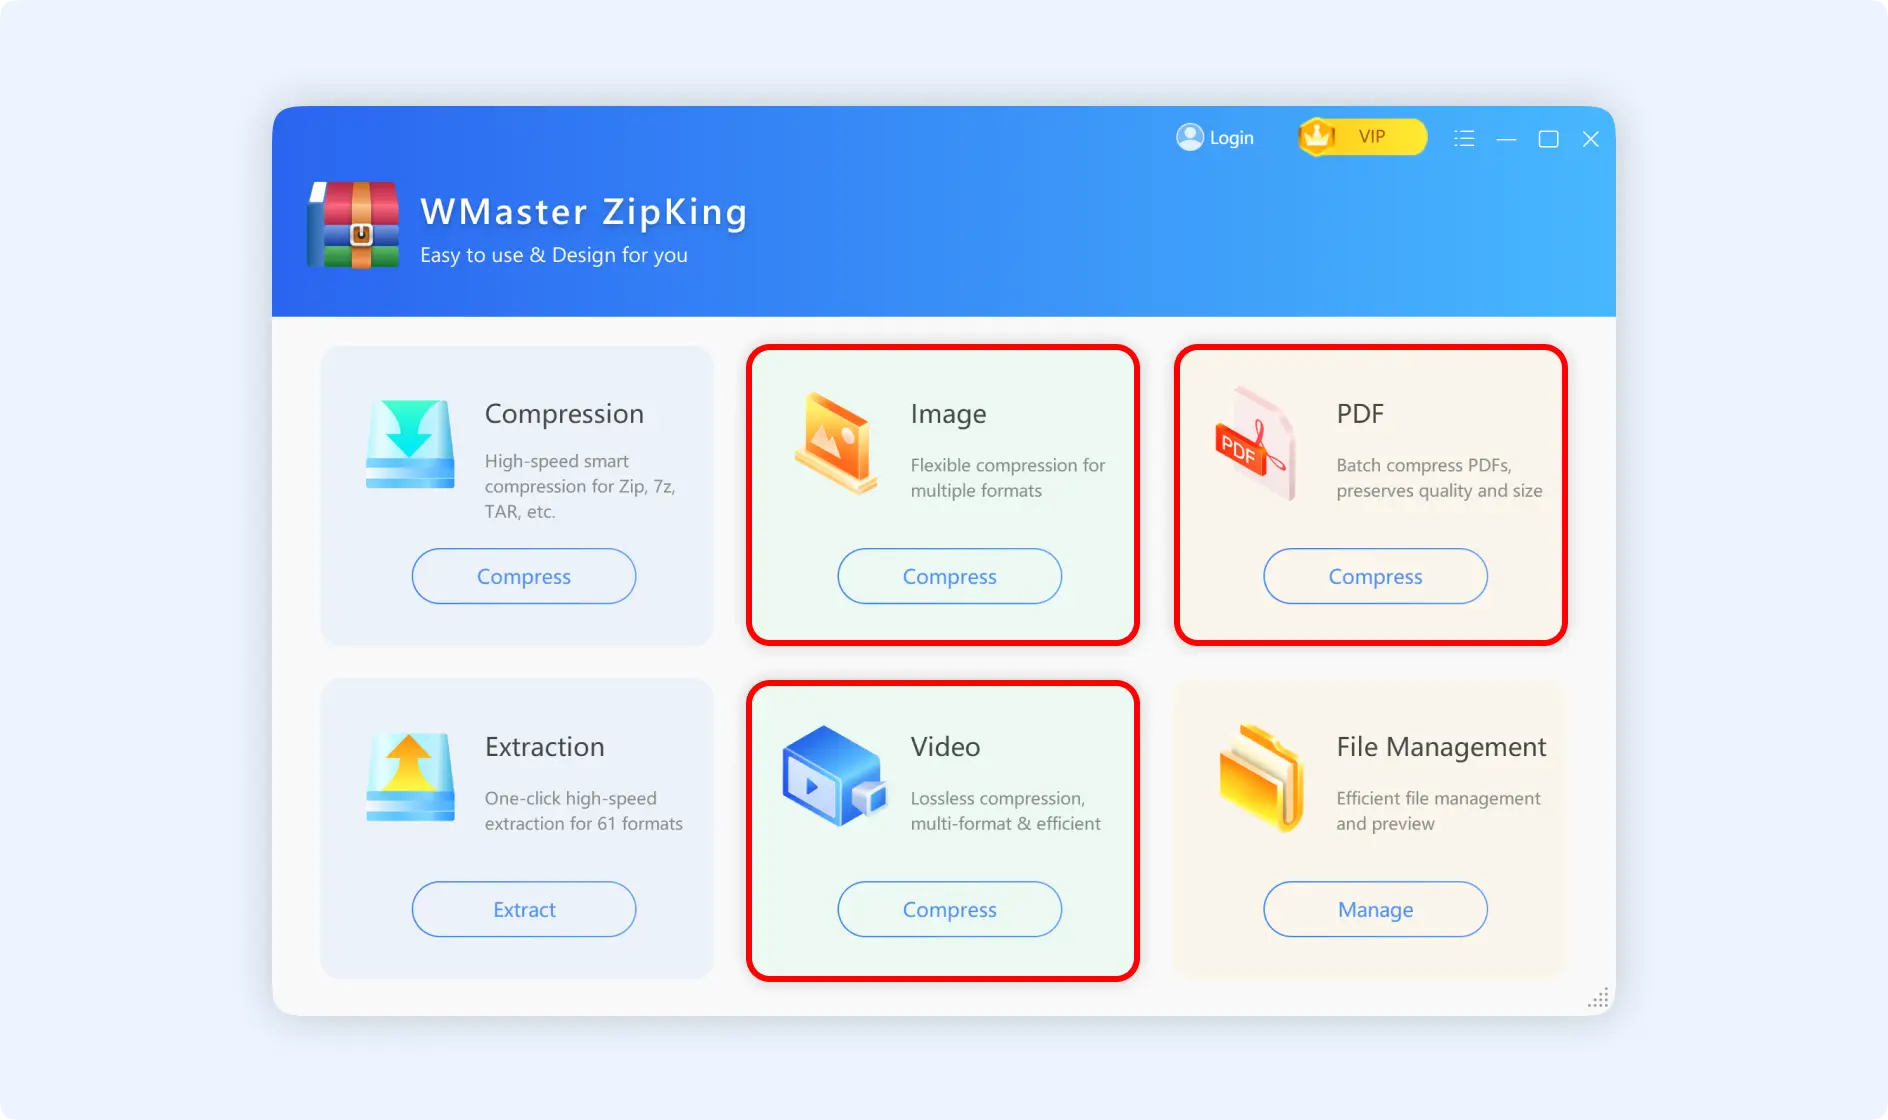
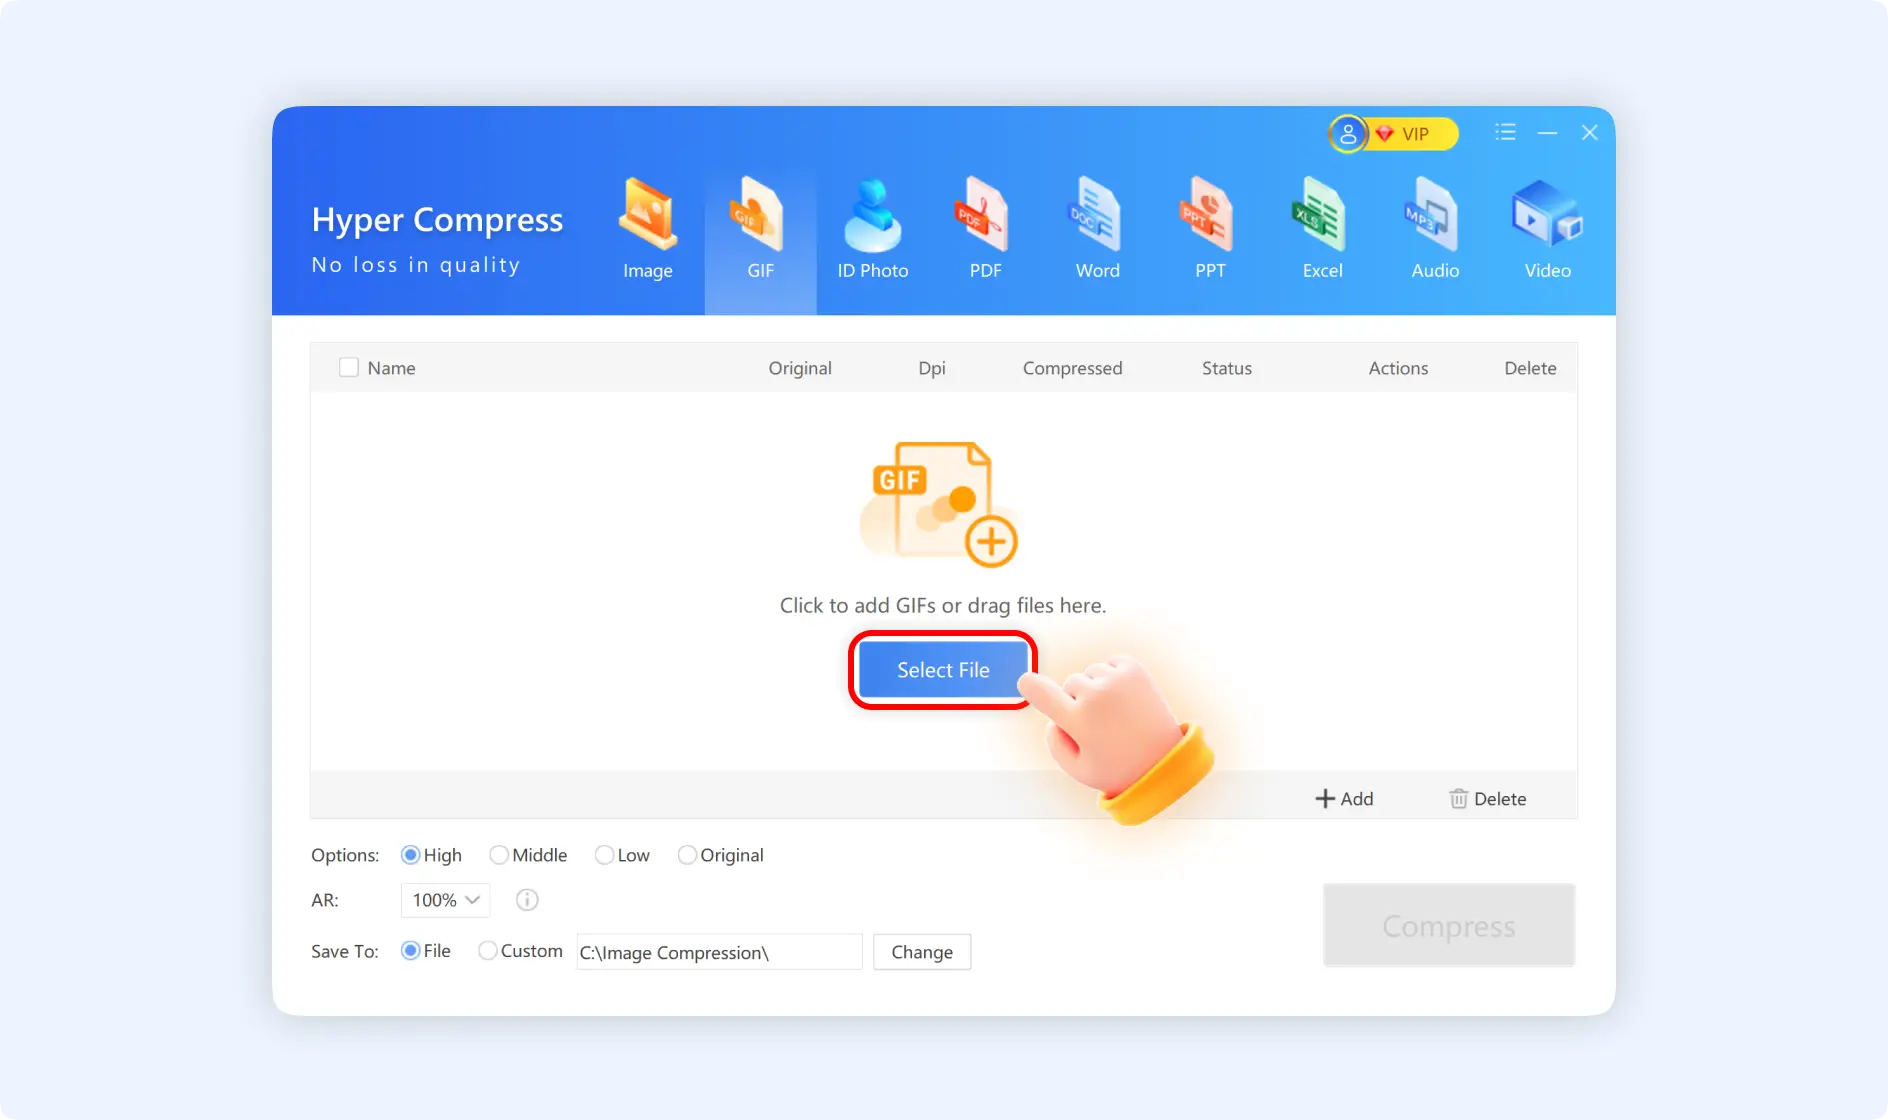
Step 1: Open ZipKing on your PC. You can access the “GIF” interface through 3 windows: Image Compress, PDF Compress, and Video Compress. Click one of them to enter into the “Hyper Compress” interface, and then navigate to the “GIF” option.
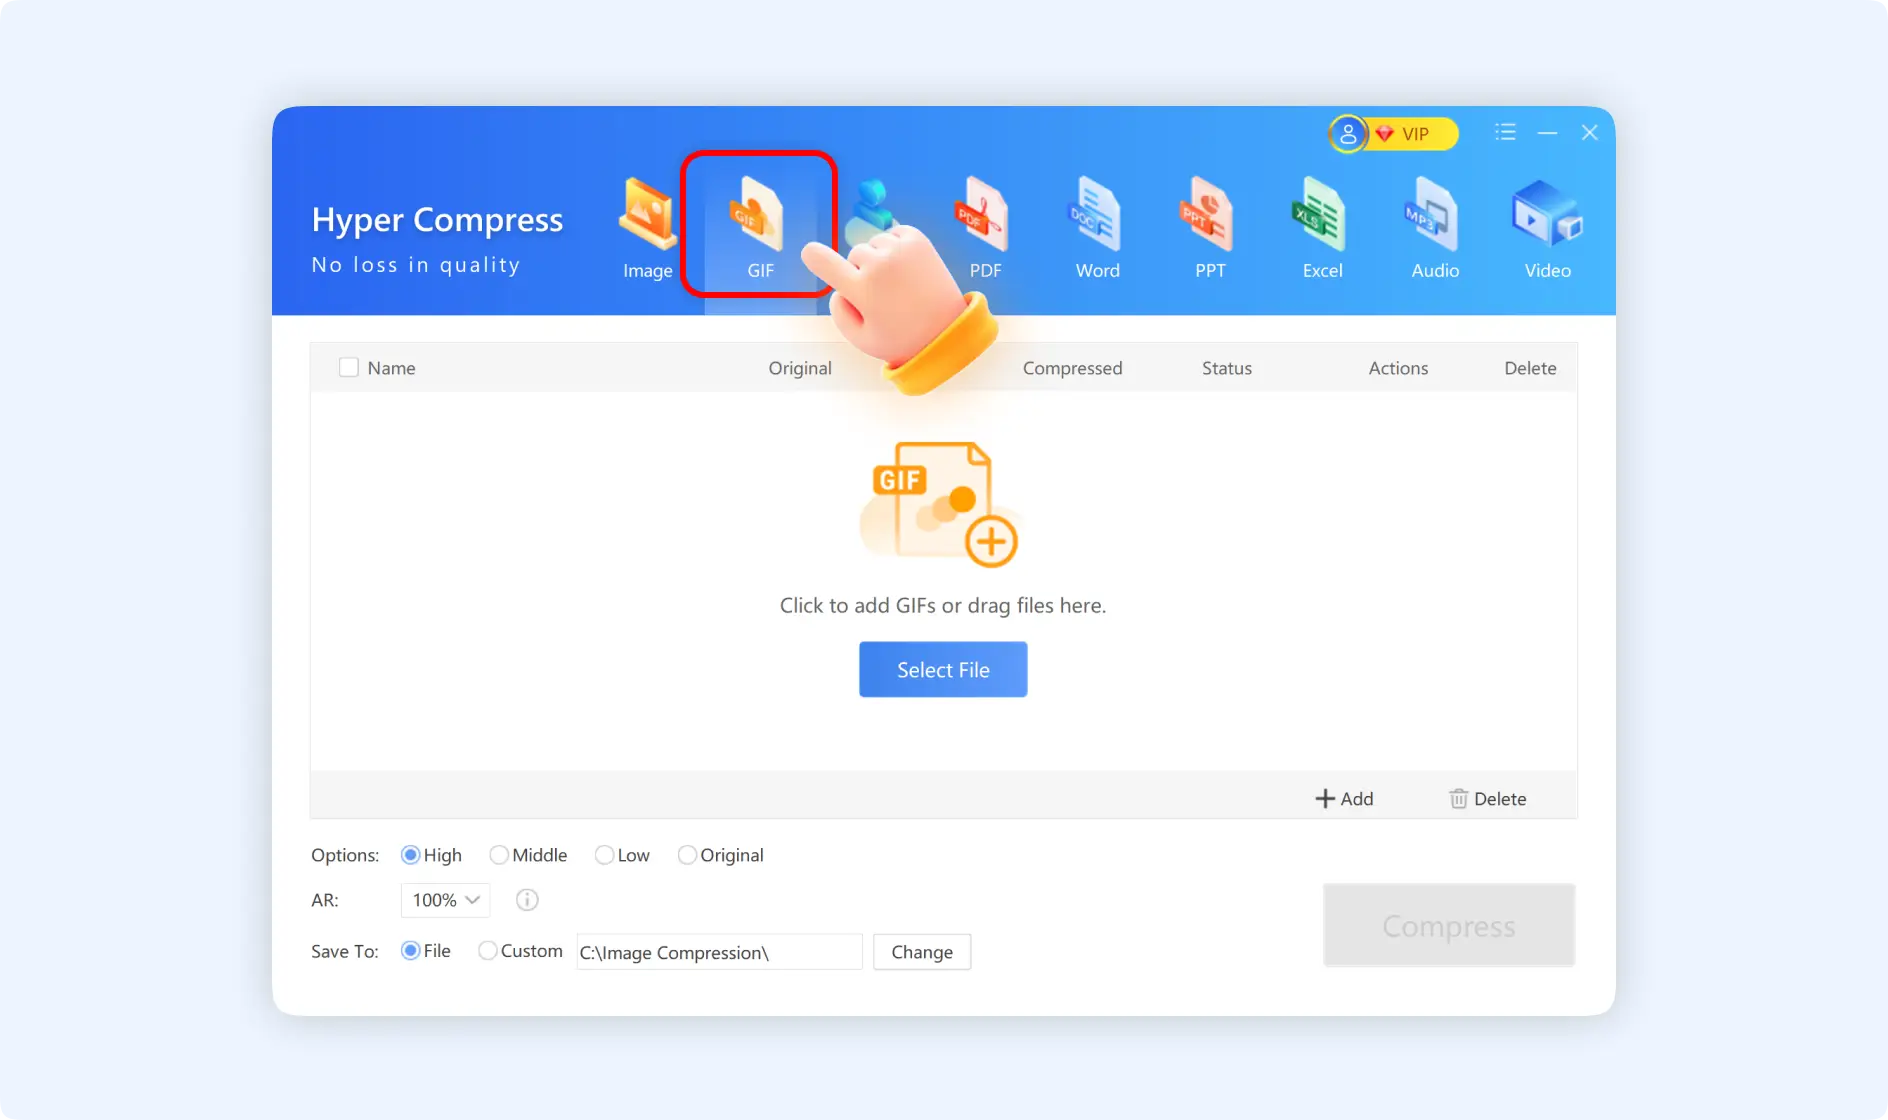
Step 2: Click“Select files” or drag and drop GIF files to the panel.
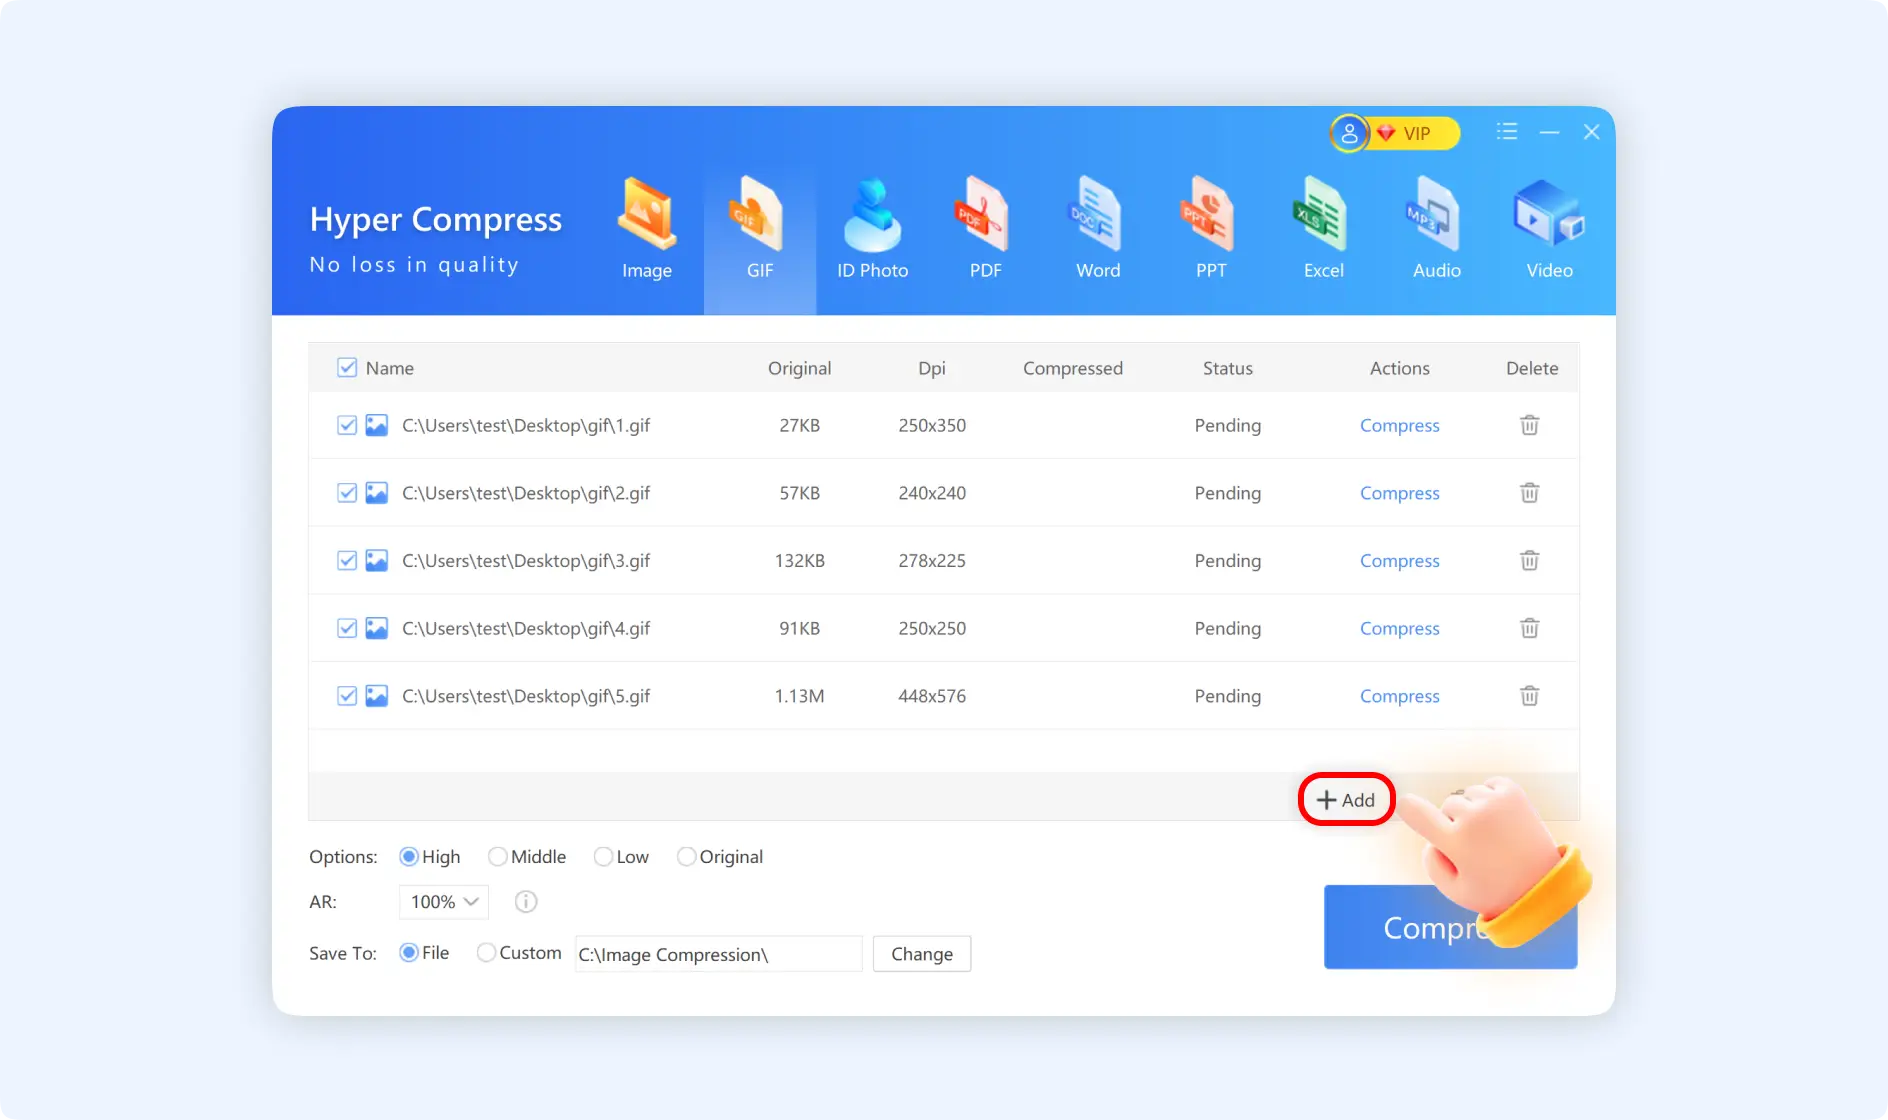
💡Tips: ZipKing supports compressing multiple GIF files, you can upload as many GIF files as you want by clicking “Add”.
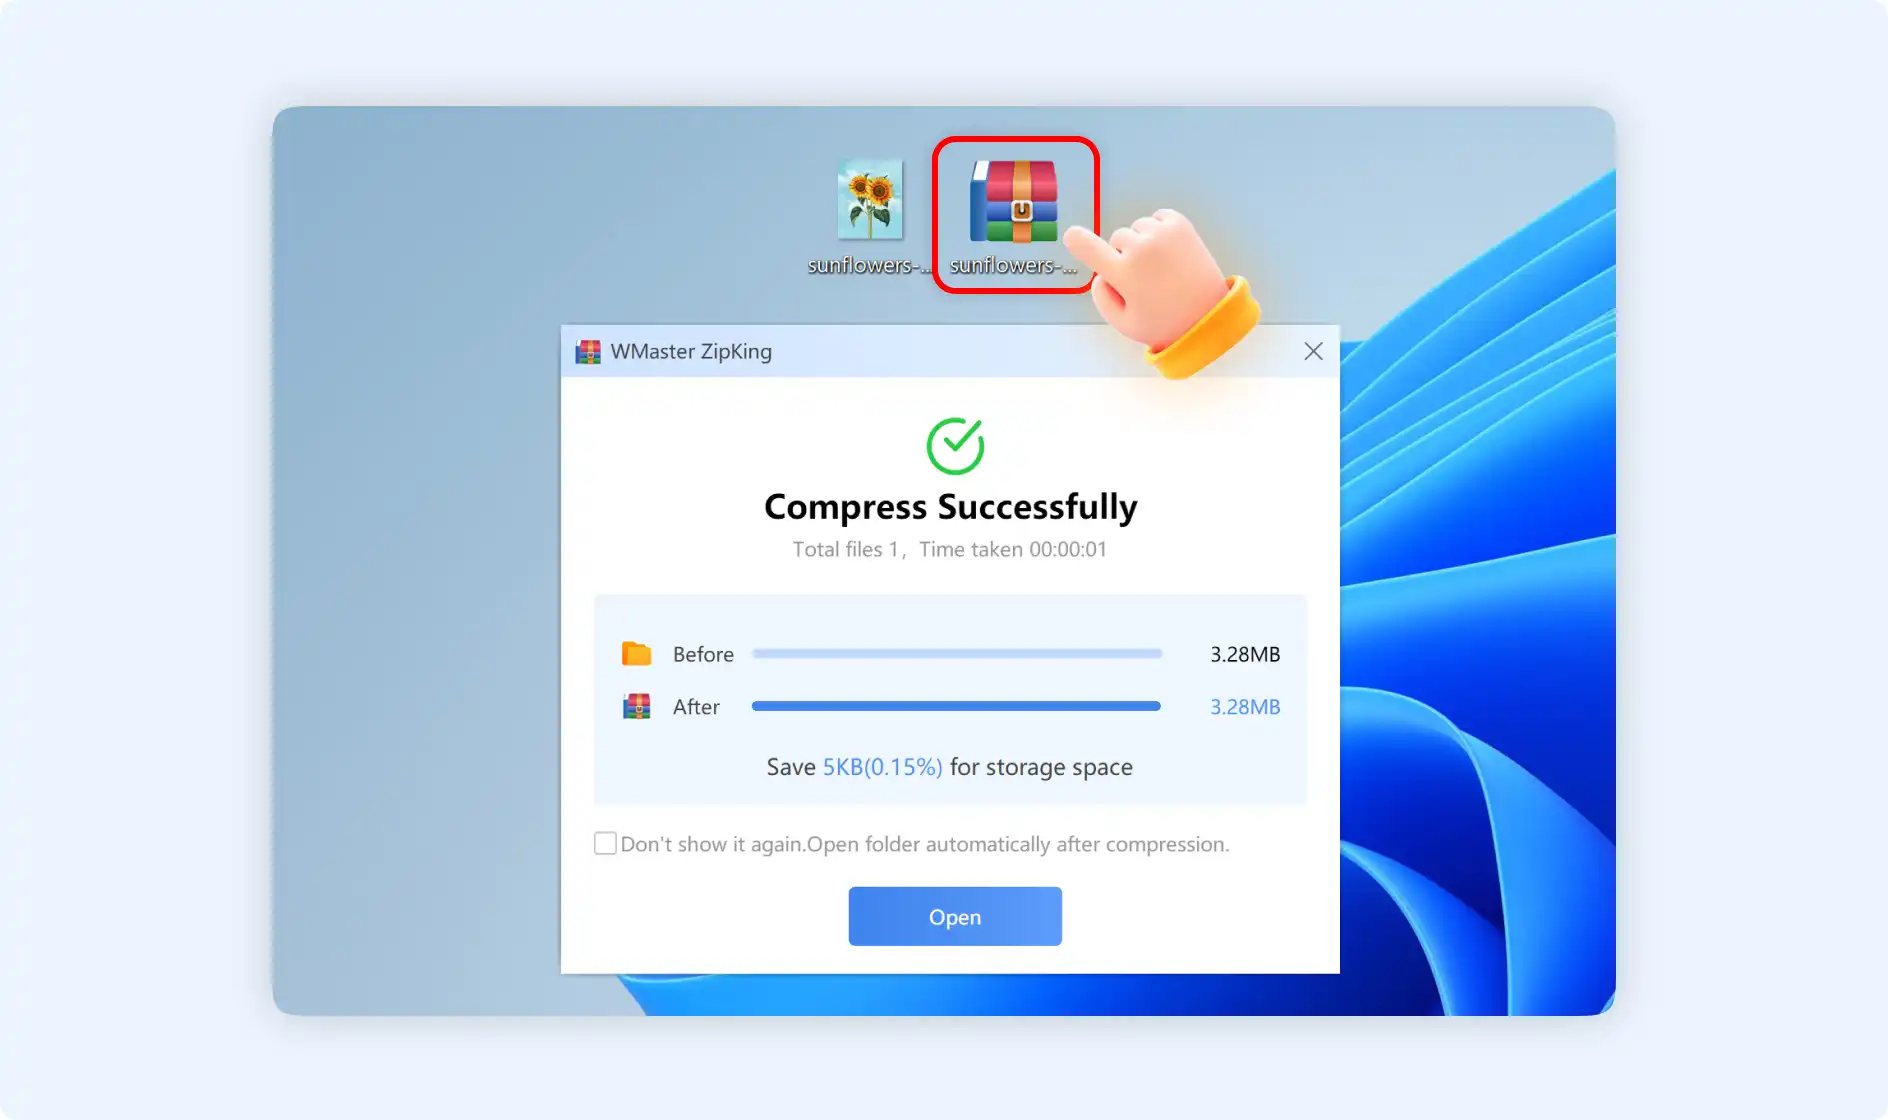
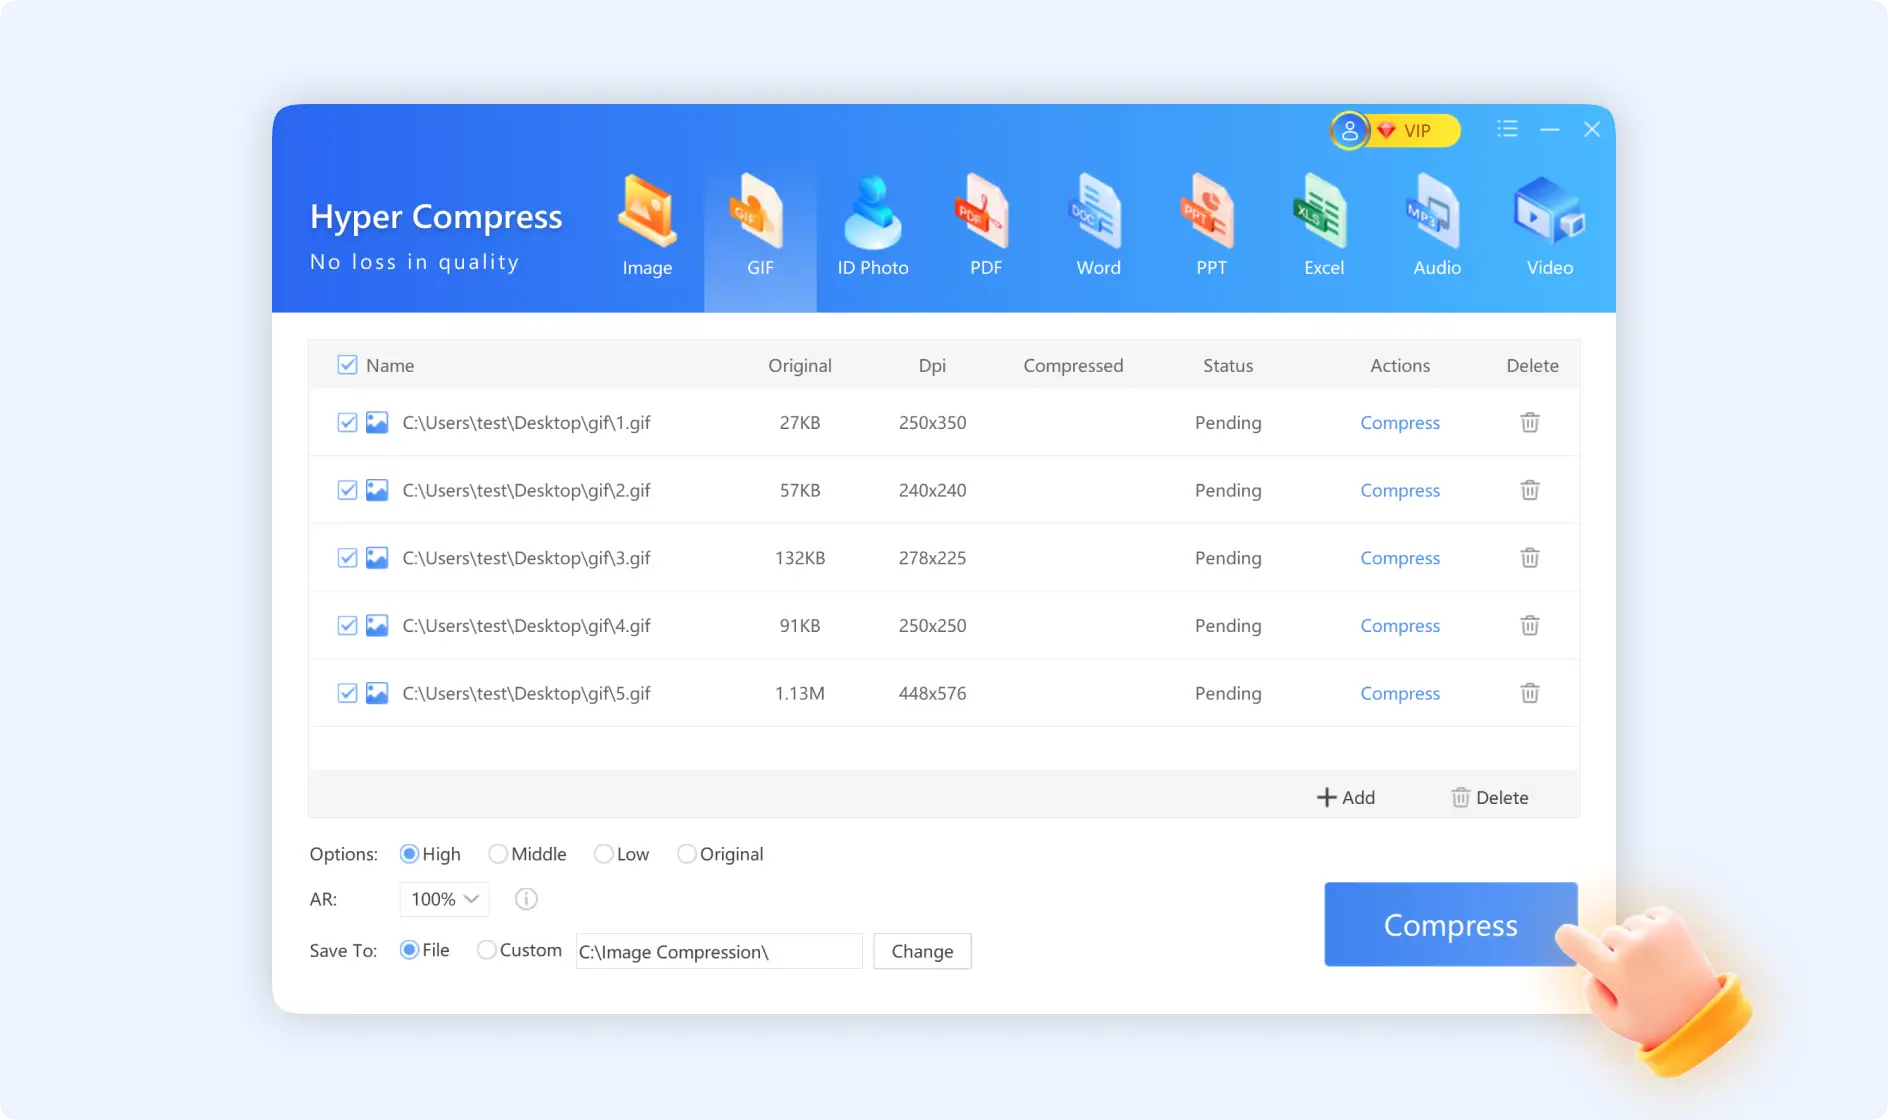
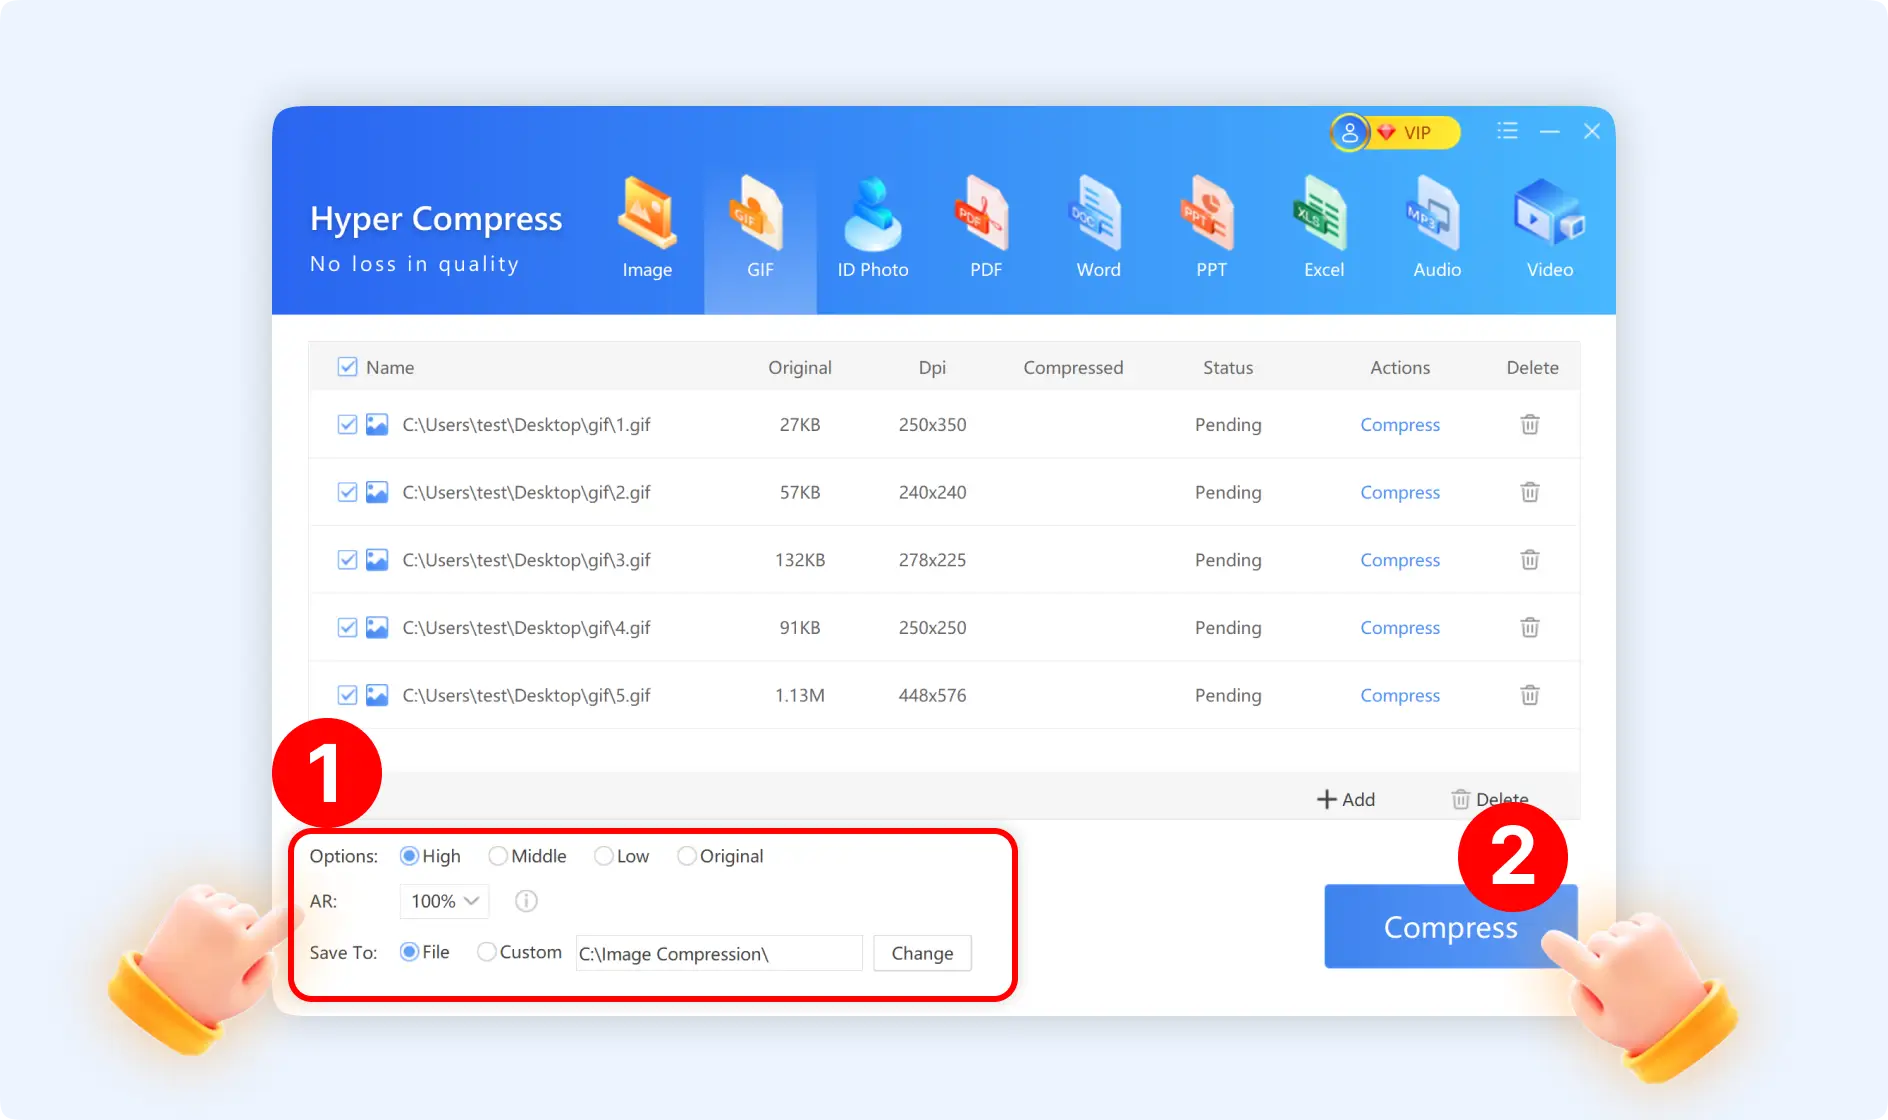
Step 3: Finally, click“Compress” to start compressing GIF files.
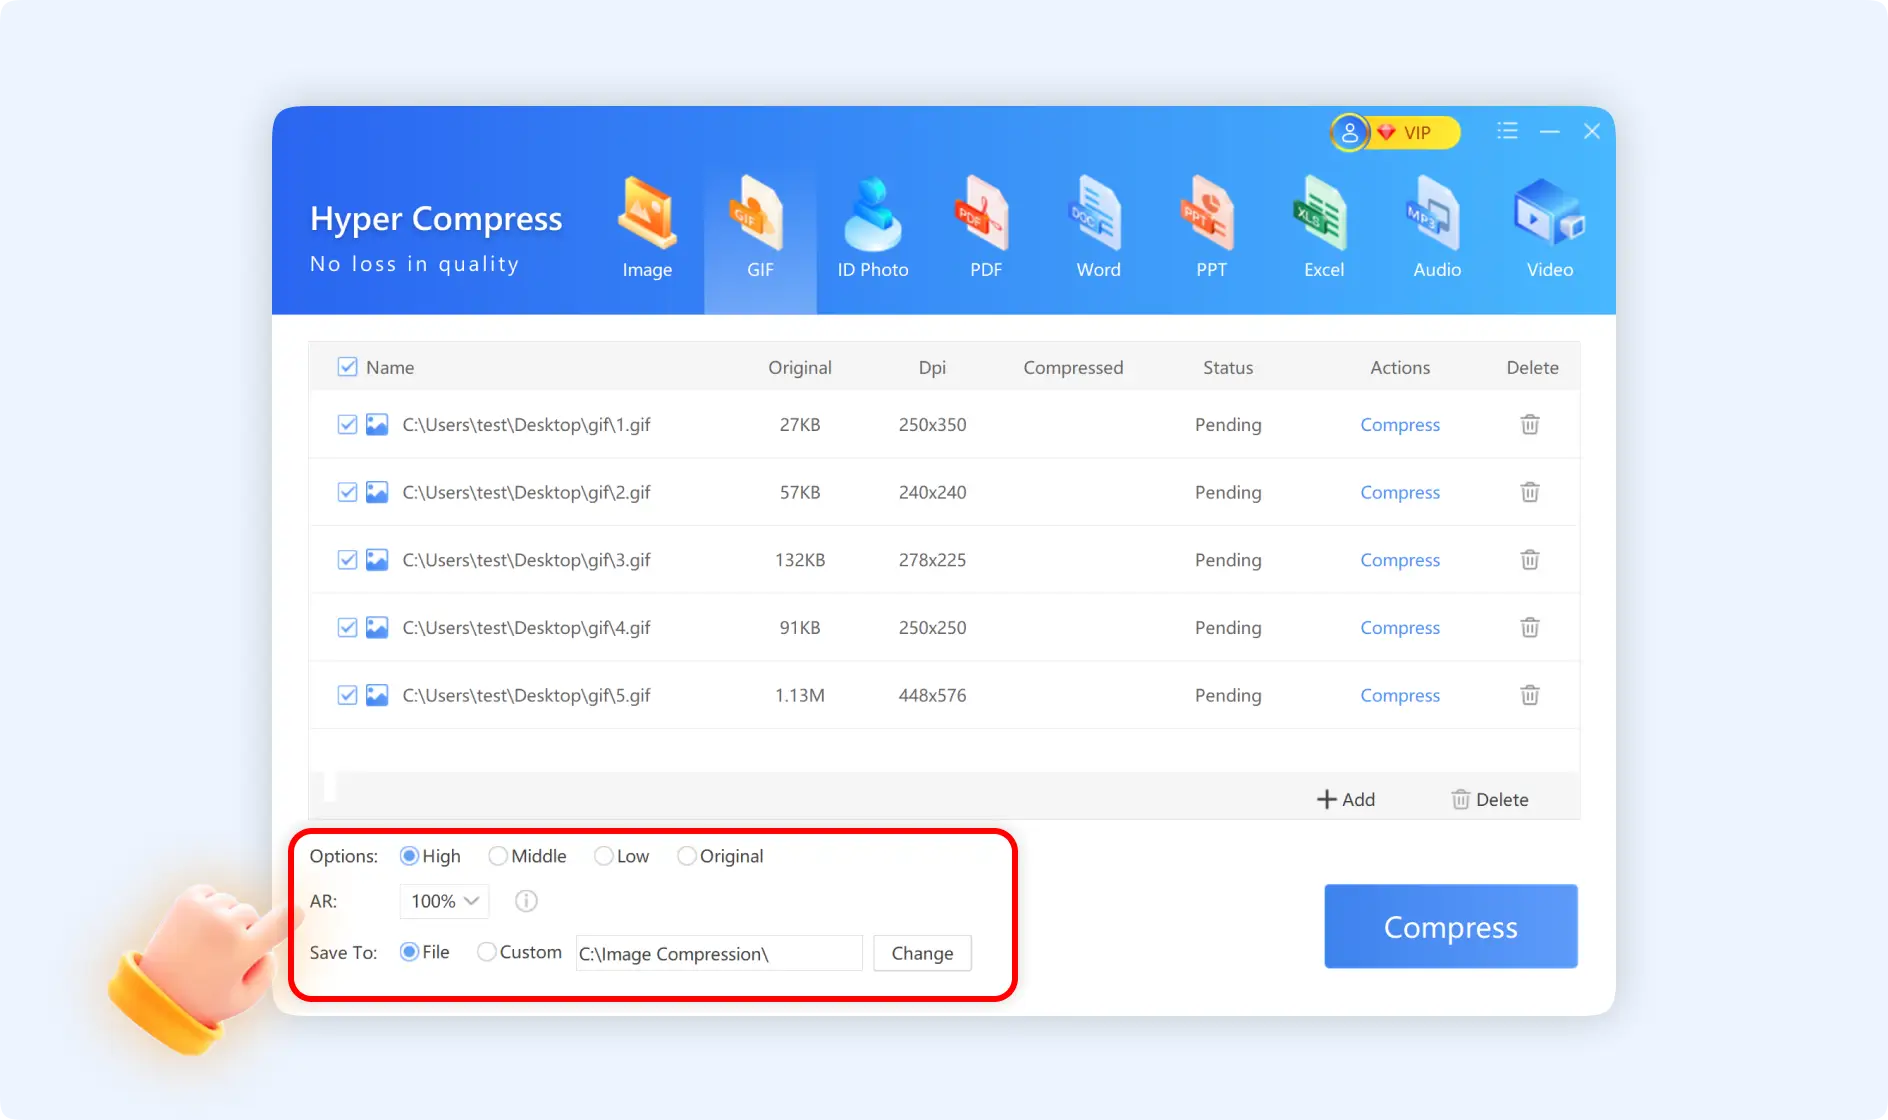
💡Tips: You can have more settings like selecting compression options (High, Middle, Low, and Original), adjusting AR, and choosing storage paths.
Method 2: Guide to Compress A GIF With ZipKing Right-Click Windows
There are 3 situations for the right-click compression operation.
Situation 1: Choose" GIF Compression"
Step 1:Navigate to the GIF files, right-click to select "GIF Compression".
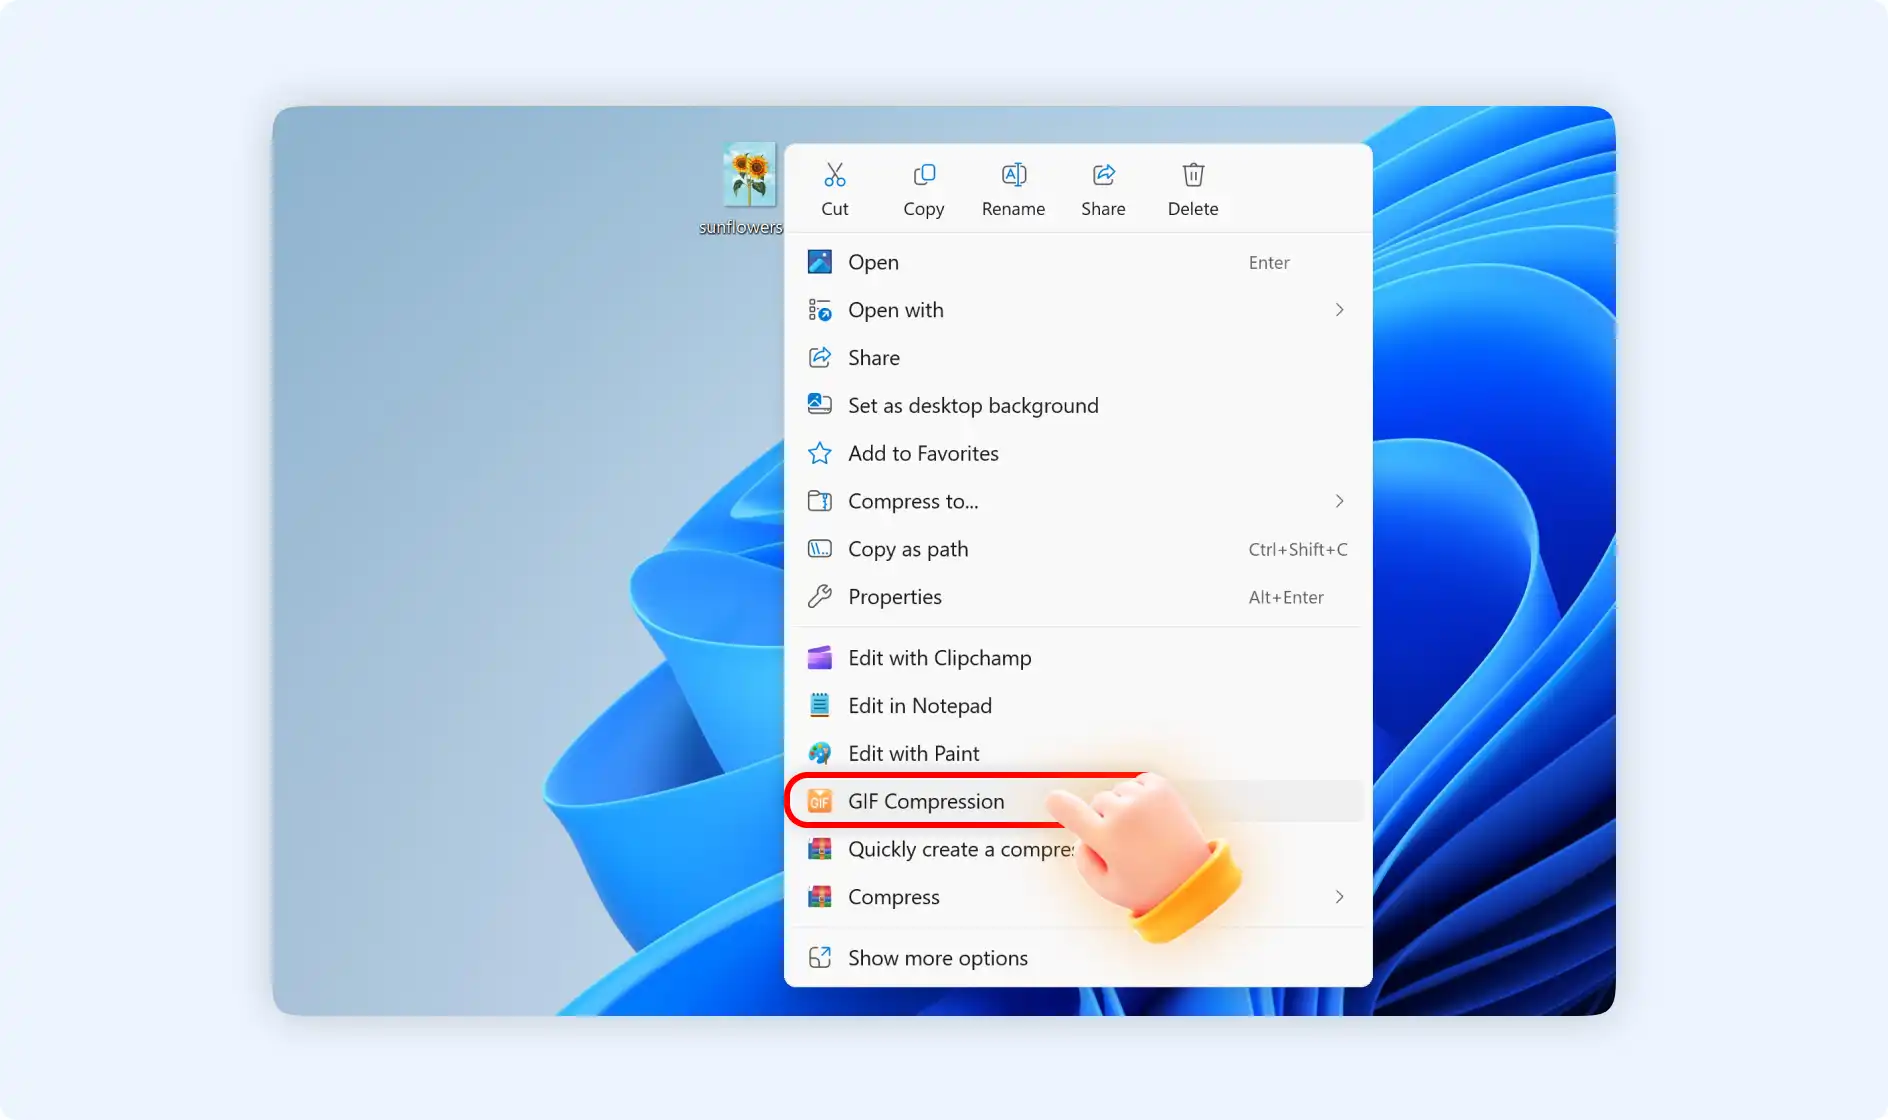
Step 2:Then you will you are going to reduce GIF file size with ZipKing. You can select the compression options, change the GIF AR(Aspect Ratio), and pick your storage path. Finally, click“Compress”.
Situation 2: Choose"Quickly create a compressed package"
Step 1: Locate the GIF files, right-click to select"Quickly create a compressed package".
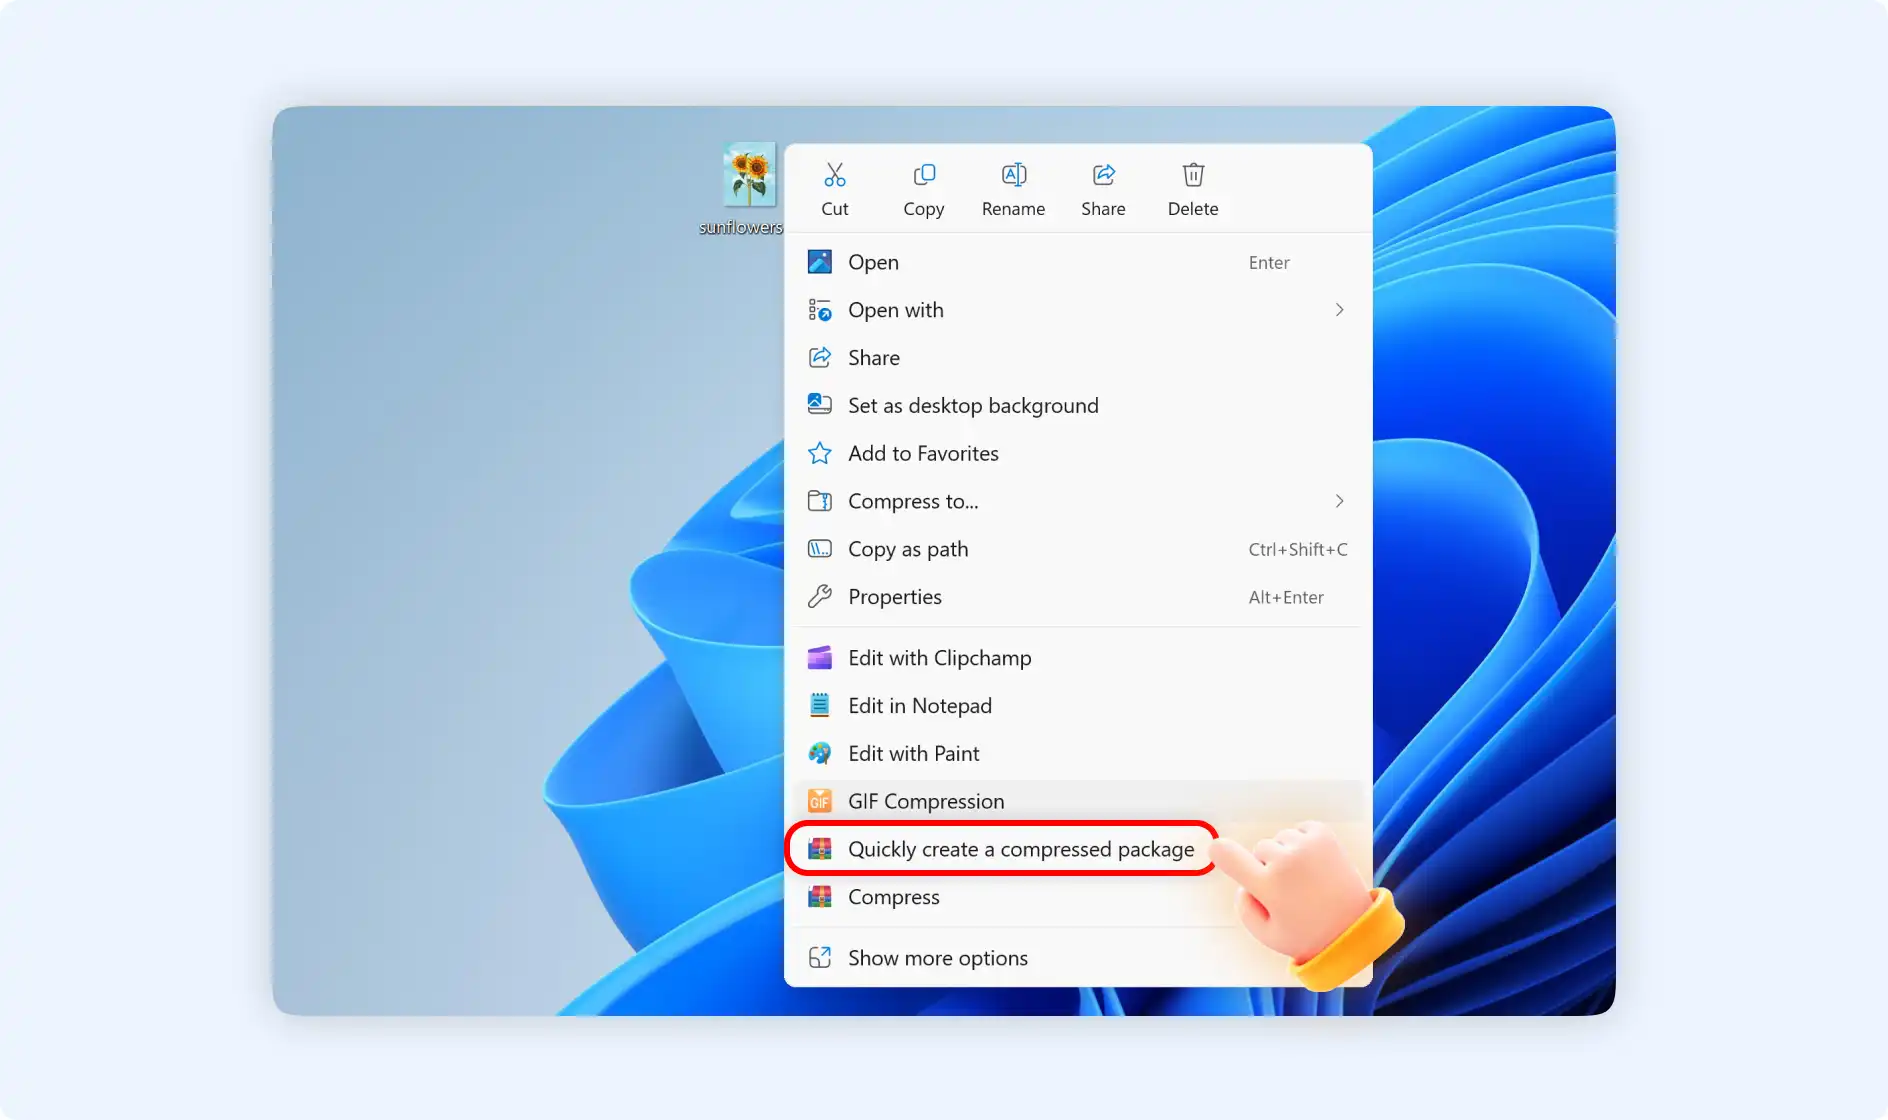
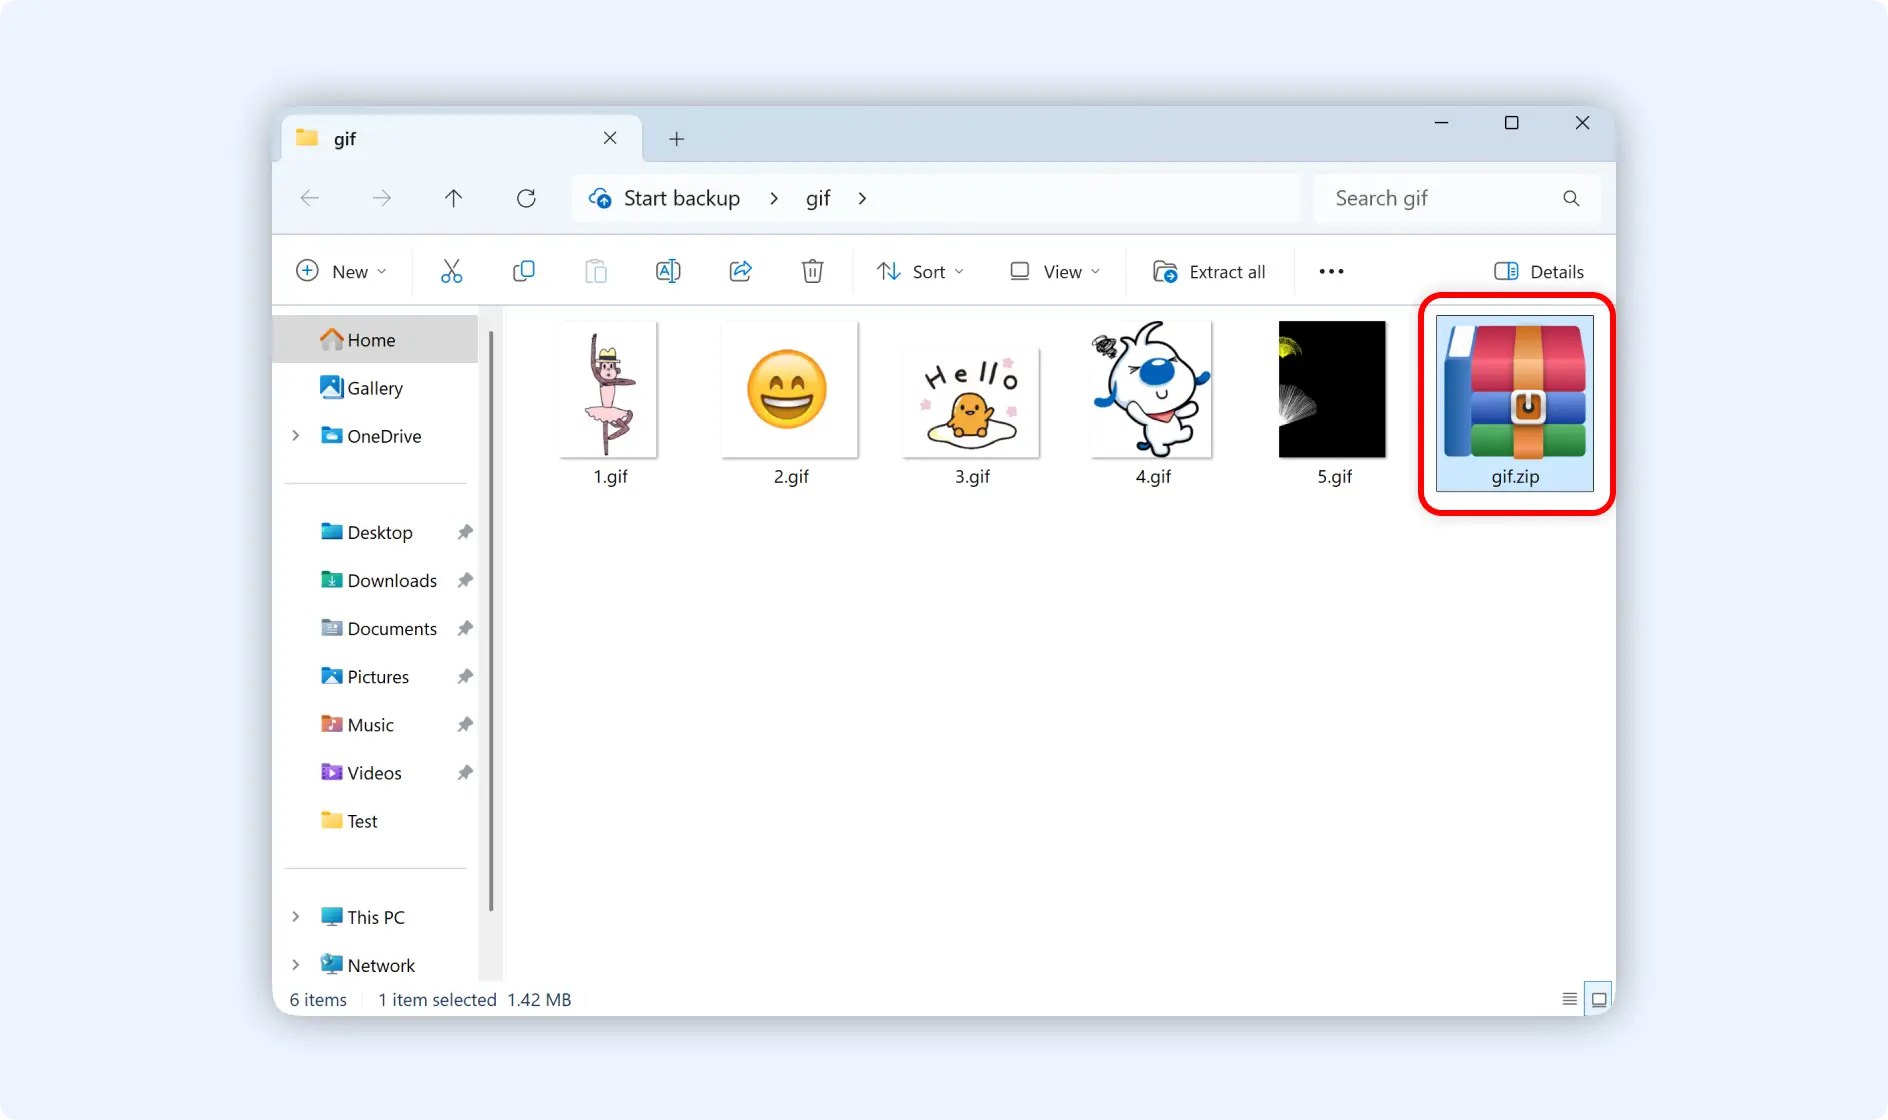
Step 2:Next you will enter into the smart compression mode for the GIF files, you will create a zip archive for these compressed GIF files.
Situation 3: Choose"Compress"
If you right-click your GIF files, then choose"Compress", here are 2 options for your reference.
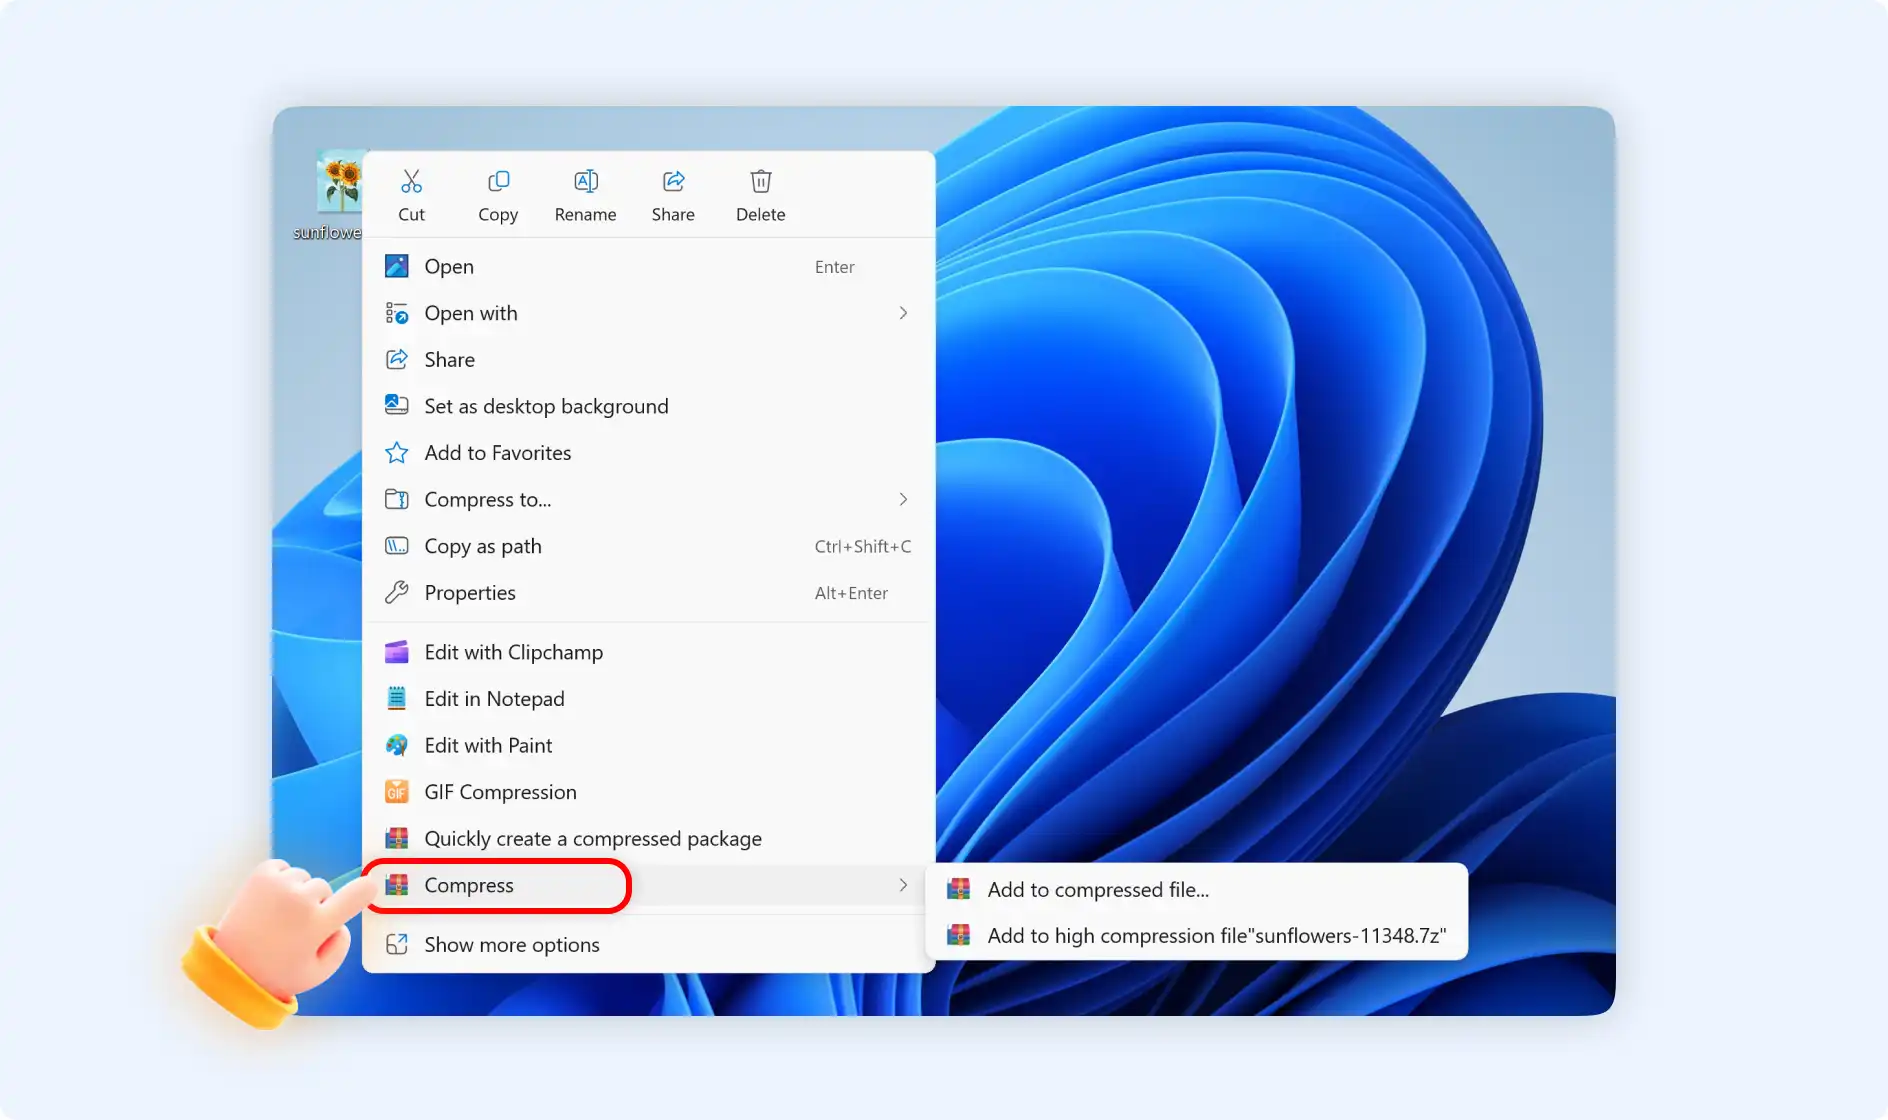
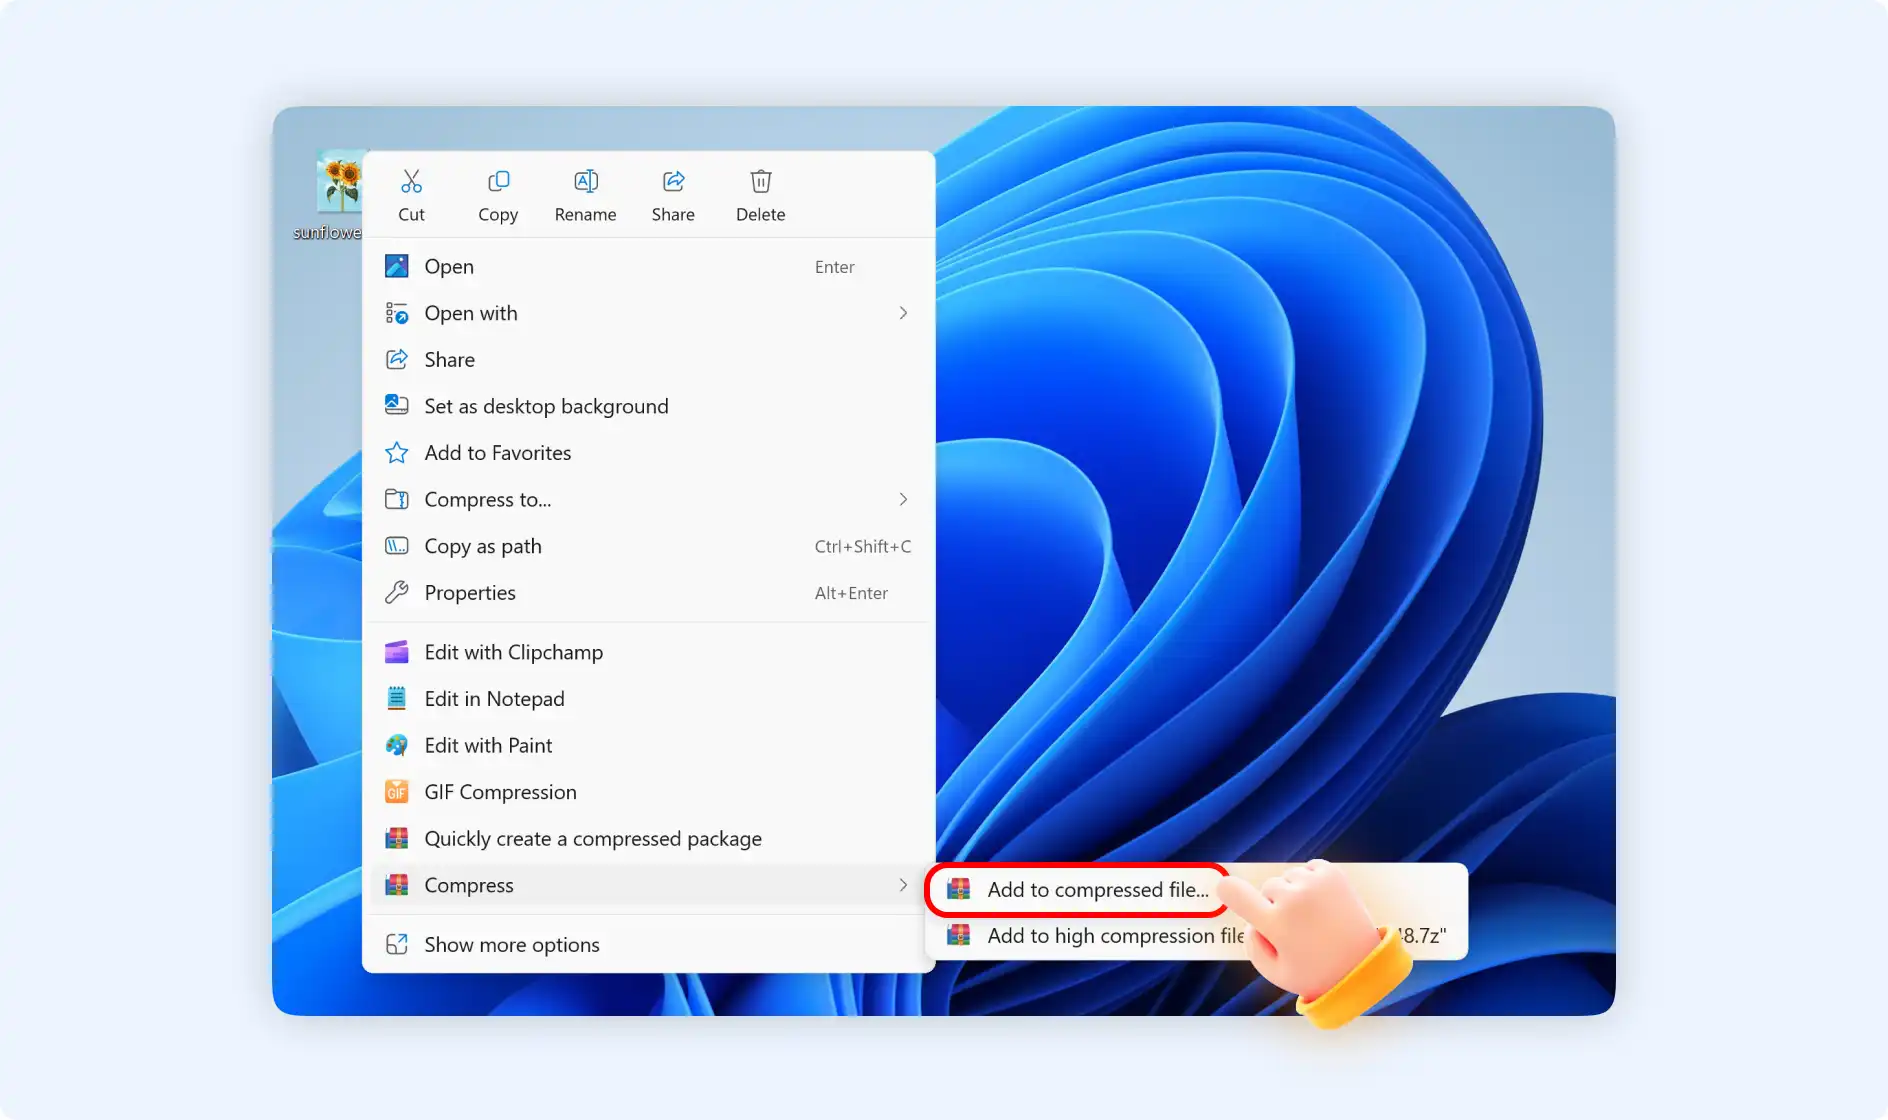
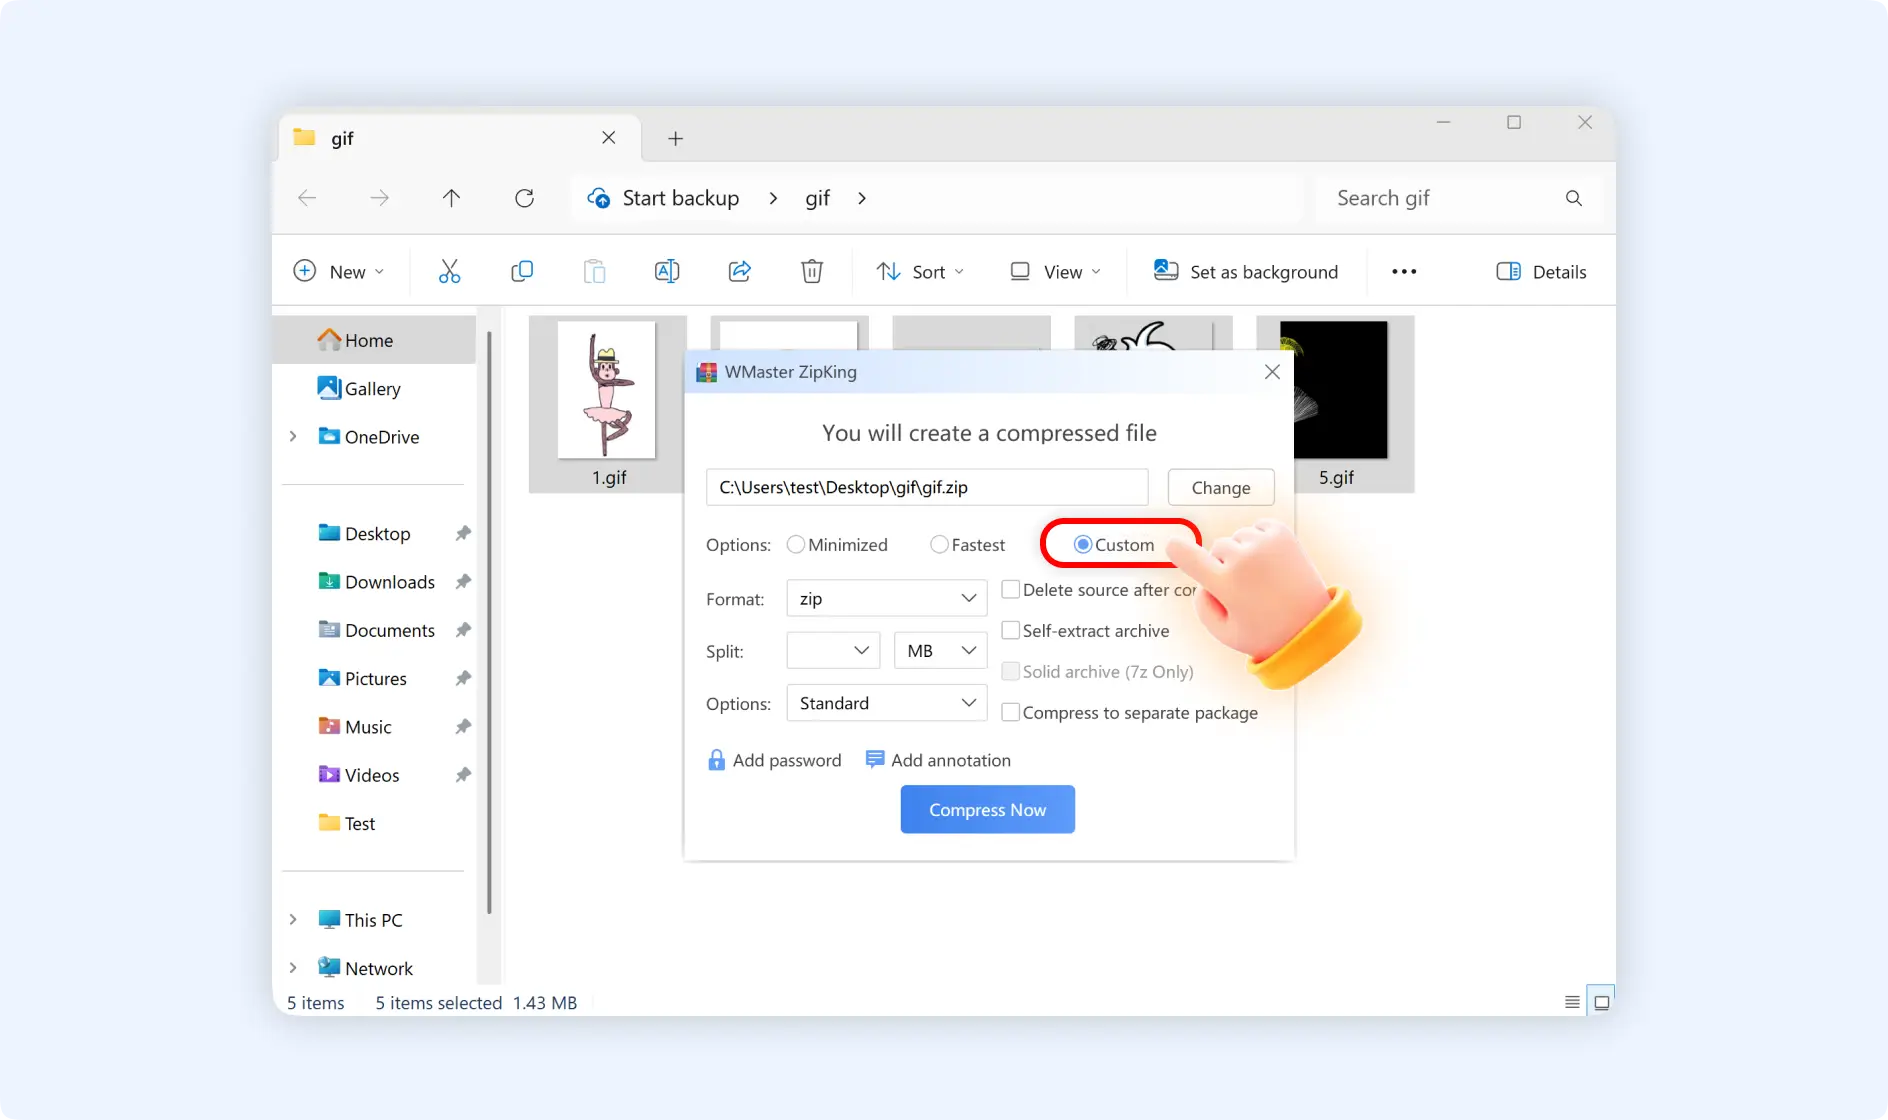
Option 1: Go to right-click the GIF files, navigate to"Compress", select " Add to the compressed file... ". A pop-up window will show that you will create a compressed file, and you can change the destination path of your compressed GIF files. What's more, selecting the compression options is also available. There are 3 kinds of options: Minimized, fastest, and custom. If you want to secure and better illustrate your compressed GIF files, you can add a password and annotation.
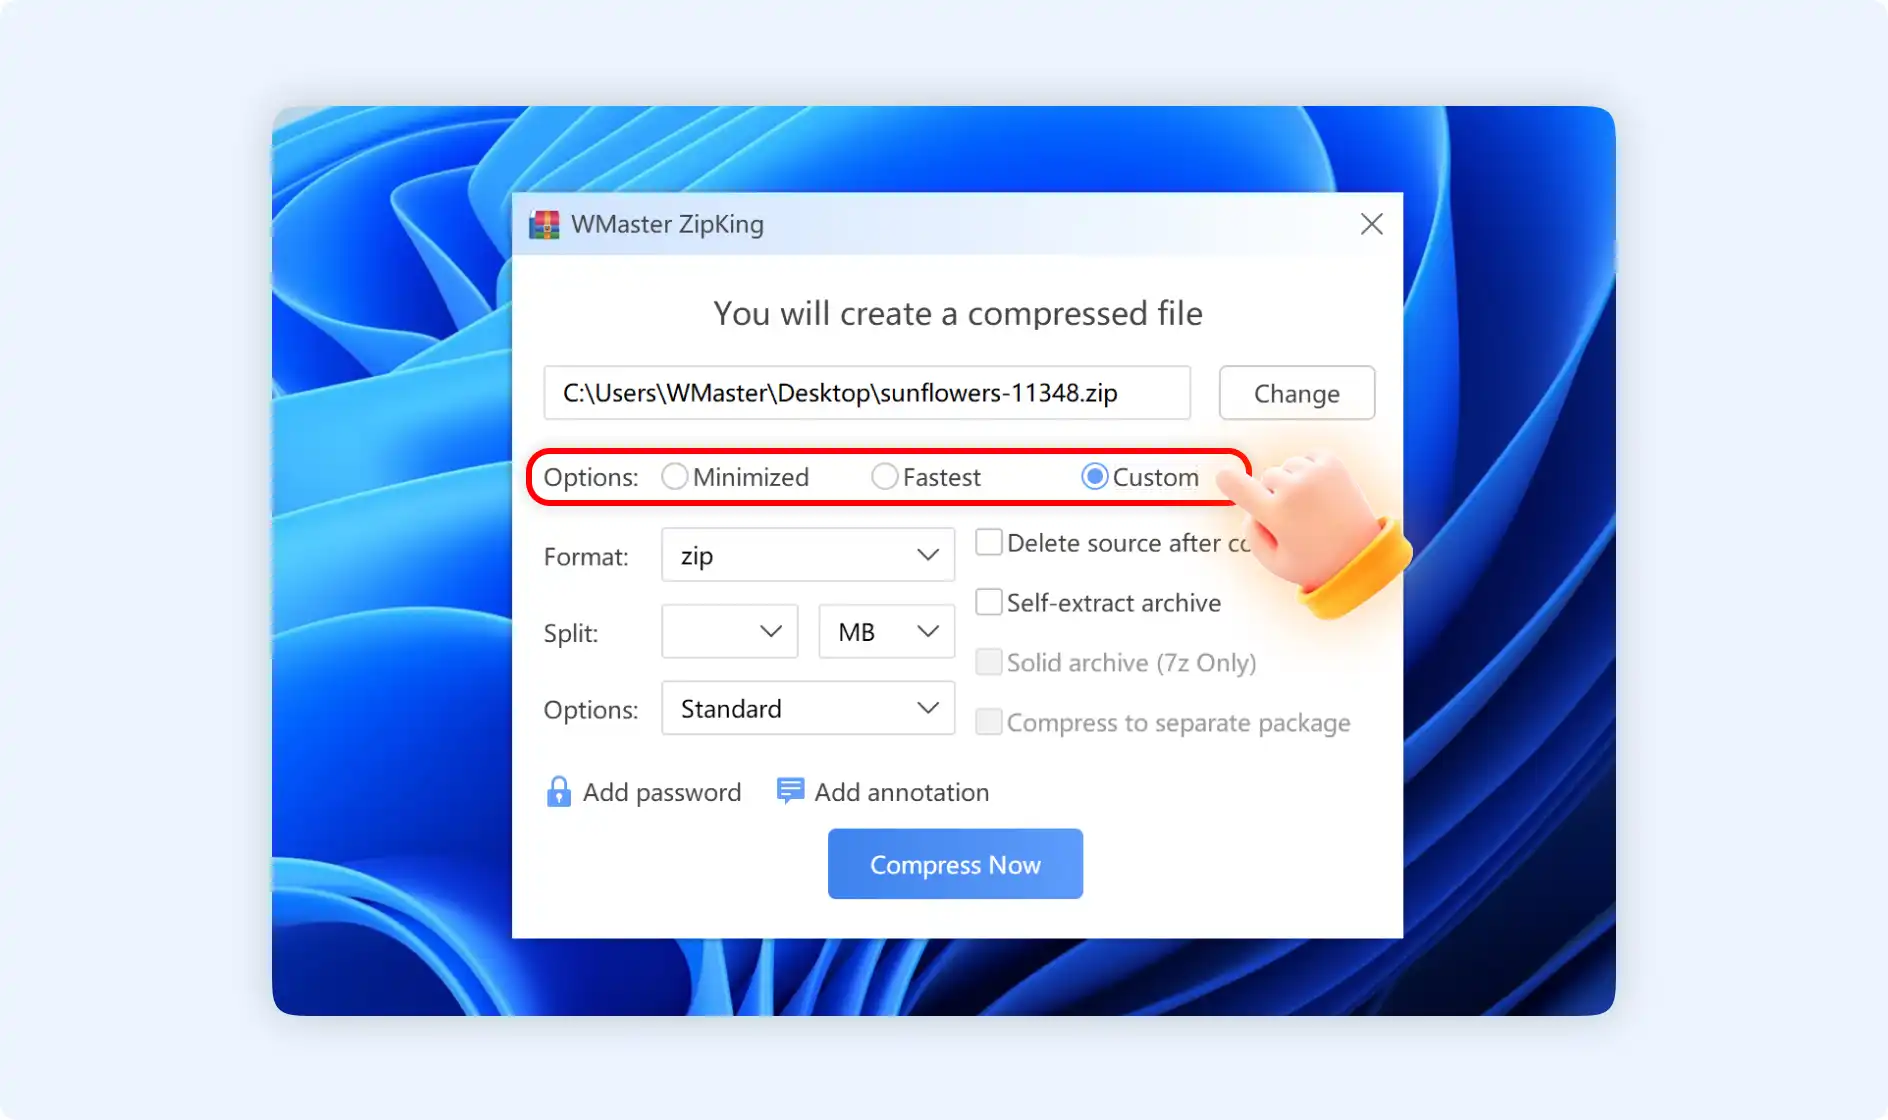
💡Tips: If you choose “Custom” for the compression, in the expanded area, you will have more choices about selecting file formats, splitting big files into separate smaller files, and creating self-extract archives.,etc
Option 2: Select "Add to high compression file [file name].7z ". You will create a 7z archive for these compressed GIF files. ZipKing will compress GIF files and open the compressed GIF archive location automatically.