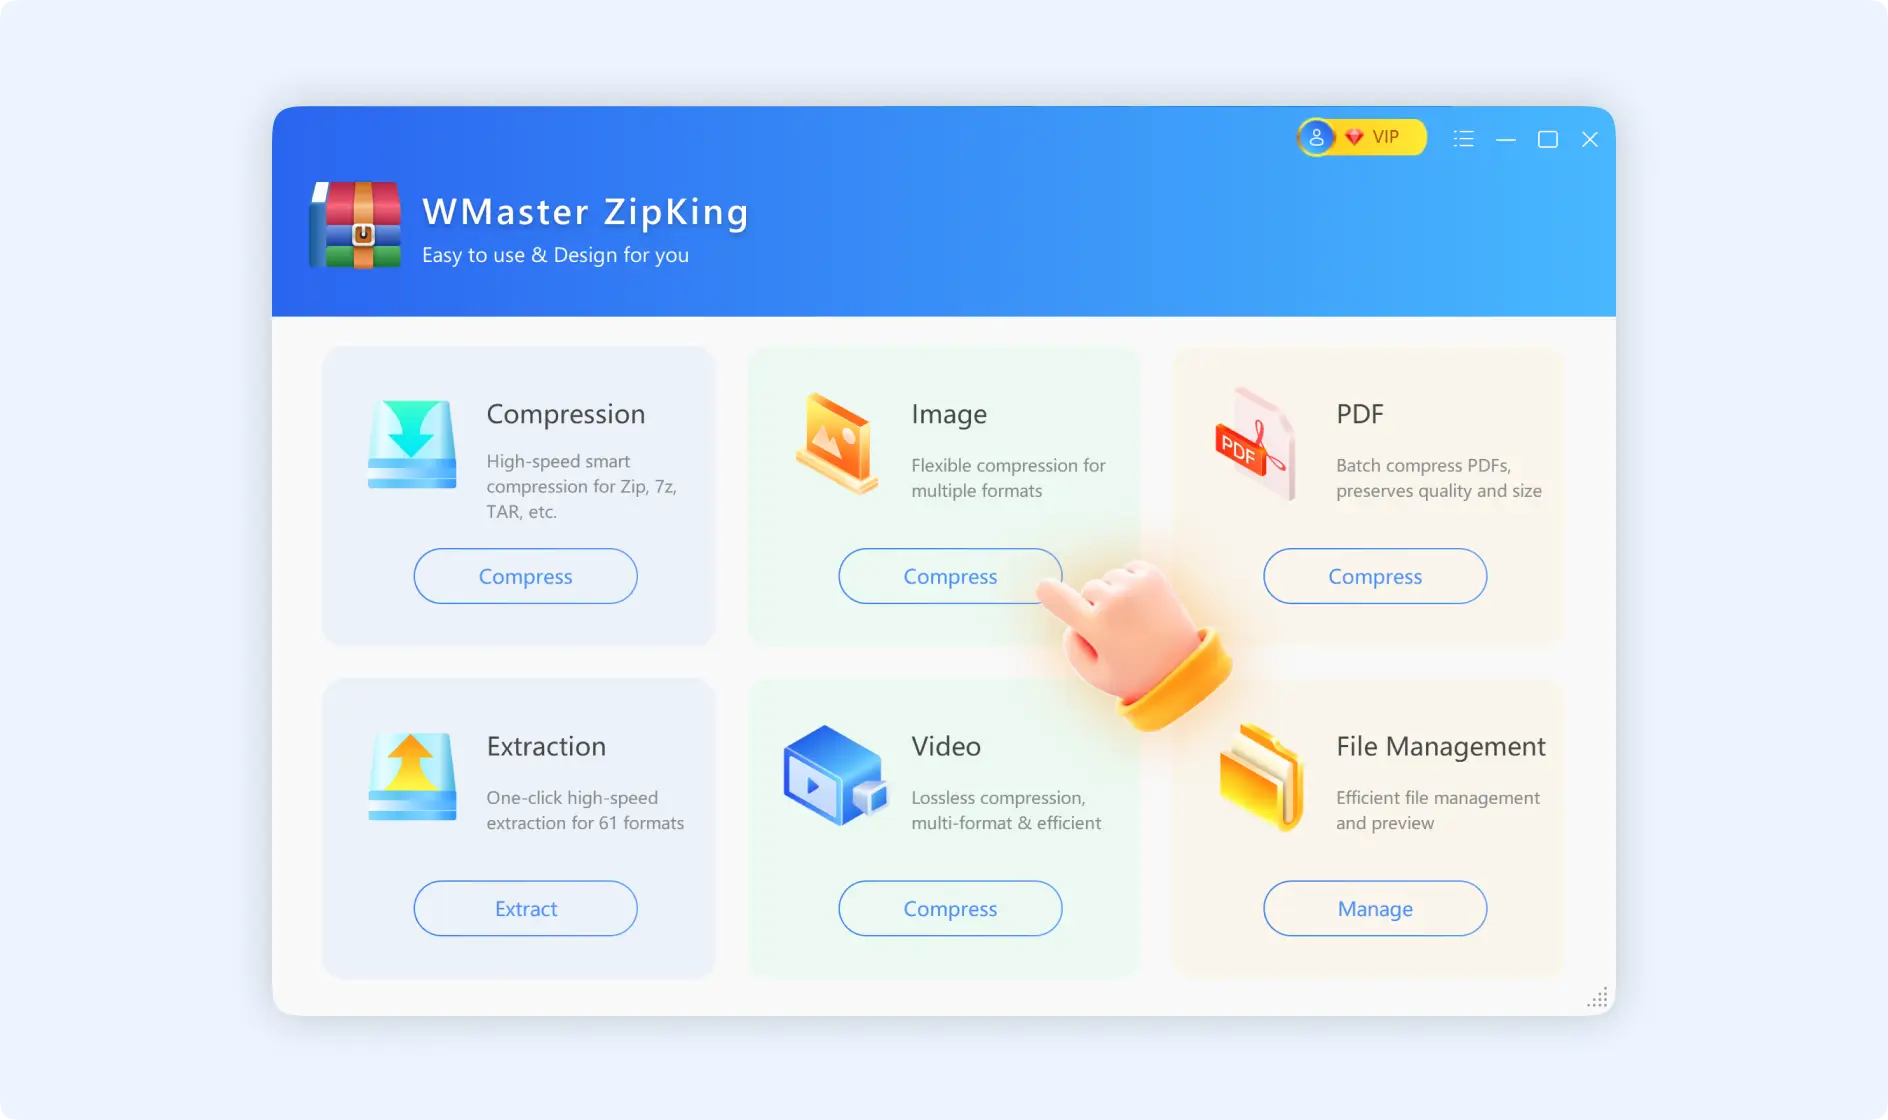
If you want to save storage space and make image sharing faster, you can try using our WMaster ZipKing to compress pictures for better transmission and storage.
There are 2 ways to compress images with ZipKing.
Method 1:Guide to Compress Images by ZipKing
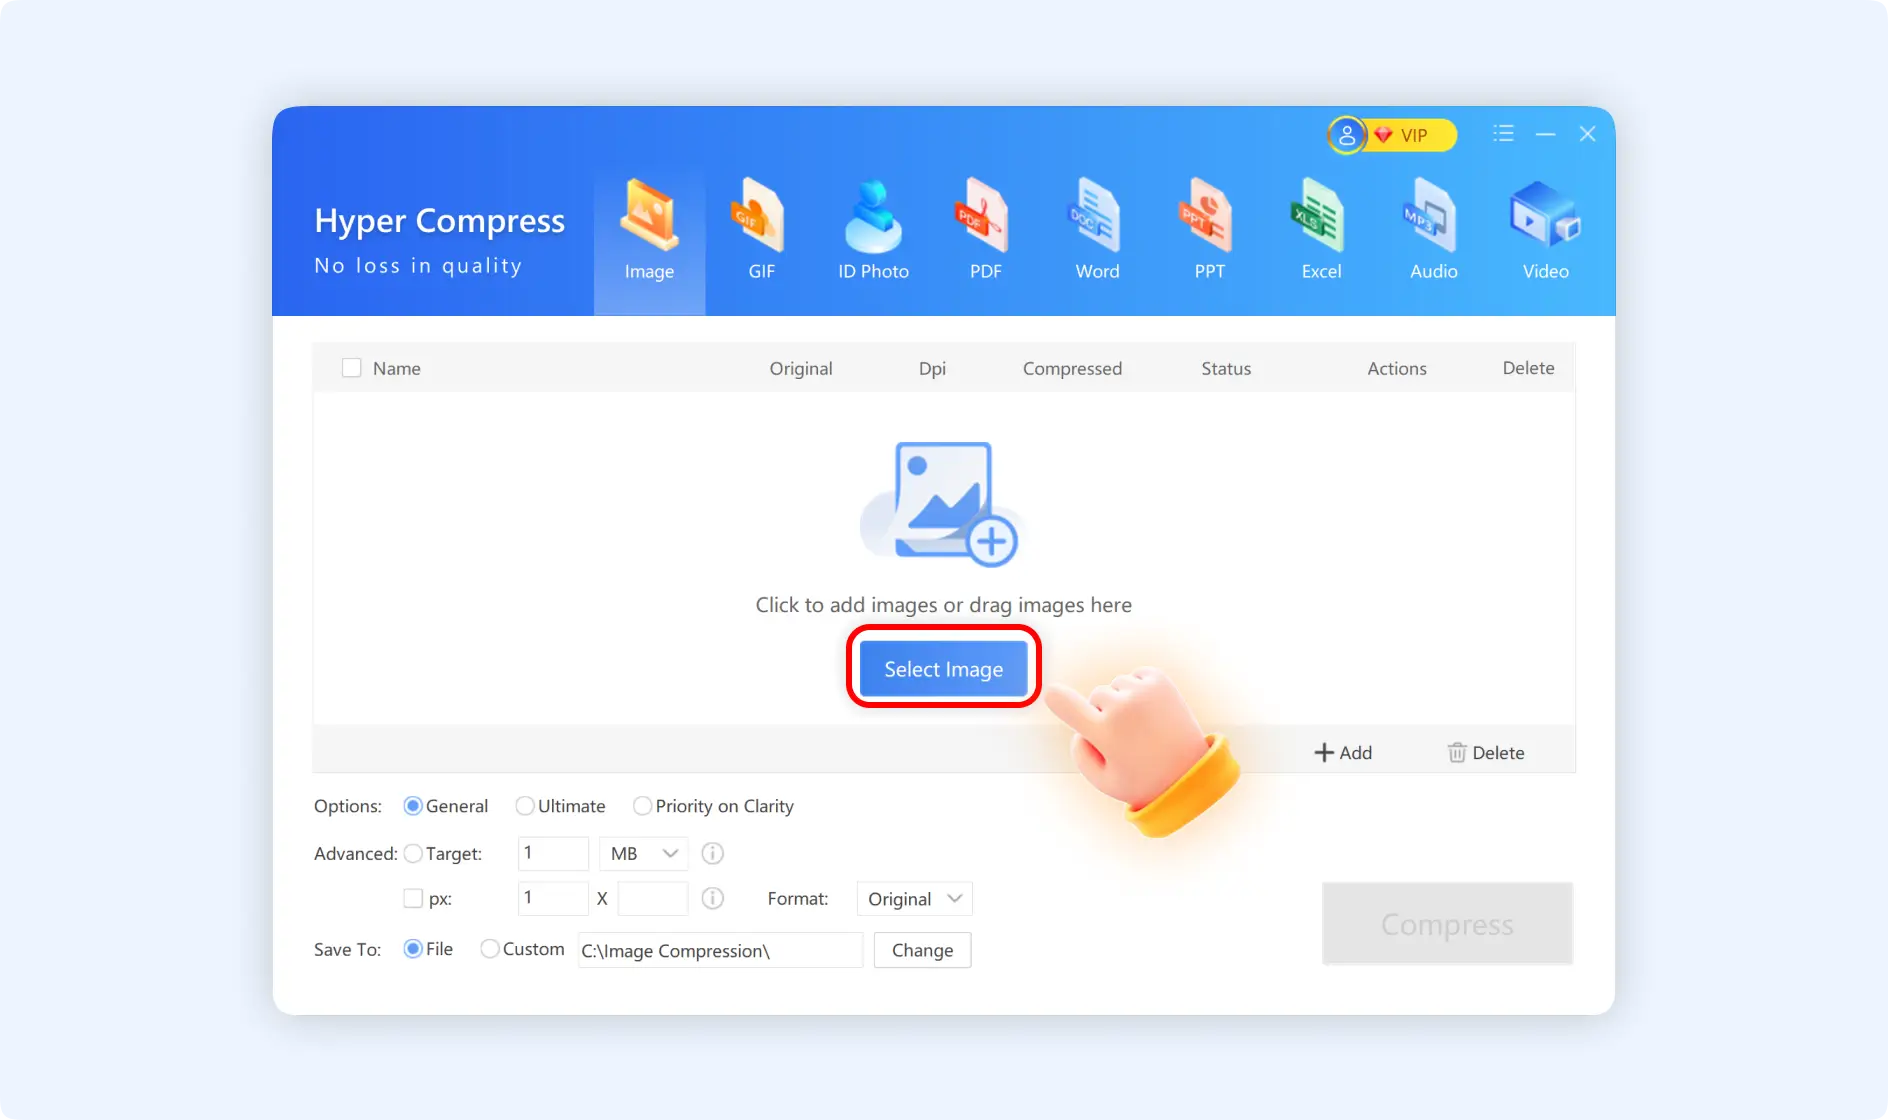
Step 1: Navigate to ZipKing's official site to download and install ZipKing on your computer, then launch it, choose “Image” to add an image or drag and drop the image to the panel. Click “Open”.
Tips: ZipKing also supports compressing bulk images. The steps are the same as those for single-image processing.
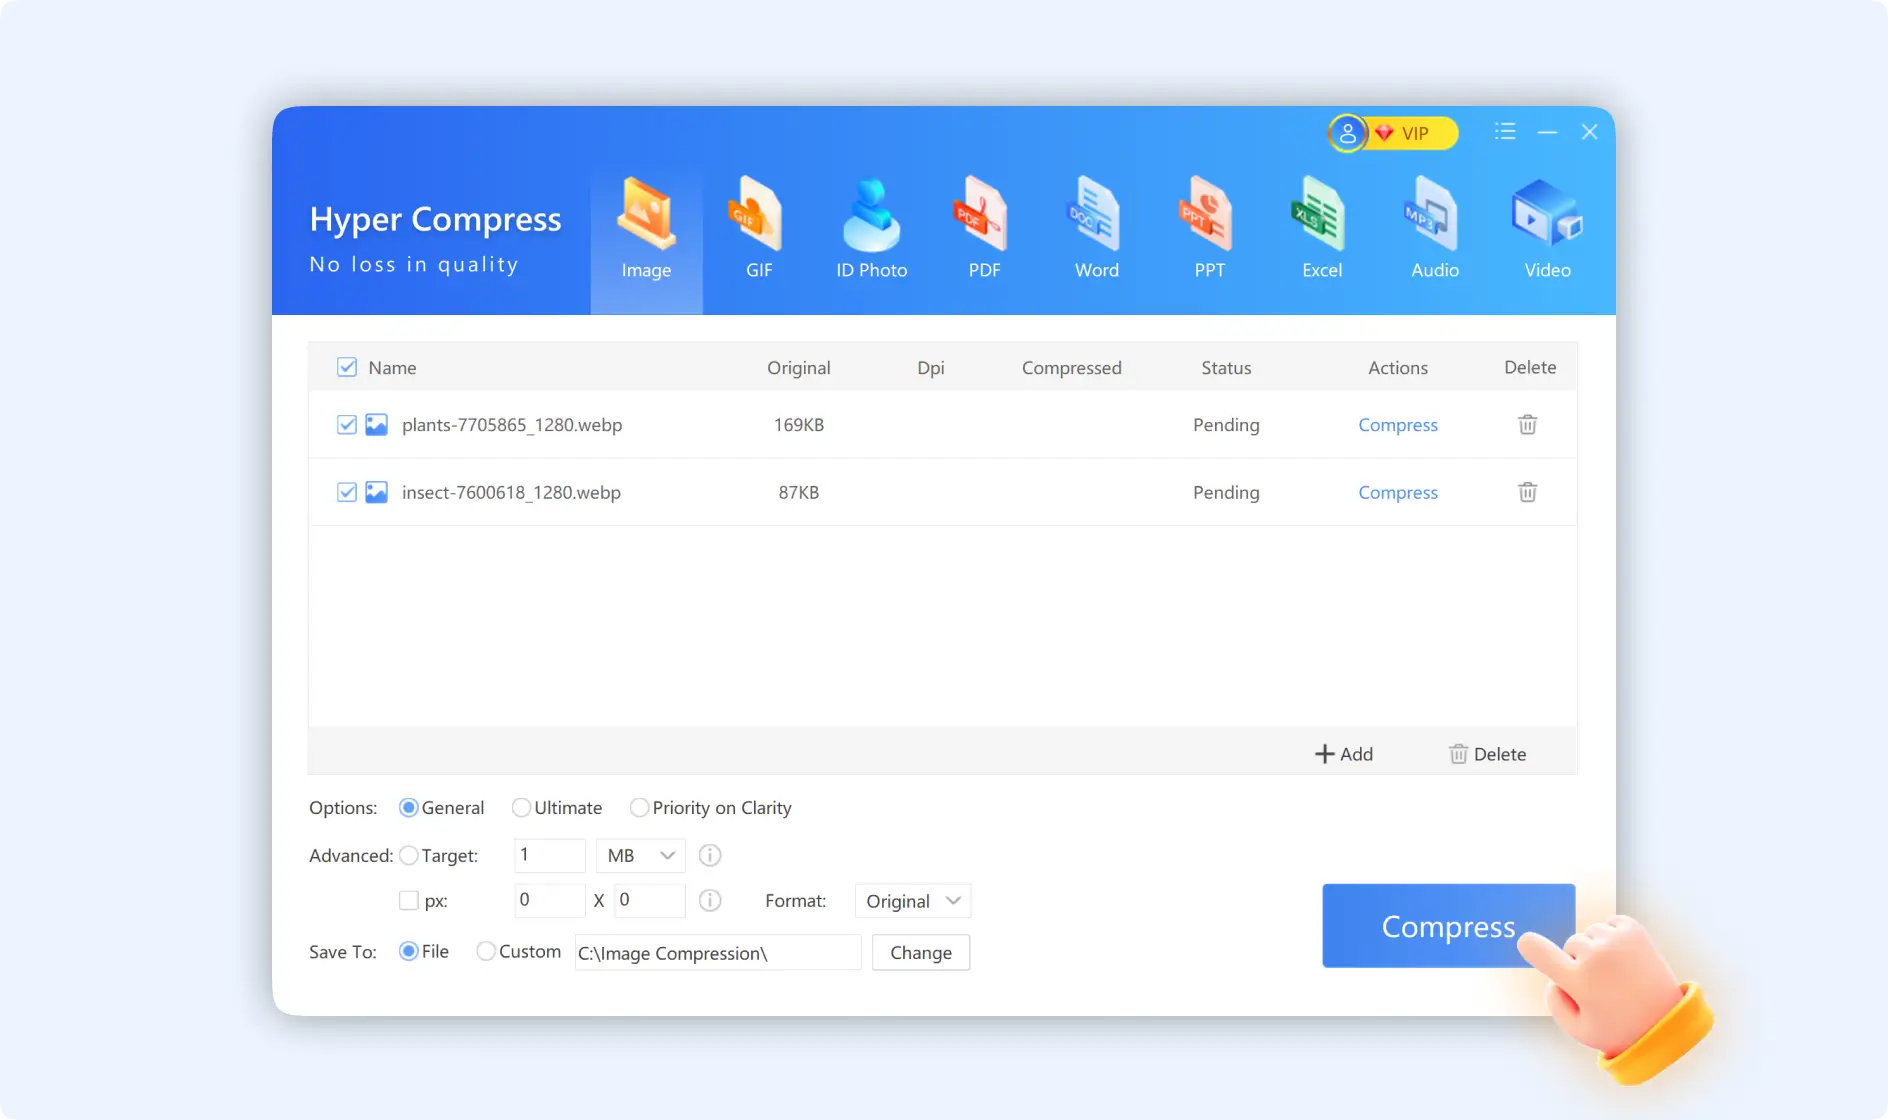
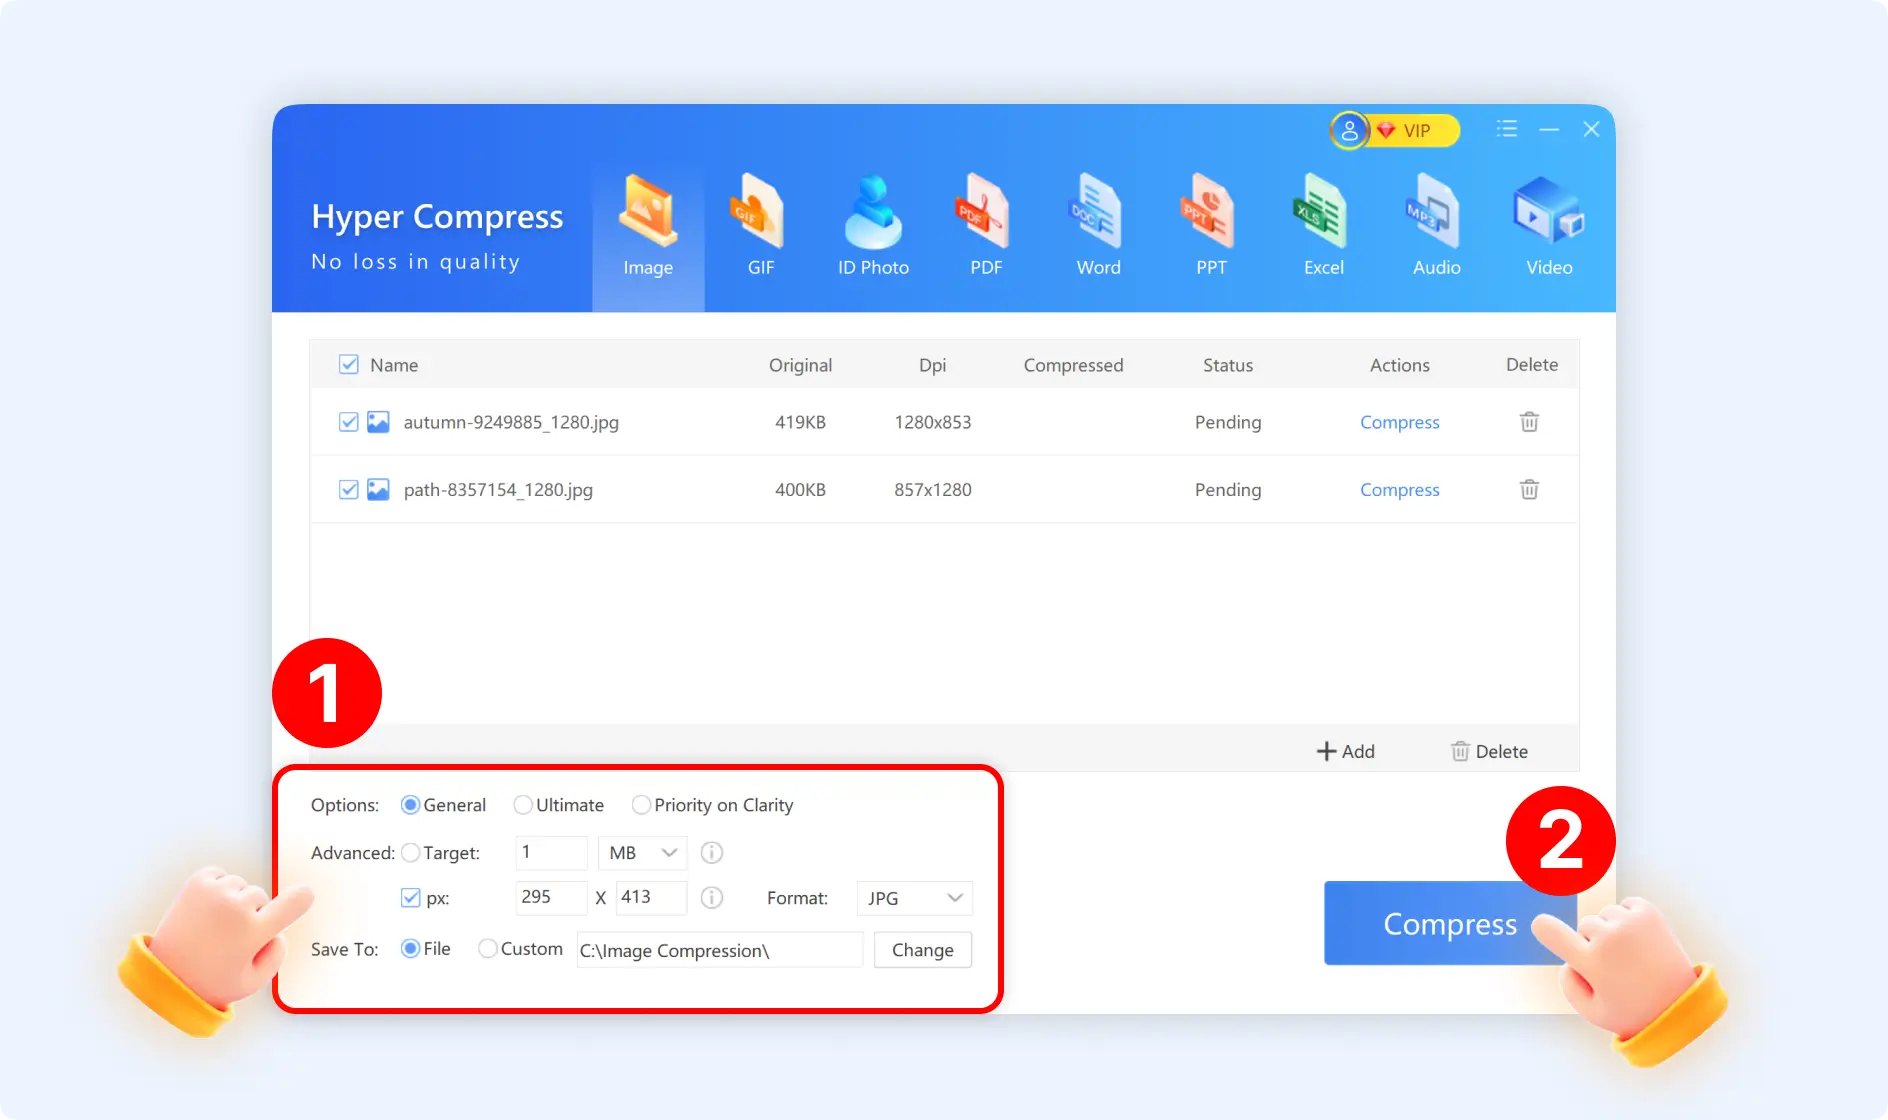
Step 2: Then you will enter into the “Hyper Compress” interface, here you can click “Add” to add multiple images. The image formats we support for uploading JPG, PNG, JPEG, BMP, and WEBP.
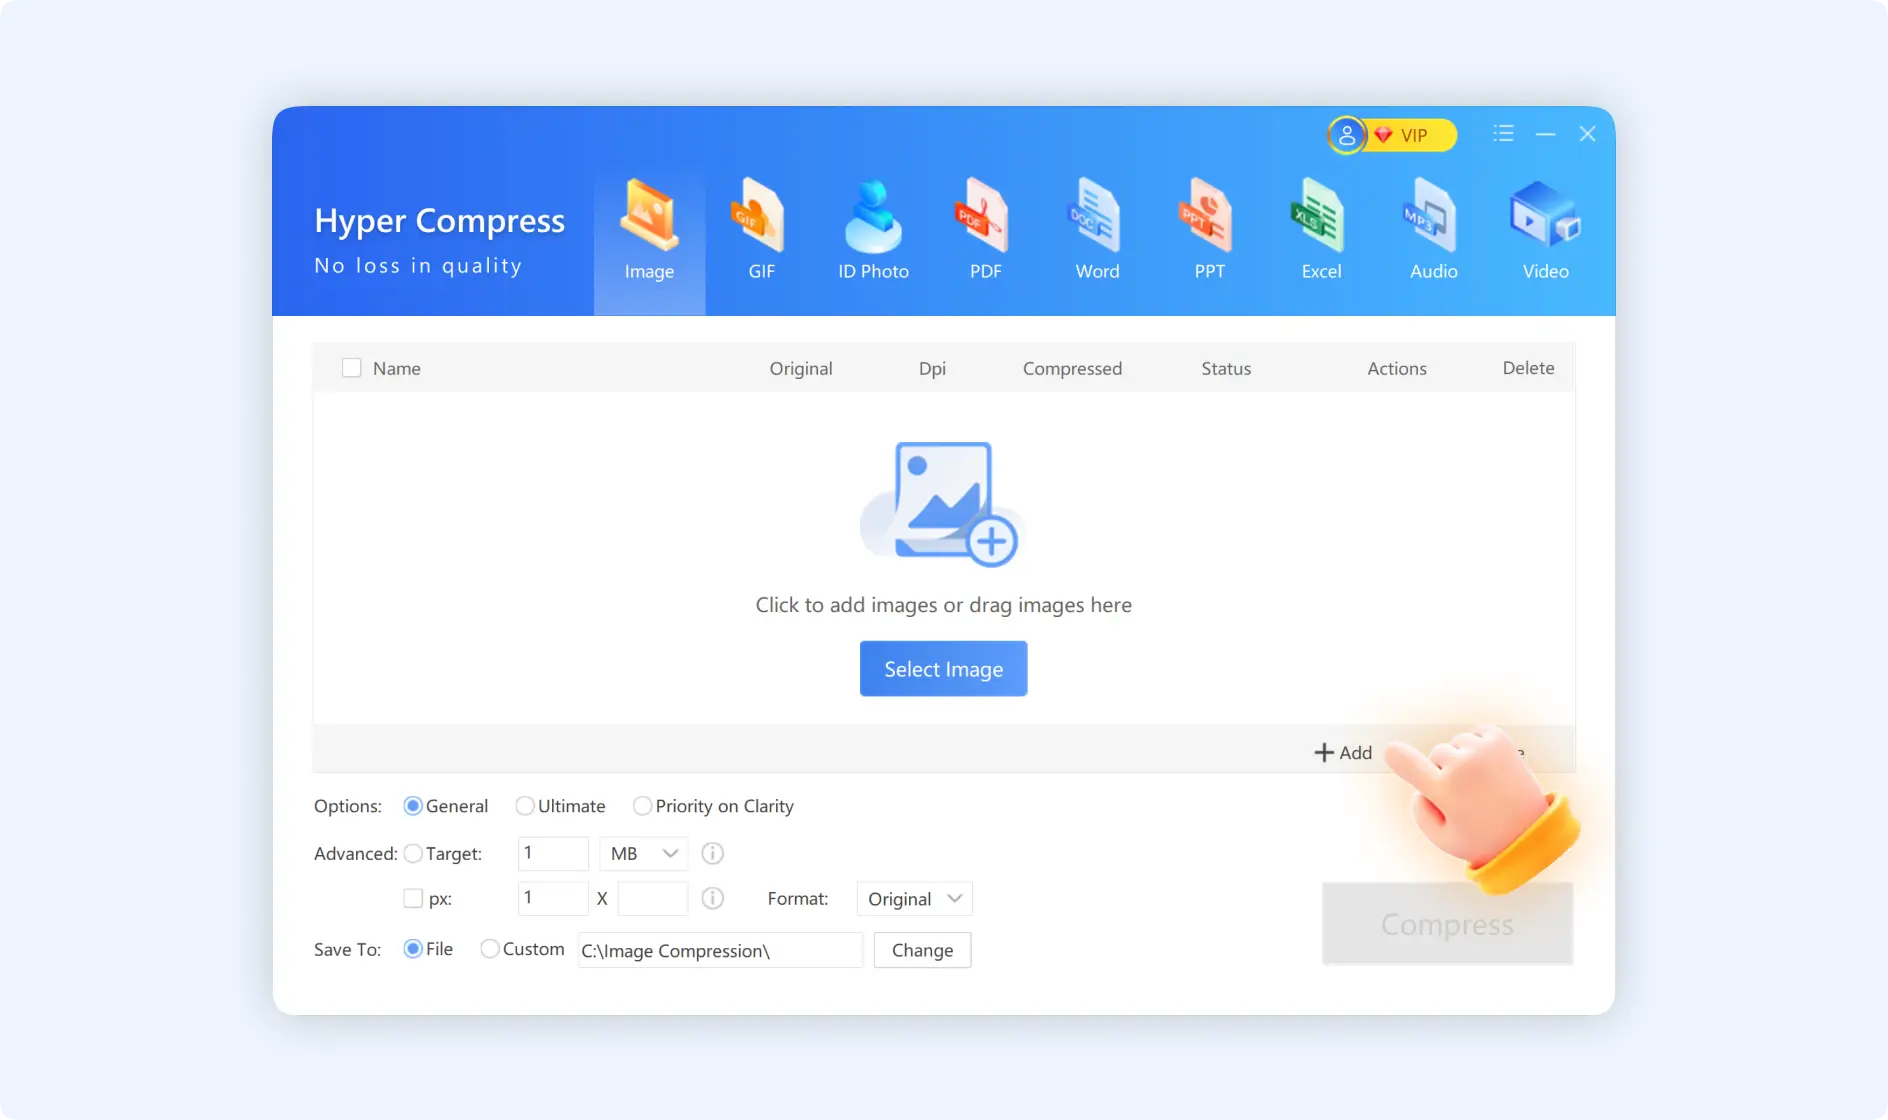
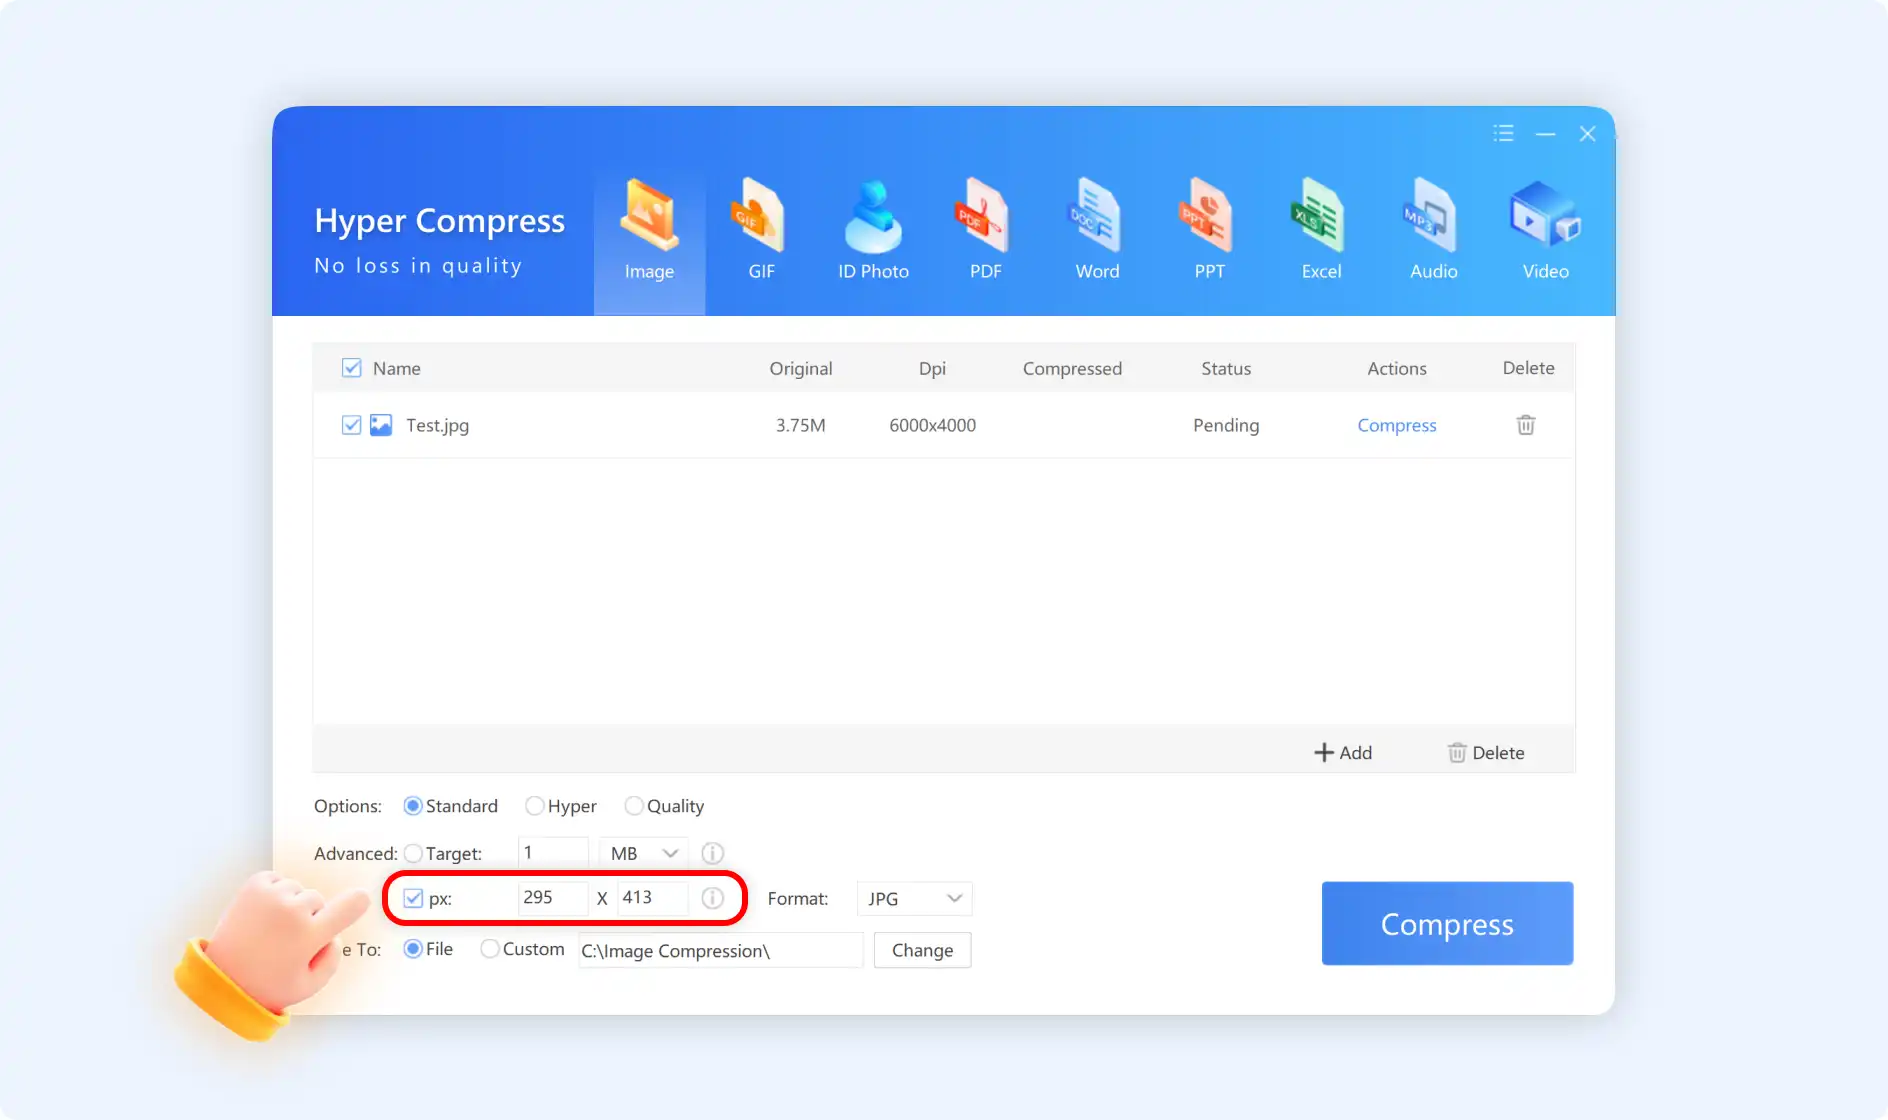
Step 3: Next you can come to set the image options for compressing, there are 3 types of options you can choose: “General, Ultimate, and Priority on Clarity” Besides, you will have access to more advanced options like setting your target image size and customize the image resolution. Finally, you can choose the custom path to store your compressed images.
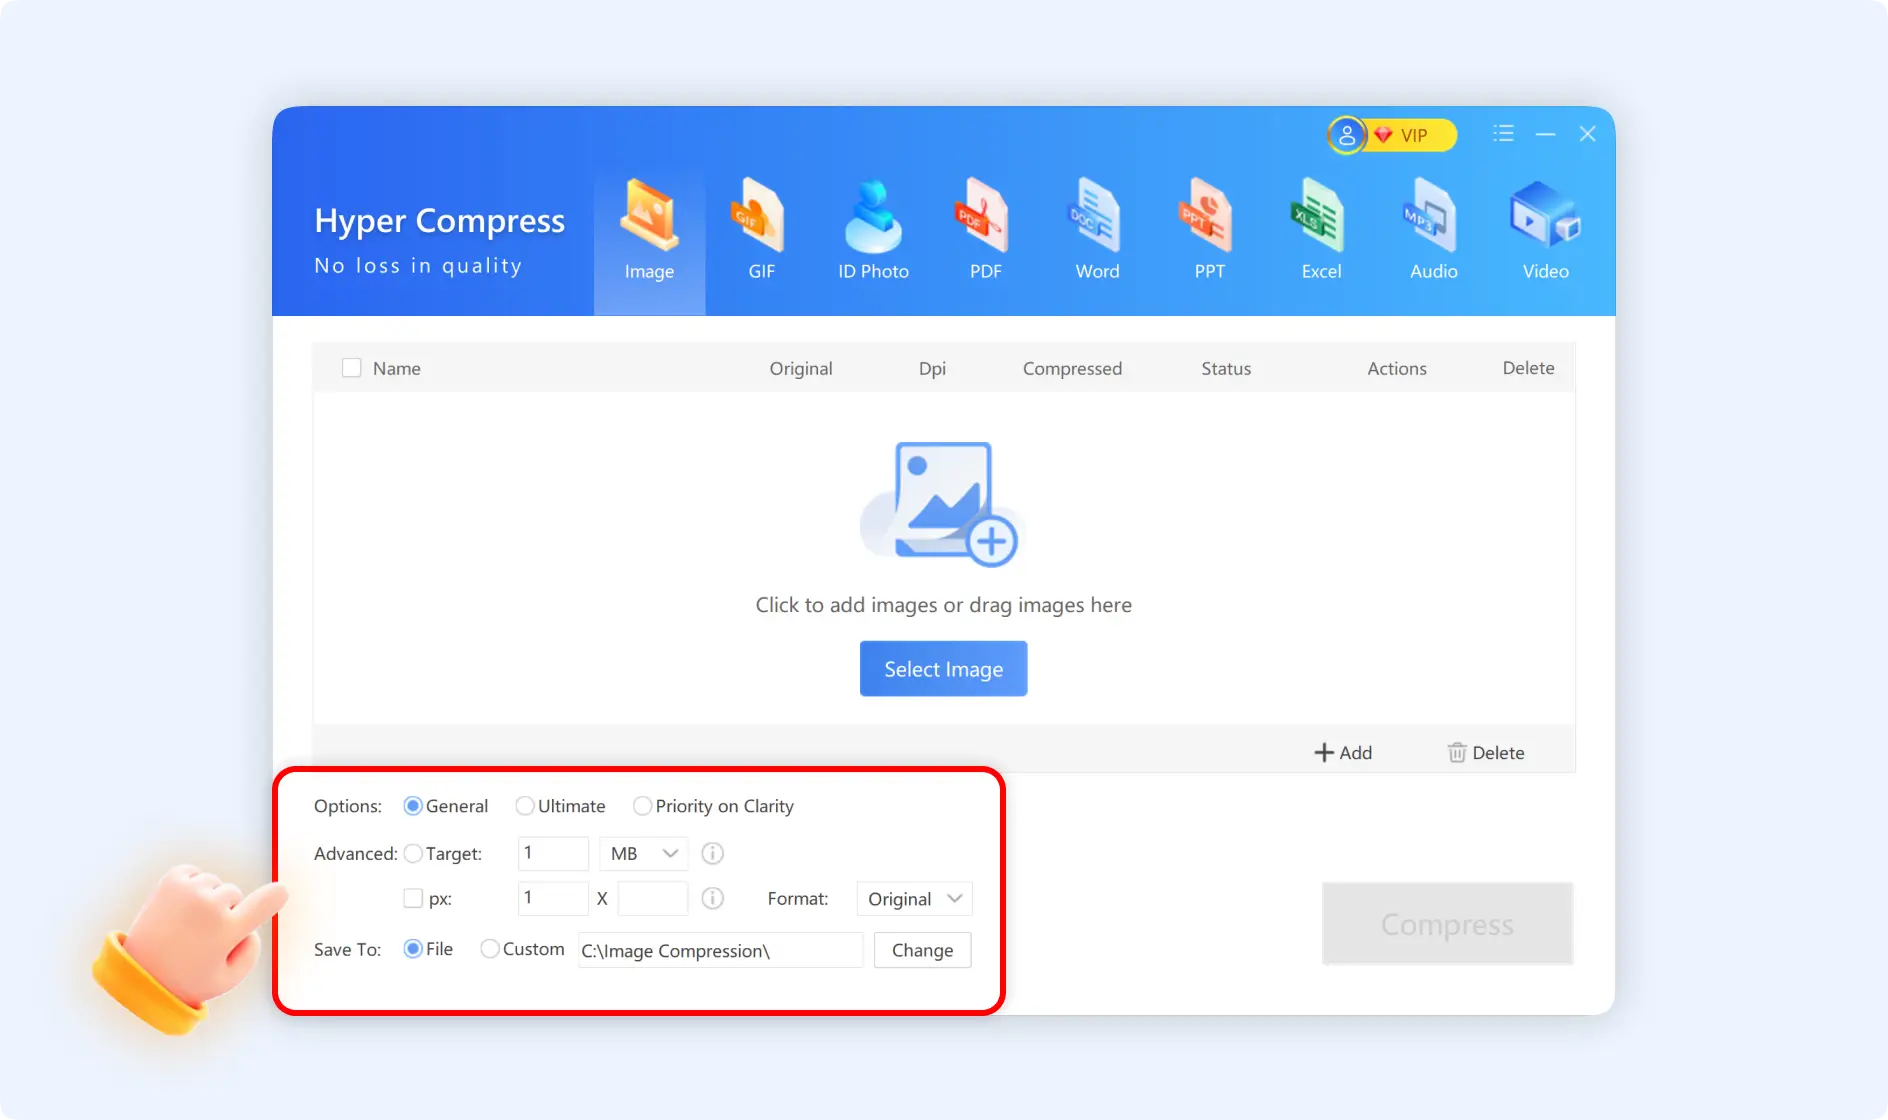
Tips: The output image formats we supported are PNG and JPG.
Step 4: After finishing the above setting, click: “Compress” button. ZipKing will begin to compress images automatically within seconds.
Method 2: Guide to Compress Images by ZipKing Right-Click Windows
Before using the ZipKing right-click option, you must ensure you have installed Zipking on your computer.
There are 3 situations to compress images by using ZipKing's right-click-windows.
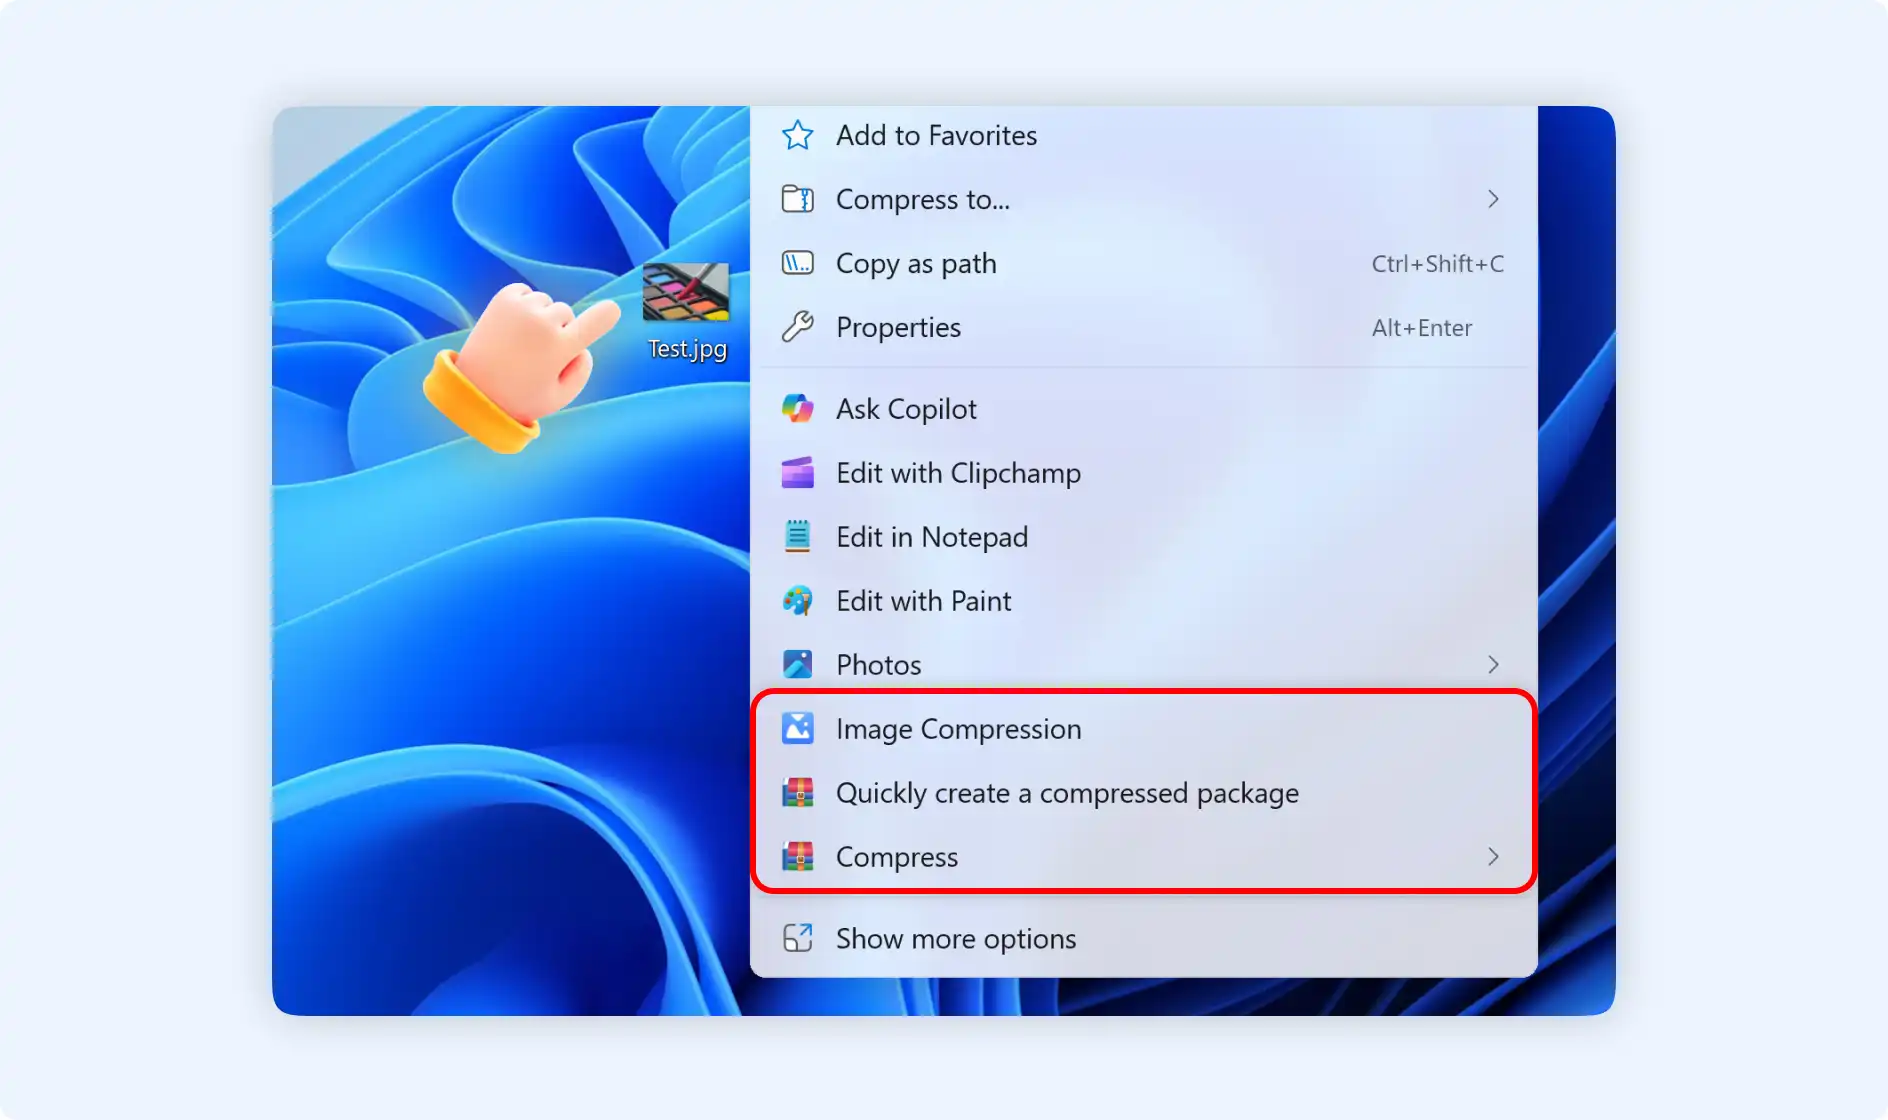
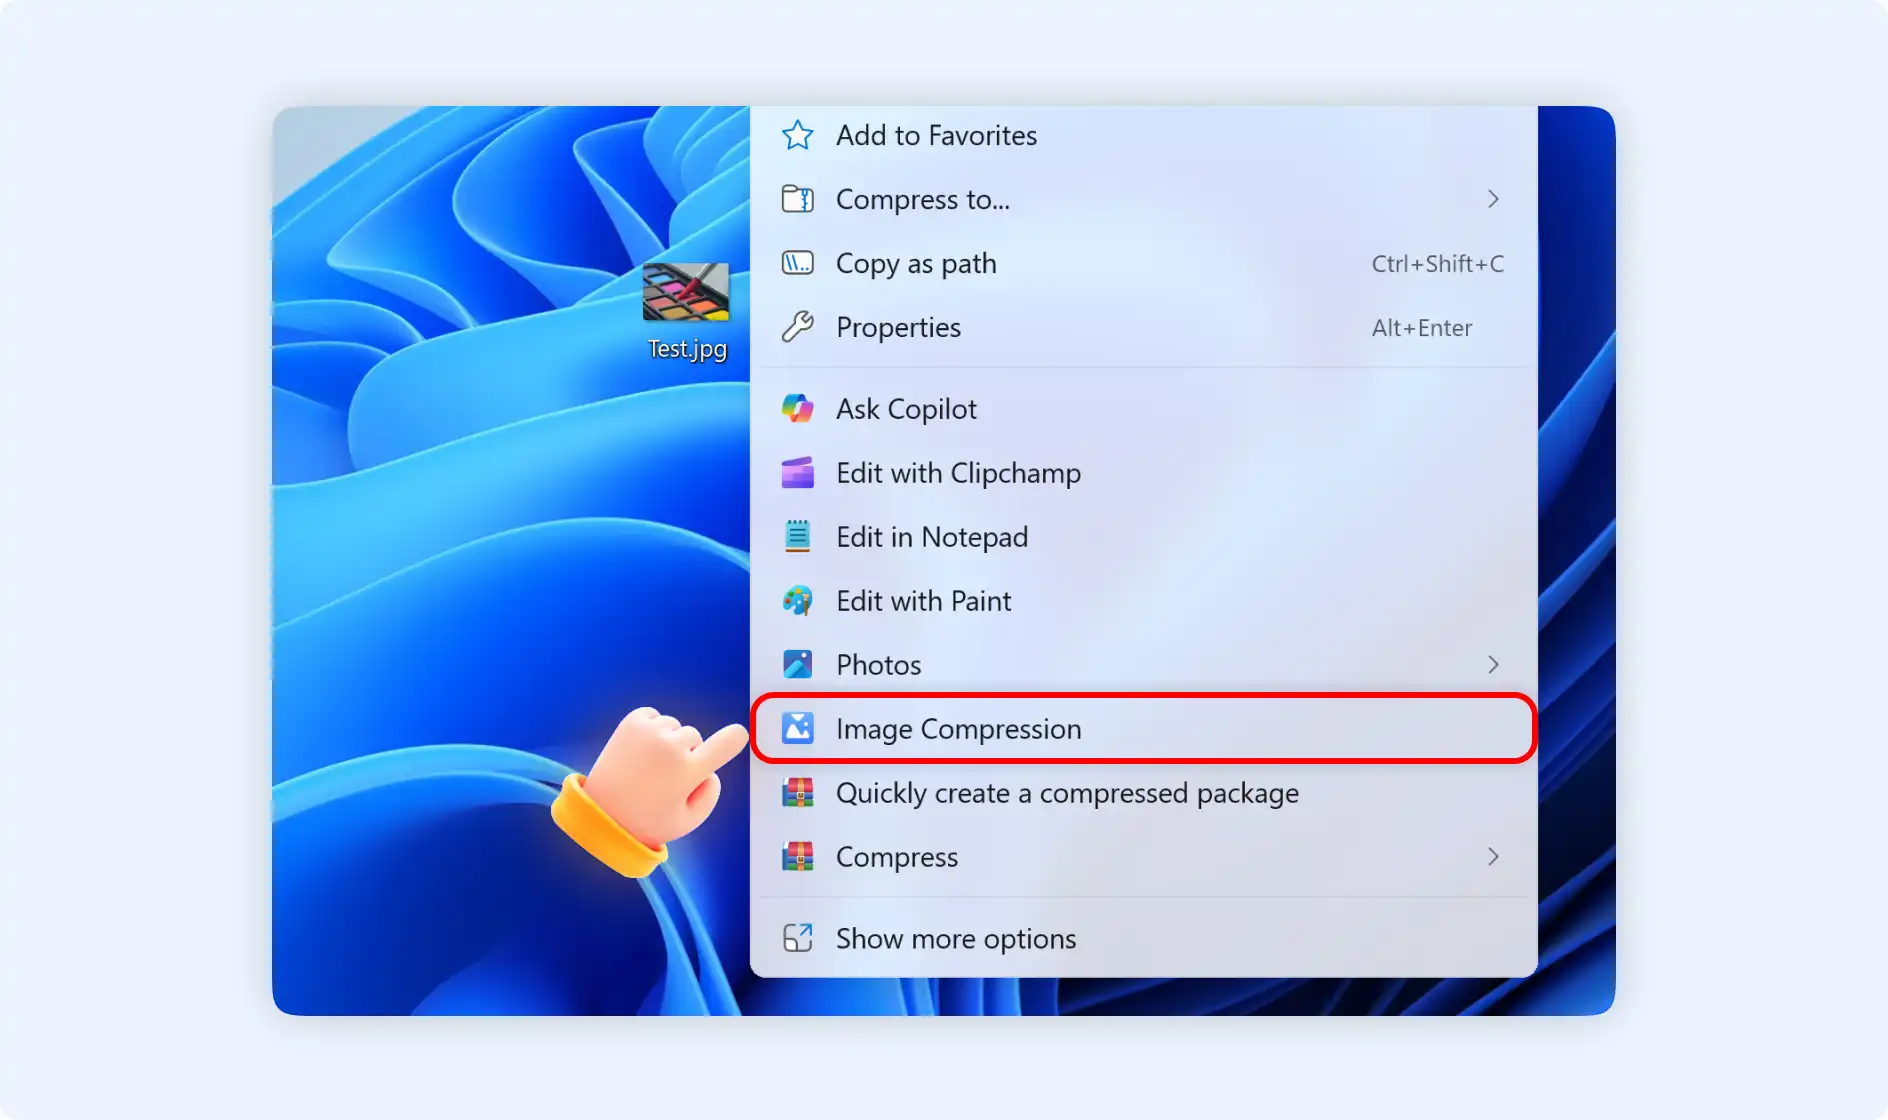
Situation 1: Right-click to select" Image Compression"
Step 1: Right-click your desired images then choose" Image Compression".
Step 2: you will go into the “Hyper Compress” interface, in this interface, you can set the compression options, target file size, and custom resolution, and choose your storage path. After you do the above setting, finally click“Compress”, and the compression procedure will begin.
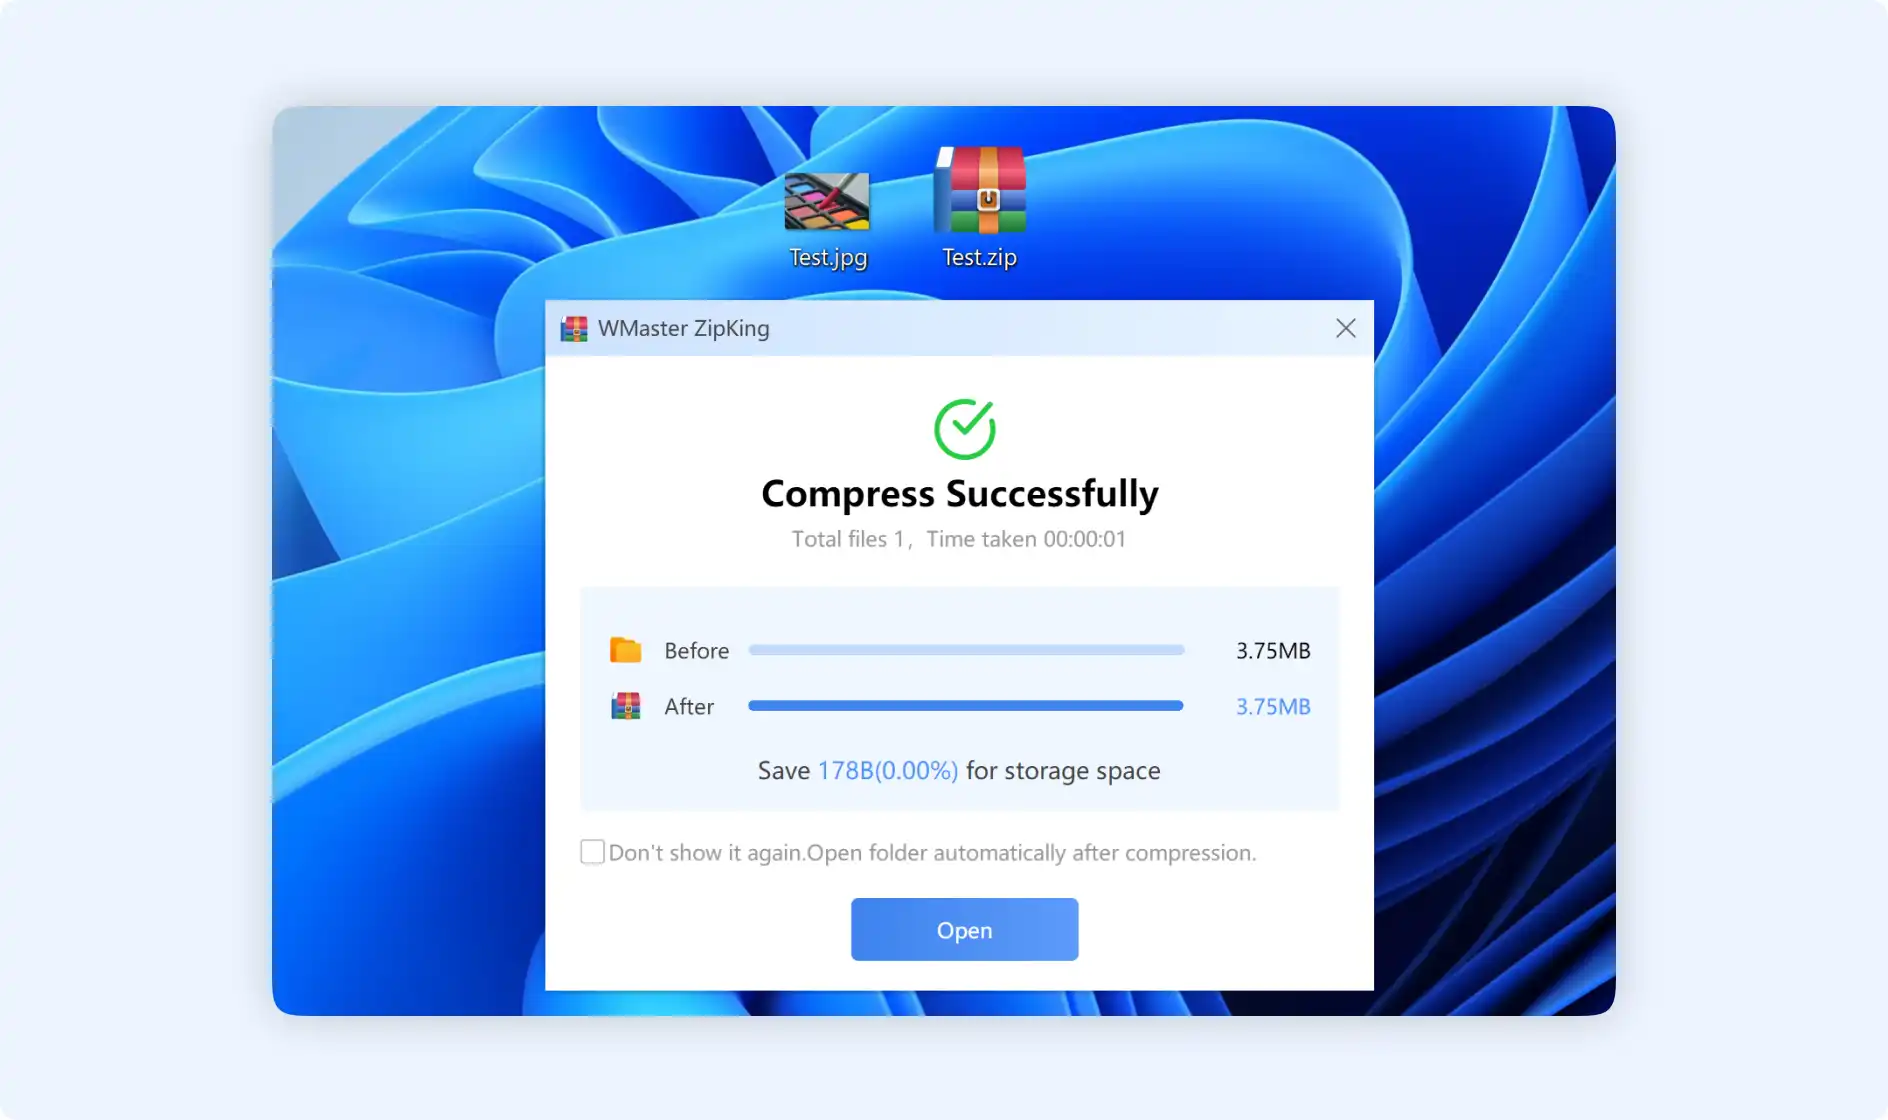
Situation 2: Right-click to select" Quickly create a compressed package"
Step 1: locate your images files,right-click to choose"Quickly create a compressed package".
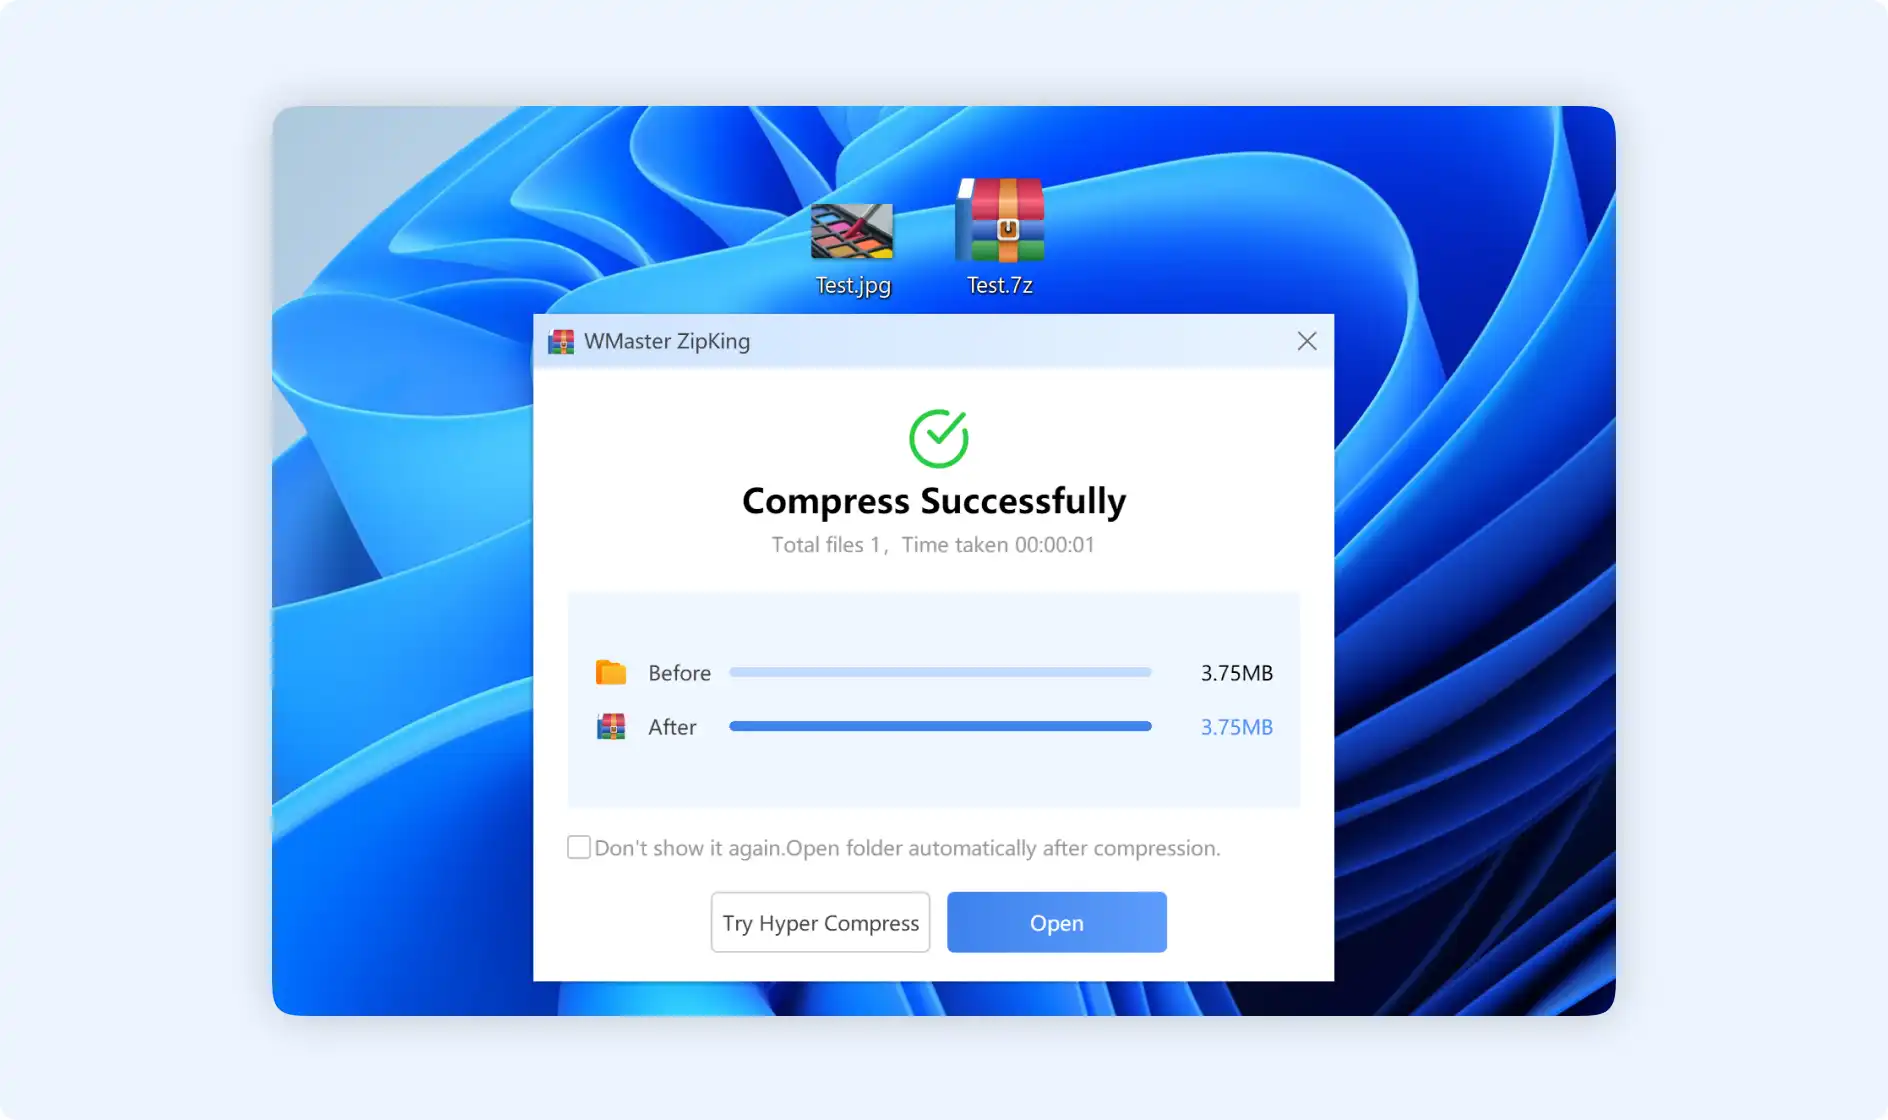
Step 2: Then ZipKing will compress images files automatically and notice you that you have created a zip archive for compressed images successfully.
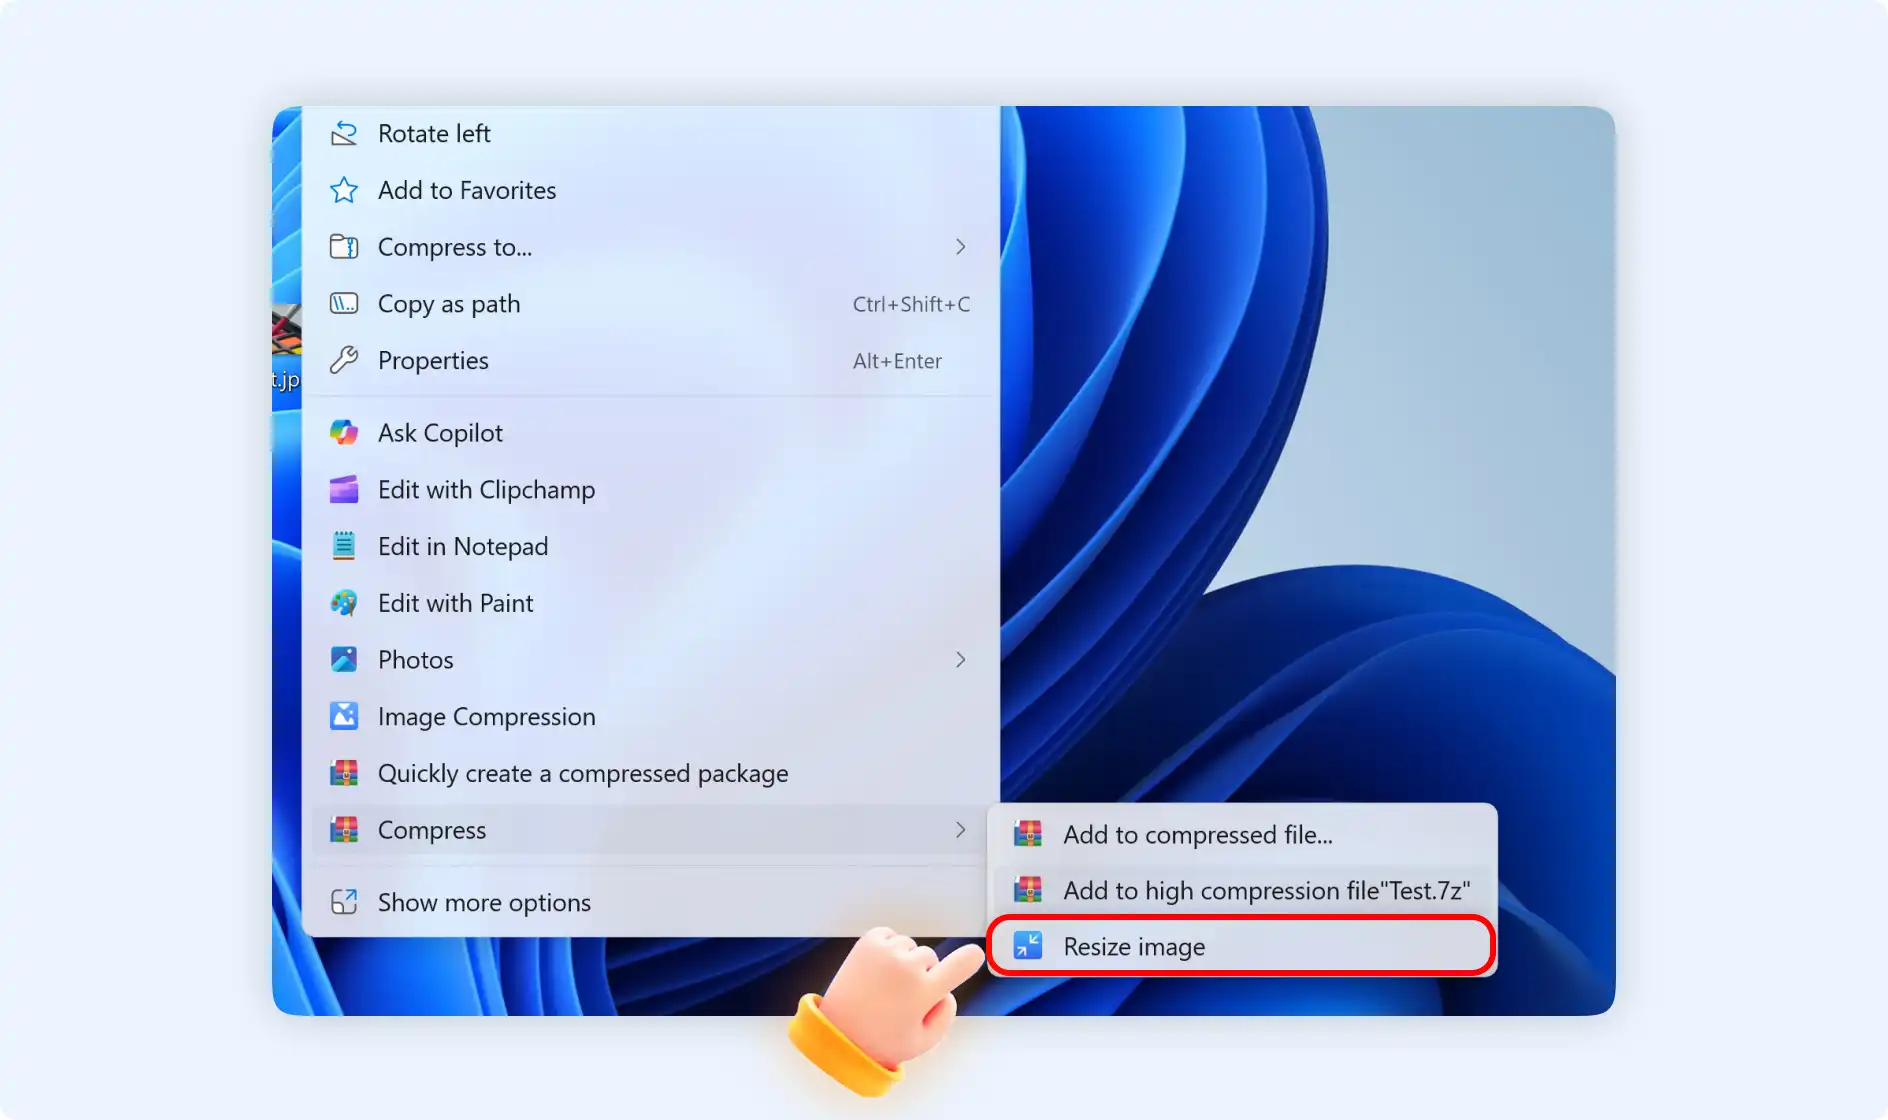
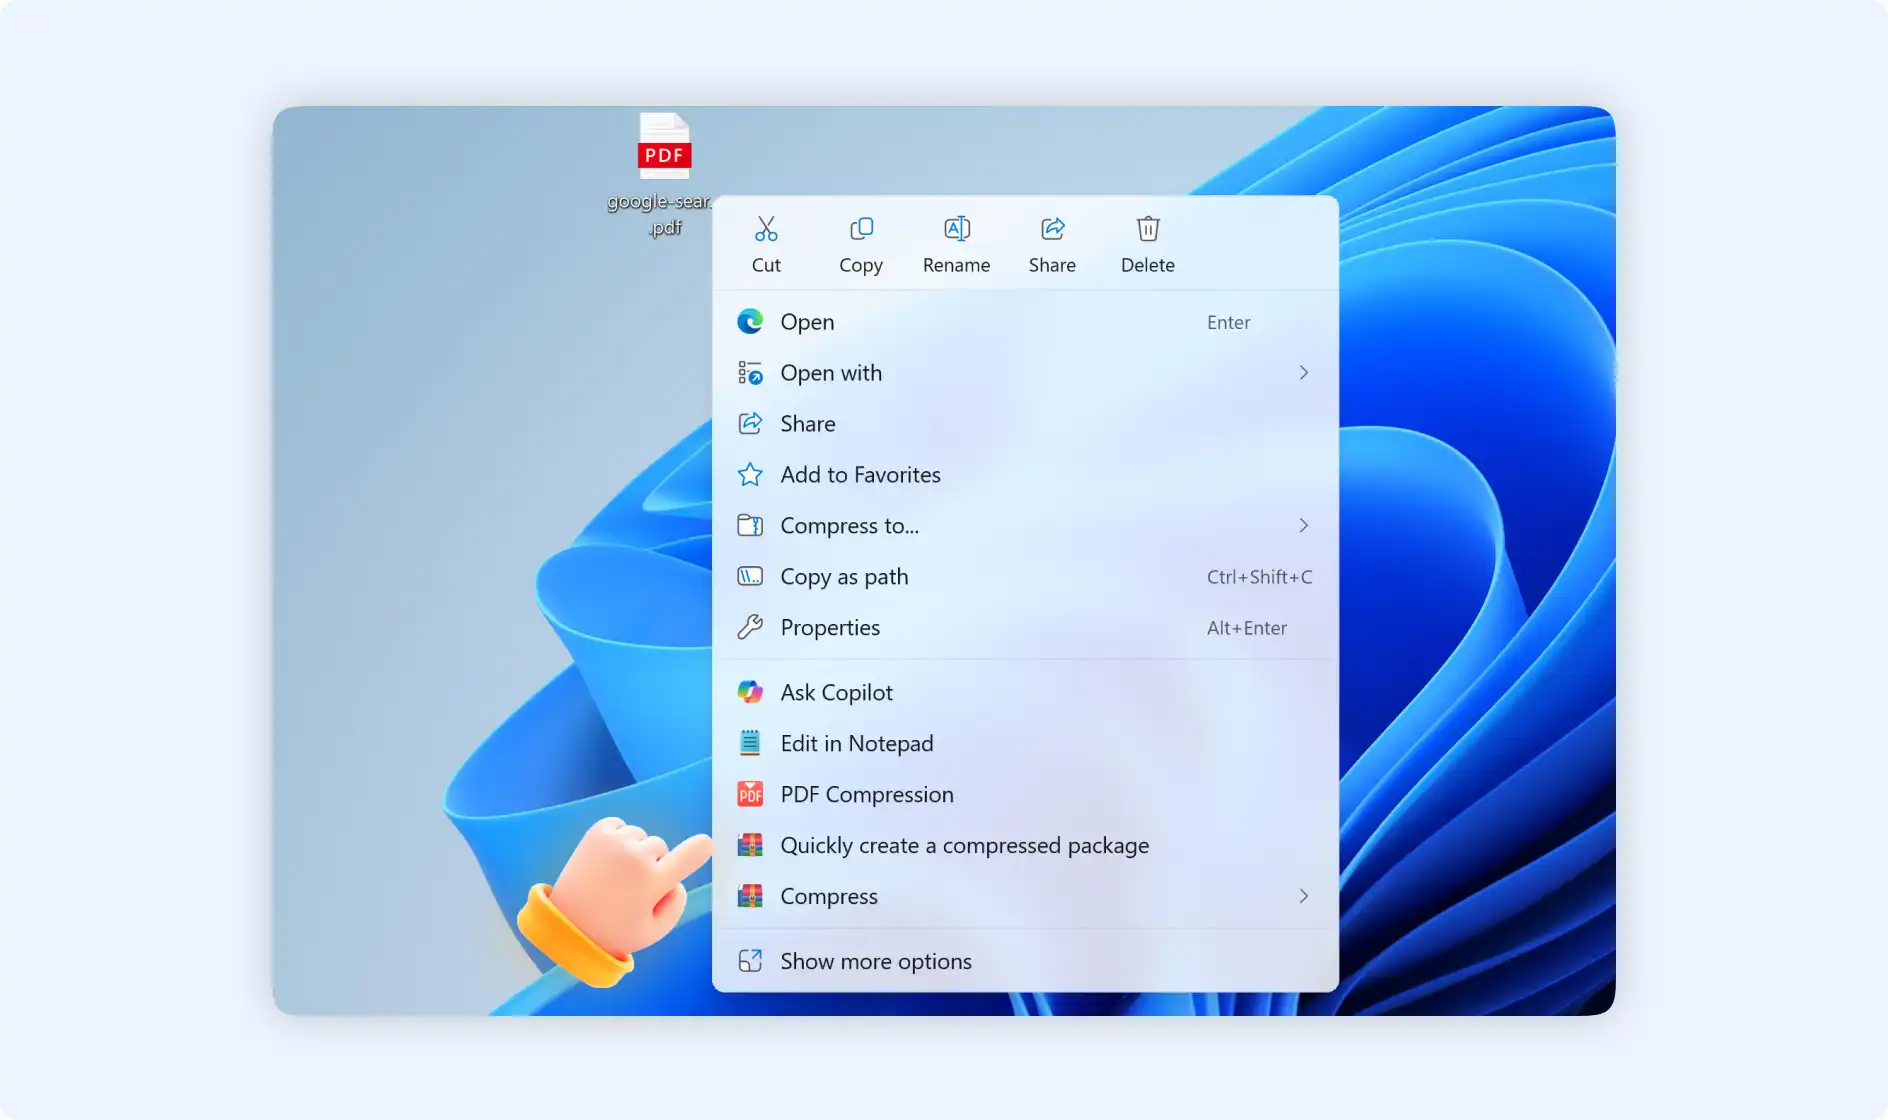
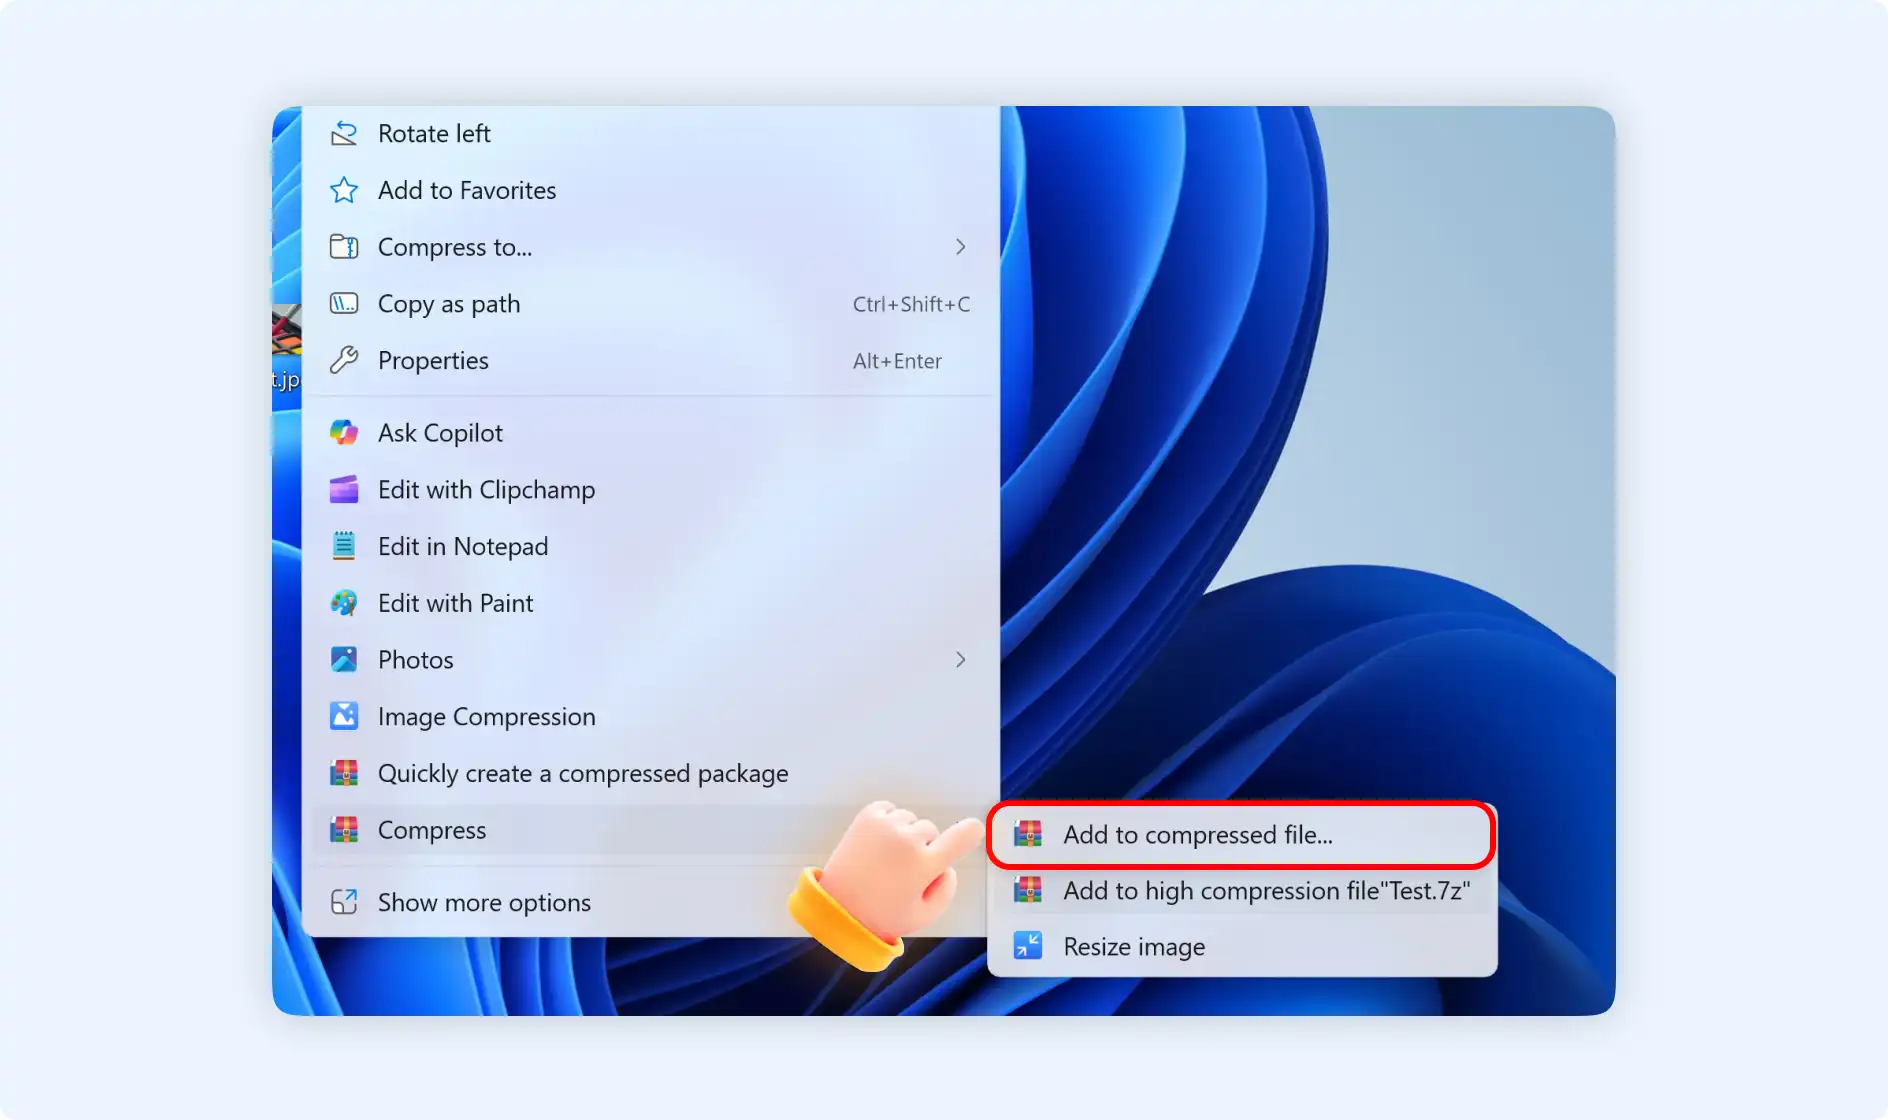
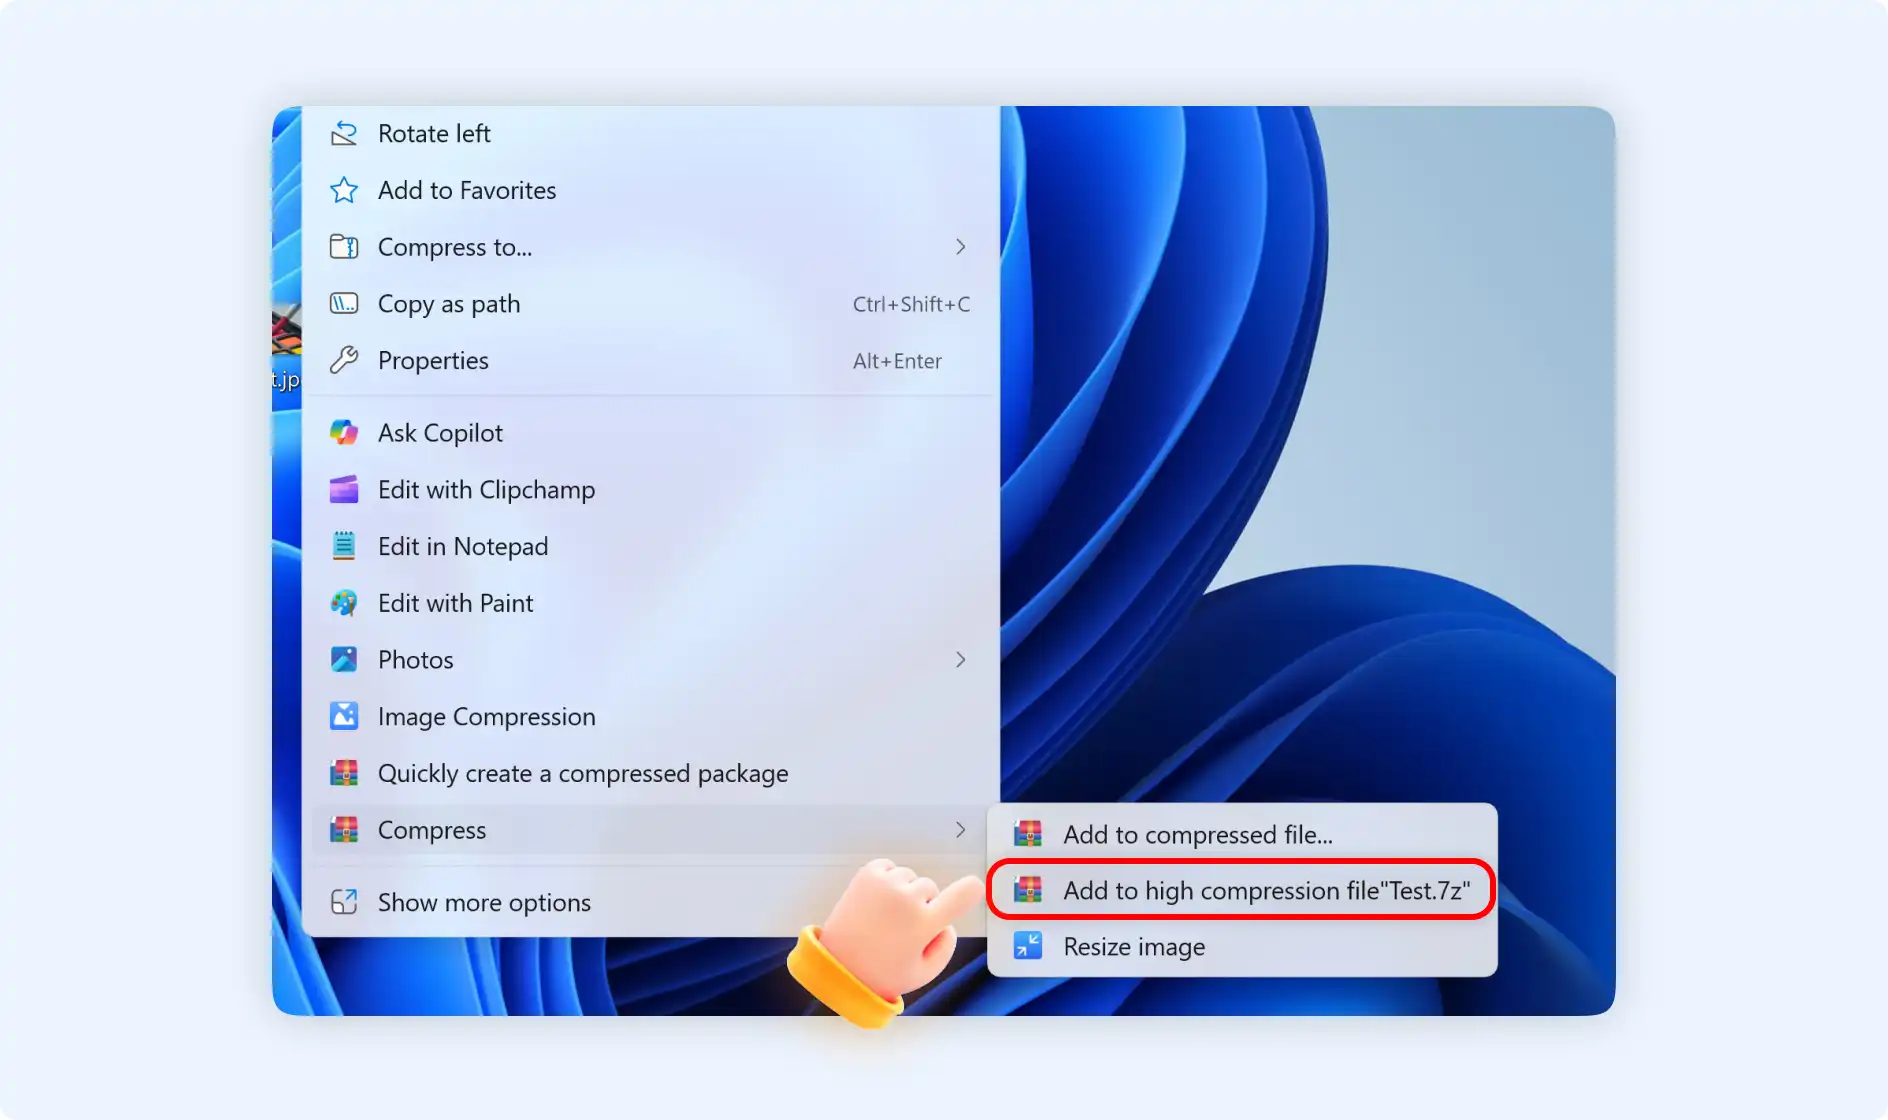
Situation 3: Right-click to choose"Compress"
There are 3 options if you choose right-click "compress" option.
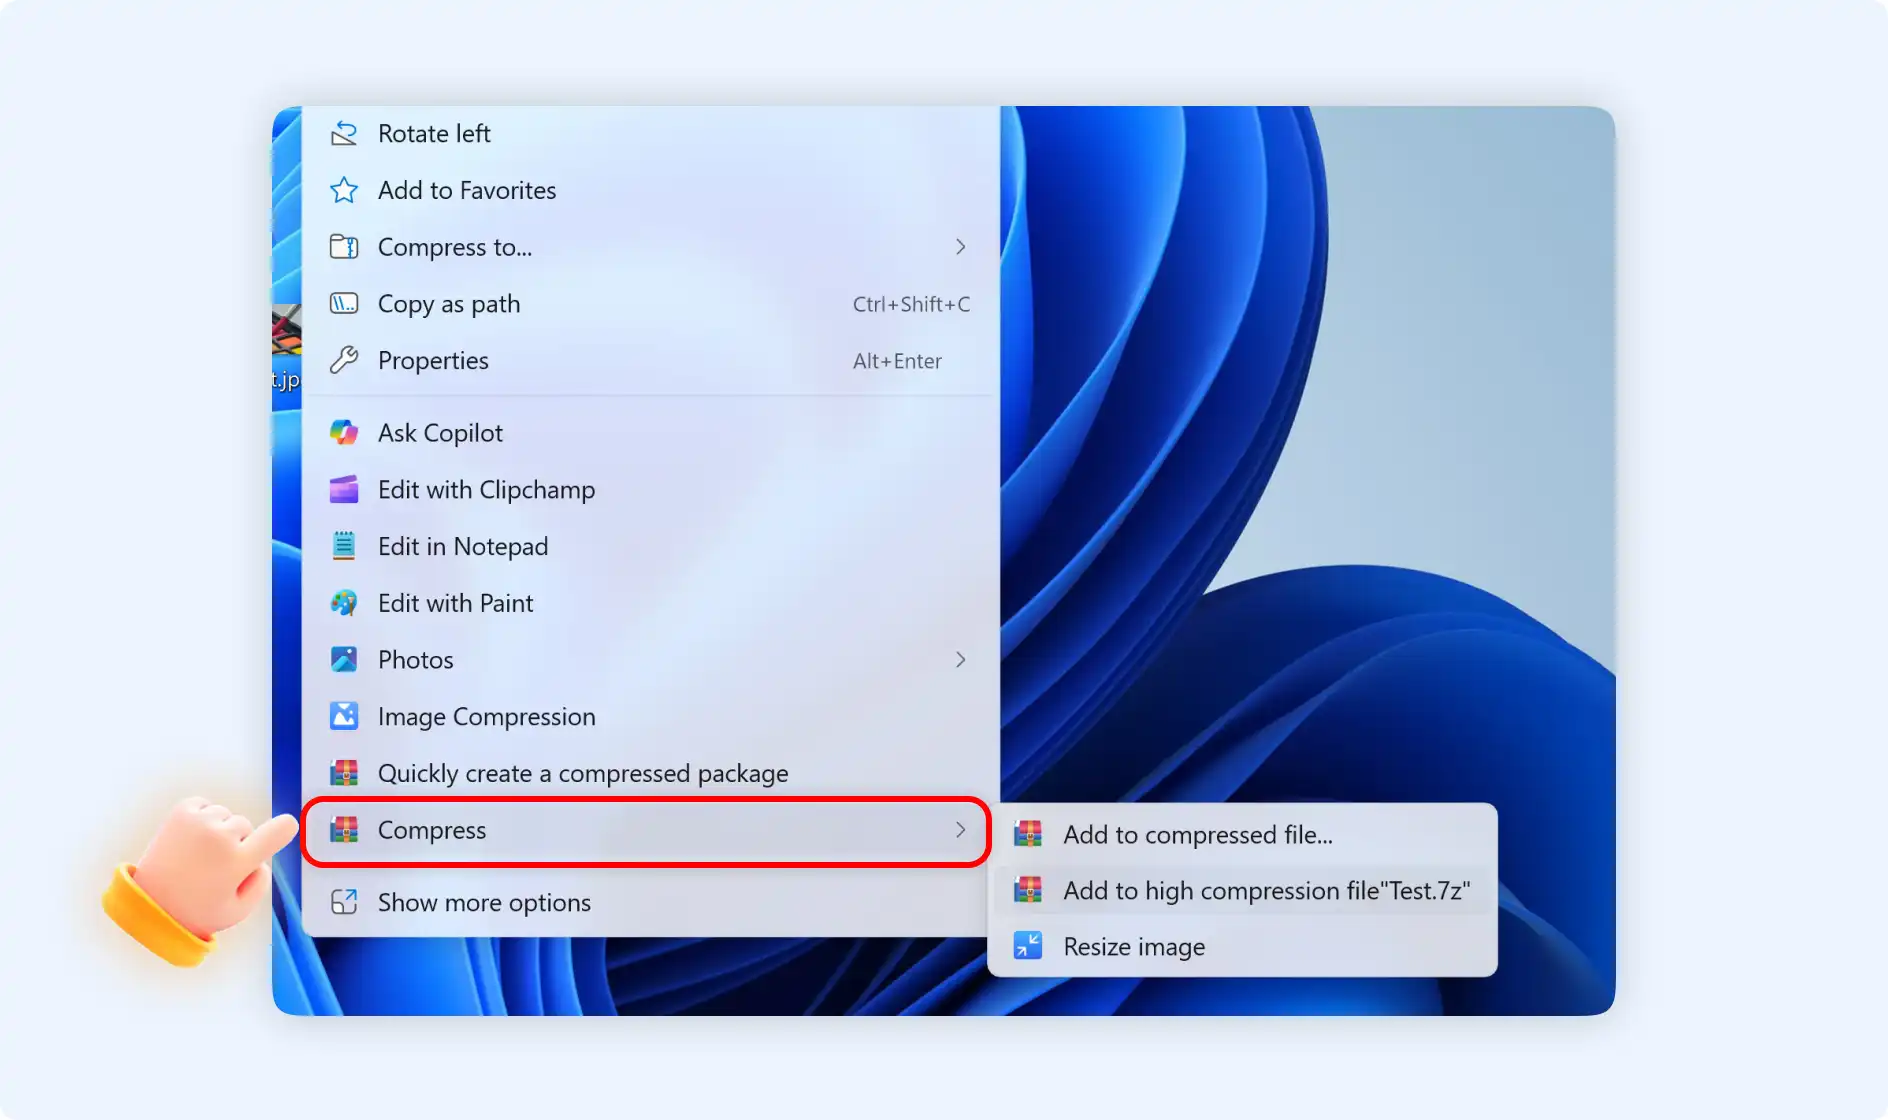
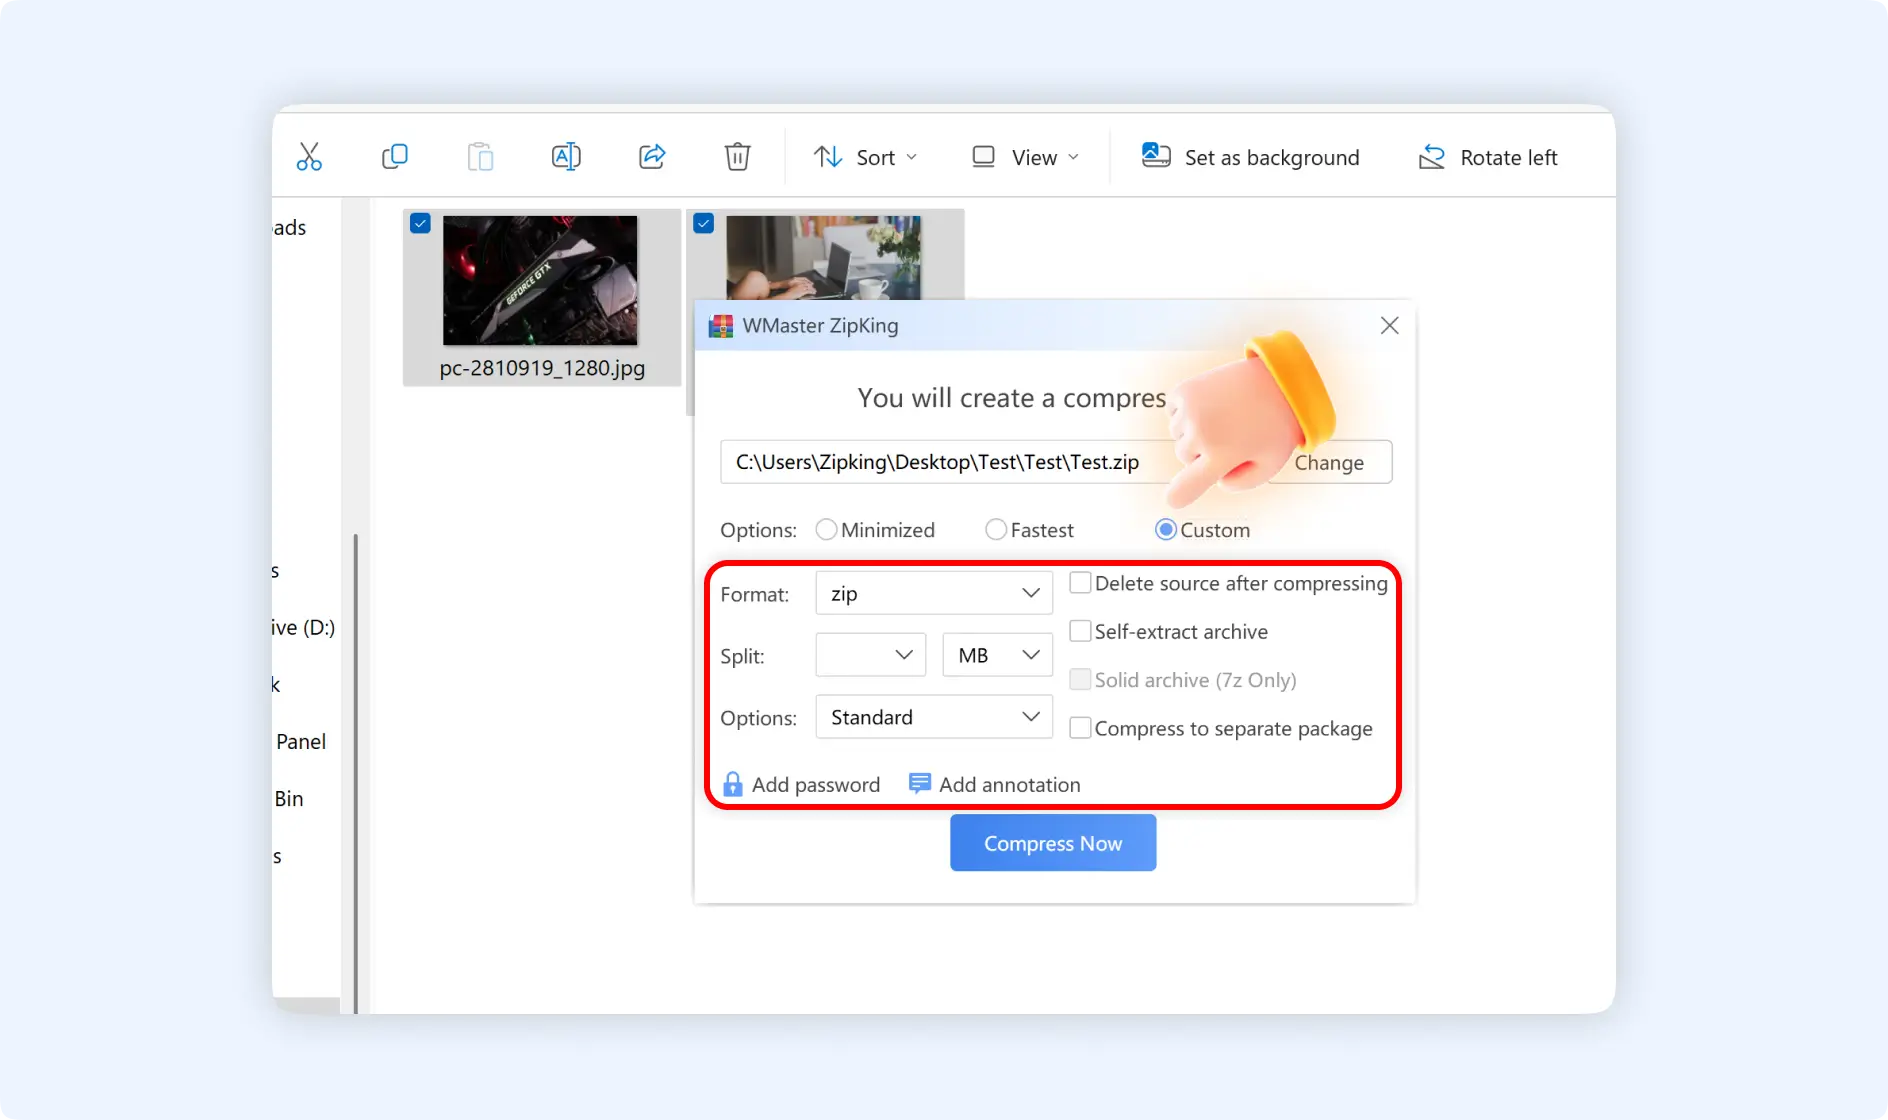
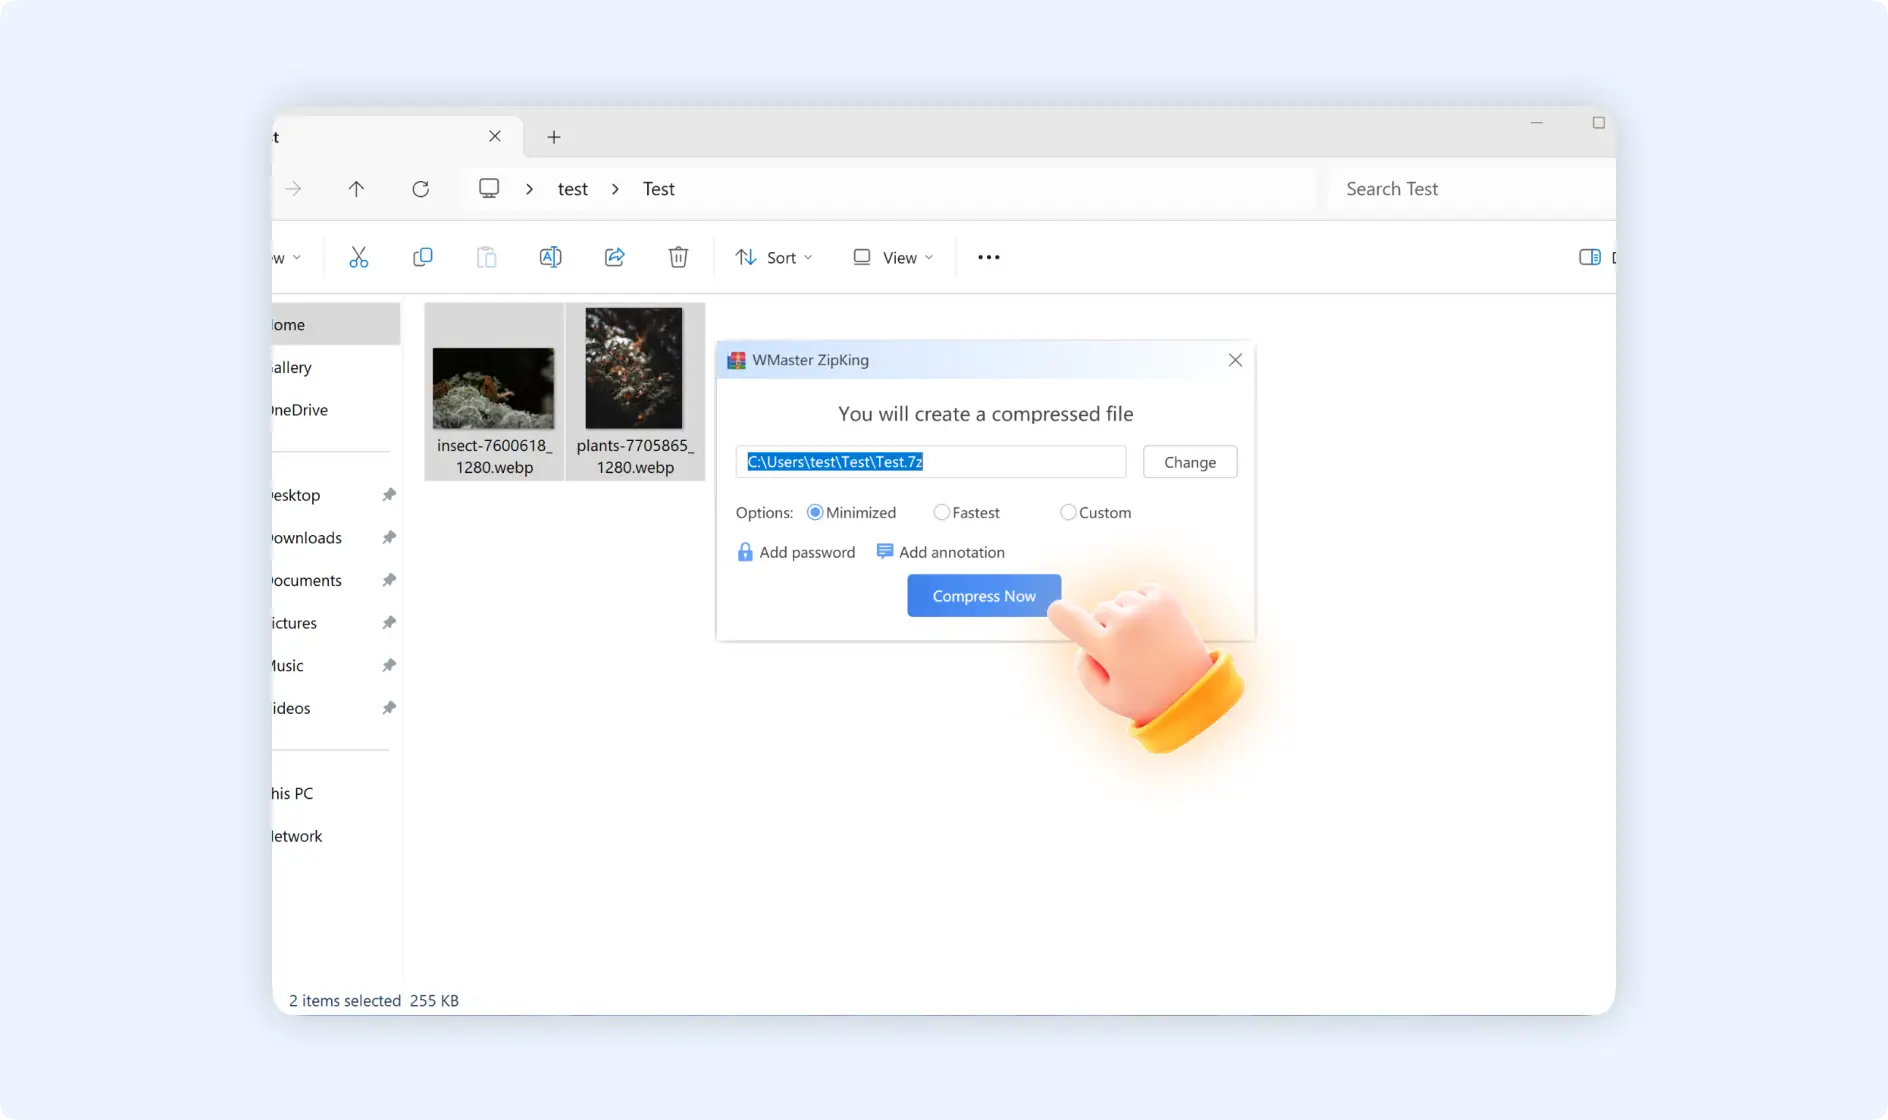
Option 1: Select "Add to compressed file", then you will enter into a pop-up window, here you can choose to change the destination path, select the compression methods, add a password, add annotations., etc. Finally, click“Compress Now”.
Option 2: Select" Add to high compression file[file name].7z", then you will create a 7z archive for compressed images.
Option 3: Select" Resize Image", next you will come into Hyper compress mode of images, here you can customize image size, choose image quality, and change image format.