Video files are enormous, especially for some recorded videos in 4k or 8k high resolutions. If you want to share or transmit them, it will be troublesome. However, there is one way to reduce your video files without losing quality, and that is to try WMaster ZipKing!
Guide to Compress Videos by ZipKing
There are 2 ways to compress video files with ZipKing. Before using them, you must ensure you have downloaded and installed WMaster ZipKing on your computer.
Method 1: Guide to Compress Video Files by ZipKing Tool
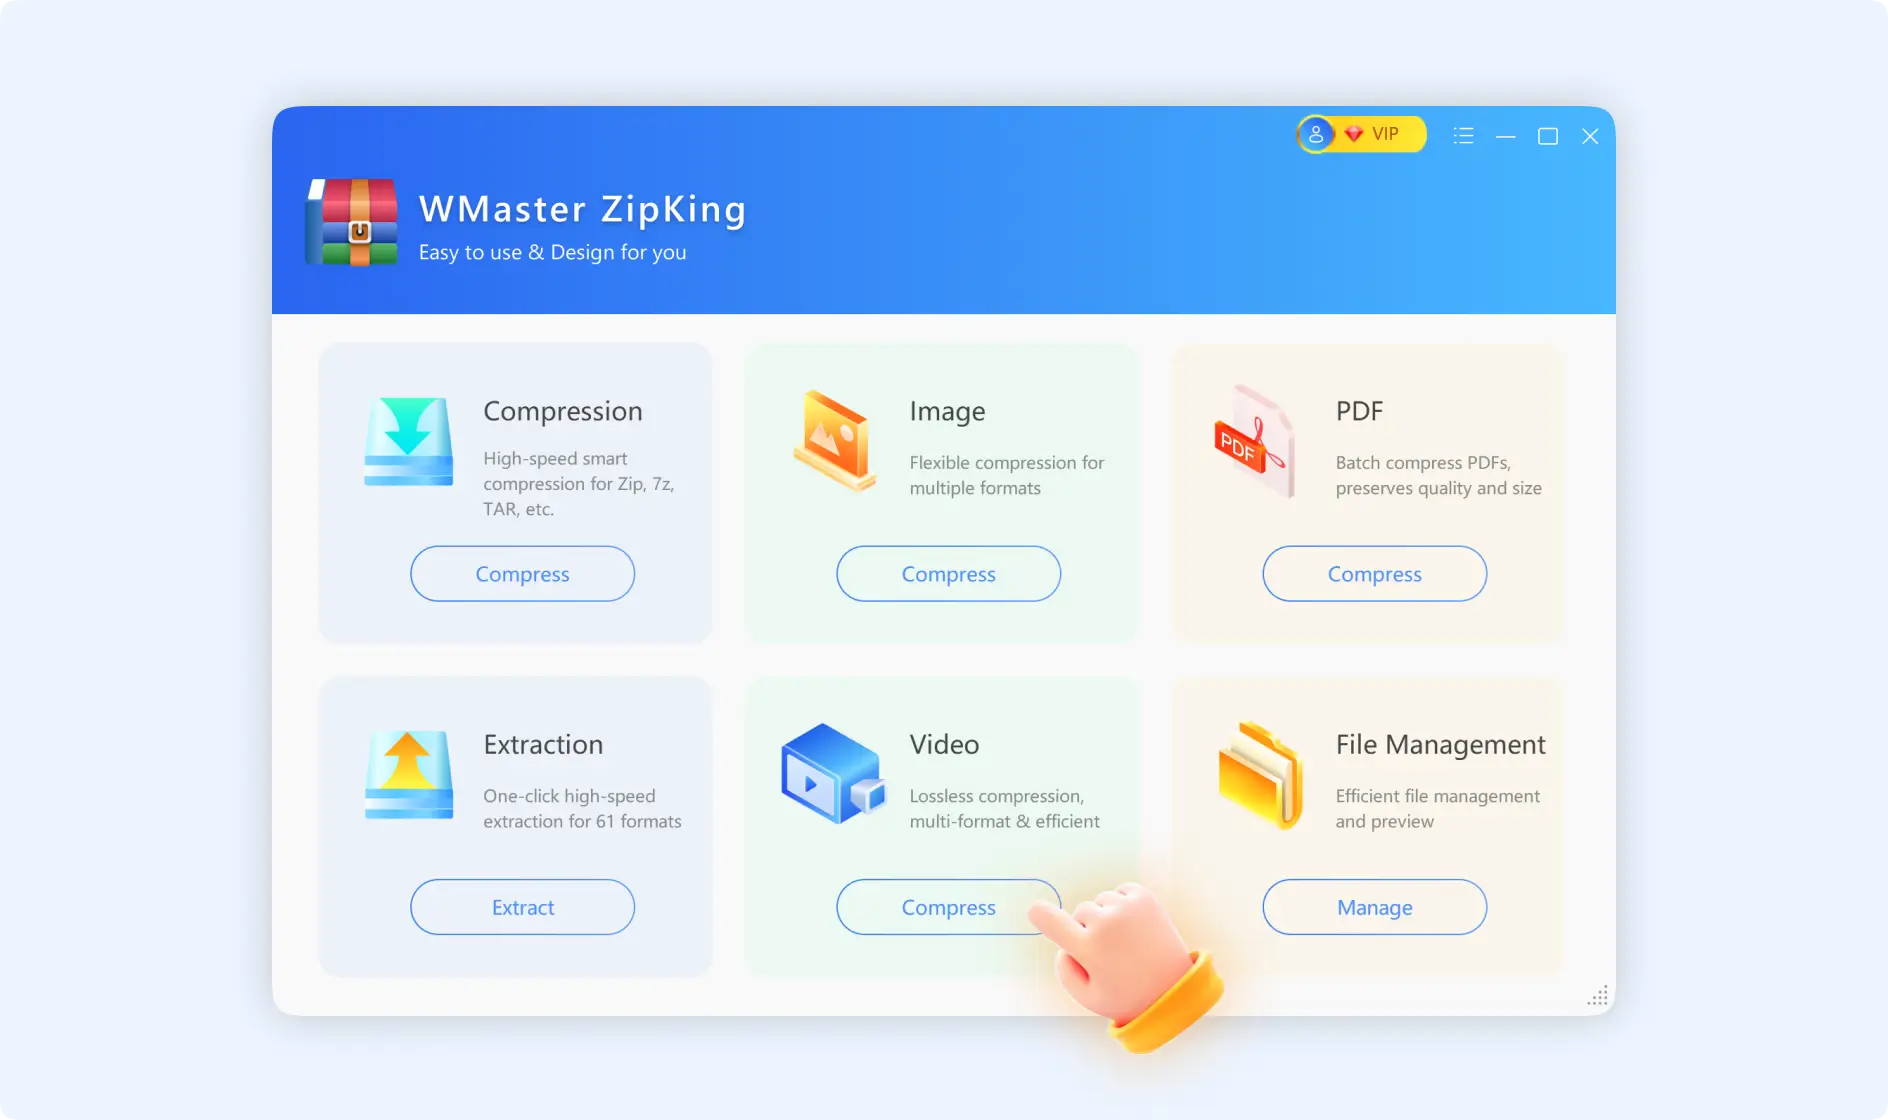
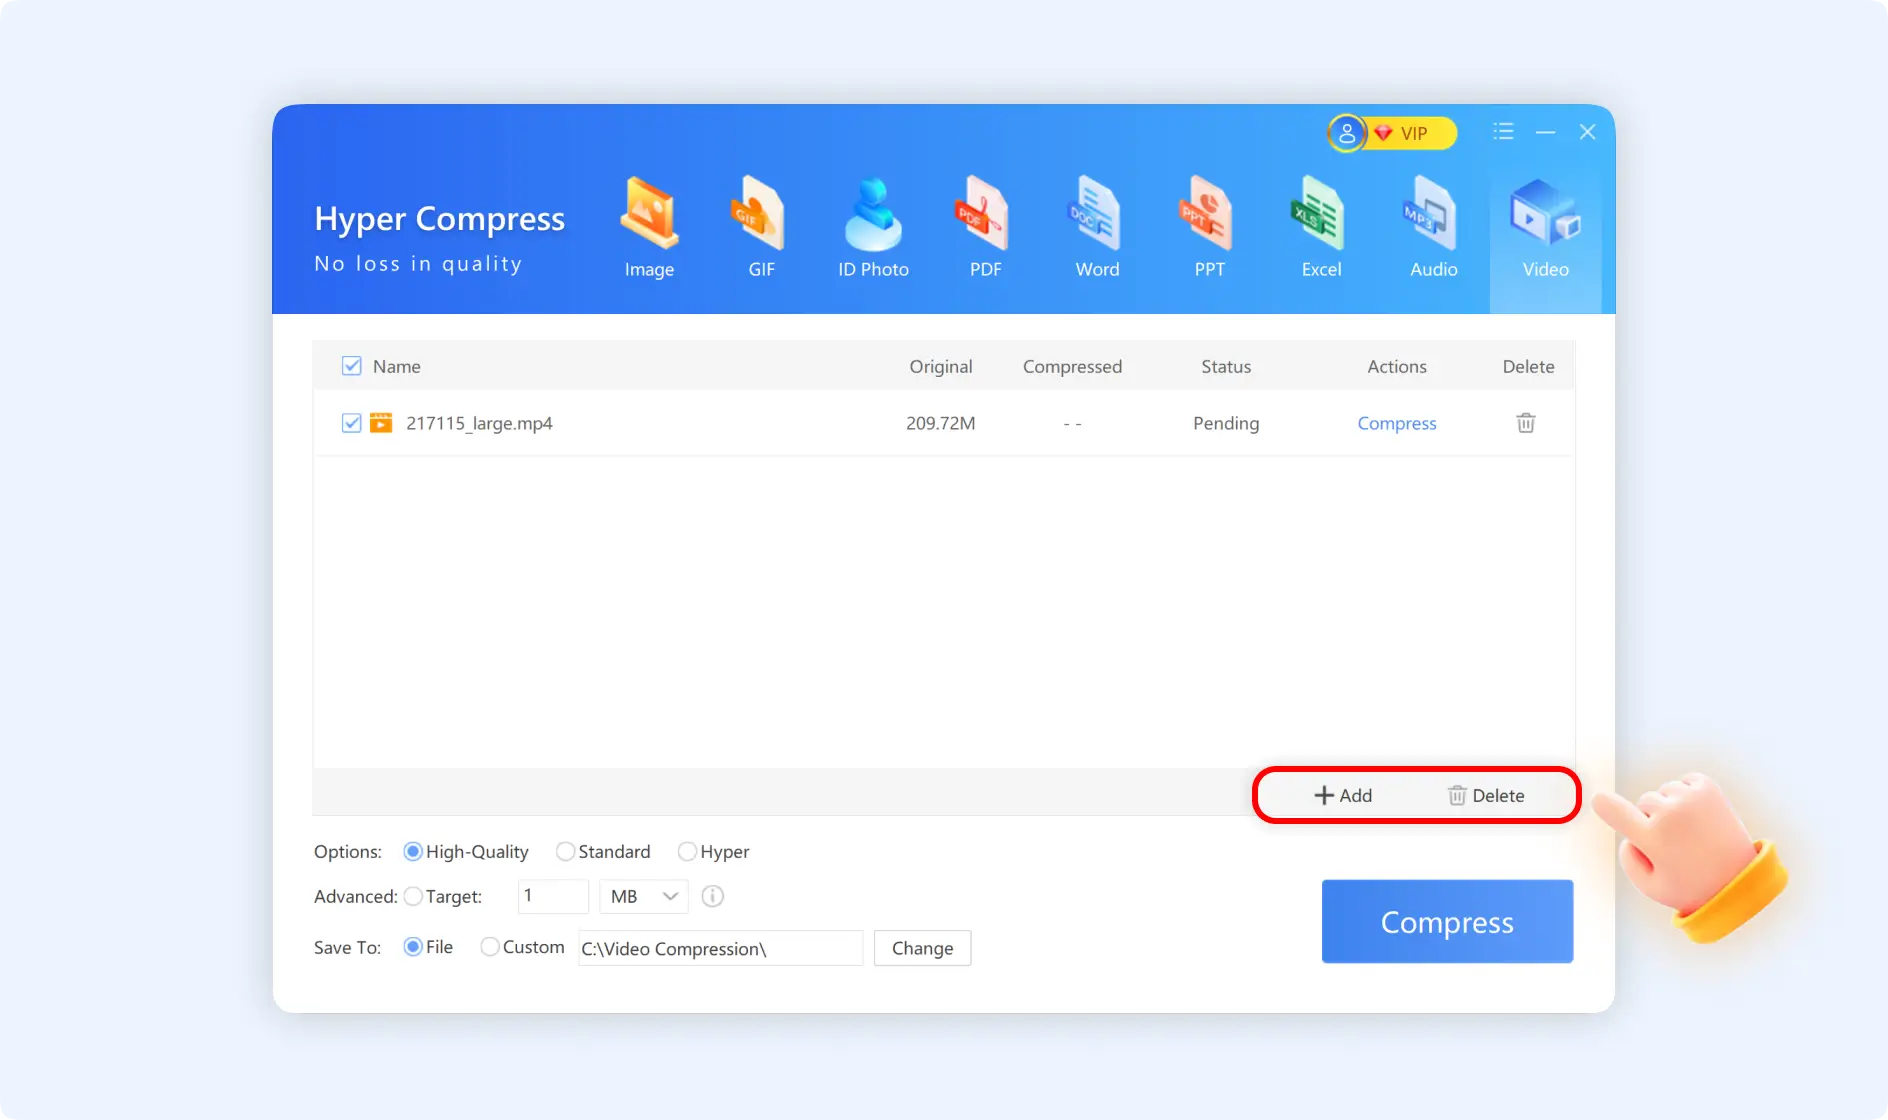
Step 1: Open ZipKing on your PC. Find “Video Compress” and click it to add the video file, or drag and drop it into the panel.
ZipKing supports uploading AVIã€MP4ã€WMVã€FLVã€MOVã€F4Vã€MPG video file formats.
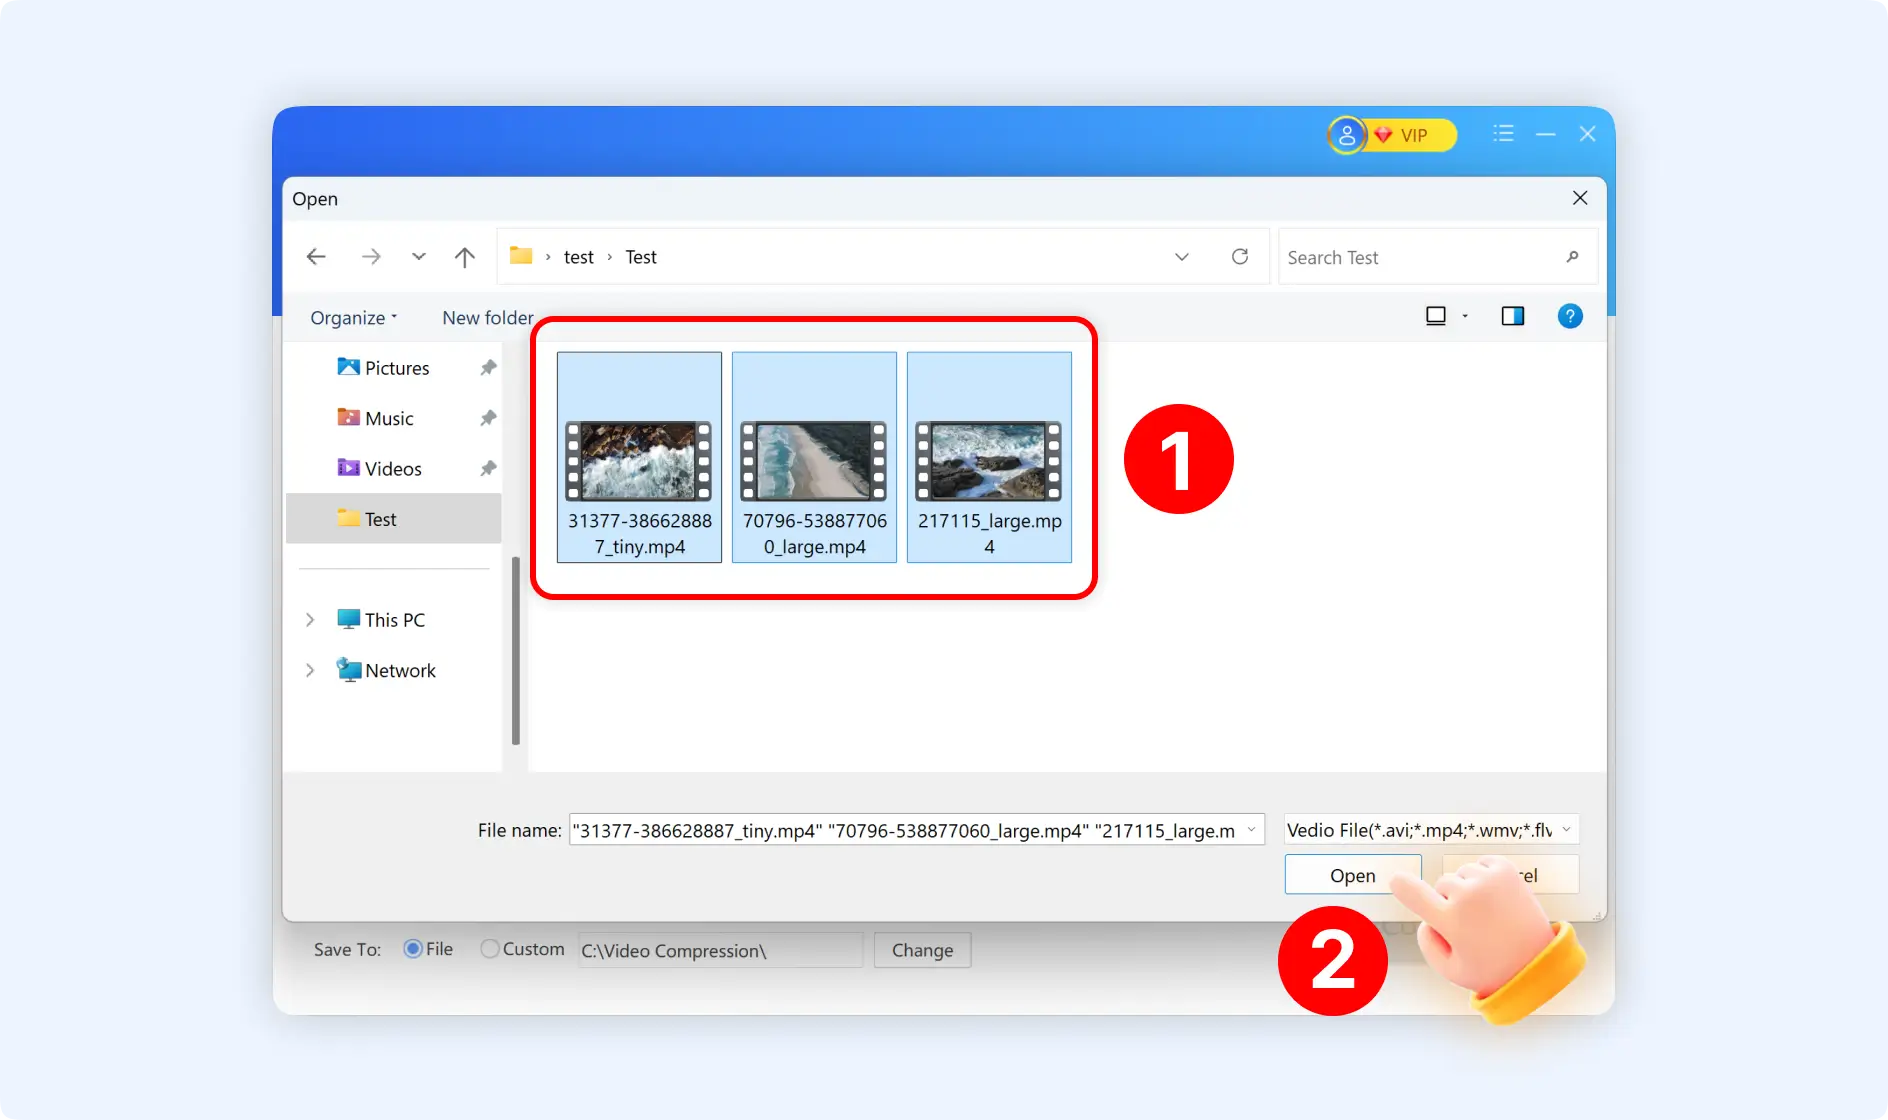
Tips: ZipKing also supports compressing multiple video files at one time. Select “Add” or drag and drop multiple videos into the panel.
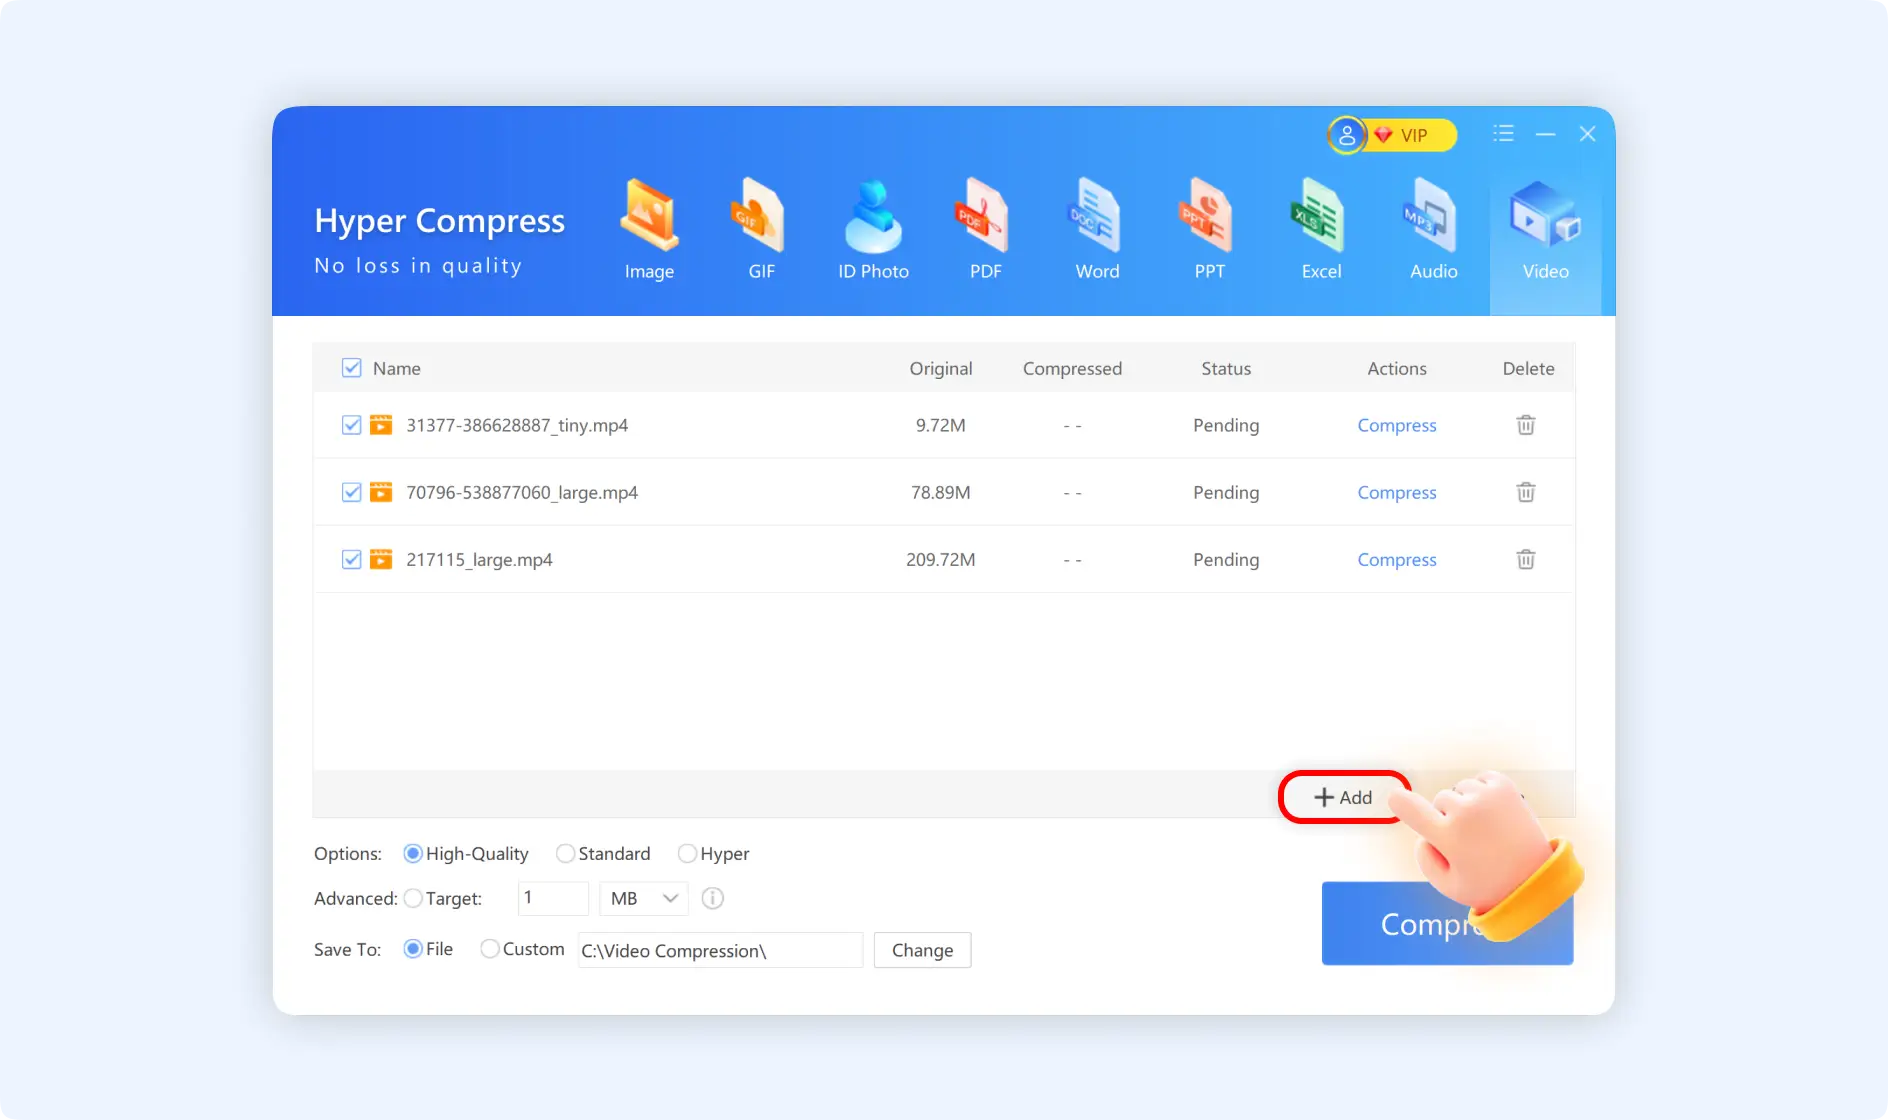
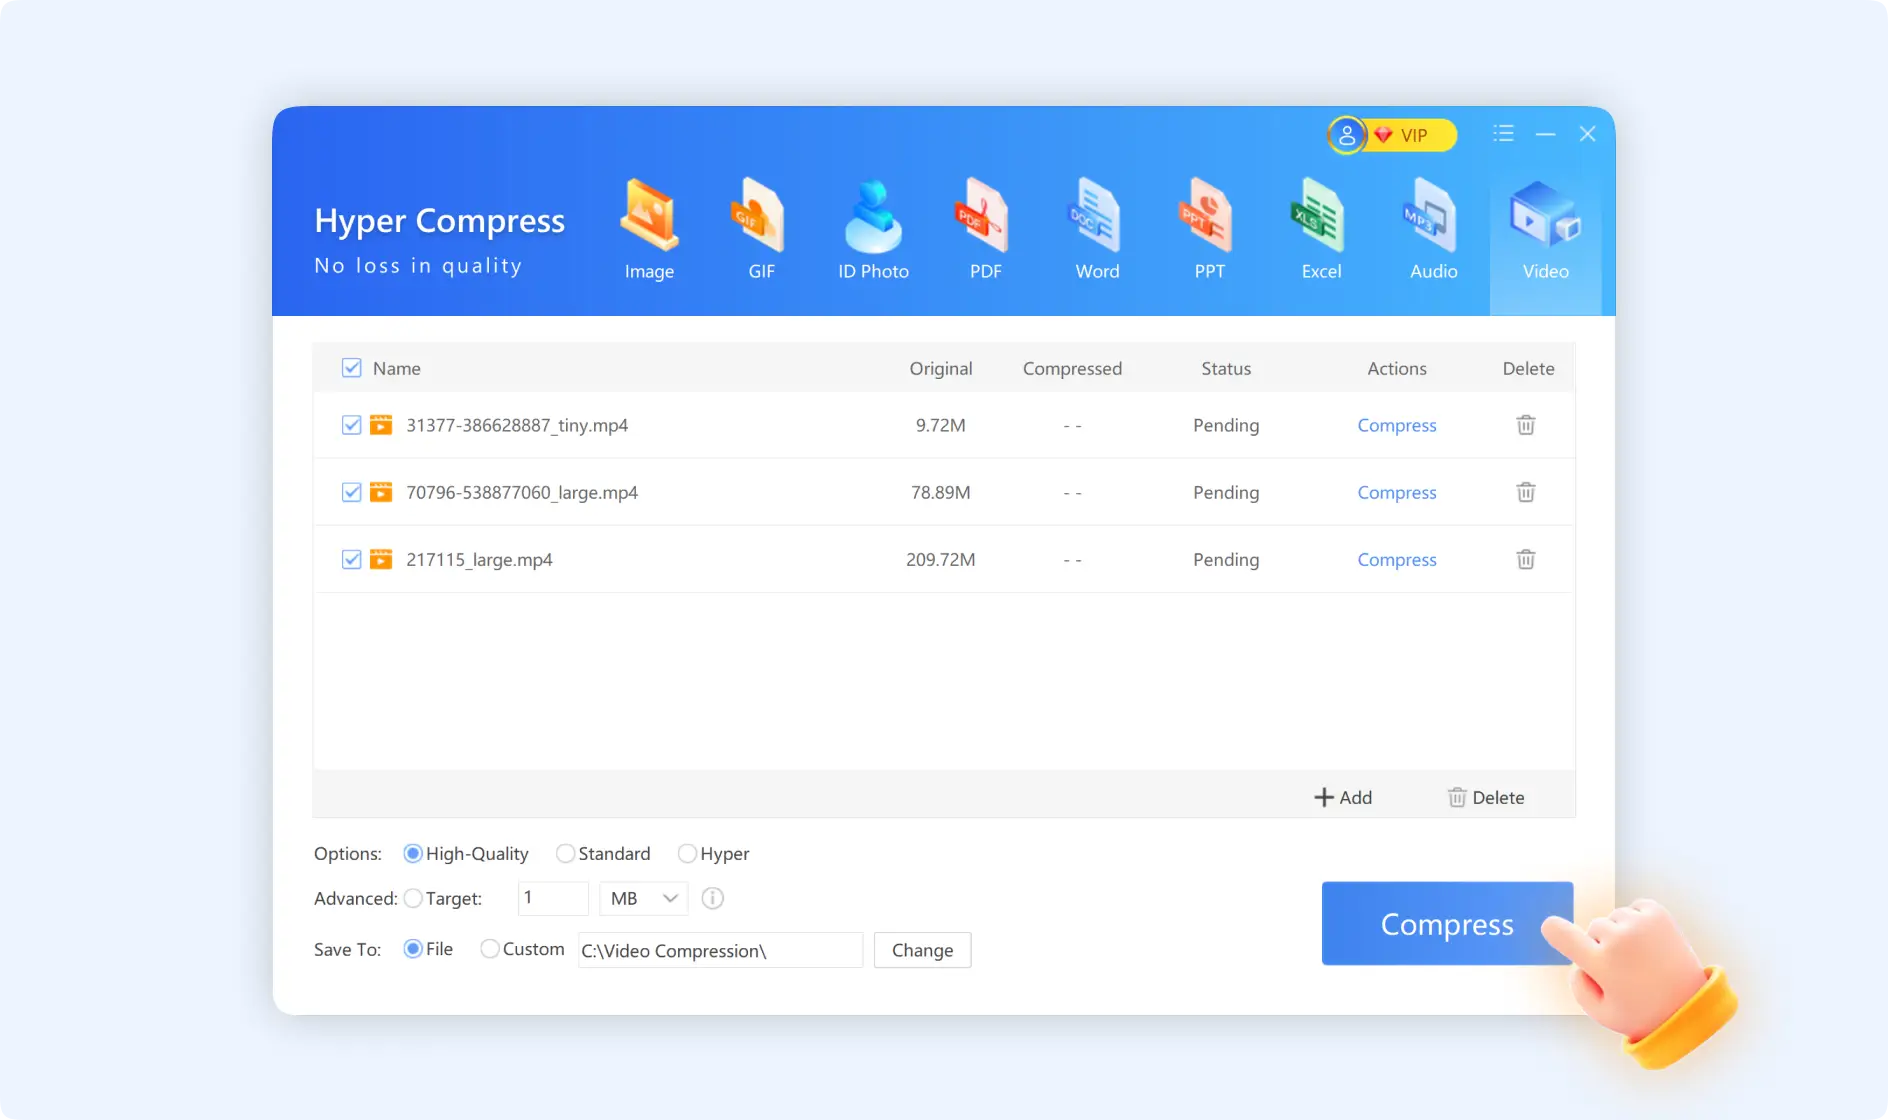
Step 2: Select your compression options. There are 3 types: High-quality, Standard, and Hyper. Besides, you can choose the advanced settings like setting your target file size and selecting the desired storage path.
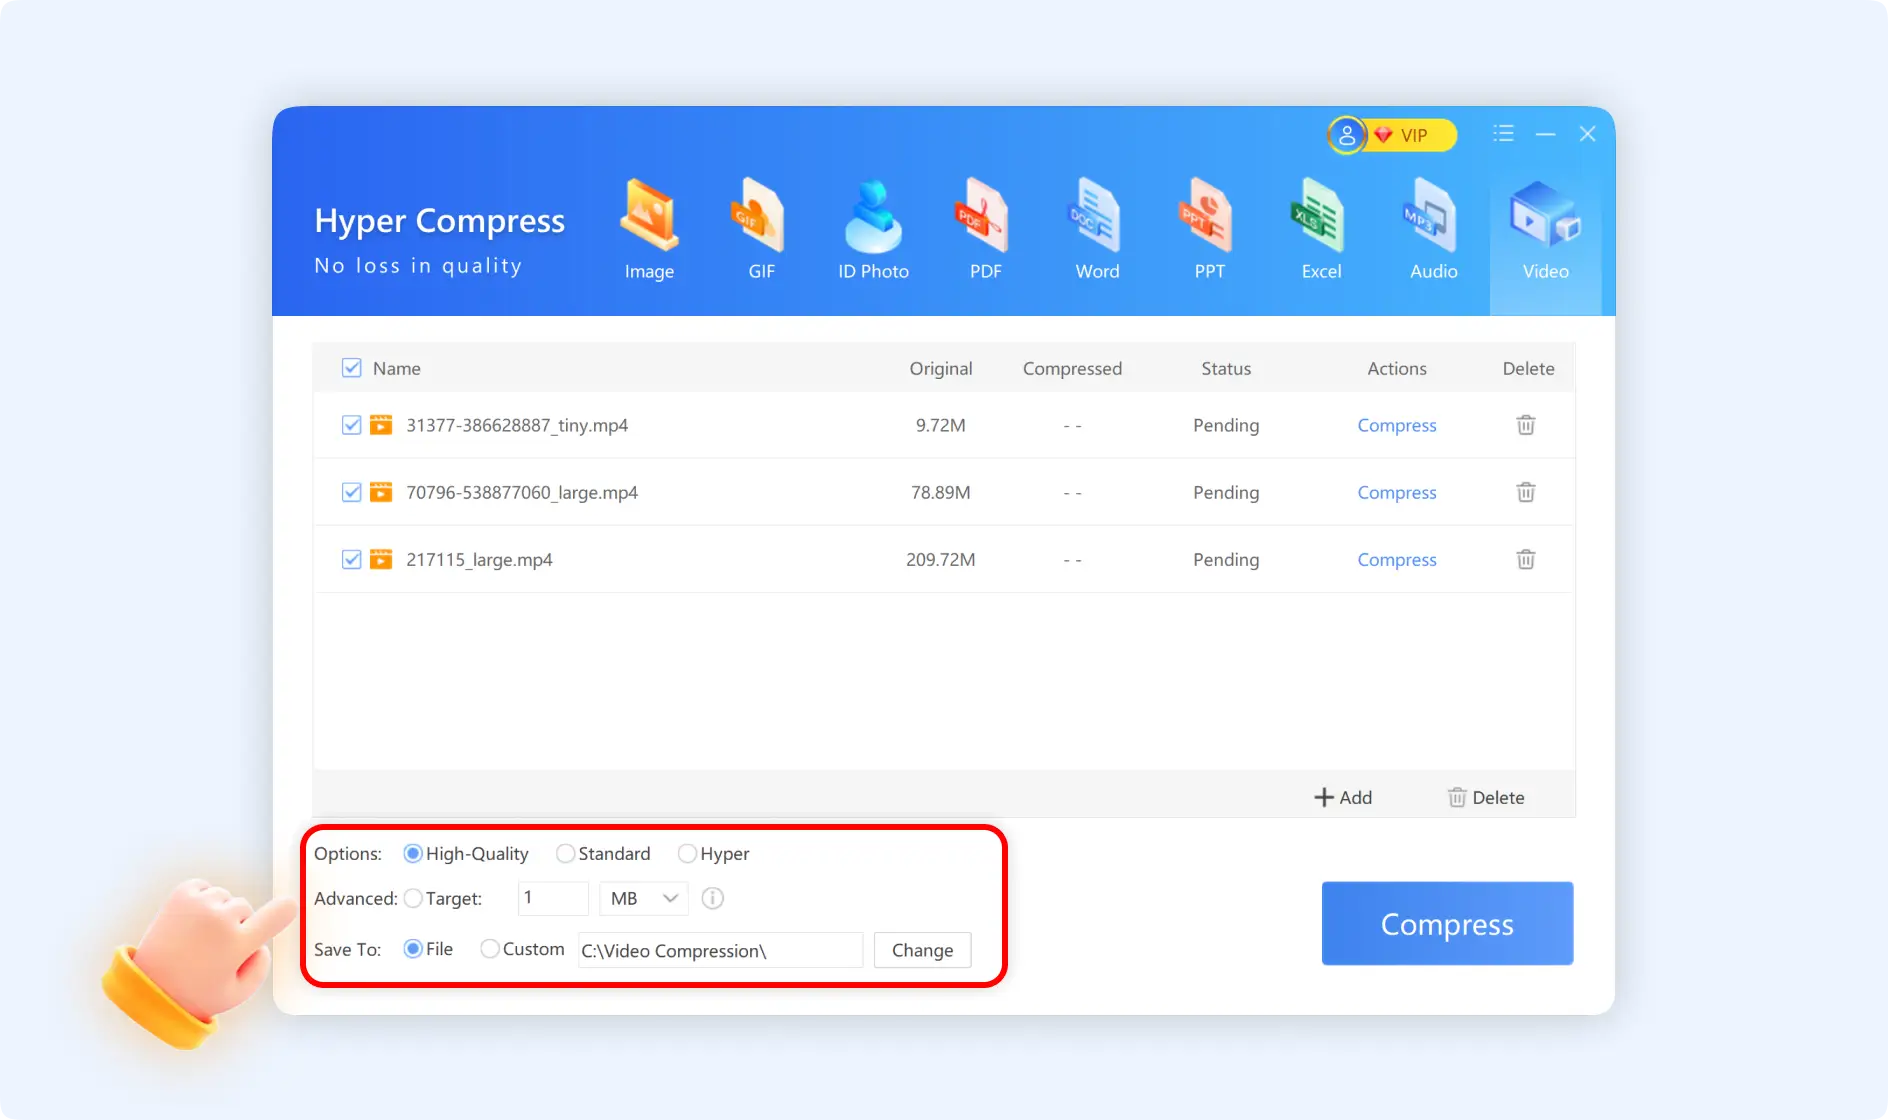
Step 3:After finishing the above setting, click“Compression”, ZipKing will begin to compress video files automatically in seconds.
Method 2: Guide to Compress Video With ZipKing Right-Click Windows
There are 3 situations when compressing videos by ZipKing's right-click windows.
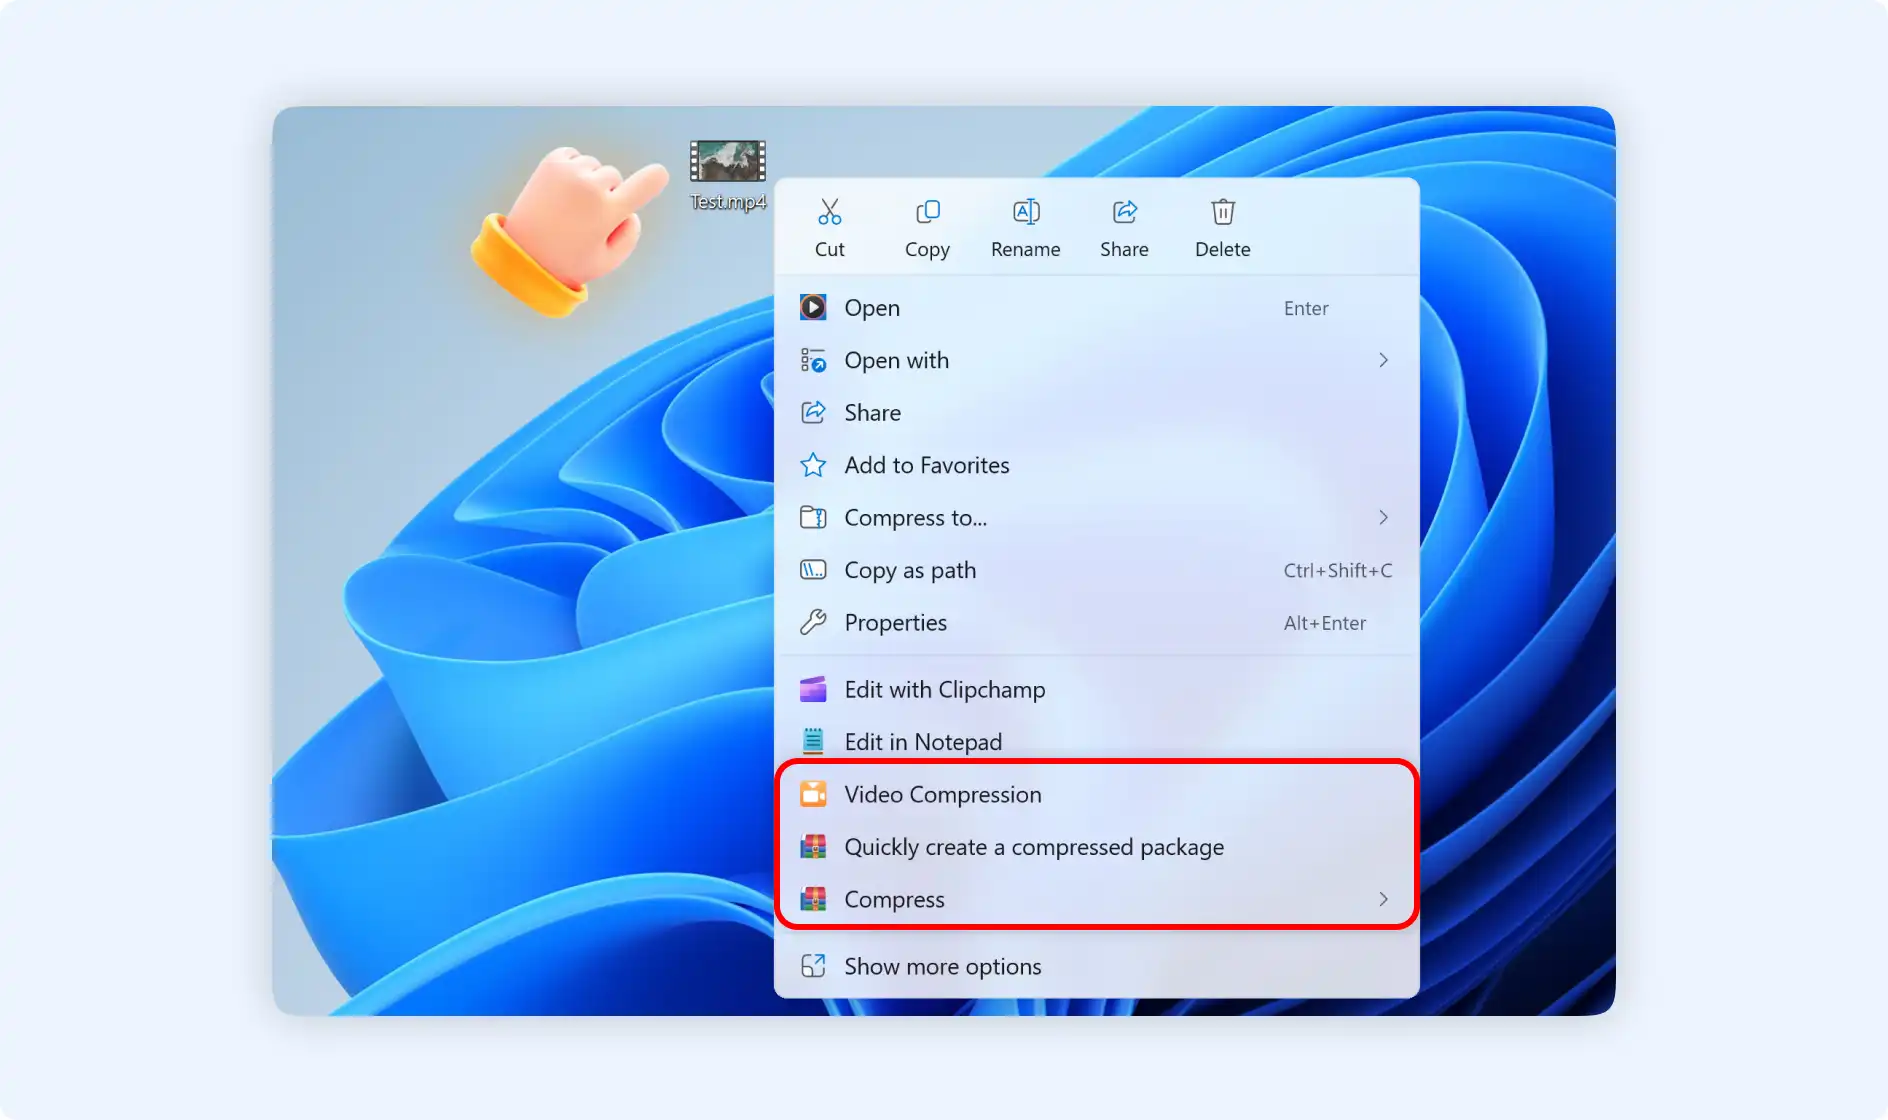
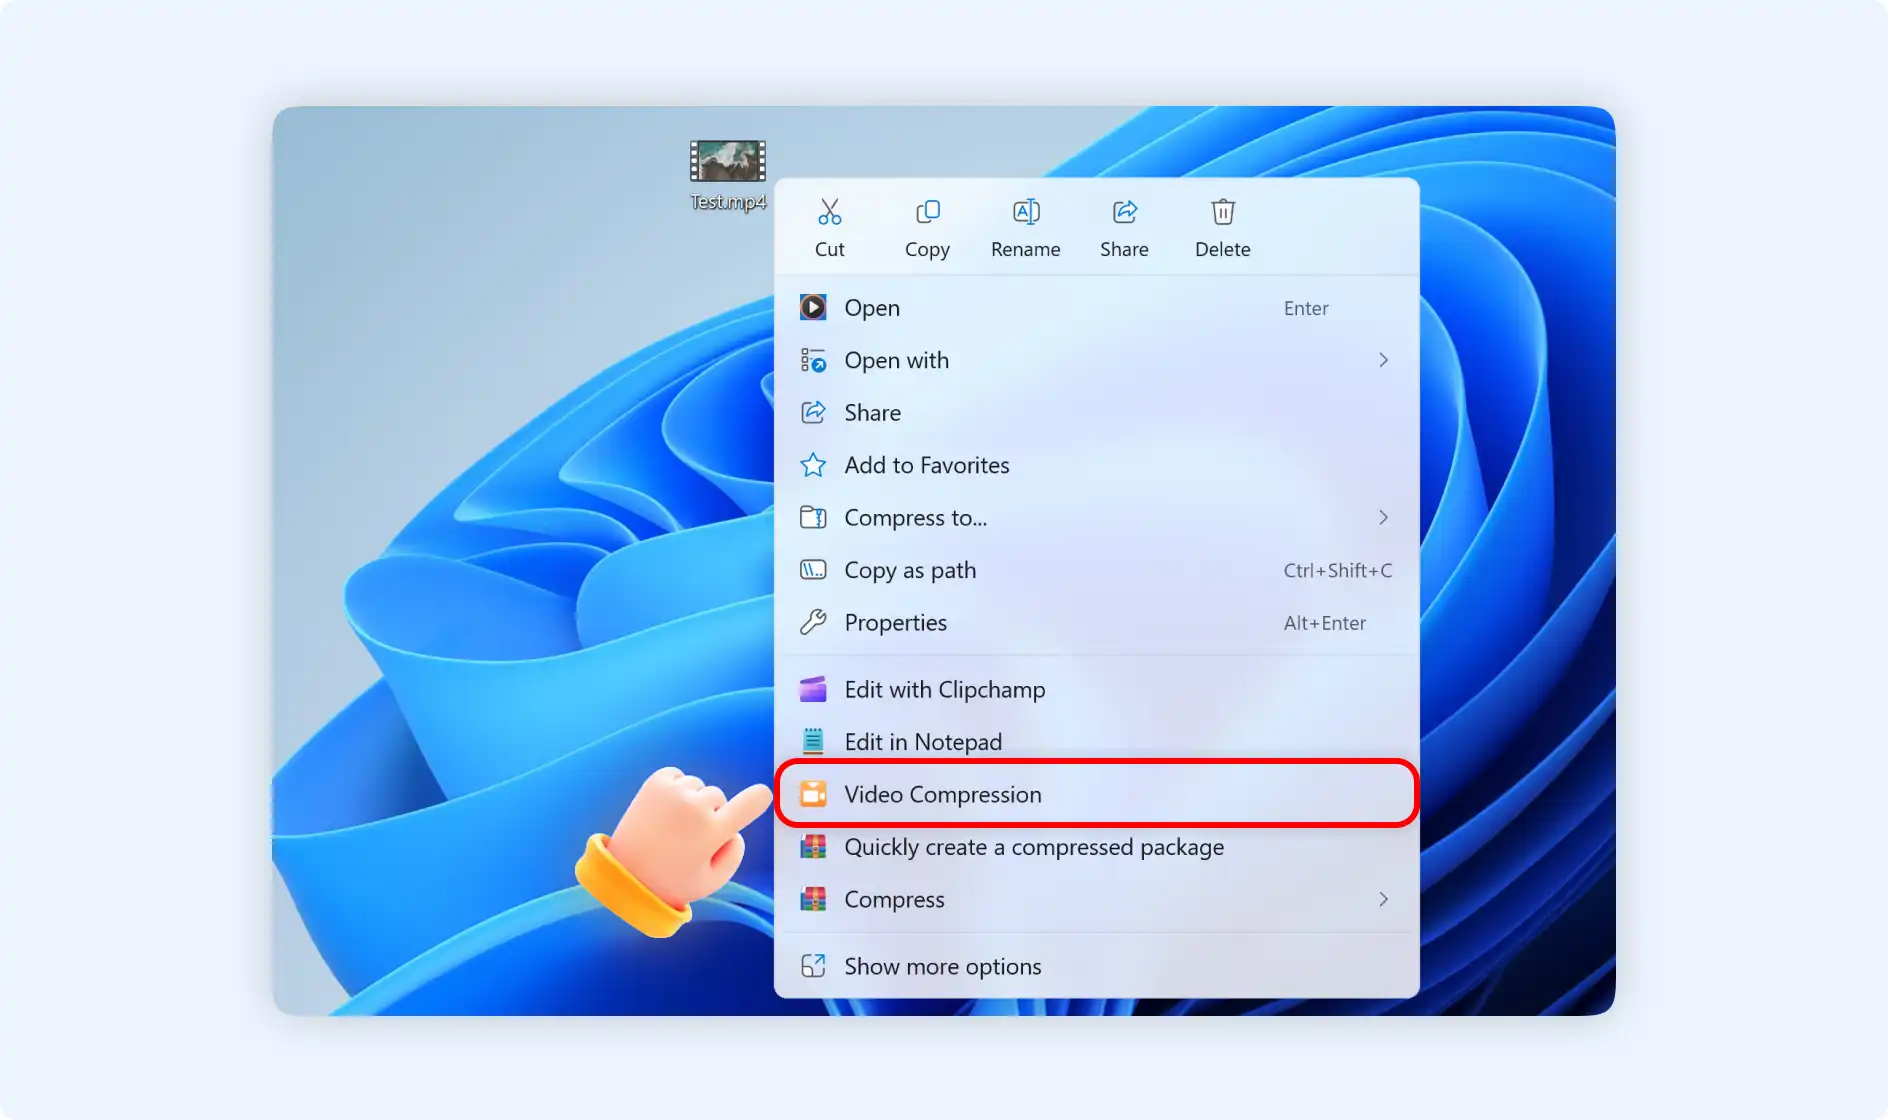
Situation 1: Right-click to choose"Video Compression"
Step 1: Find your single or batch video files, right-click to select"Video Compression".
Step 2: You will enter into Hyper Compress mode for the Video interface. Here you can "Add" more video files or delete unwanted video files.
Situation 2: Right-click to choose" Quickly create a compressed package"
Step 1: Locate your video files, right-click to choose"Quickly create a compressed package".
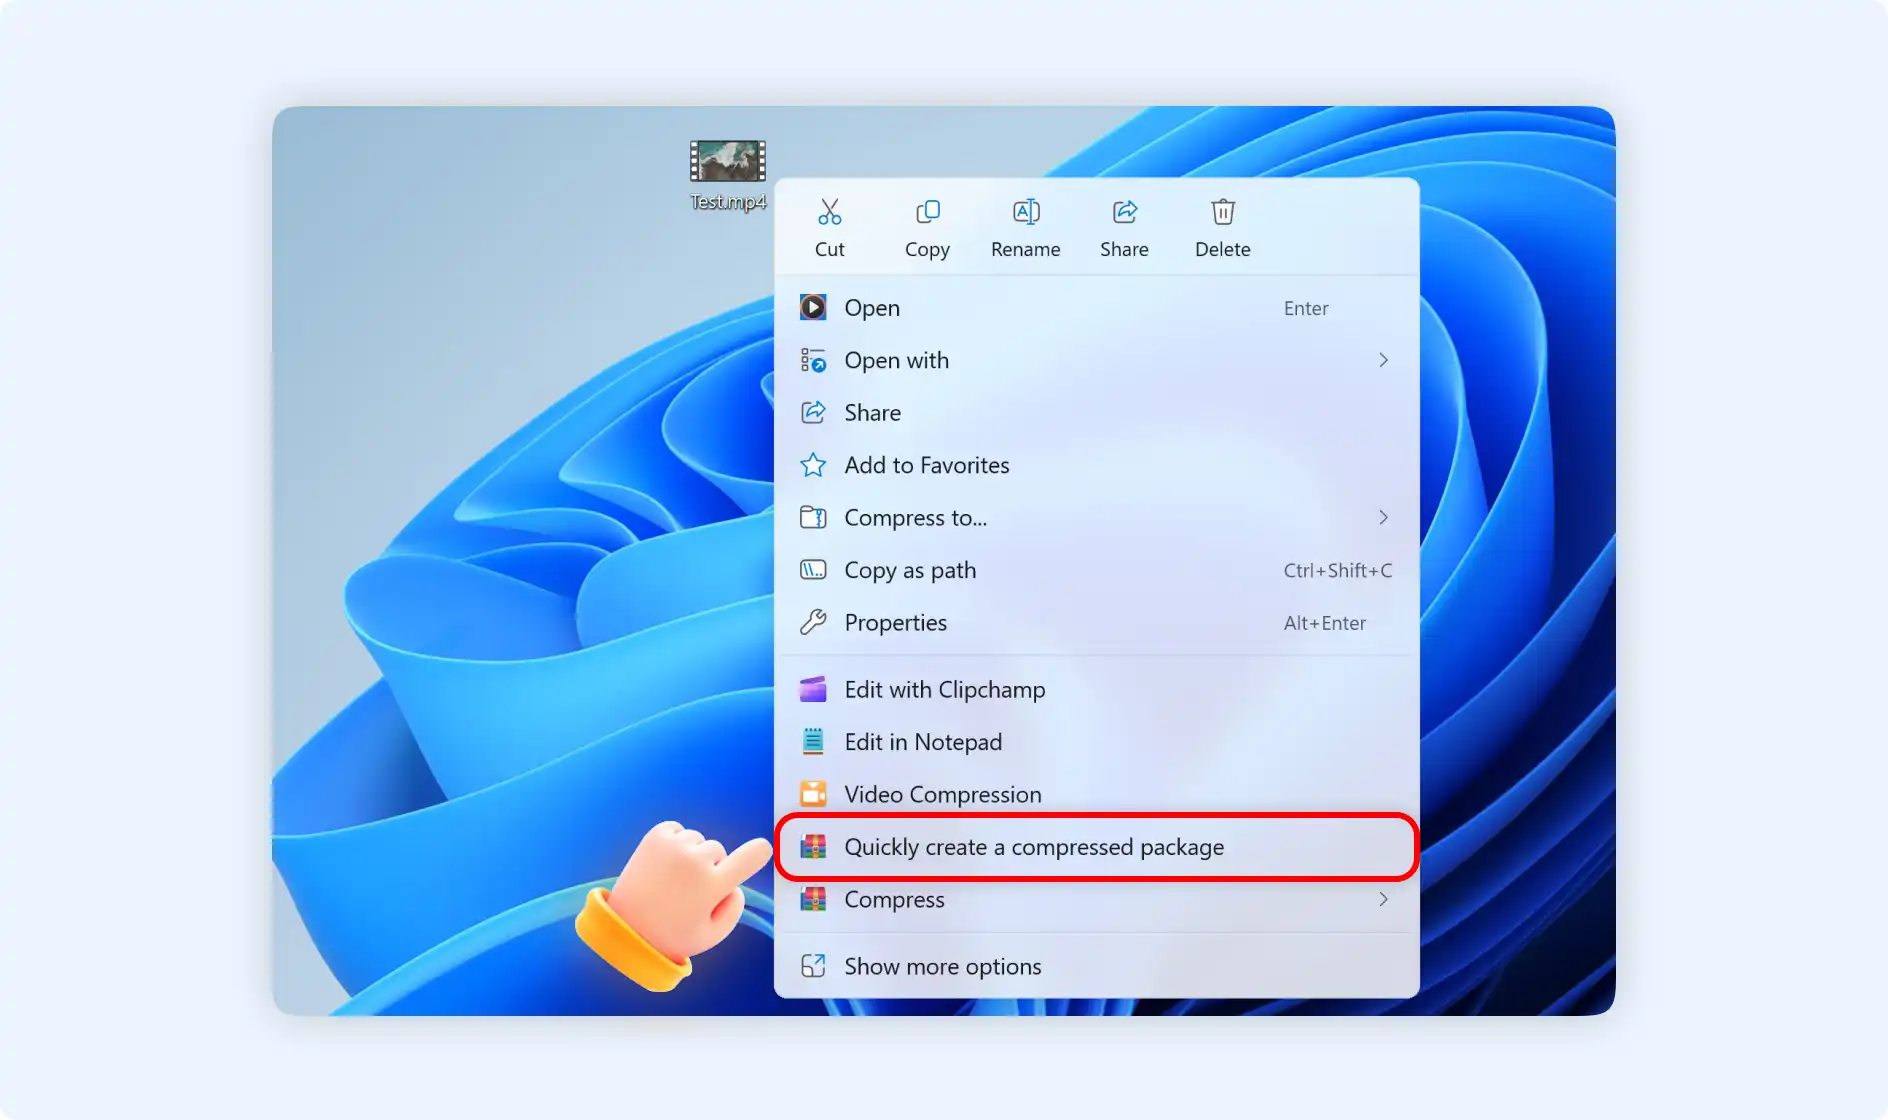
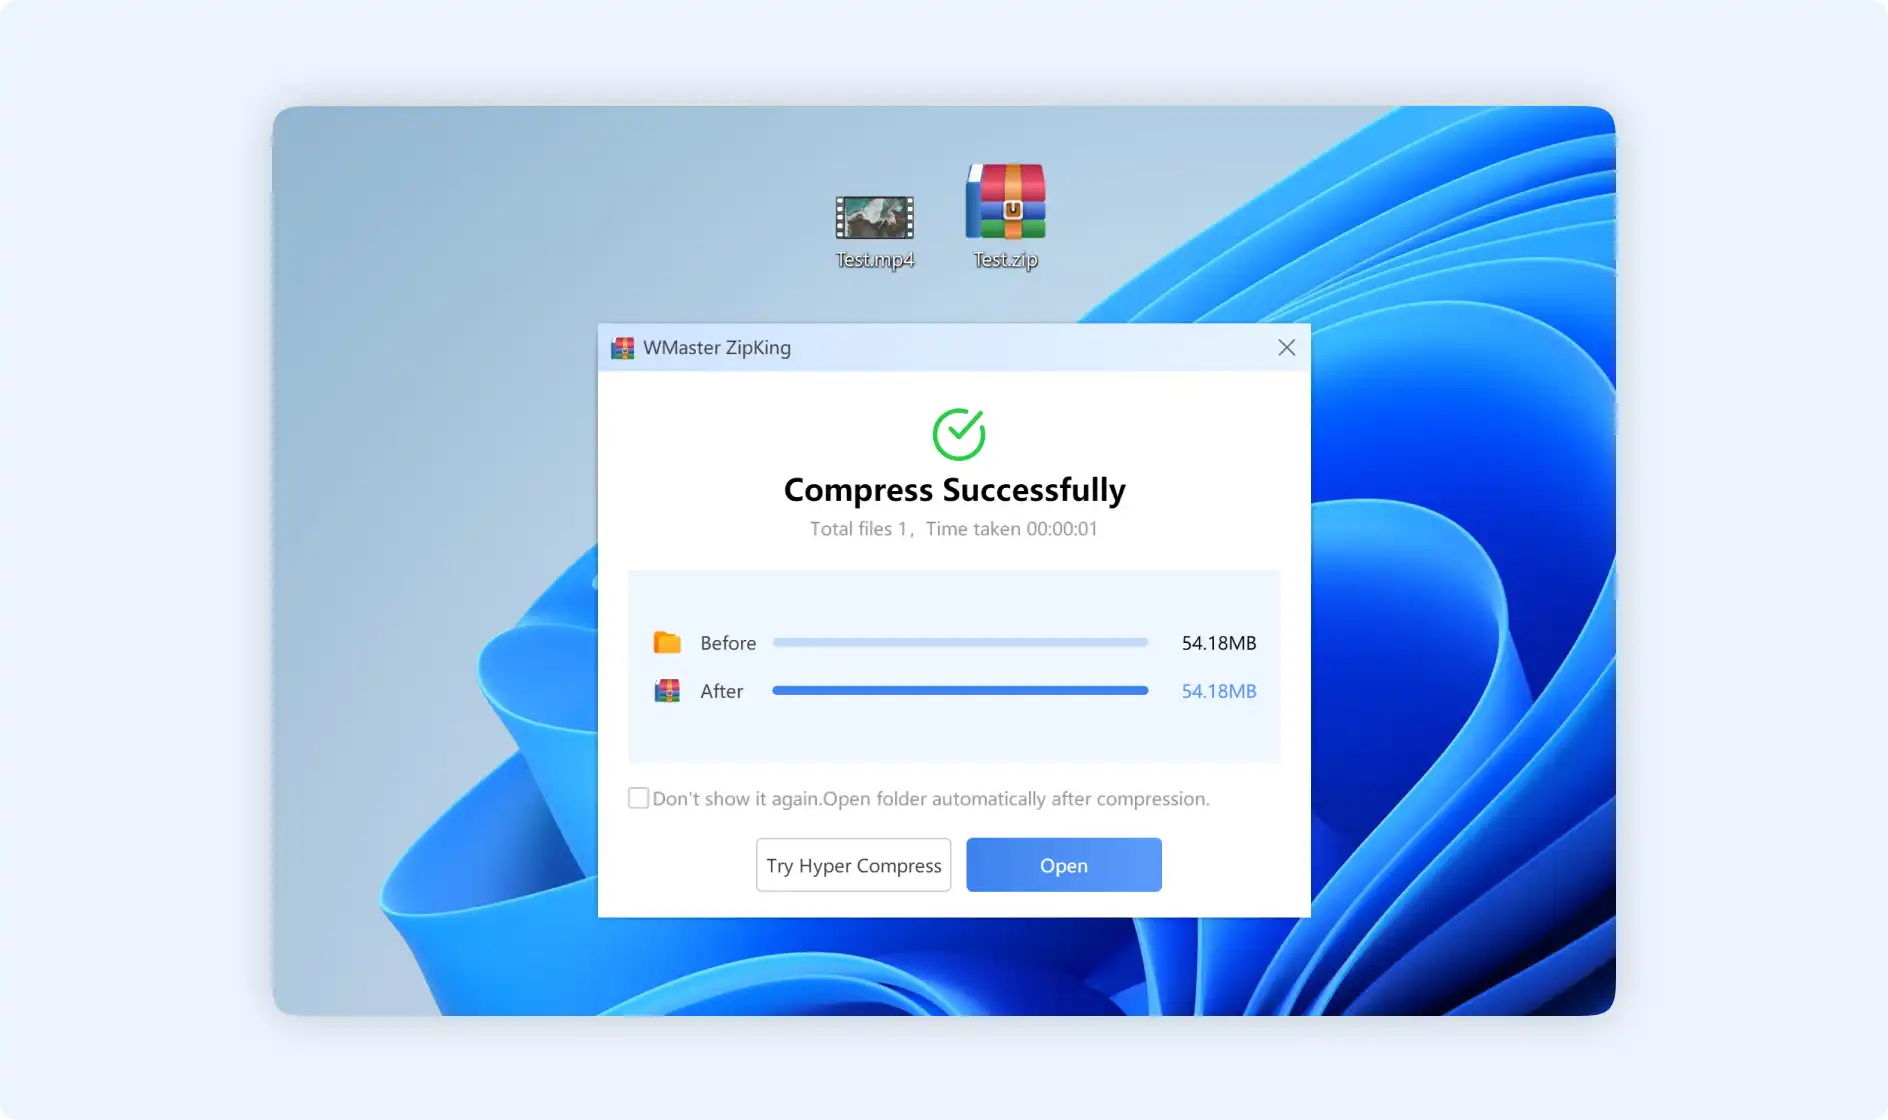
Step 2: Then you will go into the smart compression mode for these video files, ZipKing will compress video files automatically in seconds, and show you you have compressed successfully.
Situation 3: Right-click to choose "Compress"
There are 2 options if you right-click to choose"Compress" mode.
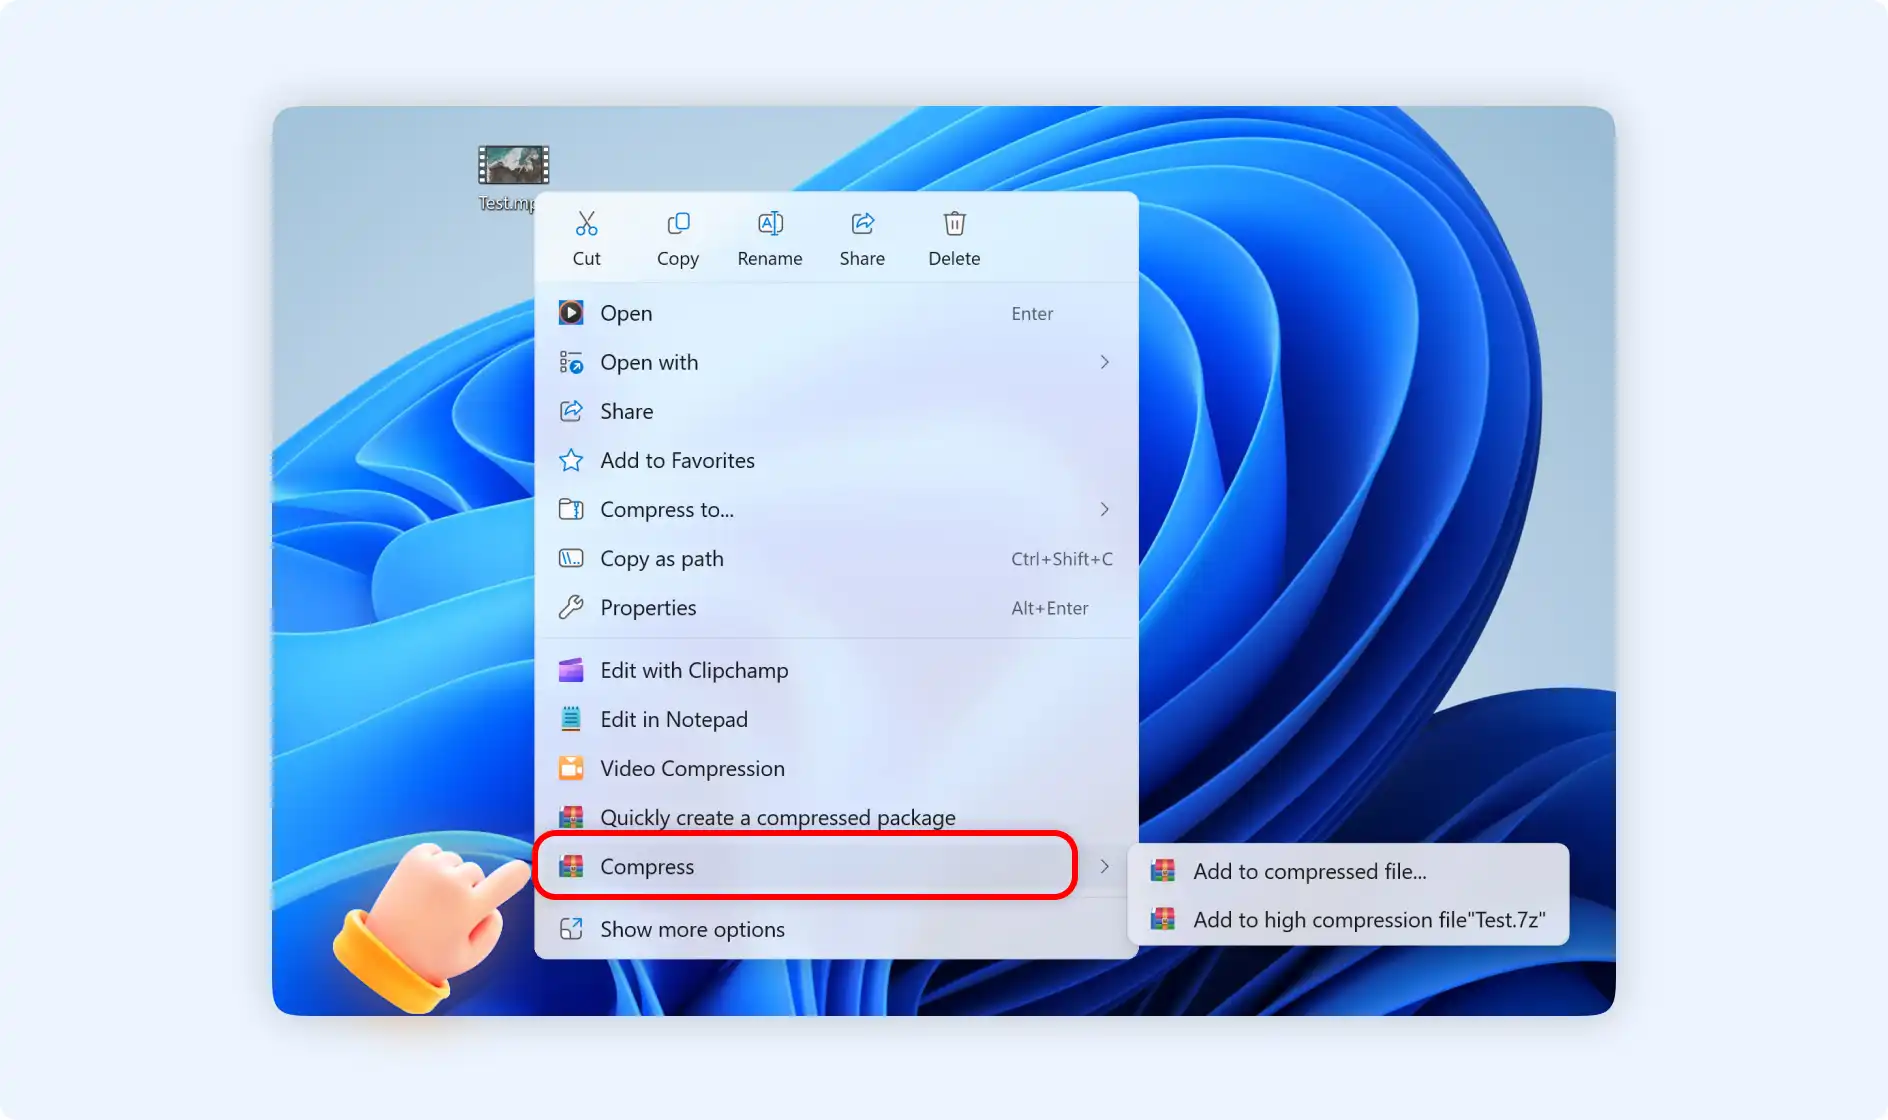
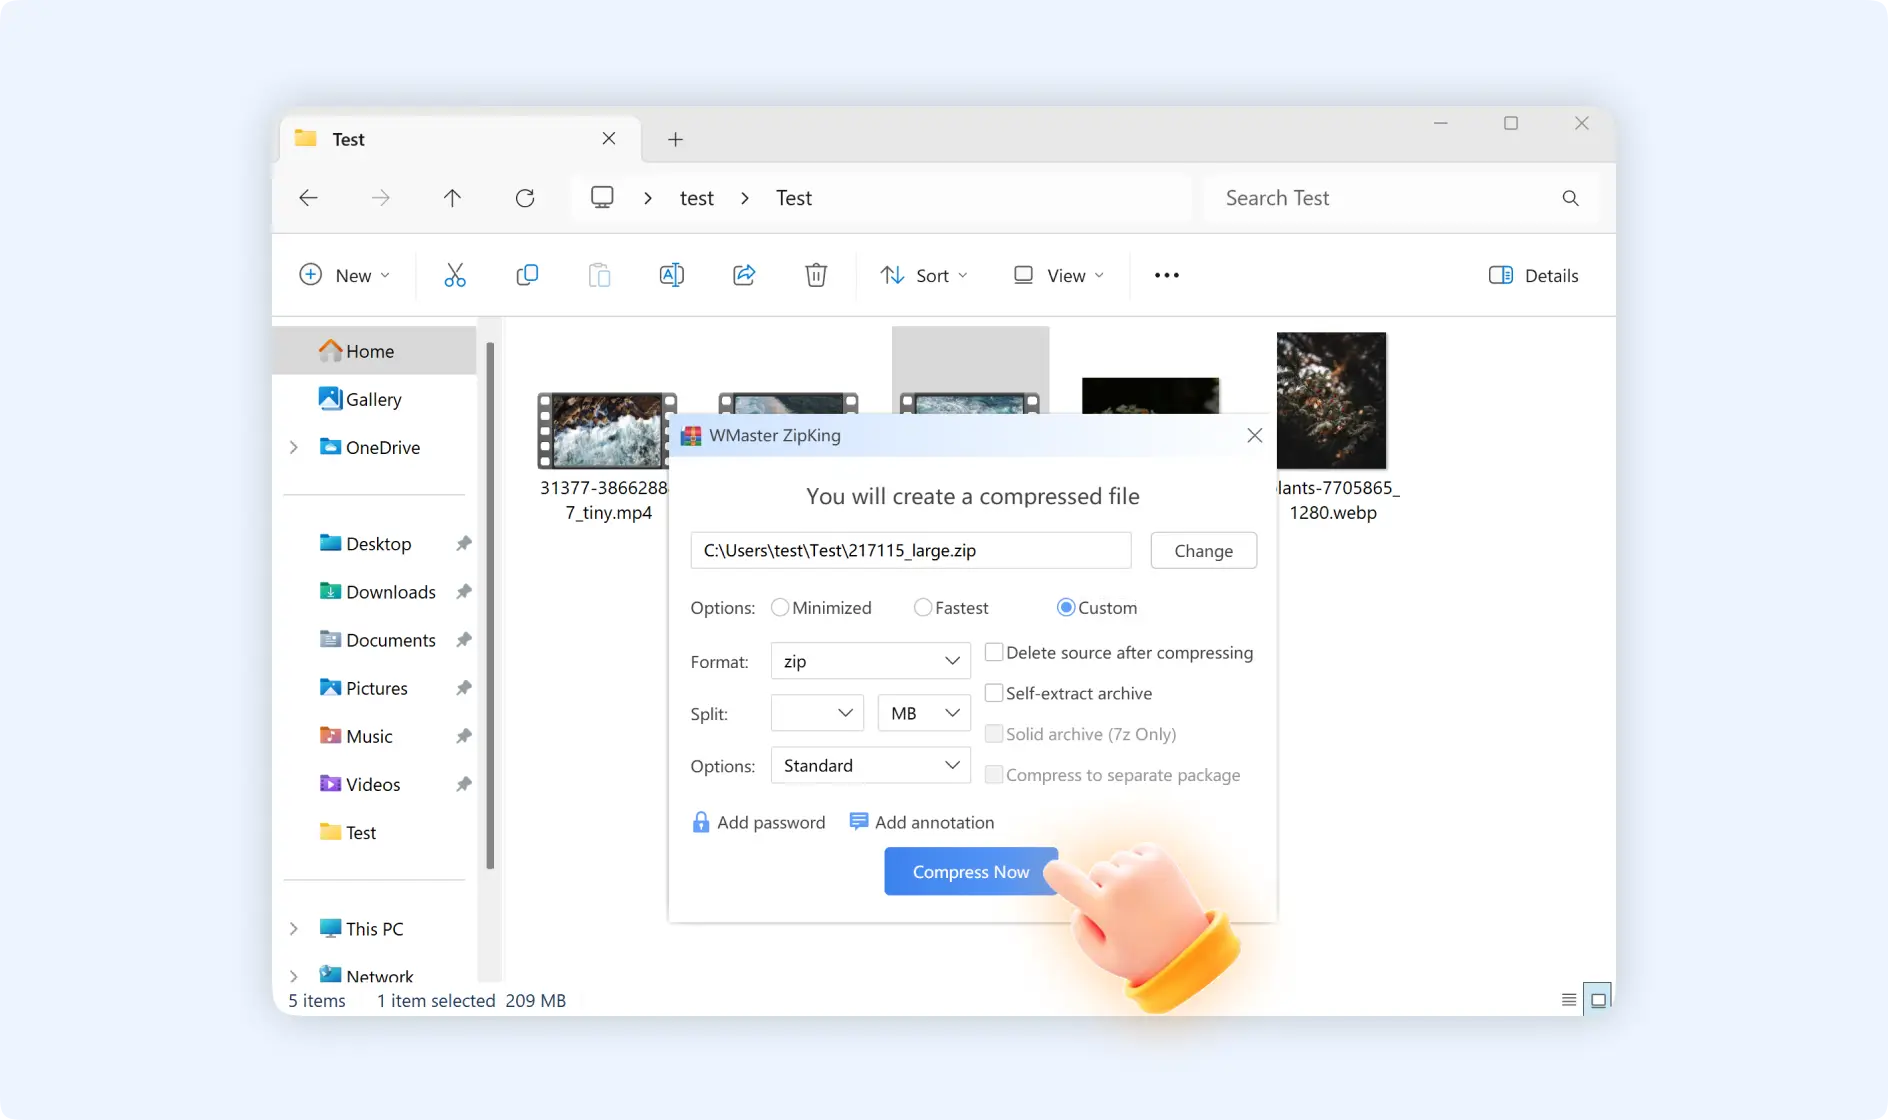
Option 1: Directly click "Add to compressed file". You will enter into a pop-up window prompting you to create a compressed file. You can do the basic settings to perfect your video file compressing, then click“Compress”.
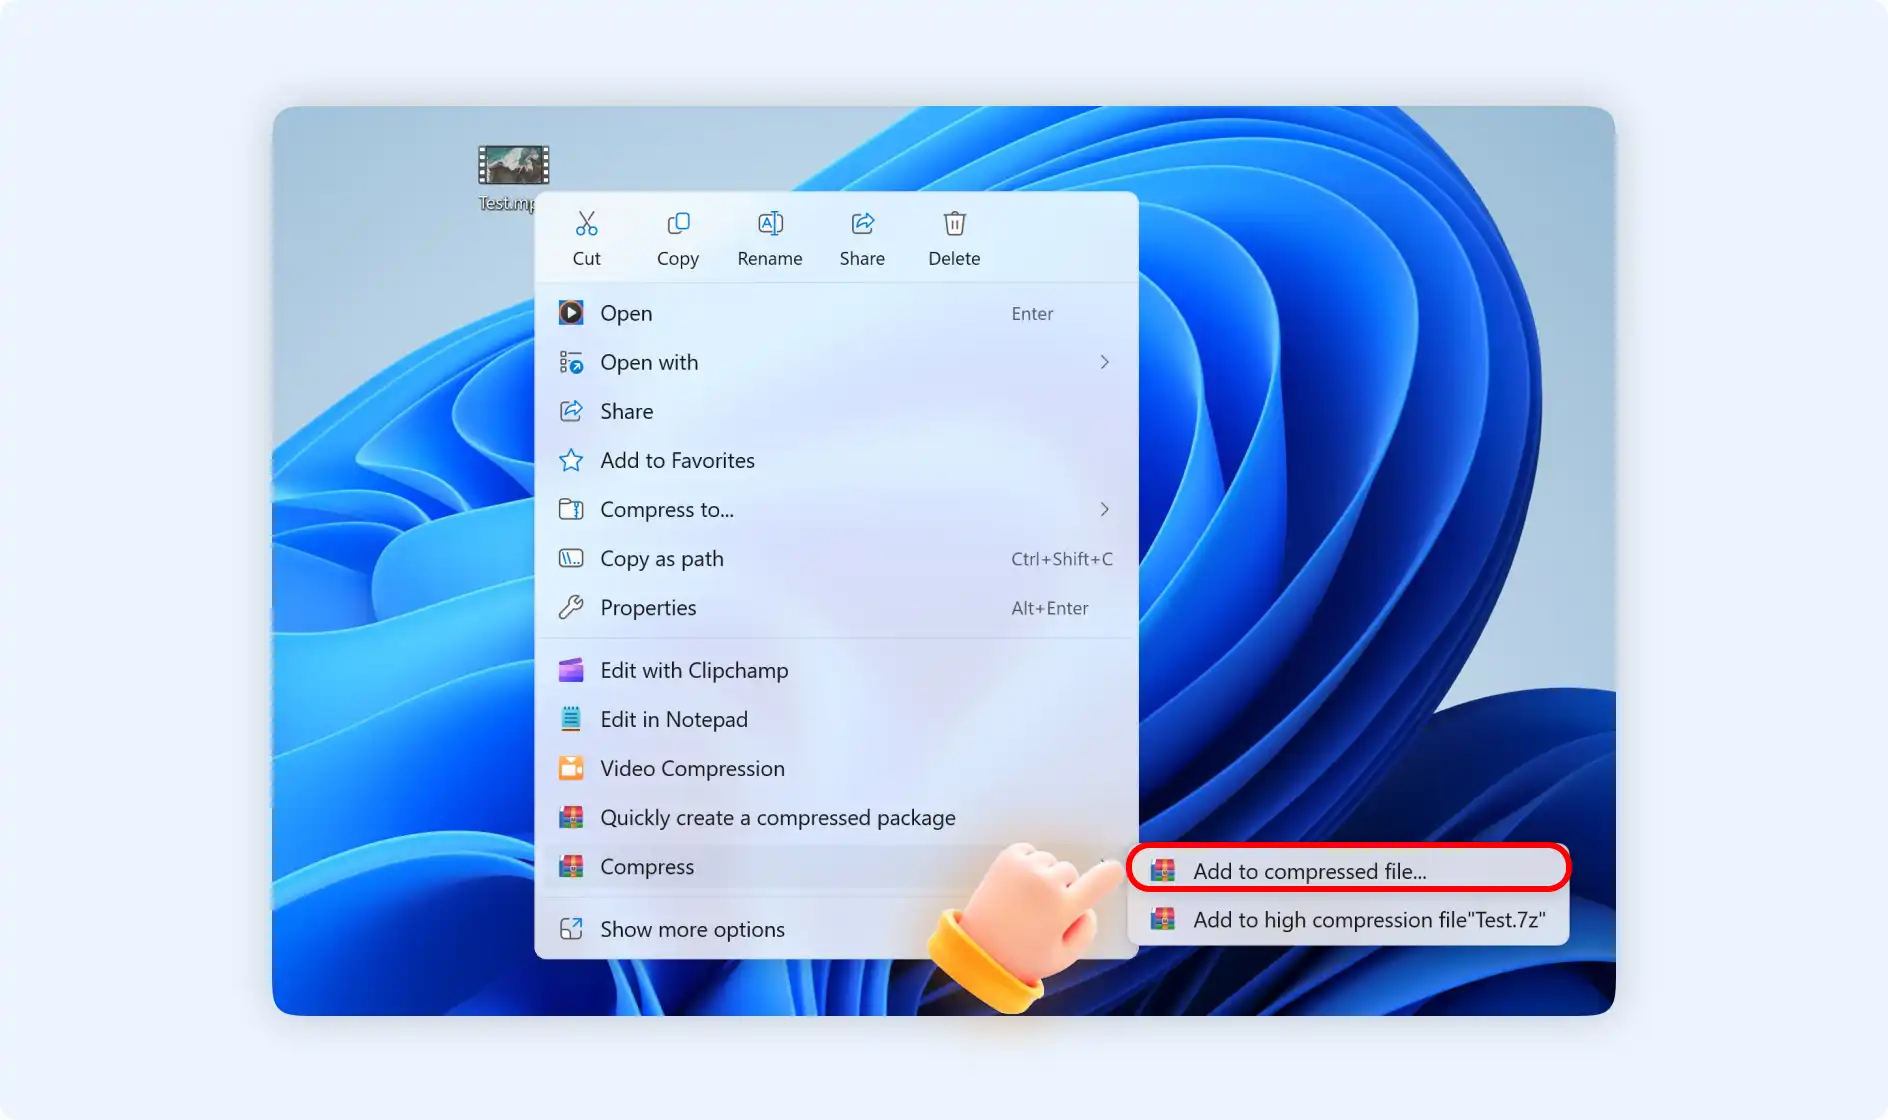
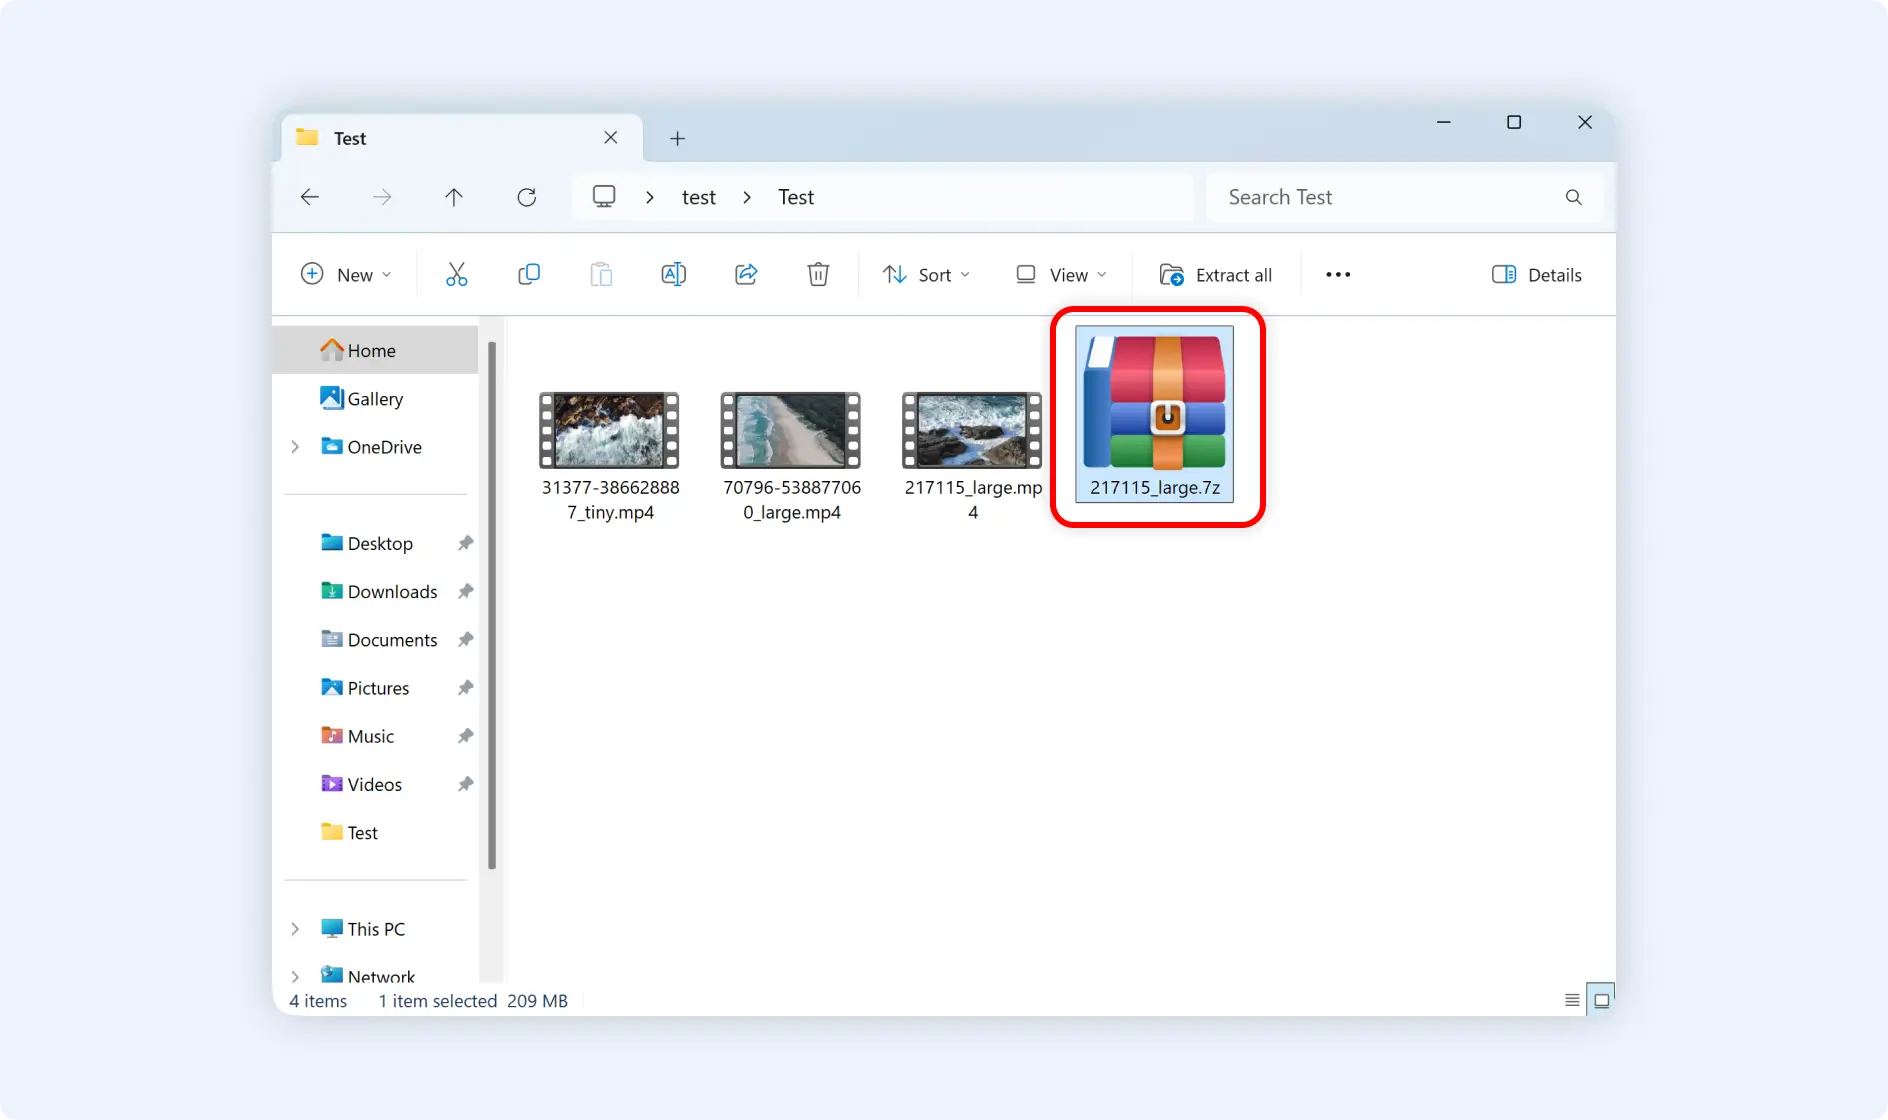
Option 2: Directly click" Add to high compression file [file name].7z, you will create a 7z archive for these compressed video files.