If you encounter size limits when transferring PDF files by email, or if your computer storage space is insufficient to store many PDF files, you may need a compression tool to help shrink the PDF file size. Try WMaster ZipKing to decrease PDF file size with ease.
Guide to Compress PDF Files by ZipKing
There are 2 ways to compress PDF files. No matter what your choice is, you must ensure that you have downloaded and installed WMaster ZipKing firstly.
Method 1: Guide to Compress PDF files with ZipKing
Step 1: Double-click ZipKing on your PC to launch it.
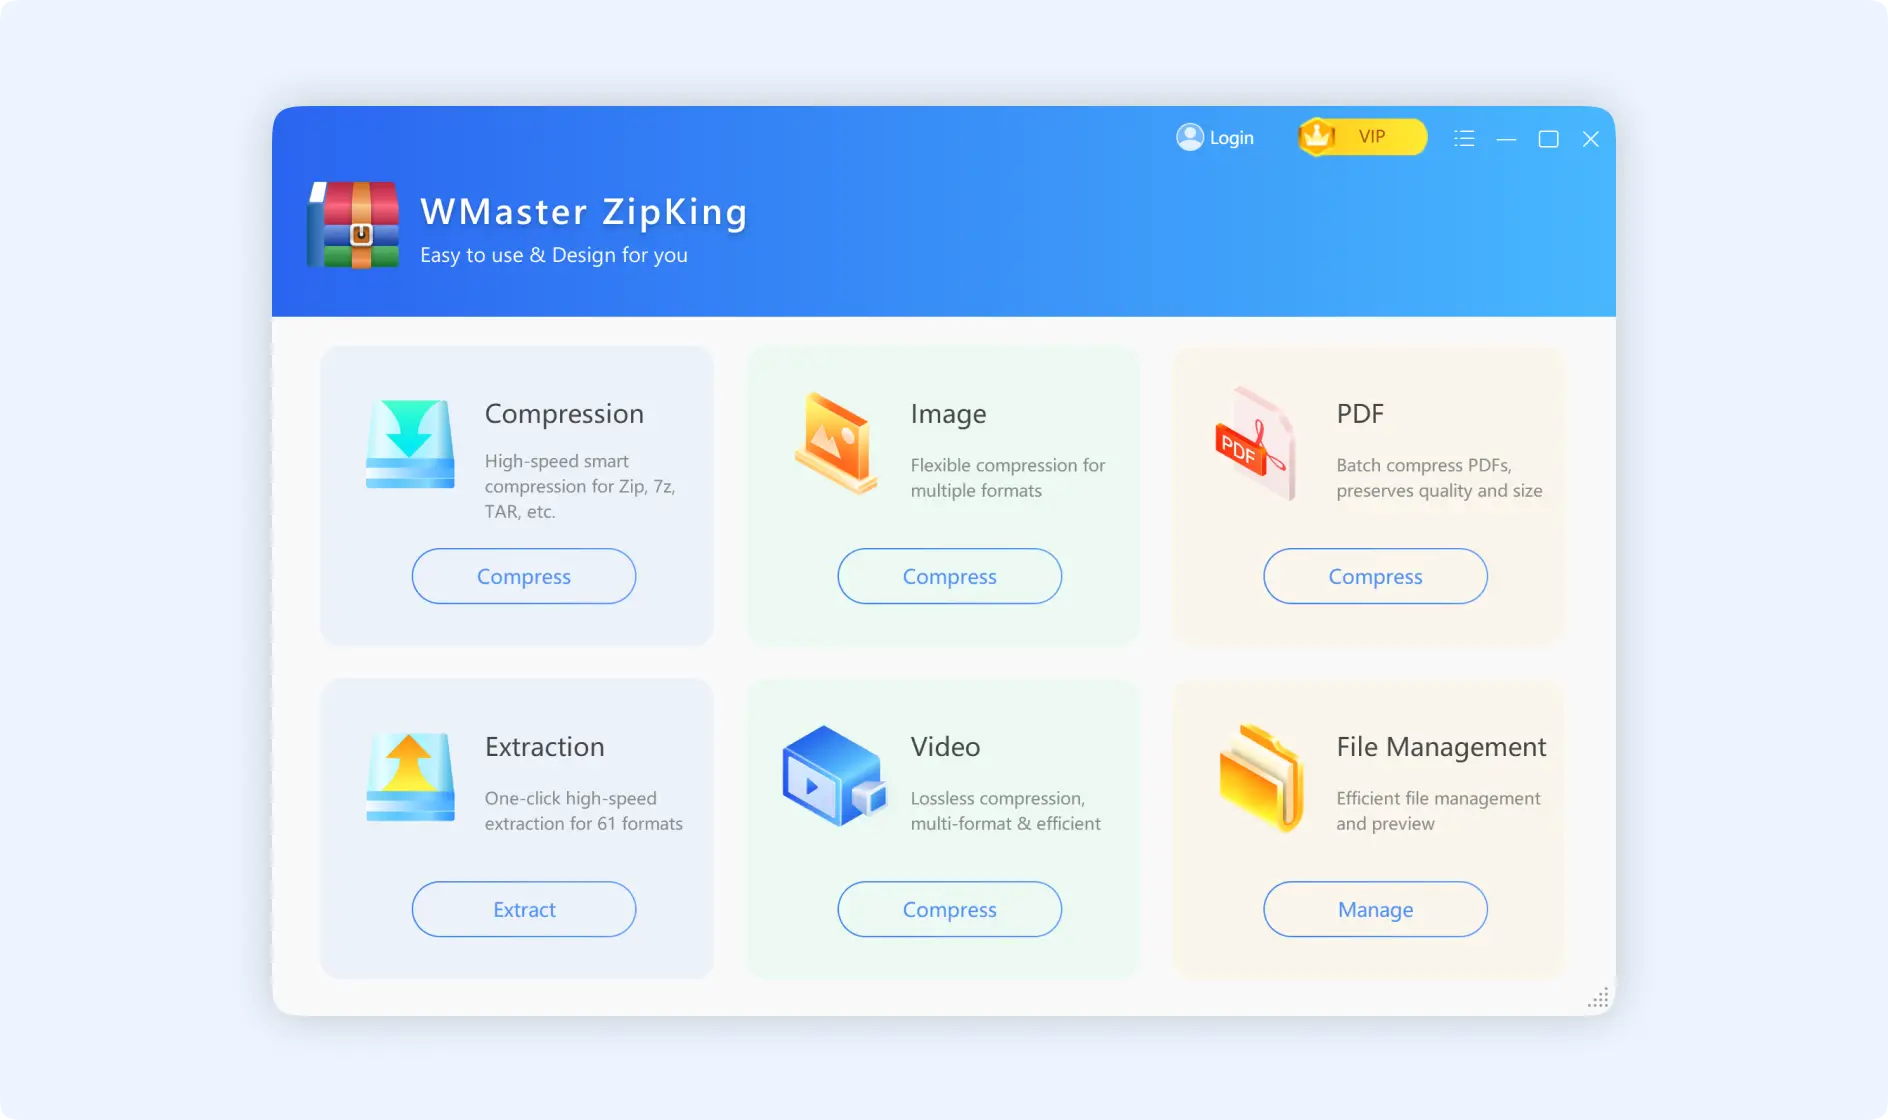
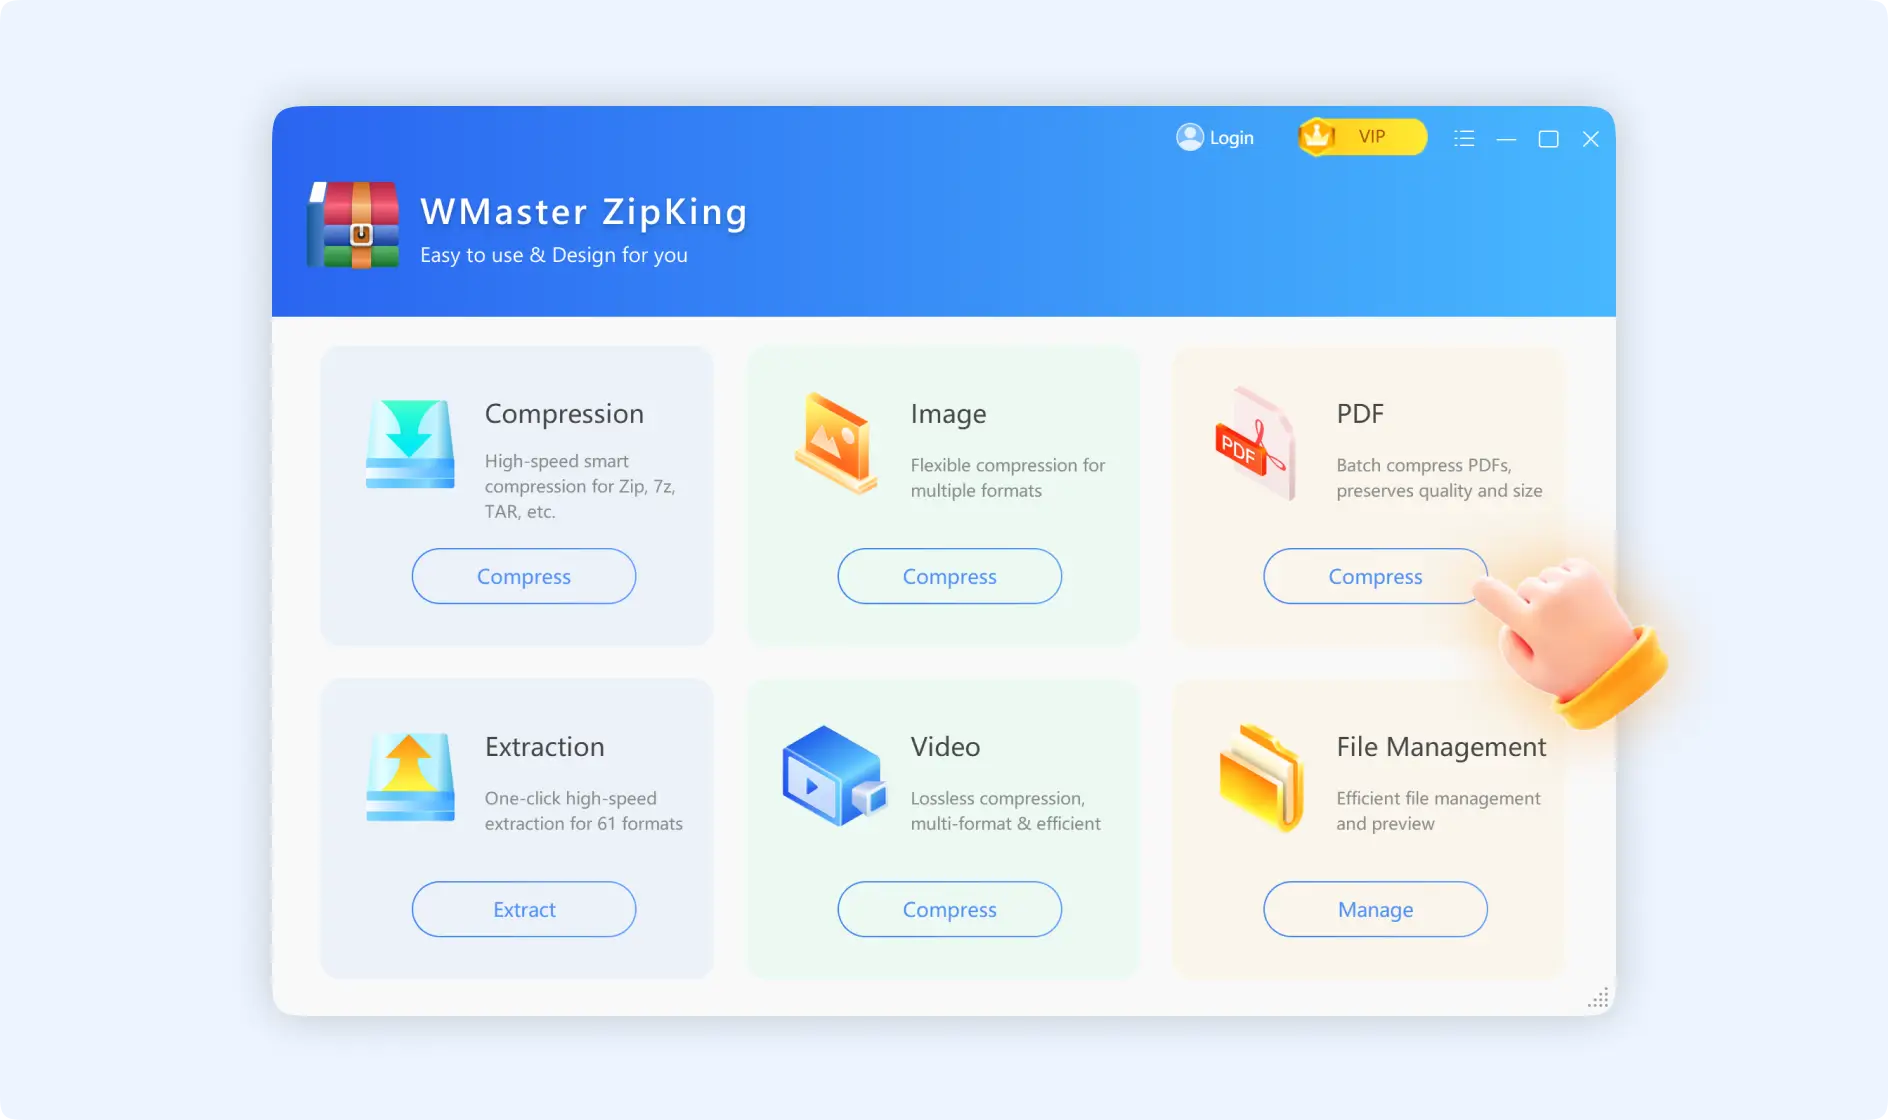
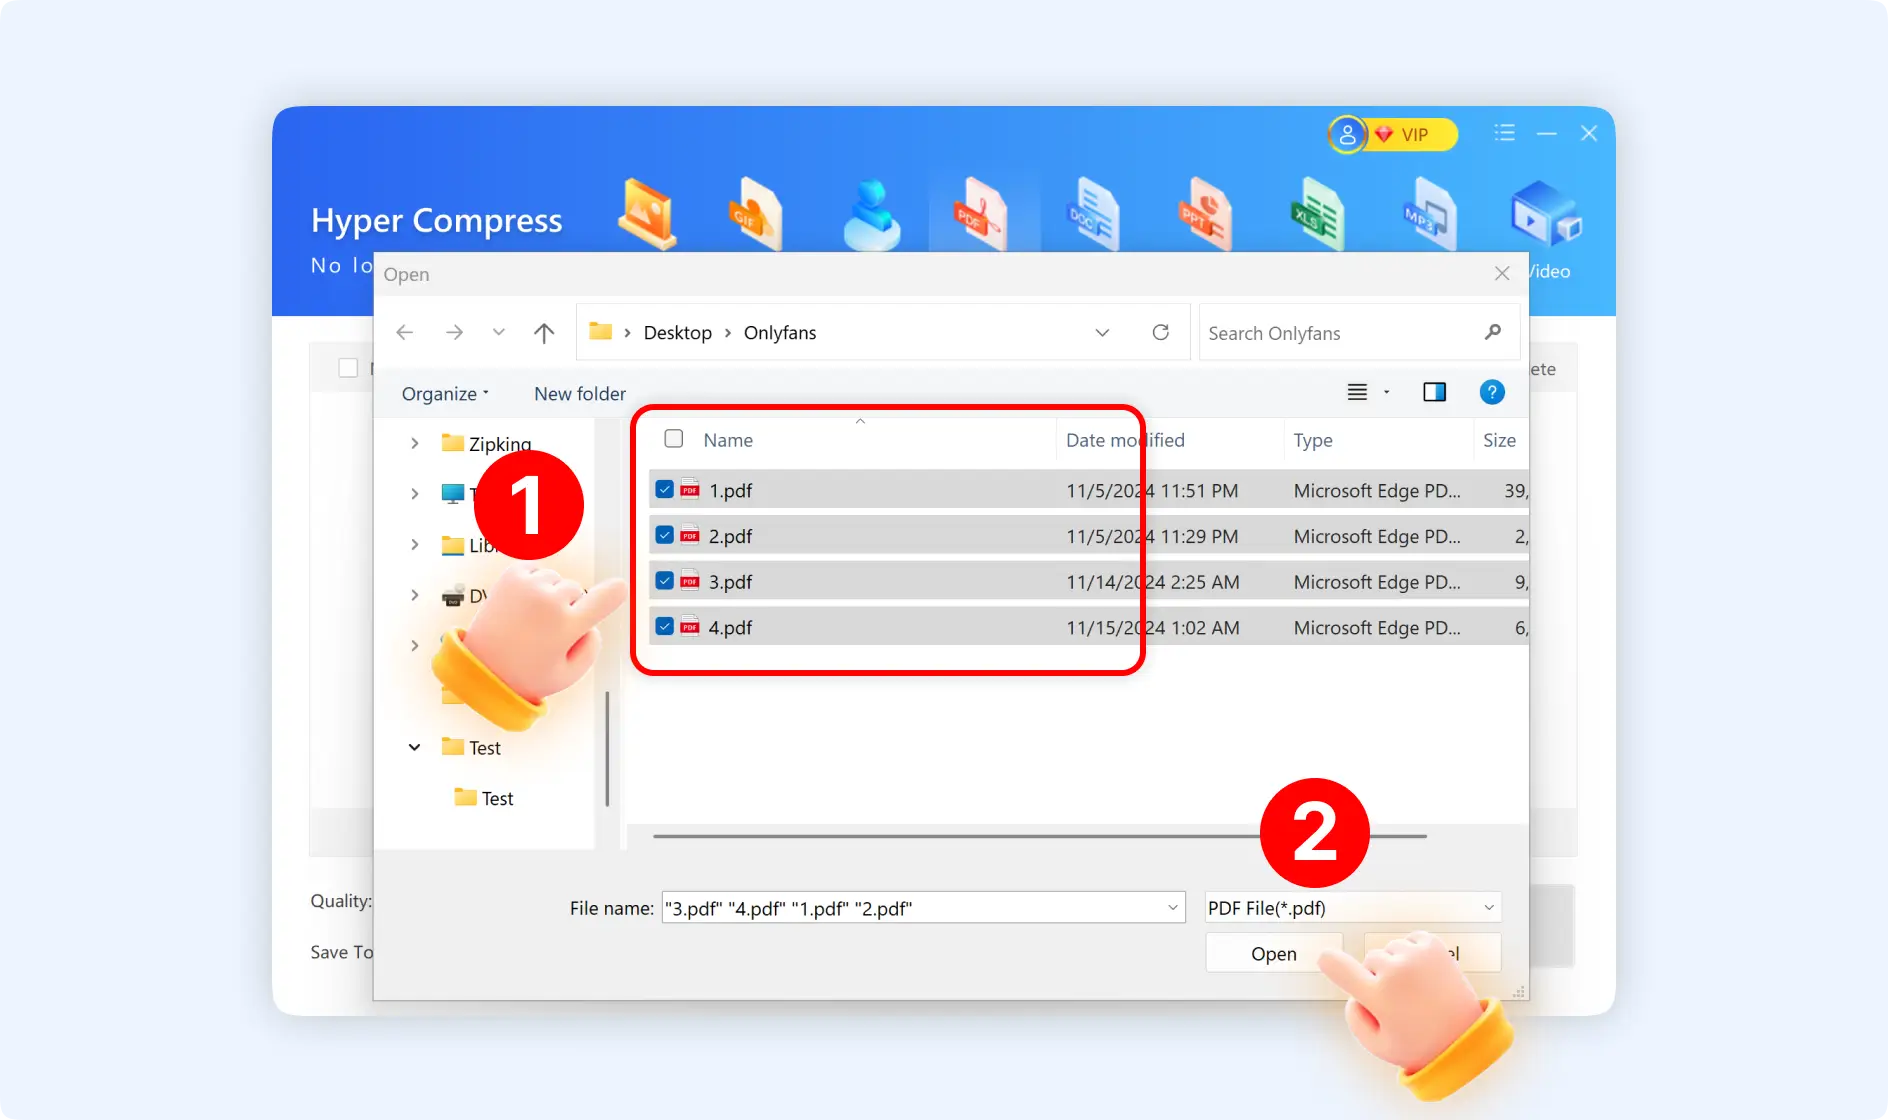
Step 2: Click “PDF Compress” to upload the desired PDF file or drag and drop it to the panel.
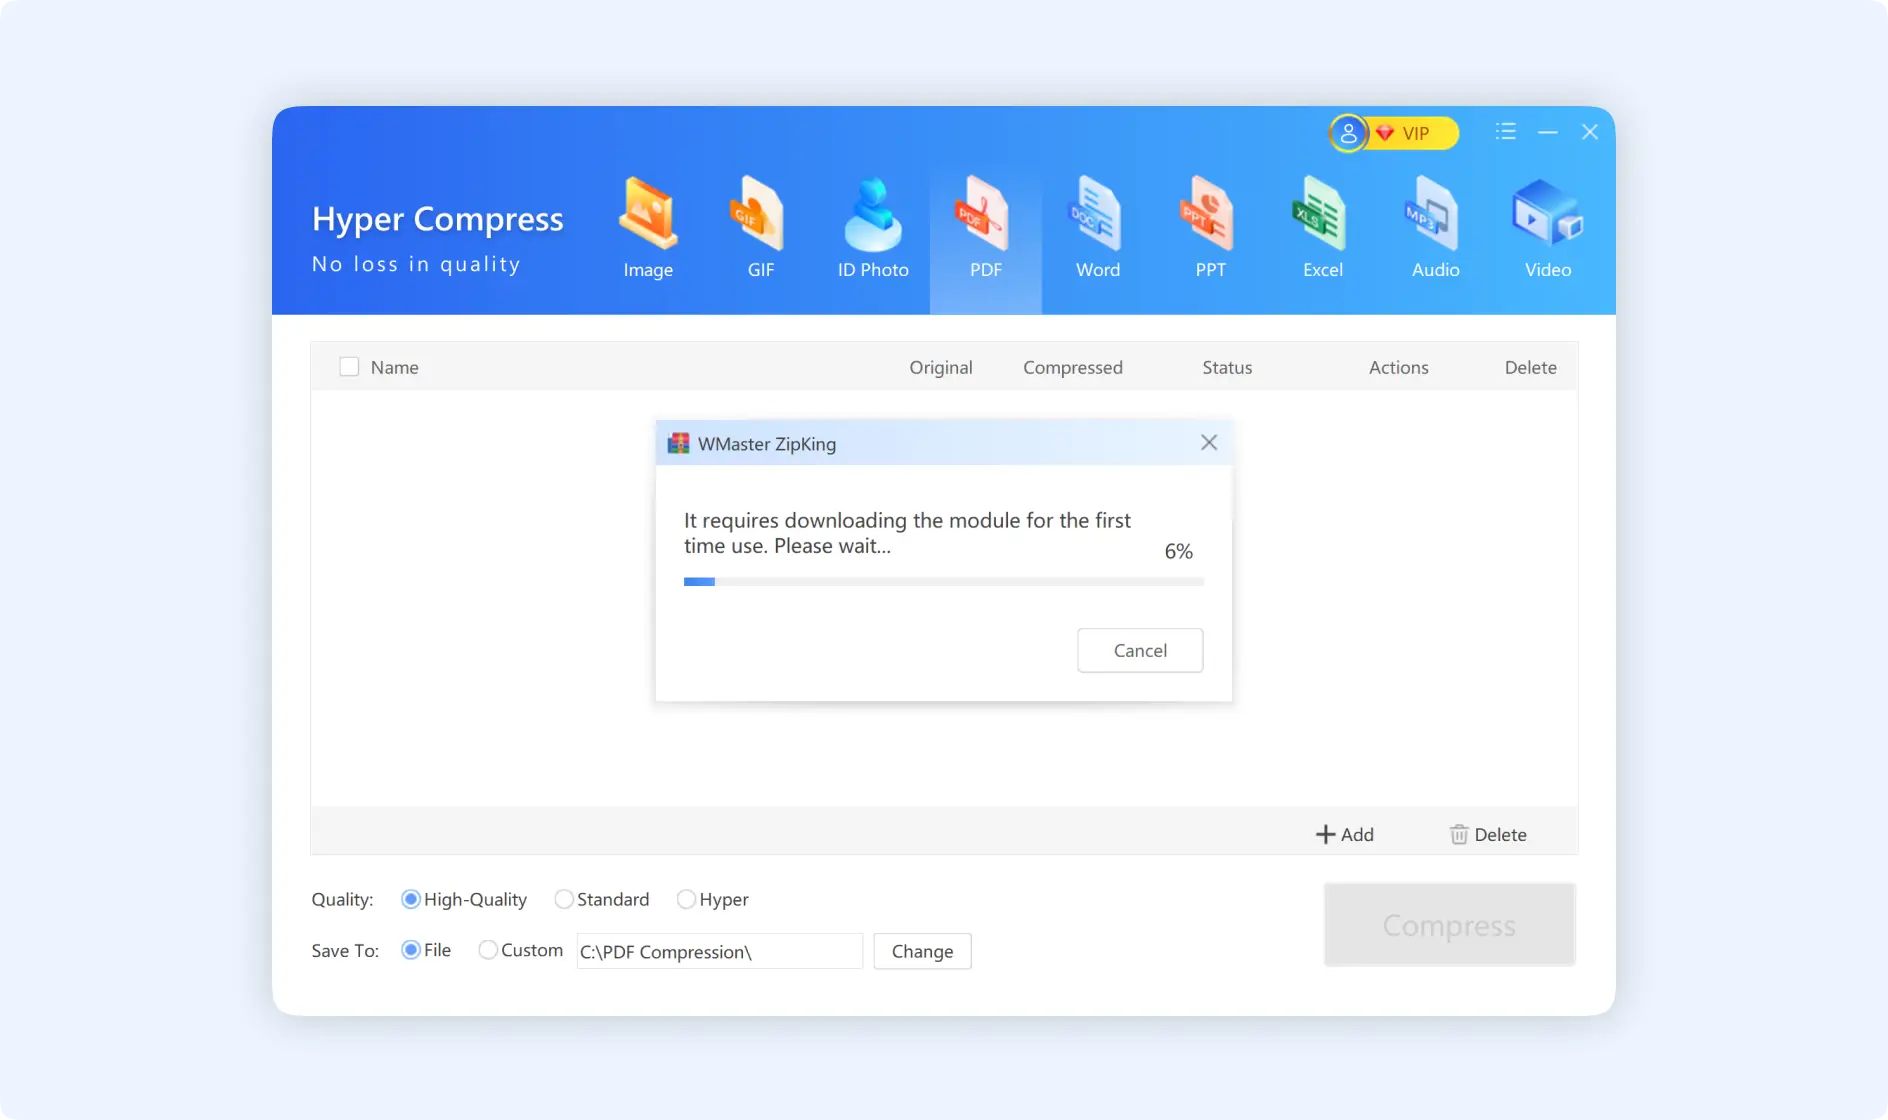
💡Tips: If it is your first time using this function, there will be a pop-up window coming up to notify you that you need to download the corresponding module.
Step 3: After adding the wanted PDF files, you can select the “Quality” options, there are 3 options for you to choose from. Besides that, you can choose to change the storage path for your compressed PDF files.
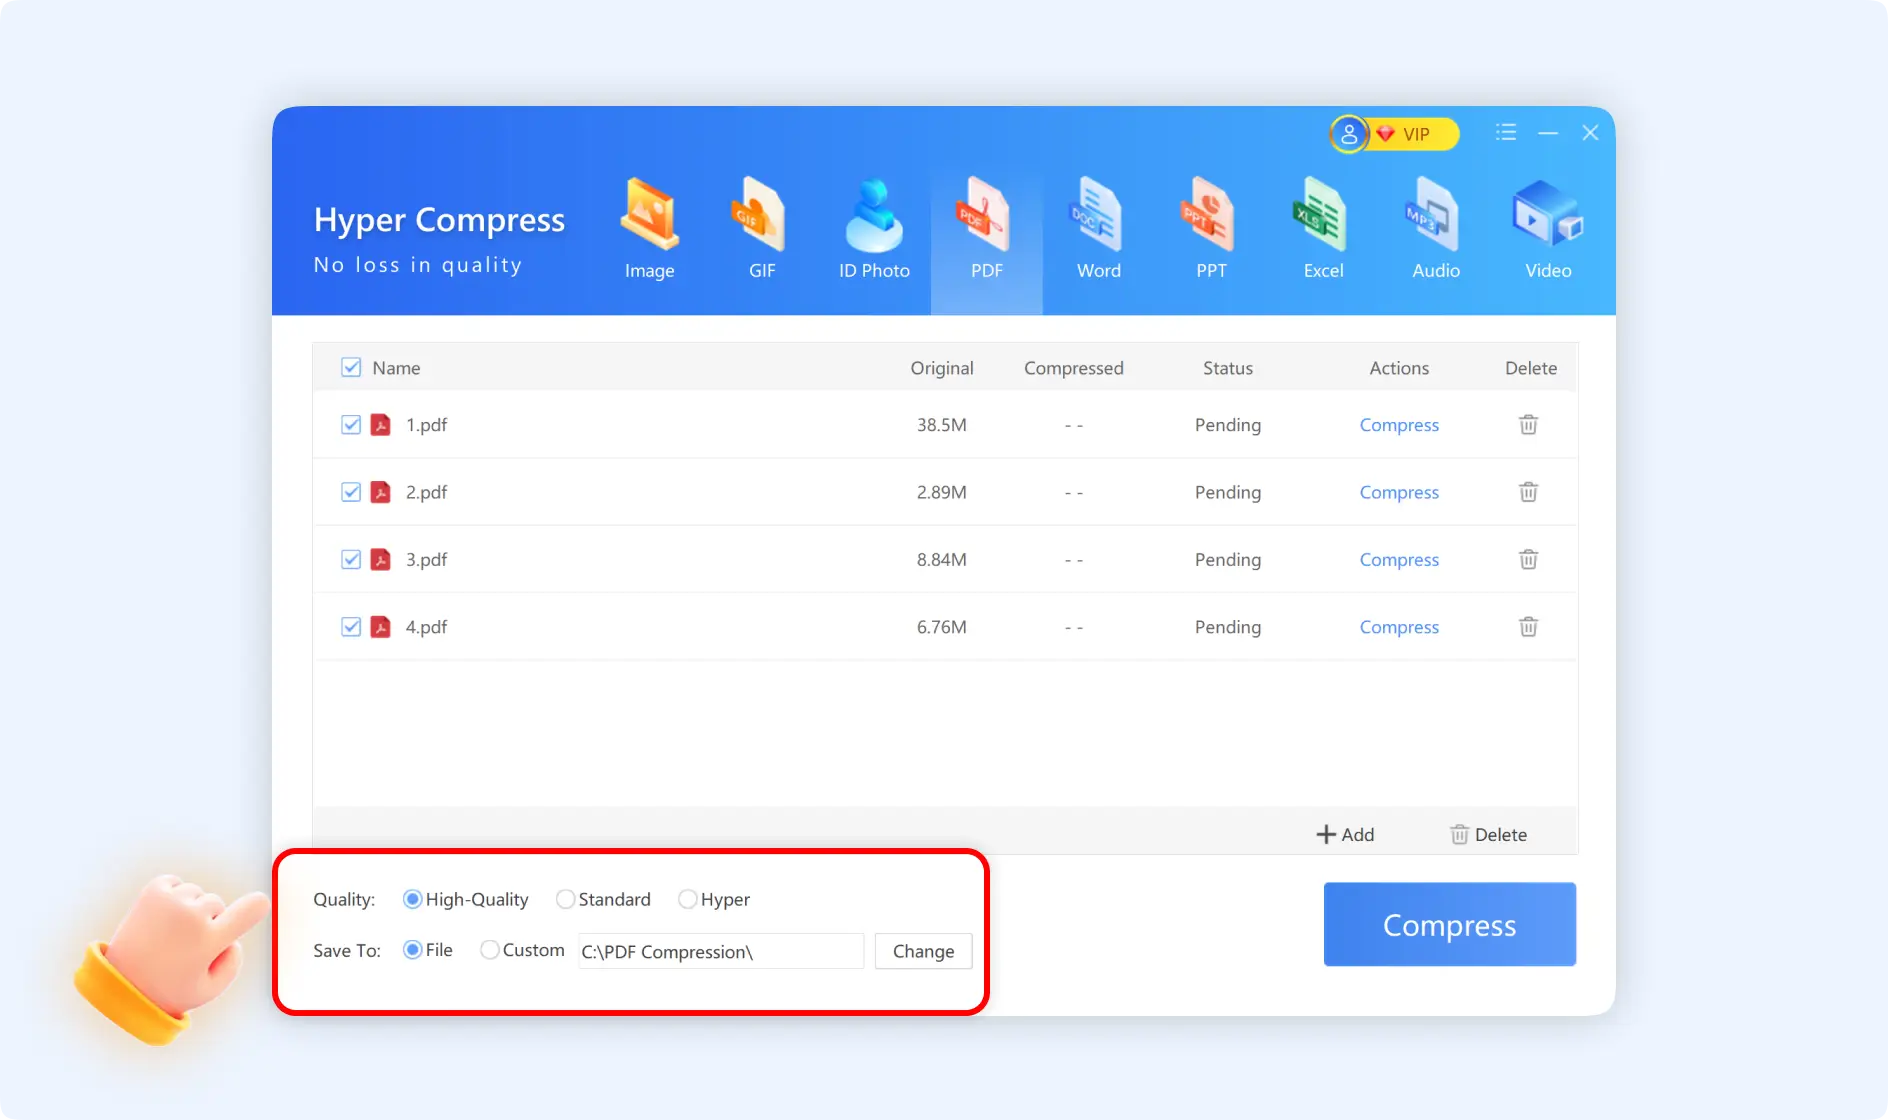
Step 4: Finally, click the “Compress” button. ZipKing will begin compressing PDF files.

Tips: You can select to open the file or archive.
Method 2: Guide to Compress PDF files with ZipKing Right-Click Windows
Here are 3 situations when you use the right-click operations to compress PDF files.
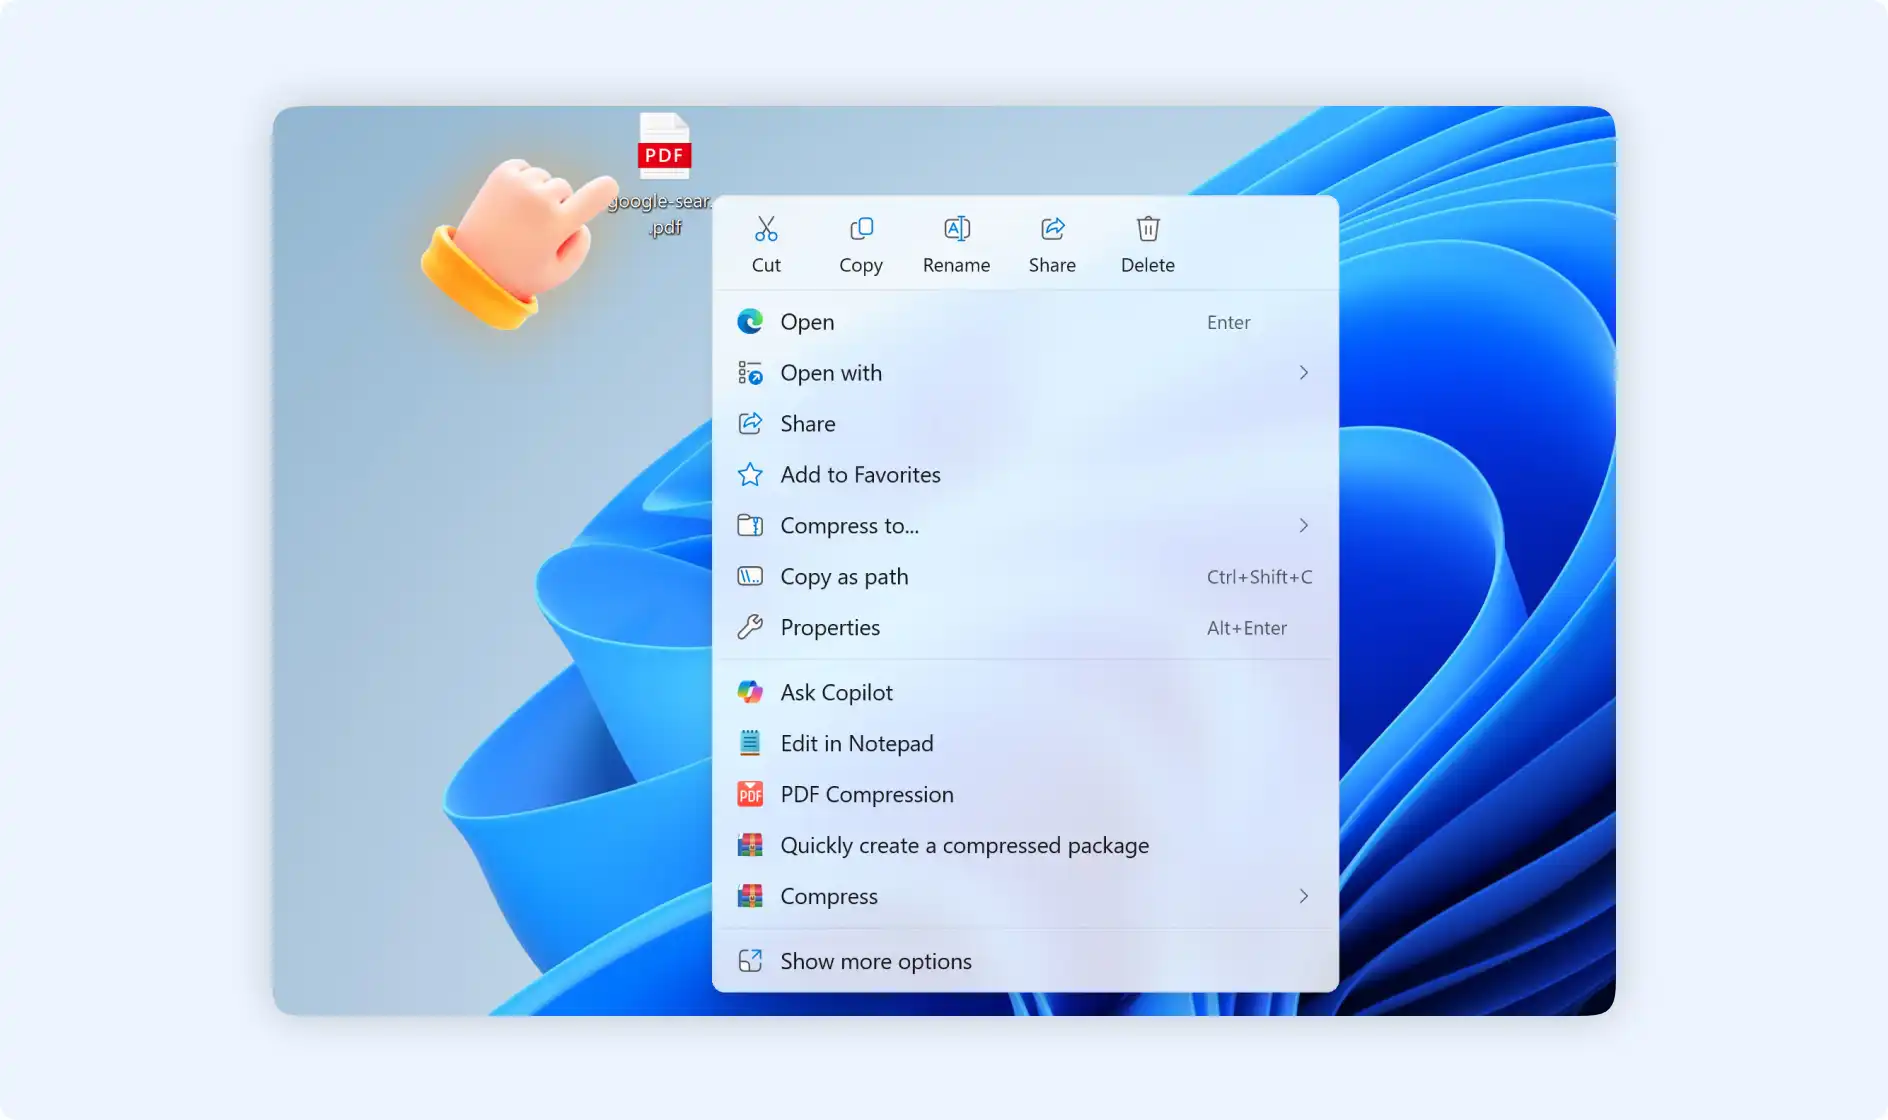
Situation 1: Choose "PDF Compression"
Step 1: Locate the desired PDF files you need to compress, right-click to choose"PDF Compression".
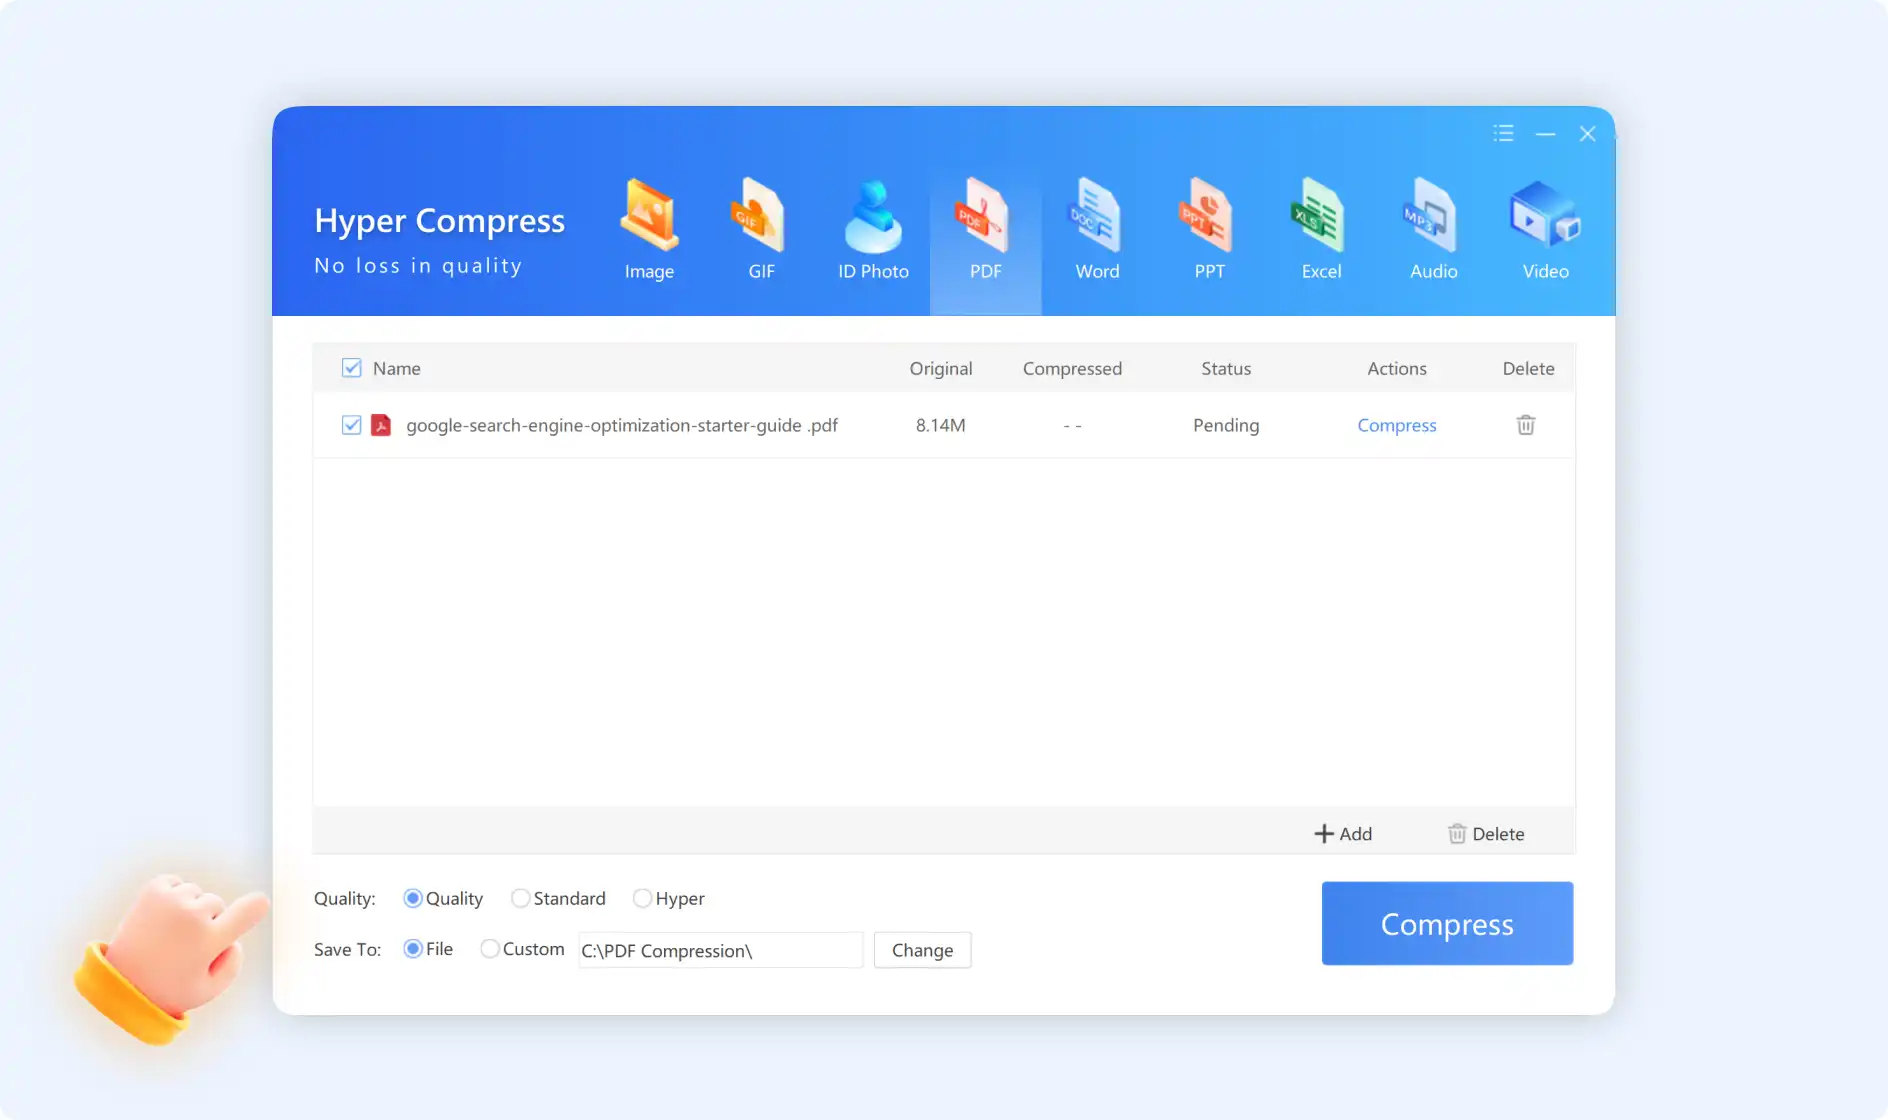
Step 2: you will enter into Hyper Compress for PDF interface. Here you can delete the selected PDF files or add multiple PDF files. And there are other settings like choosing compressing quality, and your storage path. You can customize them quickly with one click. After everything is done, click “Compress”. The Compression procedure will start.
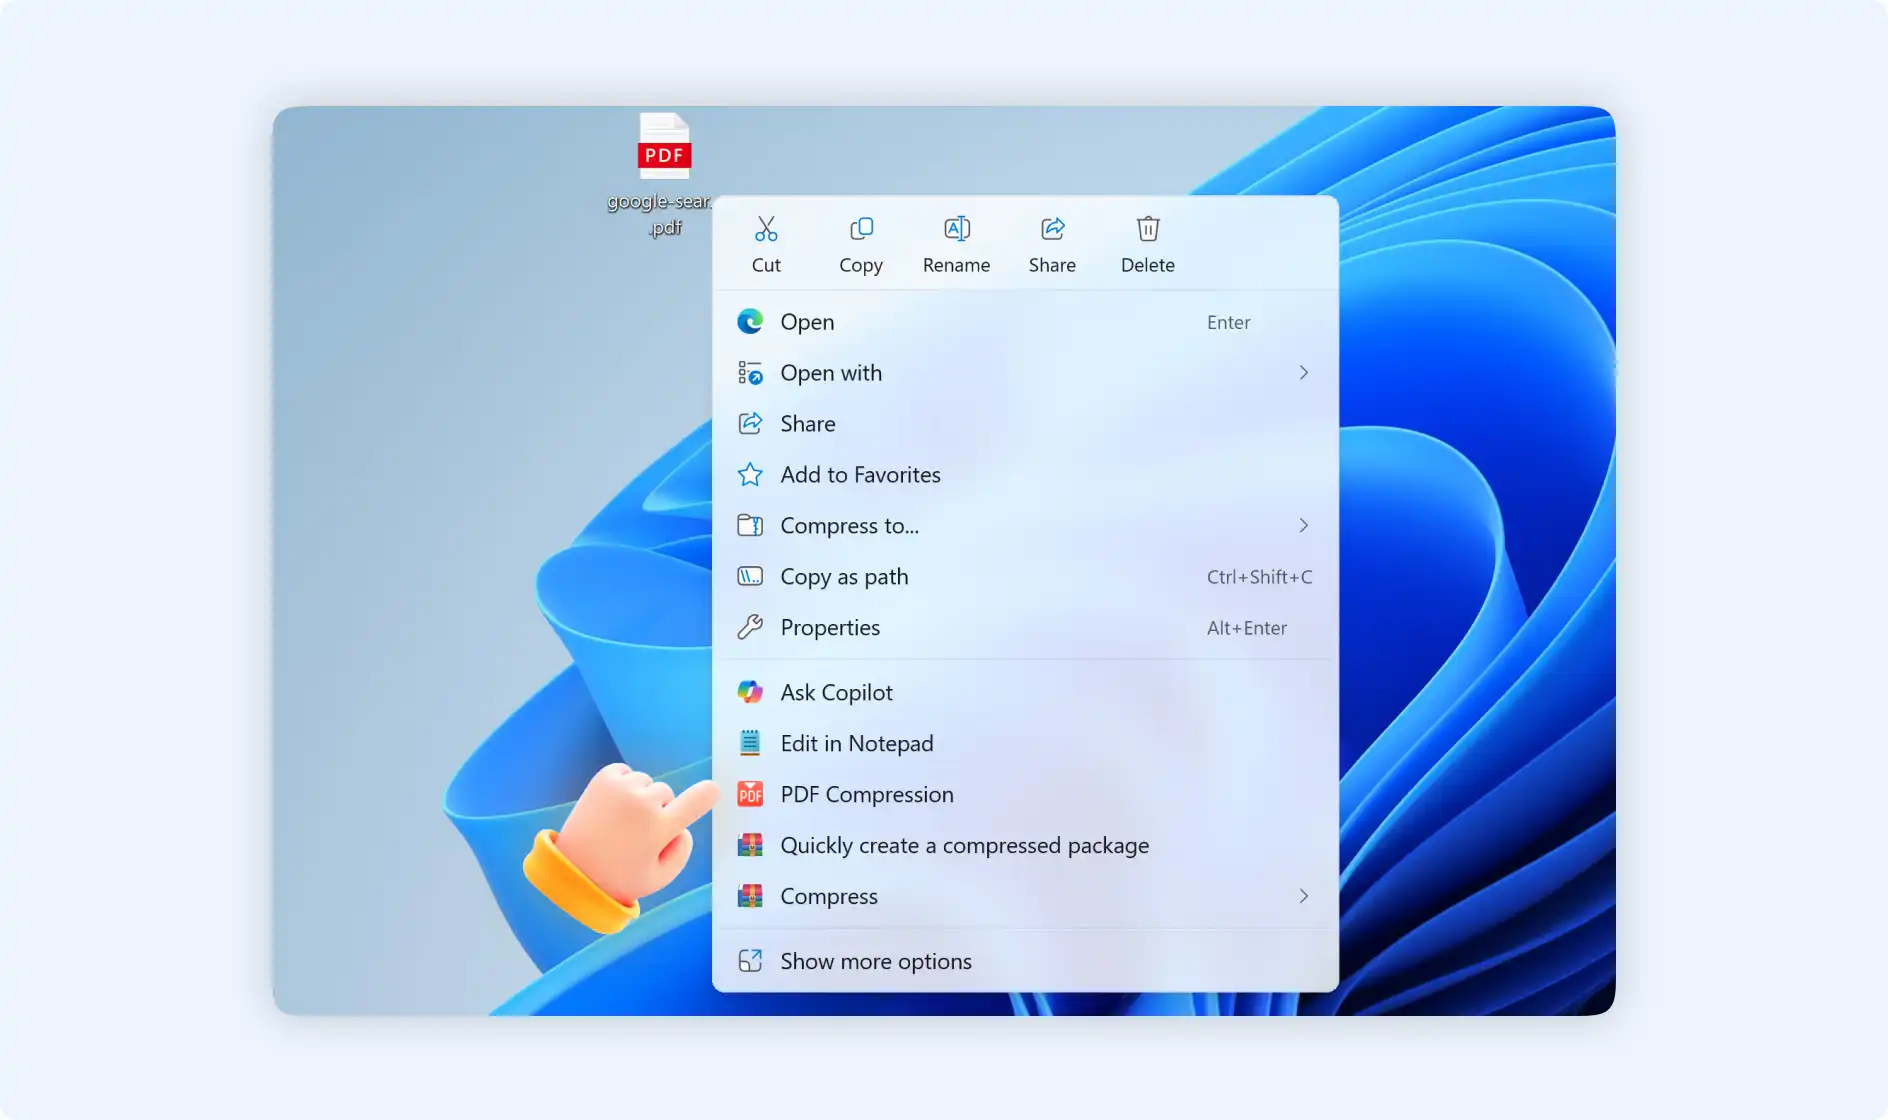
Situation 2: Choose "Quickly create a compressed package"
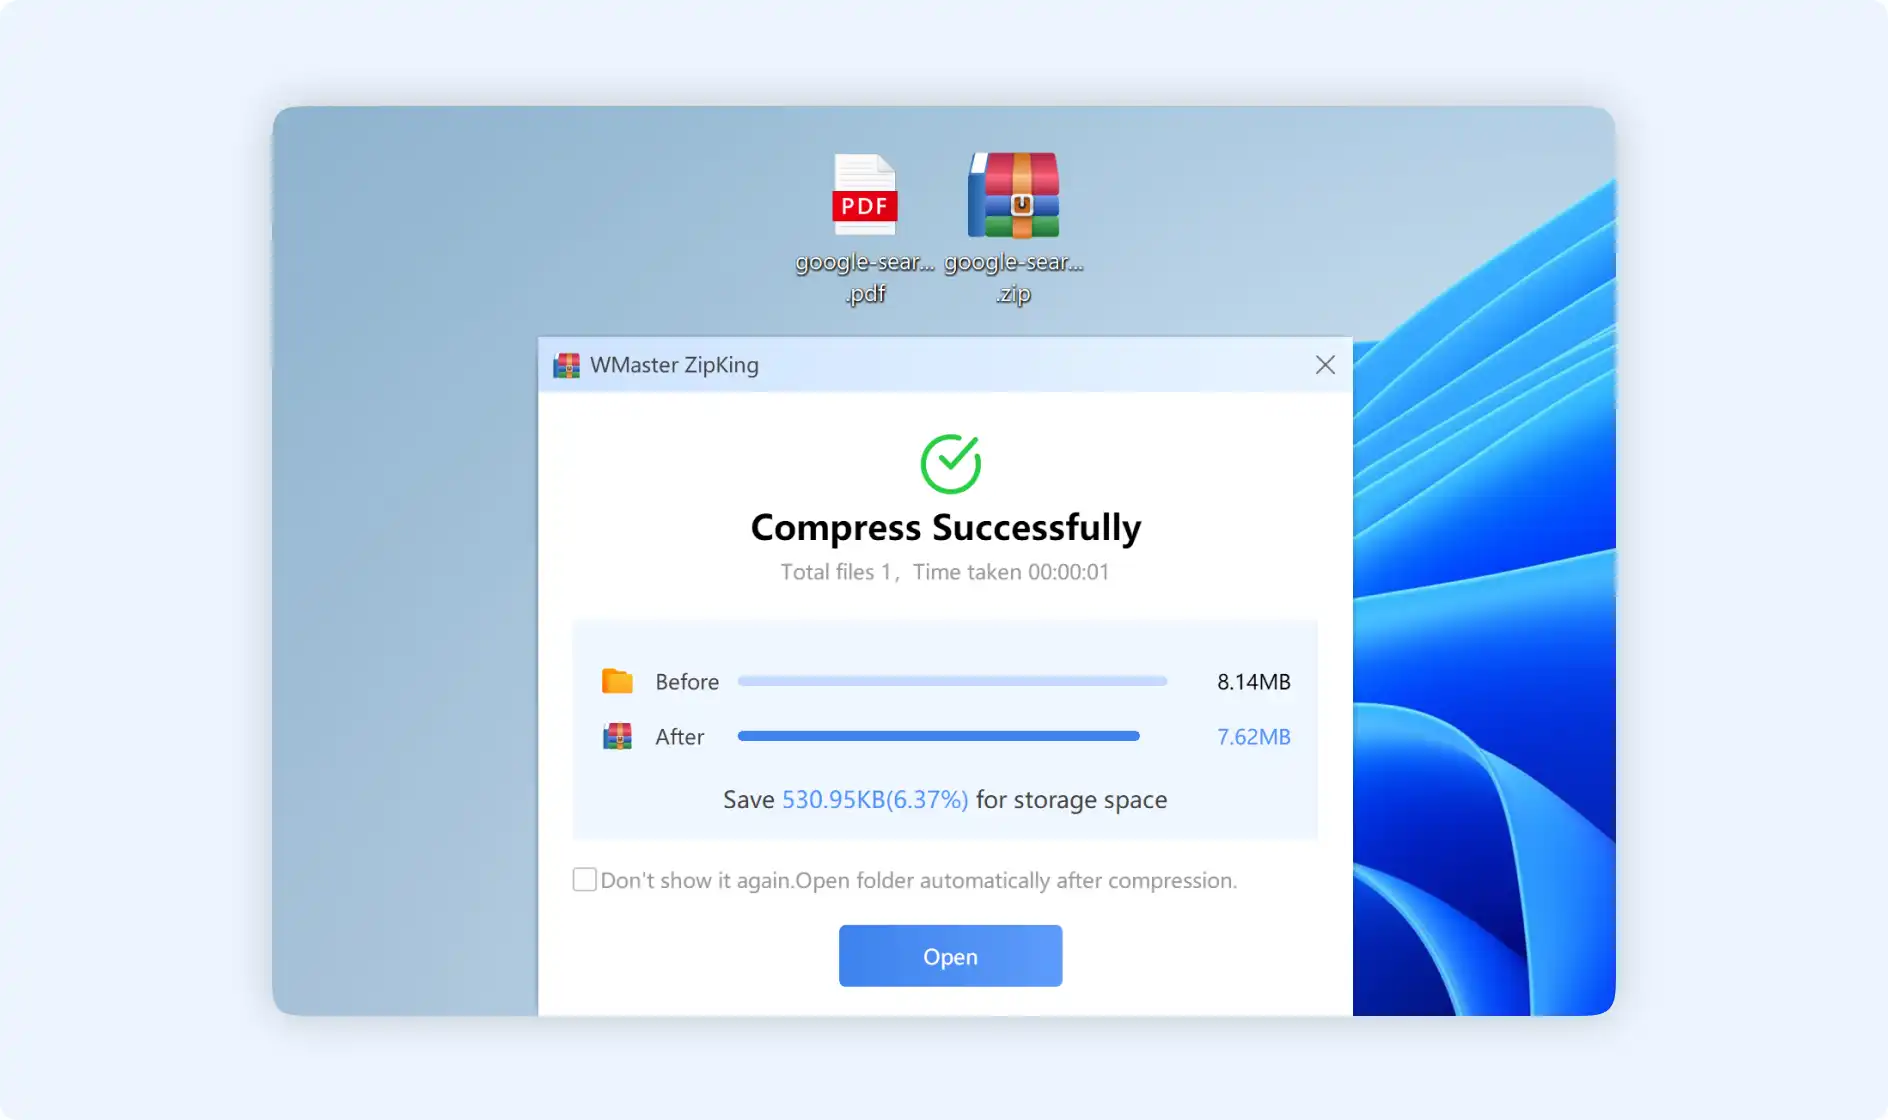
Step 1: Select your desired PDF files, right-click then choose"Quickly create a compressed package".
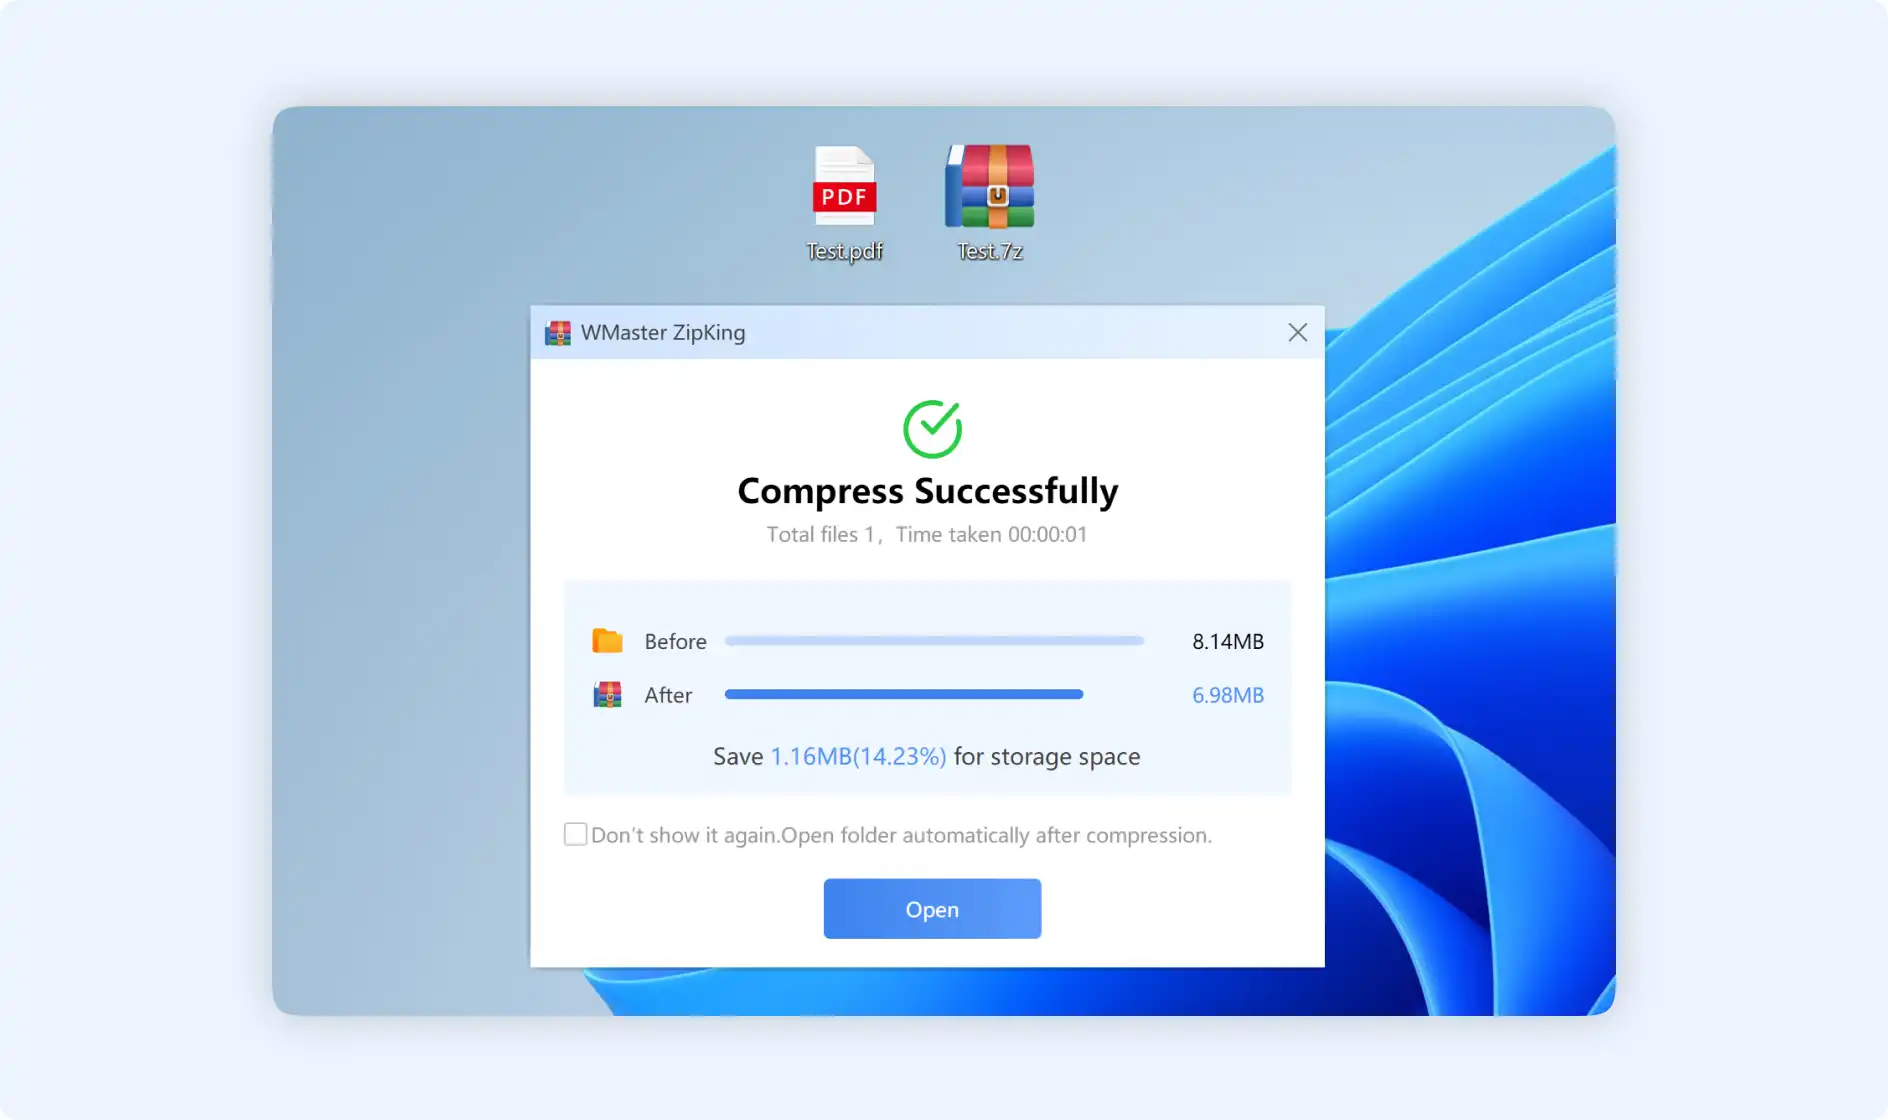
Step 2: Next ZipKing will quickly decrease your PDF files automatically, then show it is zipped successfully.
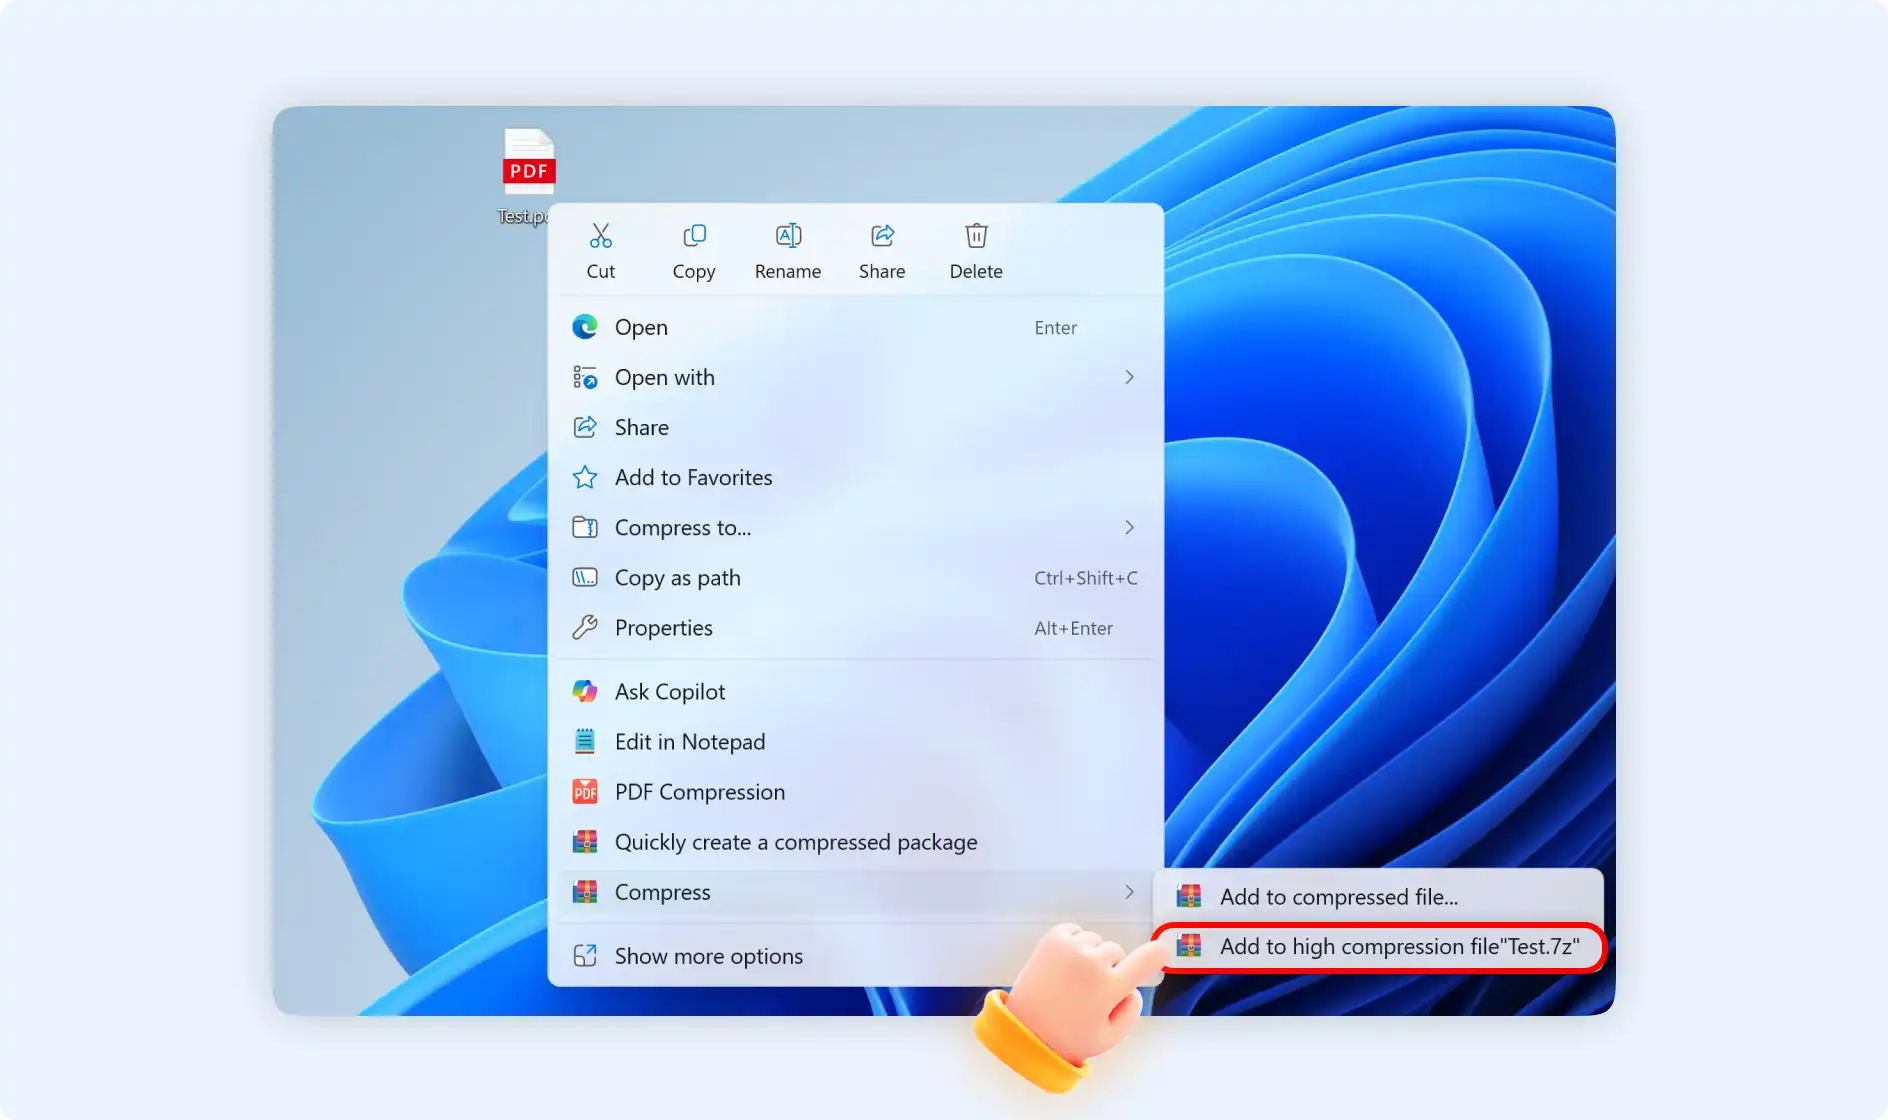
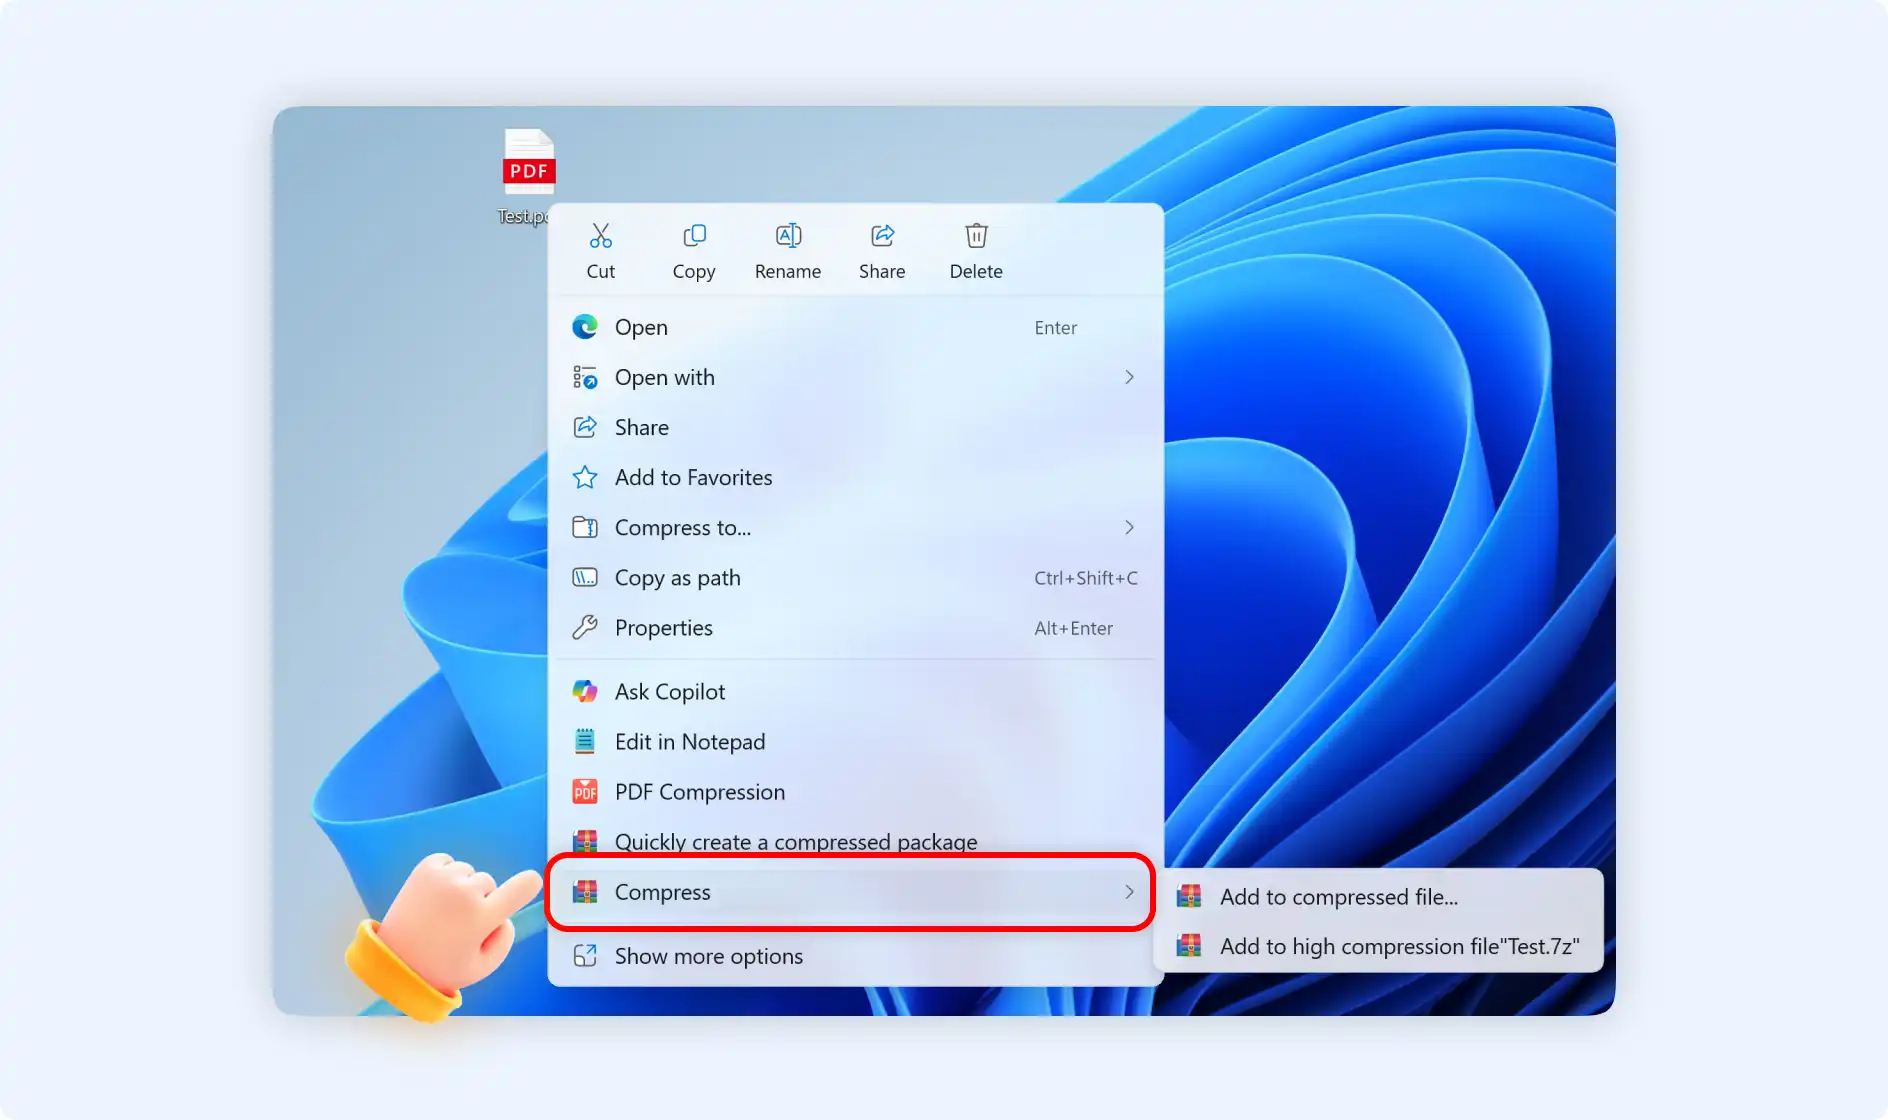
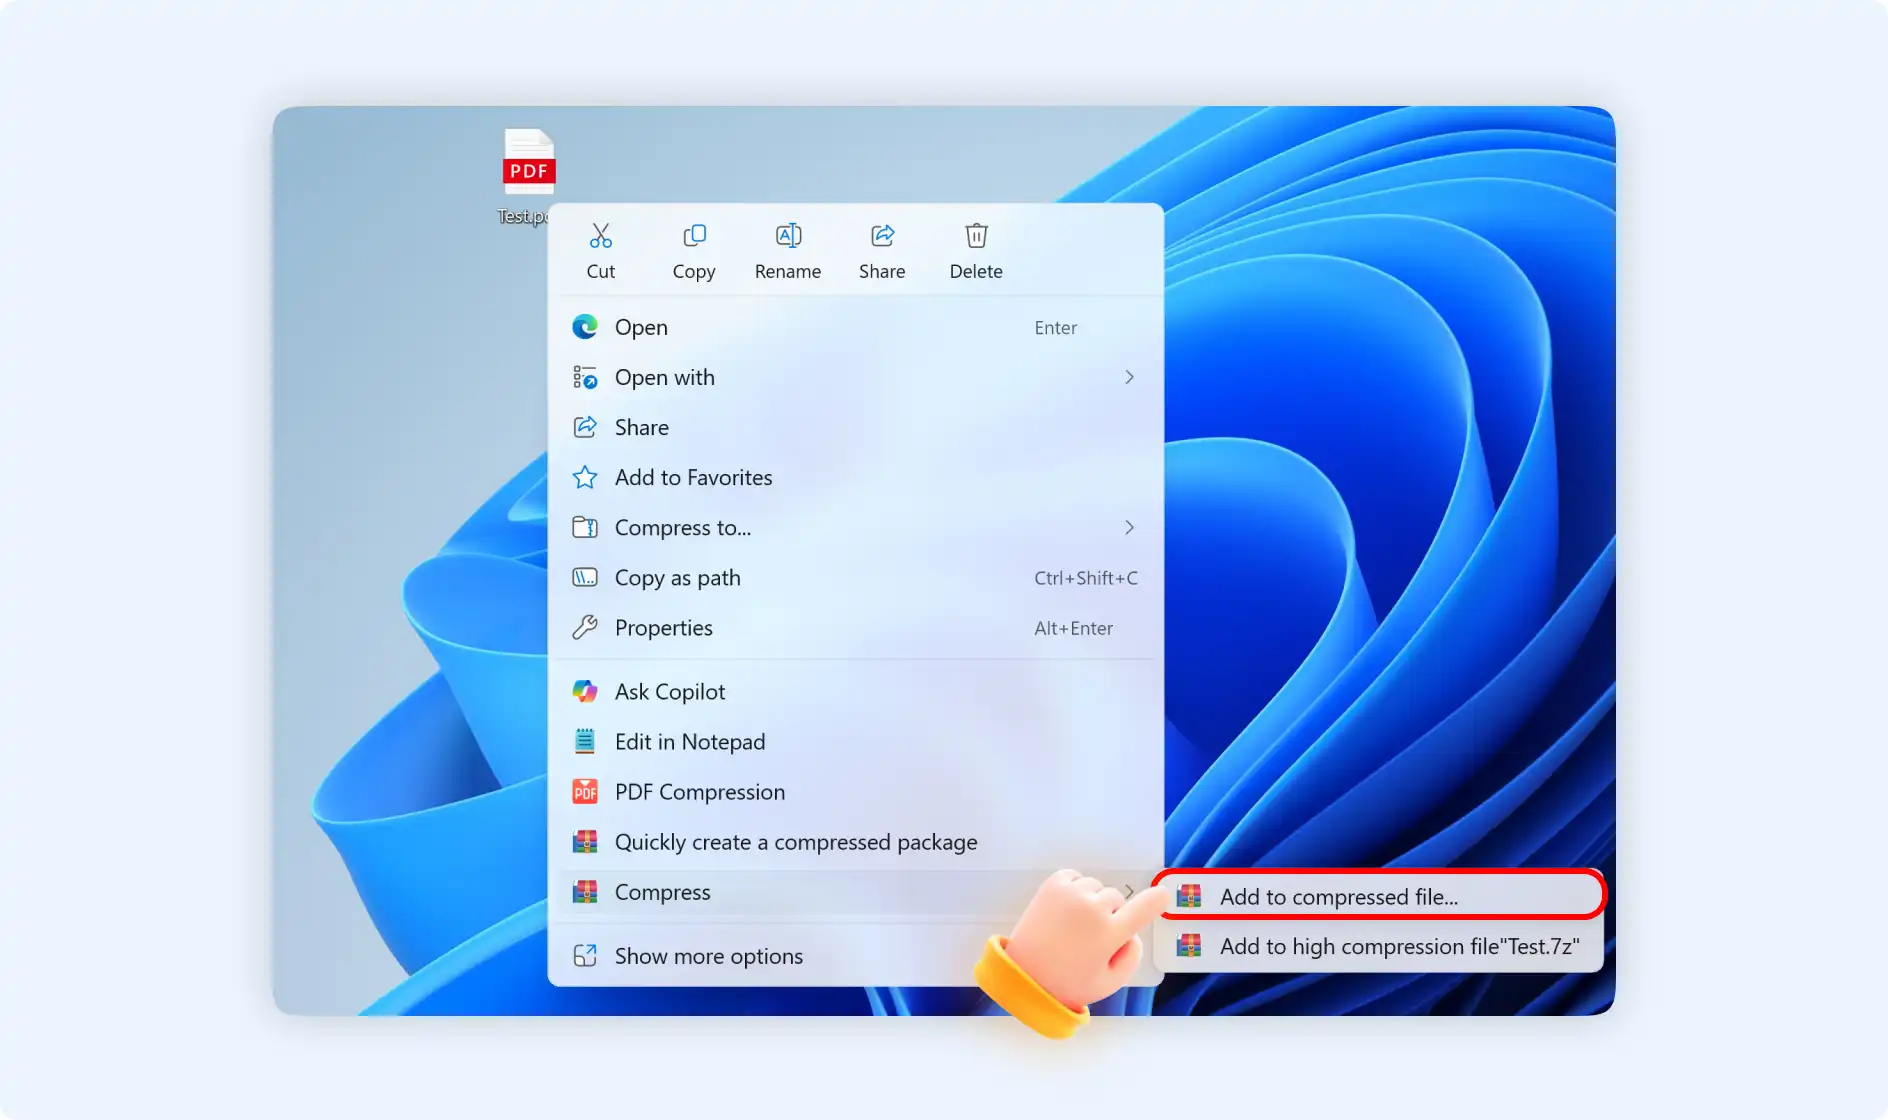
Situation 3: Select "Compress"
Here are 2 options when you right-click your PDF files to select"Compress".
Option 1: Select" Add to compressed file". You will see a pop-up window showing that you will create a compressed archive. Here, you can change your storage path, choose your compression options, add a password to secure your PDF file or add an annotation. Finally, click the “Compress” button. ZipKing will start compressing PDF files automatically within seconds.

Option 2: Select "Add to [file name].7z", it means you are going to create a 7z archive for these PDF files. Click it to start compressing PDF files.