
Have you ever scrolled through those perfectly curated Instagram feeds and found yourself curious about how they manage to present such breathtaking images without any awkward cropping?
Have you ever asked yourself, "How do I resize photos for Instagram without cropping it?" There is a strategy that can benefit anyone, ranging from quick photo size adjustments to more thorough editing.
Many of us find it challenging to resize images just right, whether it's a sweeping scenery or a finely detailed close-up, the goal is to maintain exceptional quality while ensuring the aspect ratio is perfectly balanced. So, if you are looking for how to resize a photo for Instagram while keeping all its stunning details and maintaining its original quality, this guide will let you learn the five best methods to prepare your photos for Insta sharing. Let's create a feed that truly shines!
In this article
- How to Resize Photos for Instagram Online for Free
- Free Desktop Software to Resize Photos for Instagram
- How to Resize Photos for Instagram Using Mac Tool
- How to Resize Photos for Instagram on Android
- How to Resize Photos for Instagram on IPhone/IPad
- How to Resize Photos for Instagram Profile Images—Expert Tips
- Hot FAQs About How to Resize Photos for Instagram
Part 1: How to Resize Photos for Instagram Online for Free
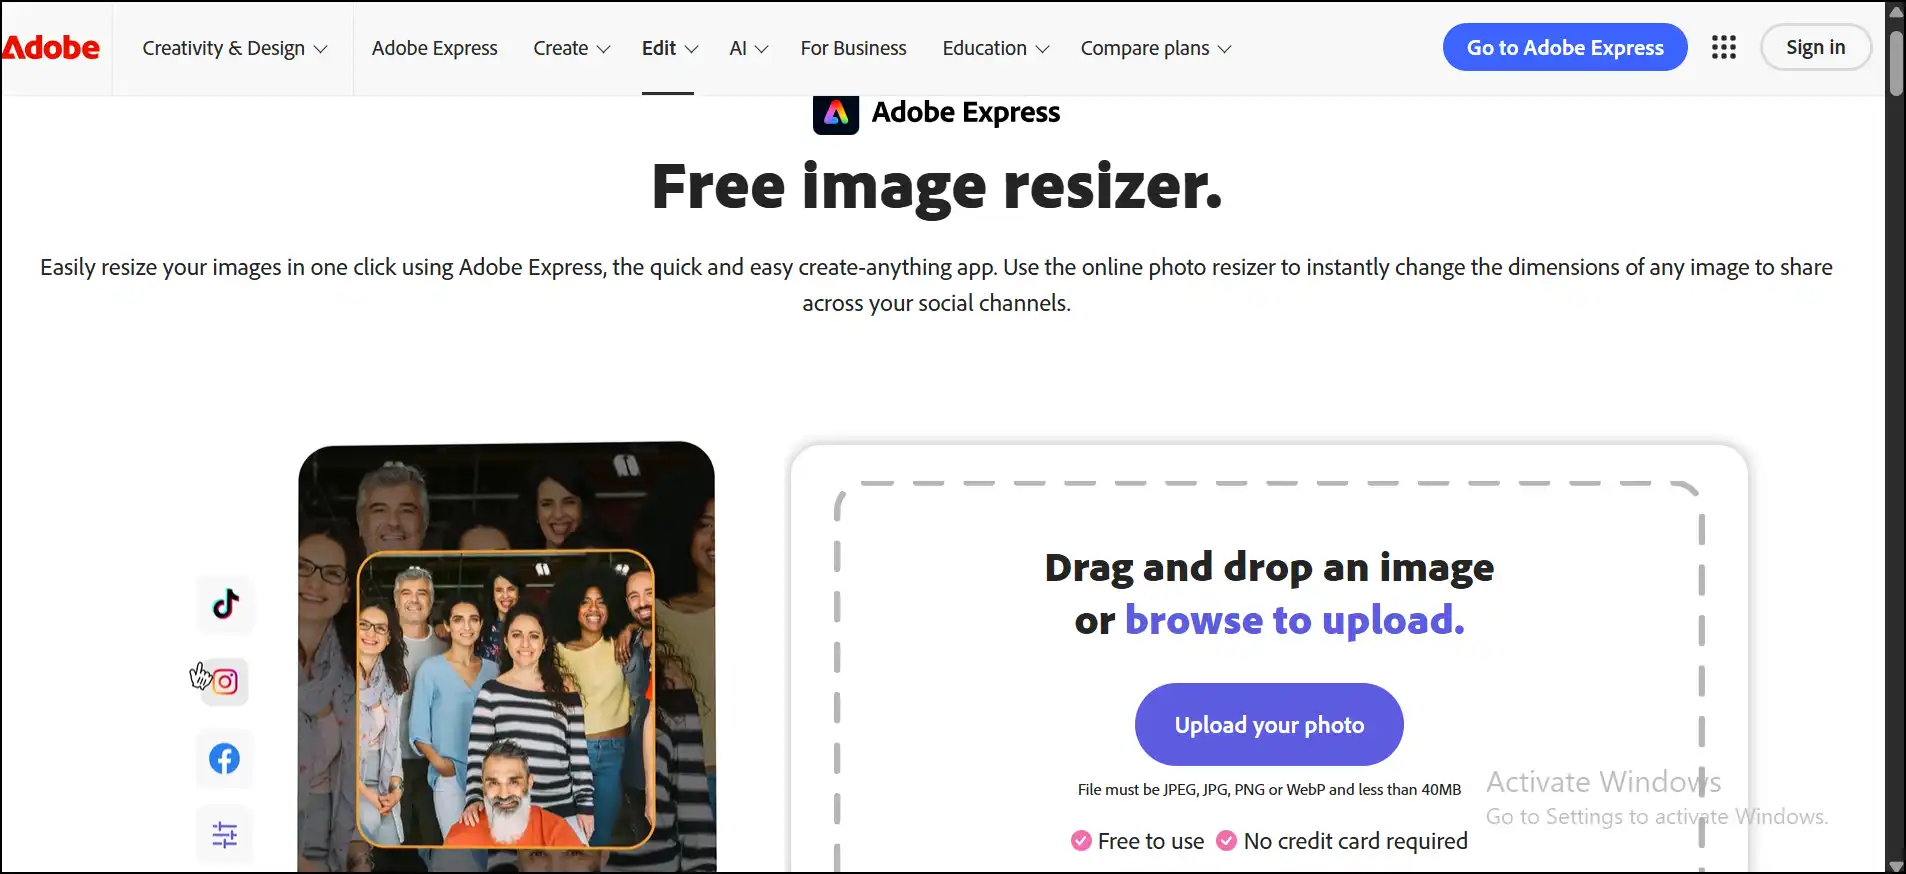
For those seeking a simple and efficient method to resize photos for Instagram for free without the hassle of software installation, online tools are the perfect solution. Adobe Express stands out as a remarkably accessible and robust choice, offering an online platform that makes resizing photos for Instagram a walk in the park.
How to Resize Photos for Instagram Online Free With Adobe Express
Step 1. Head over to the Online Resizer: Visit Adobe Express by clicking https://www.adobe.com/express/feature/image/resize to resize photos for Intagram free without creating an account.
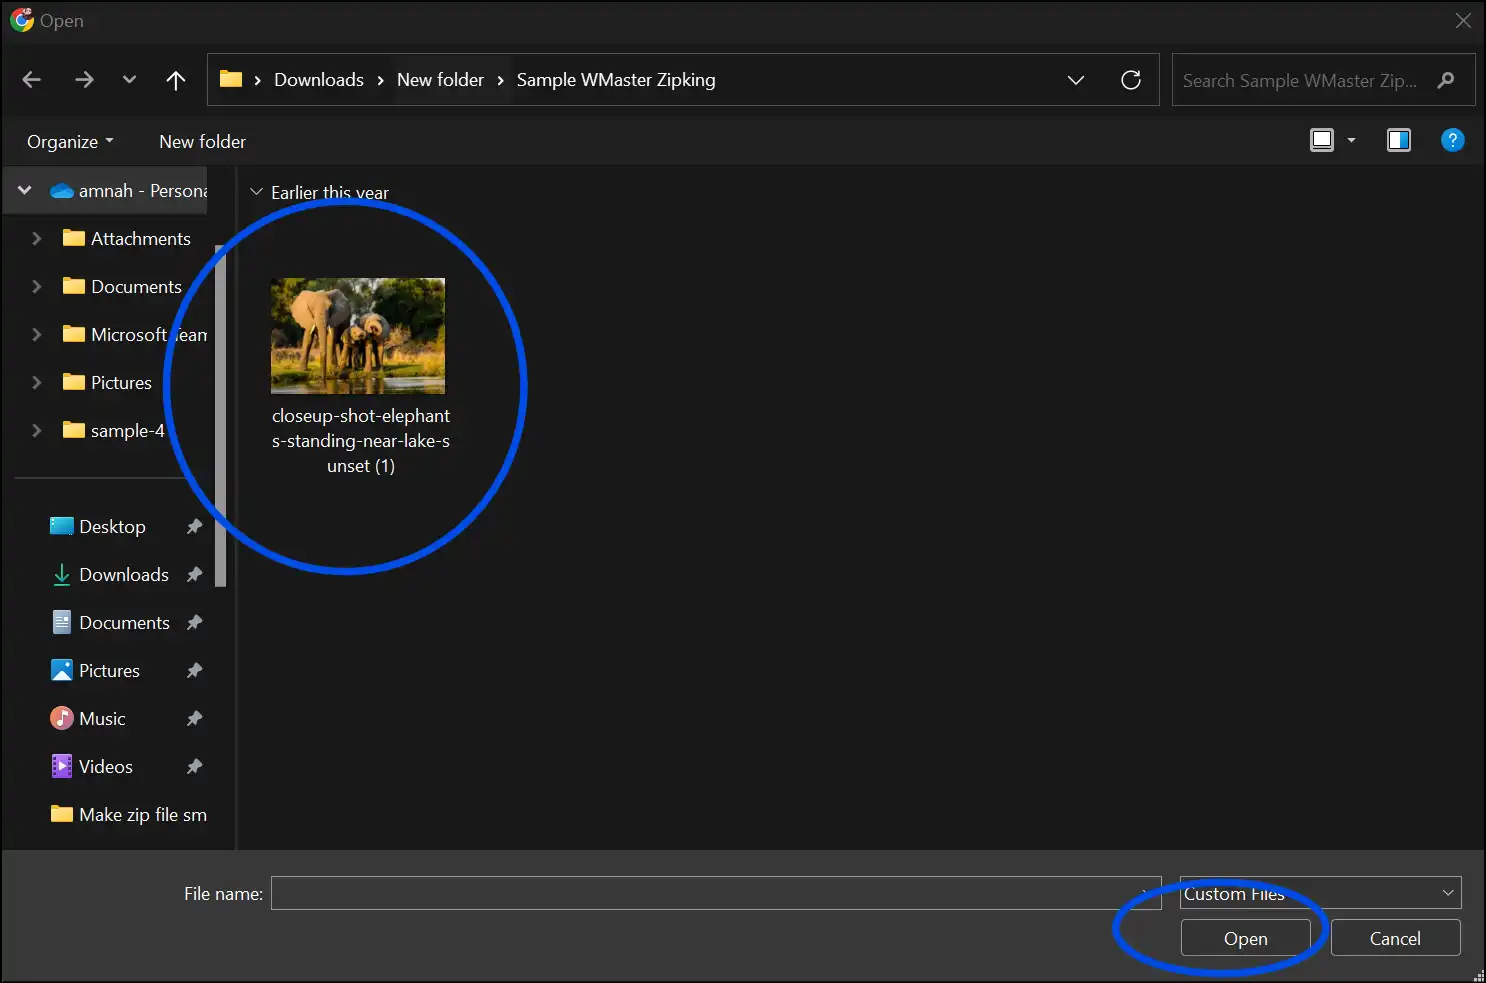
Step 2. Upload your photo:Click "Upload your photo", select the image file, and click "Open", or simply drag your image to the website to resize a photo for Instagram online.
Step 3. Choose the Dimensions:Pick out "Instagram" from aspect ratio and then tap on the "1:1 Square" format for profile pictures.
💡Tips:Select different dimensions according to your image post needs.
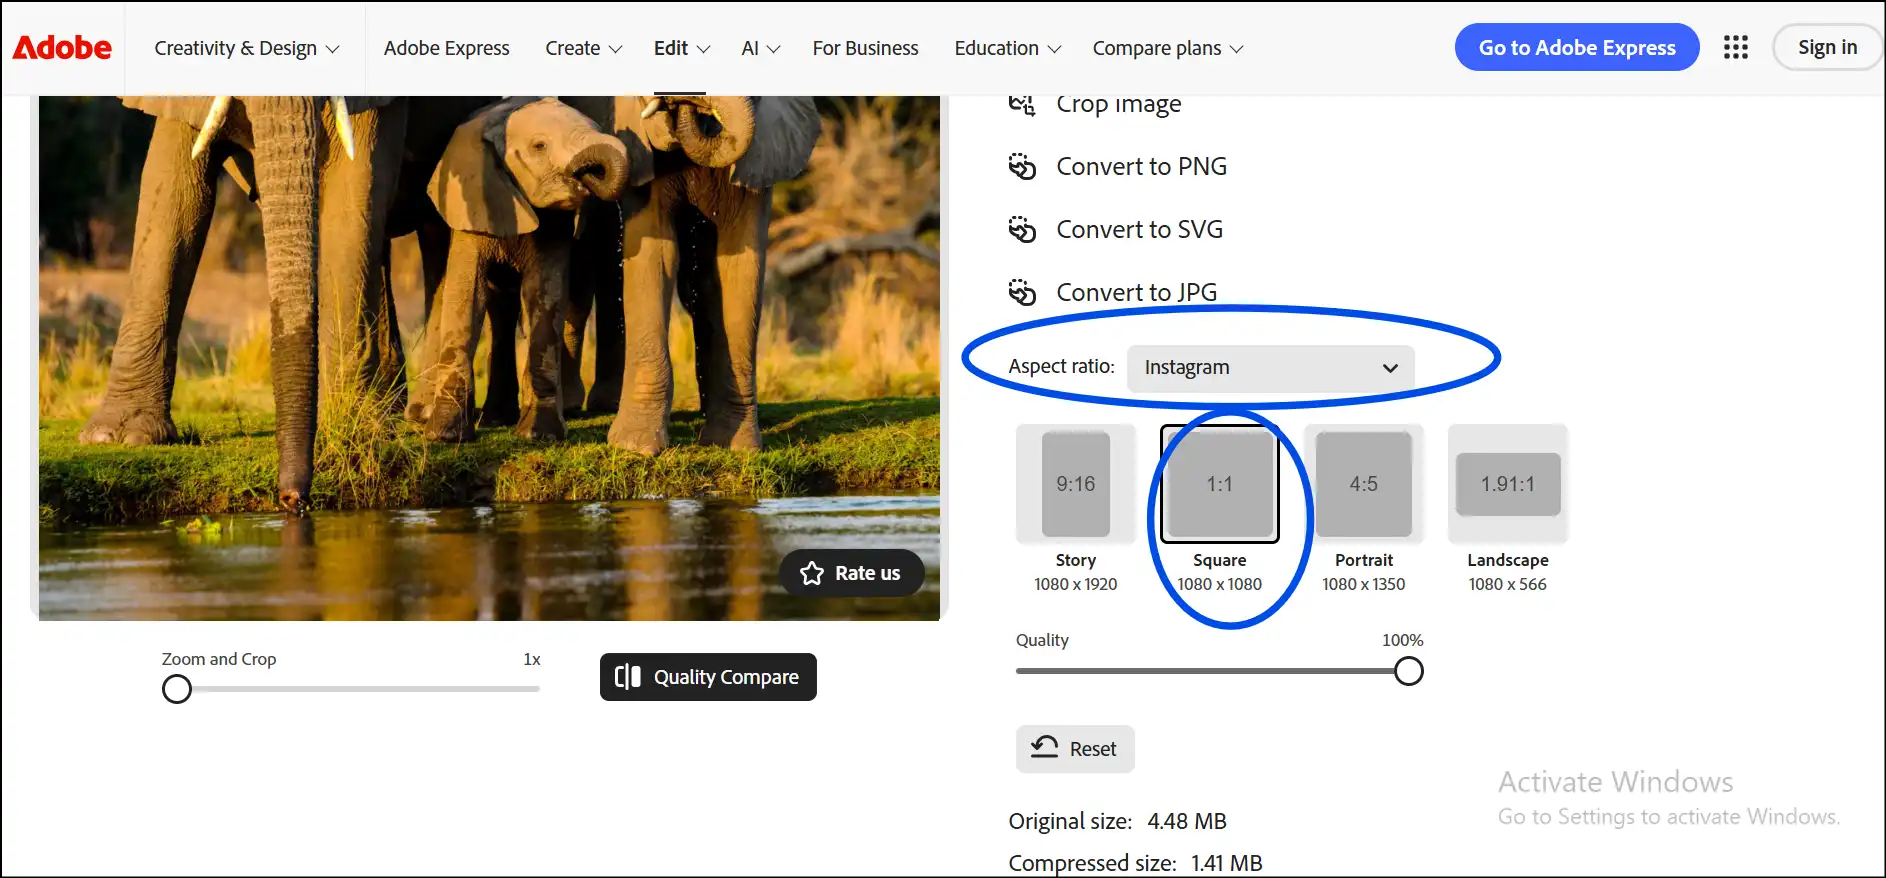
Step 4. Download the File: Adjust the crop and other customization if needed, then click "Download" to save your resized photo for Instagram.
Part 2: Free Desktop Software to Resize Photos for Instagram
When it comes to getting more control and handling batch processing, desktop software truly shines as an excellent option. Check out WMaster ZipKing, our amazing free tool made just for you to effortlessly resize photos for Instagram. WMaster ZipKing makes resizing photos for Instagram trouble-free with its user-friendly interface and powerful features, all while keeping your image quality intact.
5 Key Features to Know About WMaster ZipKing for Resizing Photos for Instagram
WMaster ZipKing
One-click to Resize Photos for insgagram
- Batch Photo Resizing: Resizing batch photos for Instagram at once.
- Customized Image Sizes: choose the exact pixel size and quality of your edited images to meet Instagram's standards.
- Competent Results: Maintain the quality and clarity of the image files after resizing and compressing it.
- Support Multiple File Formats:Resize or compress any image format, like JPEG, PNG, WebP, and more, for your Instagram.
- Free Access: Use all the features of WMaster Zipking free of cost for a limited time.
Steps to Resize Photos for Instagram by WMaster ZipKing
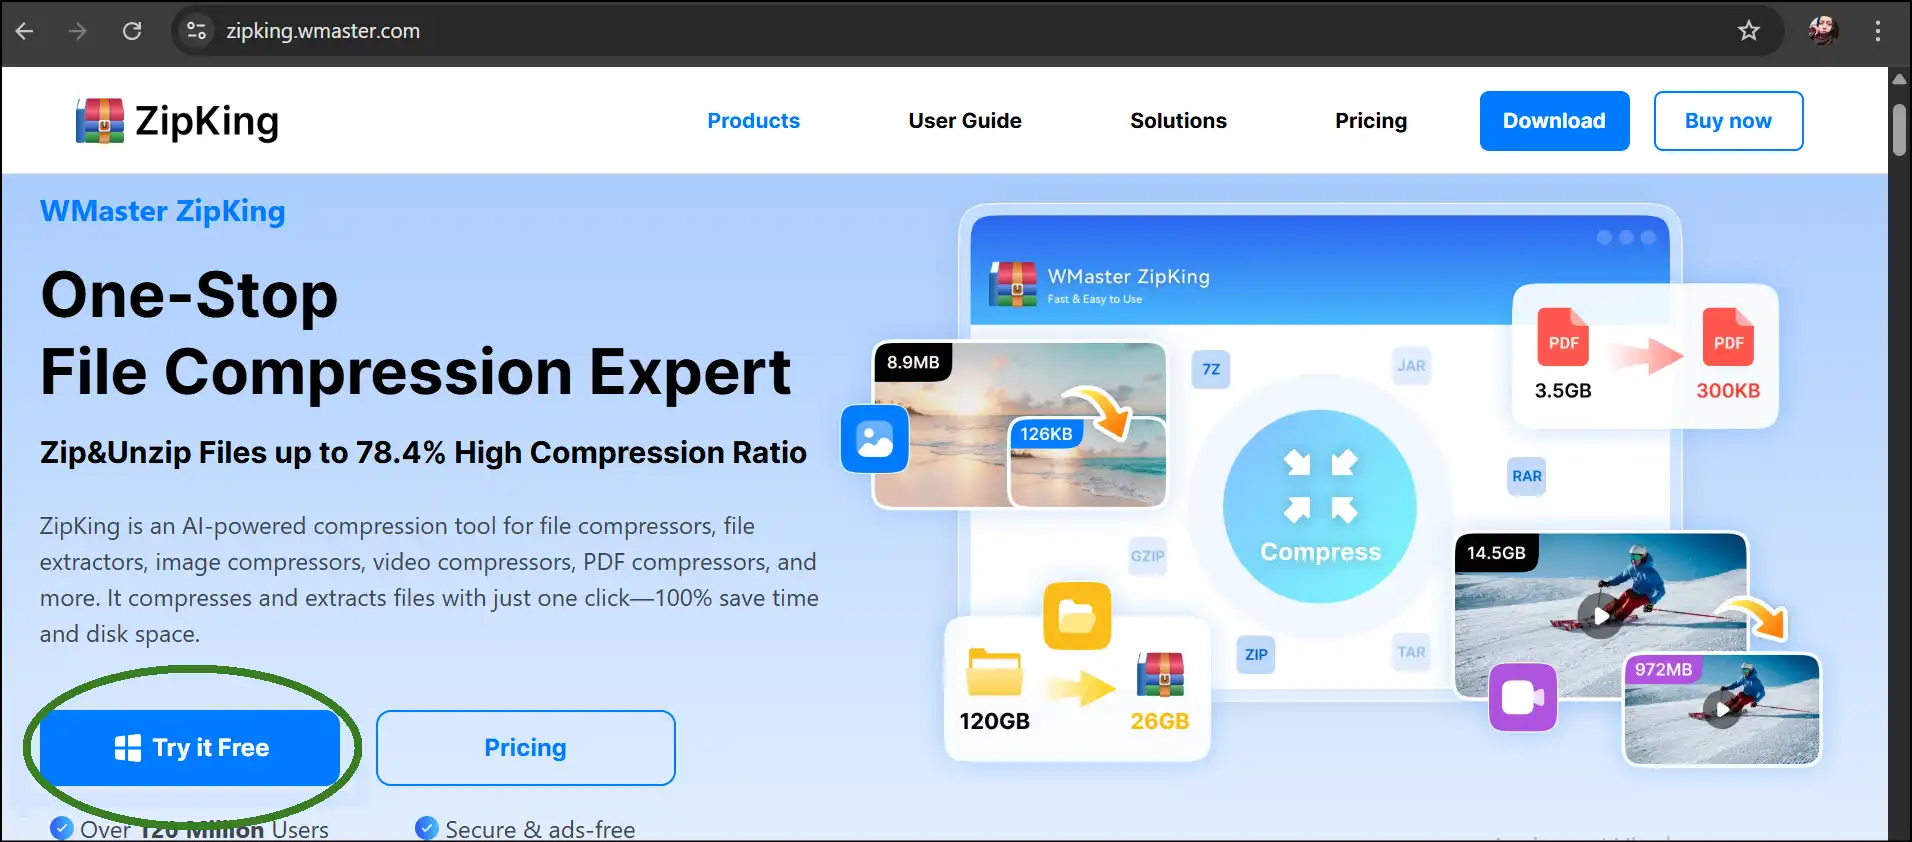
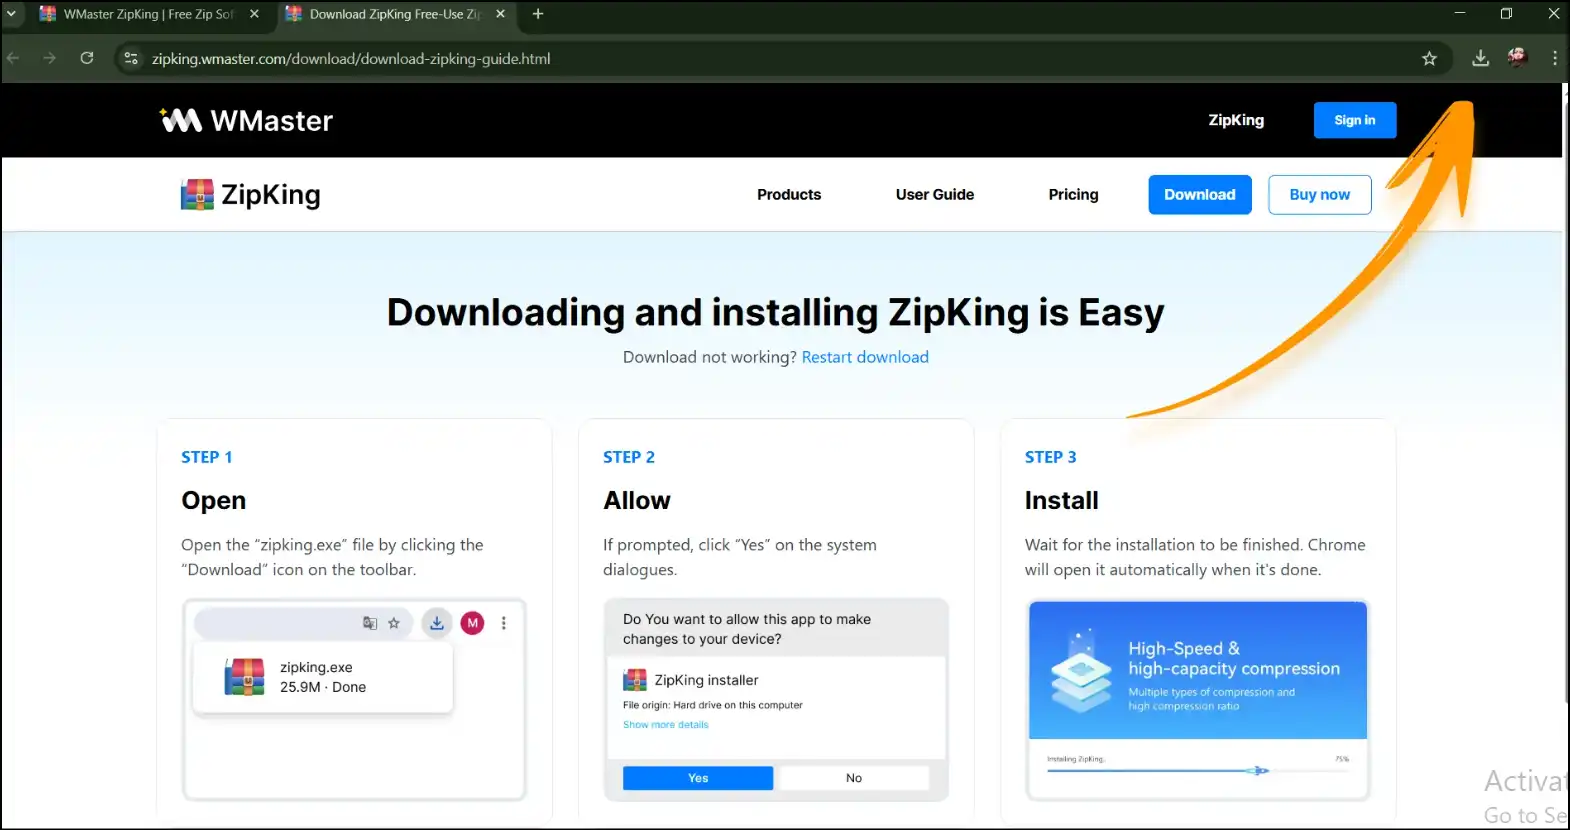
Step 1. Install & Launch ZipKing: Hit on our official website, download and install the tool by following the below image guidance.
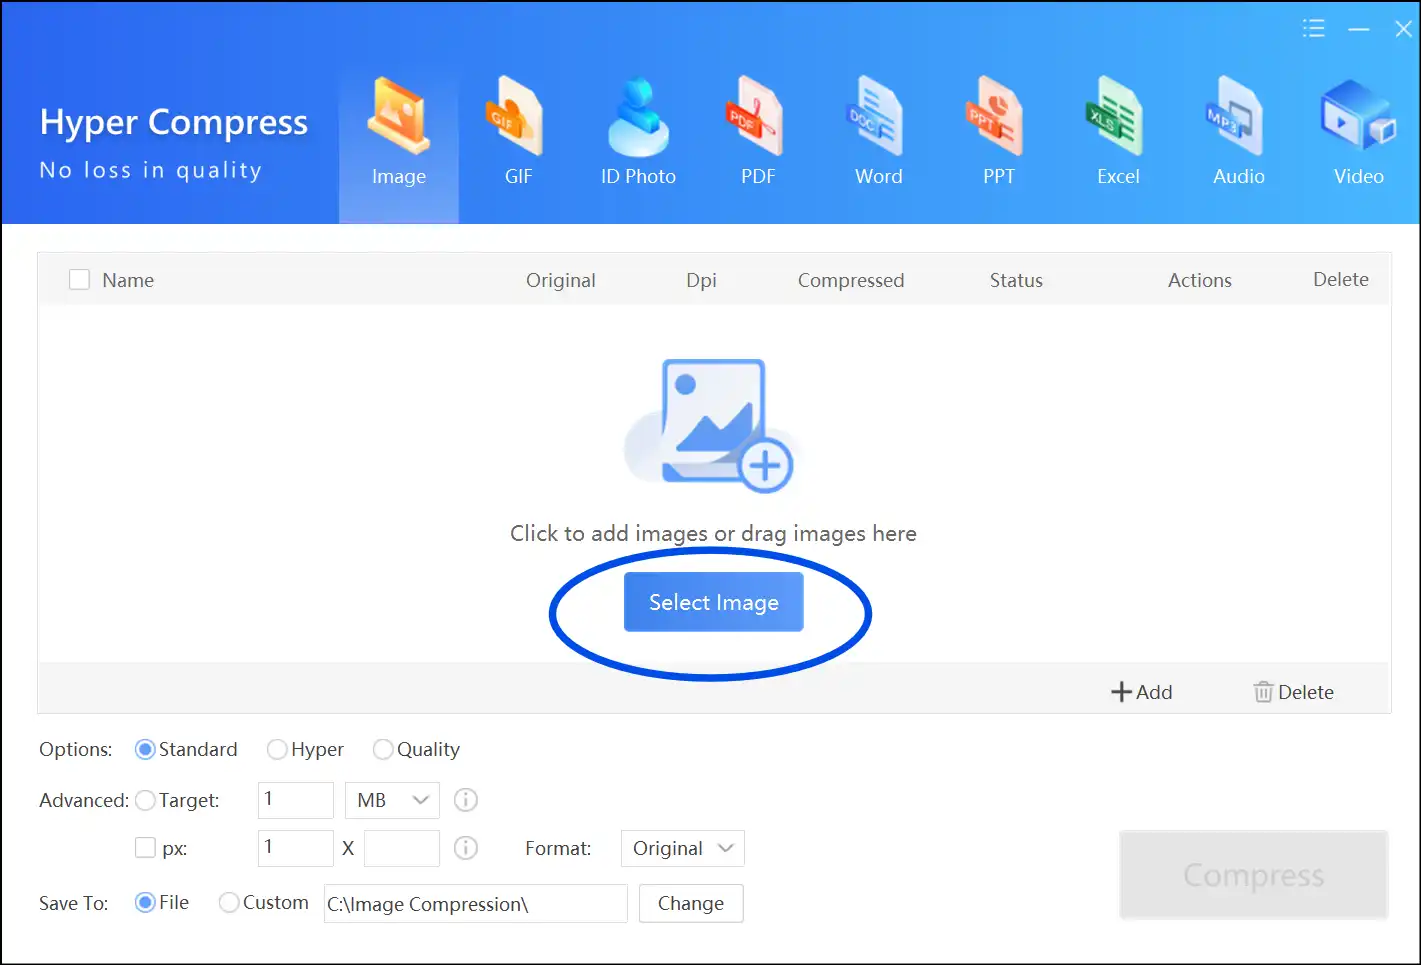
Step 2. Launch WMaster Zipking: After installation, launch our all-in-one tool on your desktop and tap on "Image Compress". Now drag-and-drop or tap on "Select Image" to upload your photo that you want to resize for Instagram.
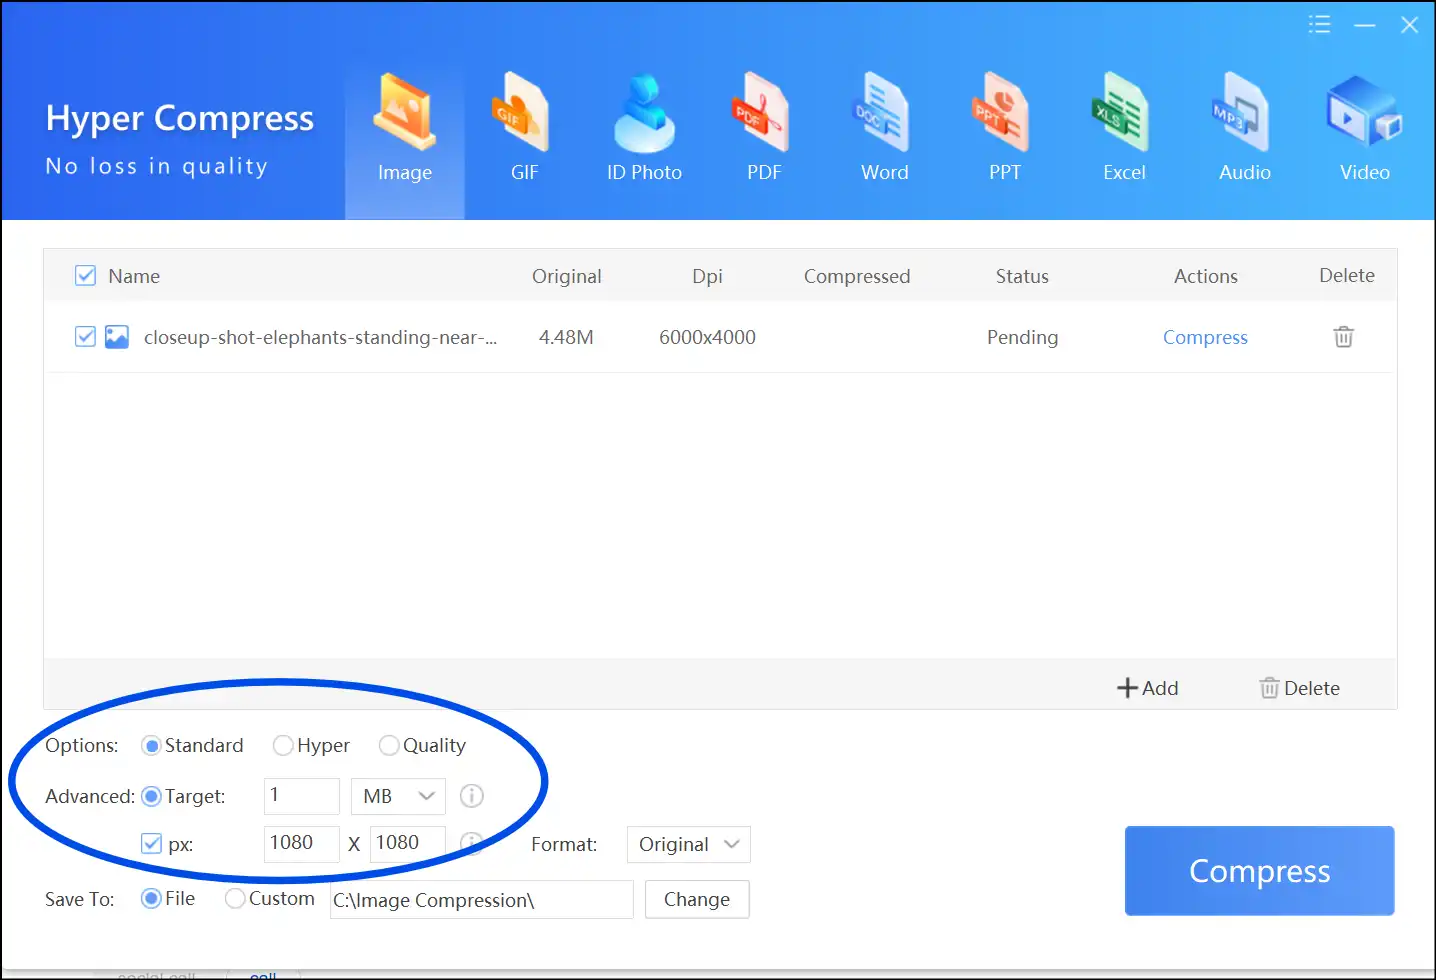
Step 3. Custom select the resize option:Once the file is uploaded, choose quality from "Options", put dimensions as desired, for example, 1080 x 1080 pixels, and then press "Compress".
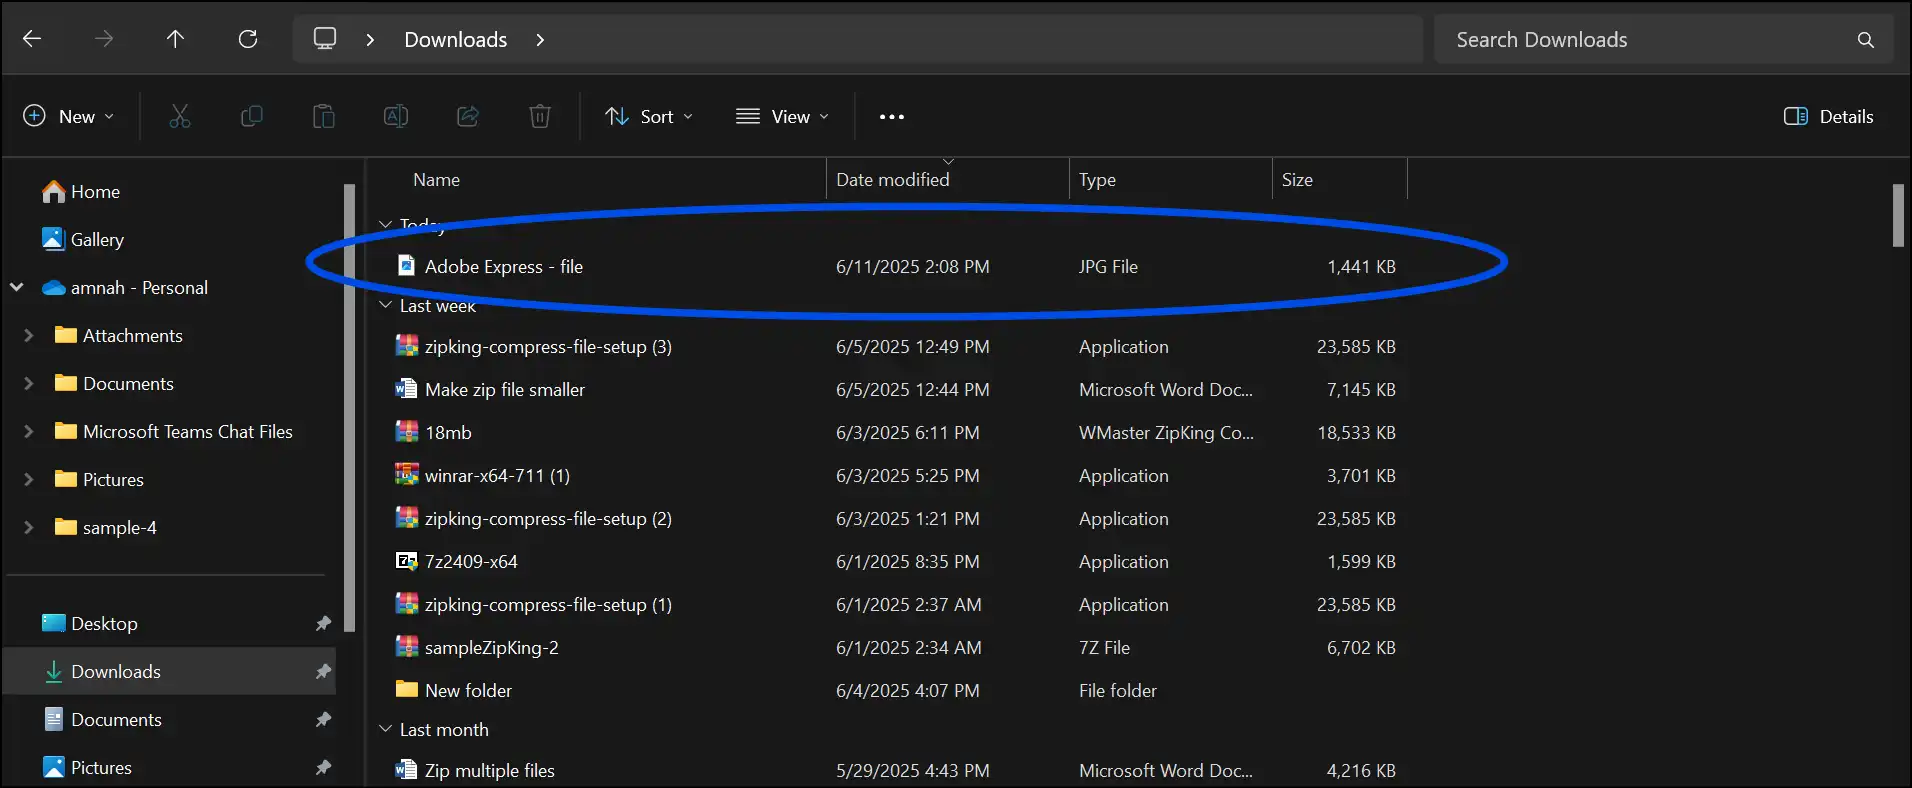
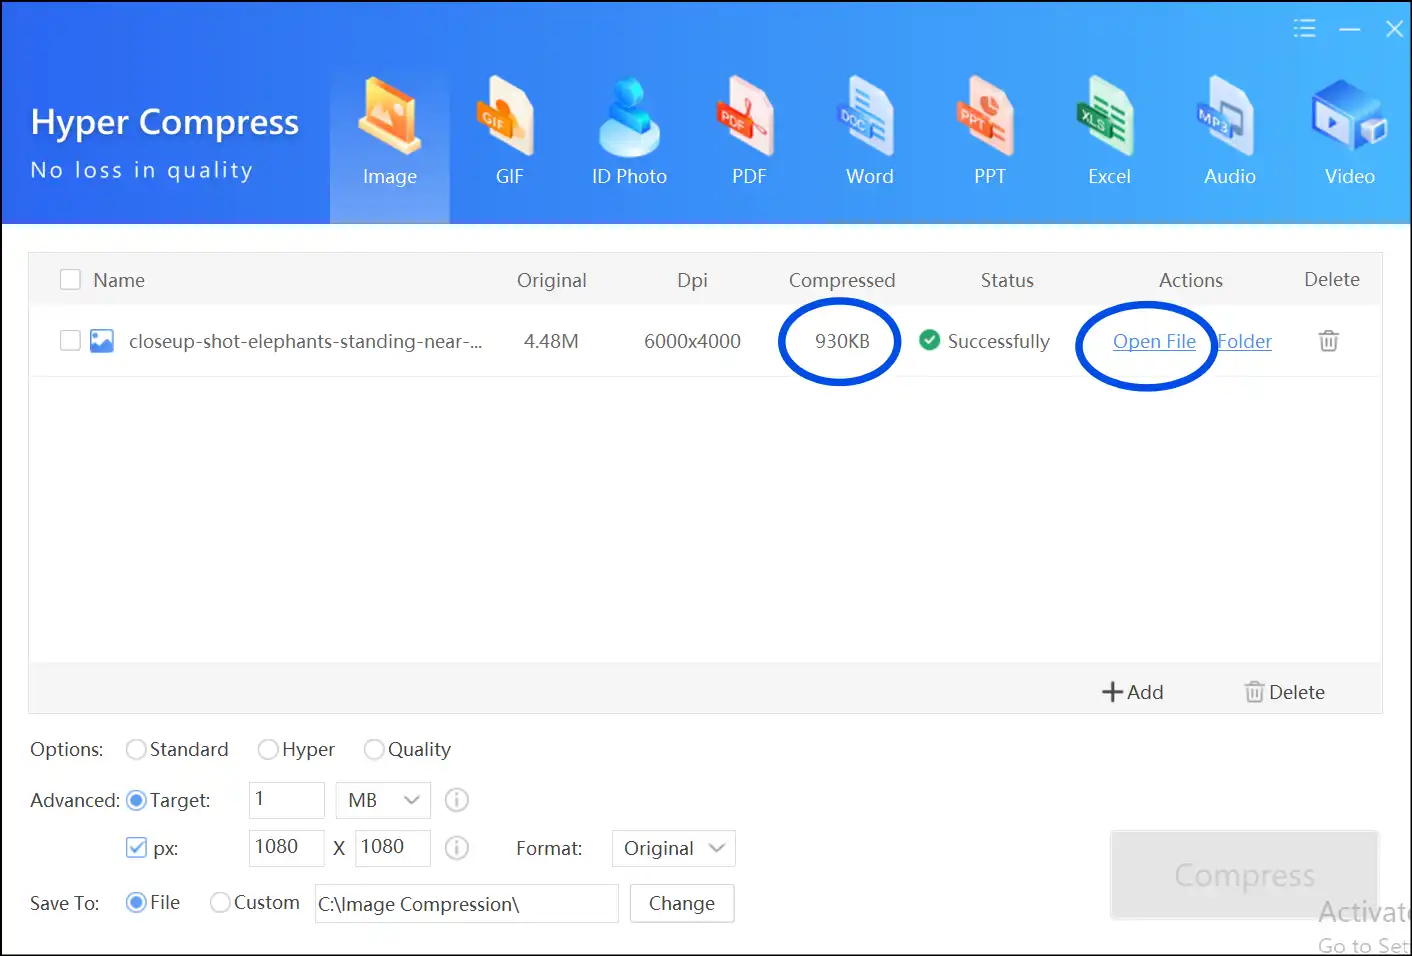
Step 4. Access the resized photo:Once the compression process is completed, click on "Open file" to view the resized photo.
💡Tips:You can also navigate to the "Downloads", access resized photos, and use them as desired.
If you want to reduce image size for normal use, you can refer to how to make a photo size smaller with no quality loss.
Part 3: How to Resize Photos for Instagram Using Mac Tool
For Mac users, there's a handy tool that simplifies the process of resizing photos for Instagram. Here's a sneak peek. It's easy to use, totally free, and works wonders for those quick edits.
Steps to Resize Photo for Instagram on Mac Using Preview
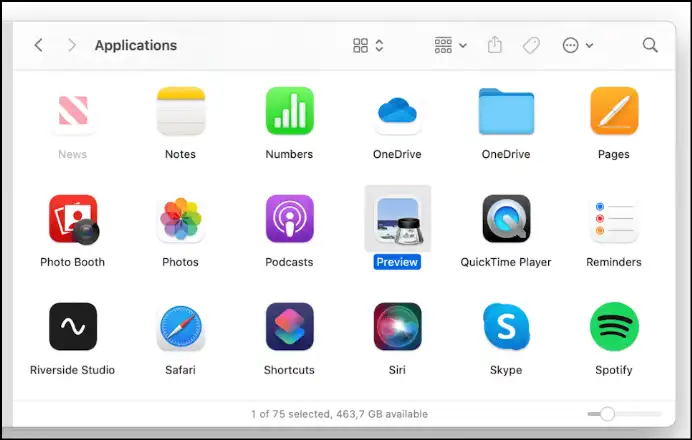
Step 1. Open the Preview App:Double-tap on the Preview App on Mac to resize photos for Instagram without any additional software.
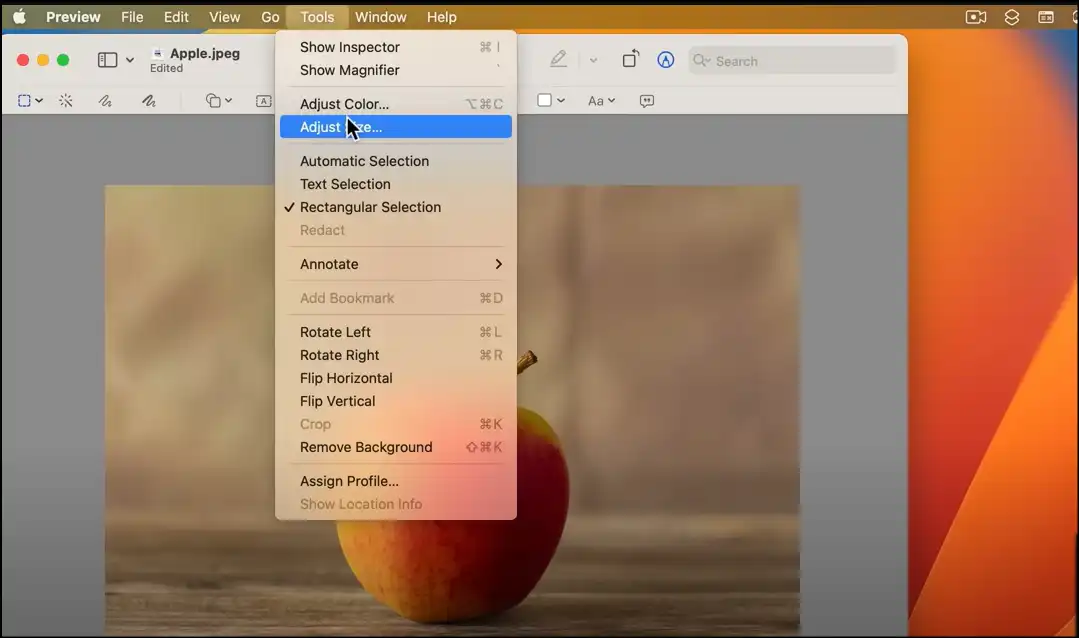
Step 2: Upload Photo to Adjust Size:Upload your photo that you want to resize on Mac Preview, click the "Tools" tab, and then click "Adjust Size" to open the Image Dimensions window.
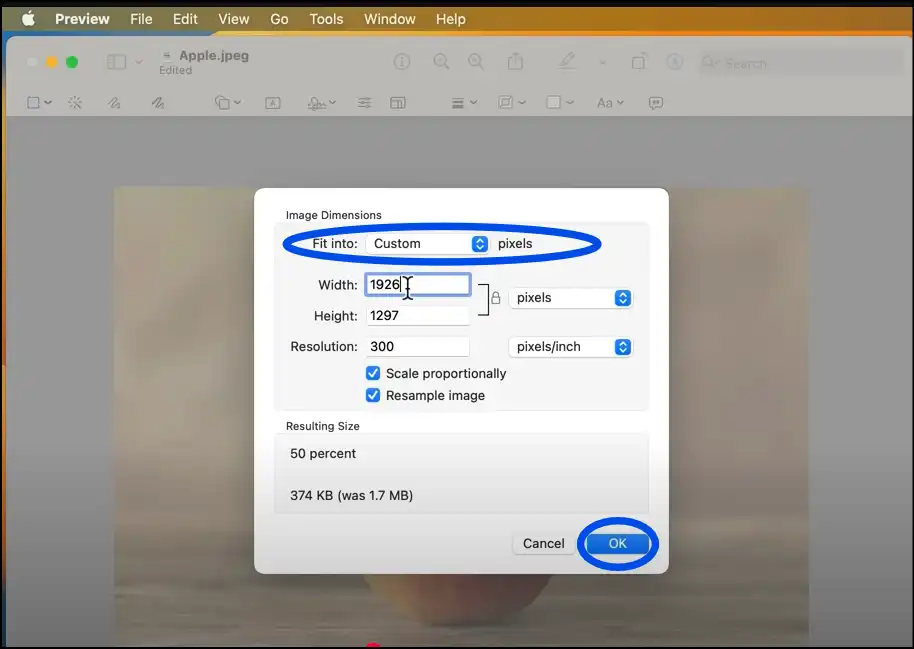
Step 3. Enter the preferred dimensions:Now select "Custom" from the Fit into options and set the desired dimensions for your Instagram photo, and then press "Ok" to save the resized photo.
💡Tips:Make sure you check the "Scale Proportionally" box to escape quality loss.
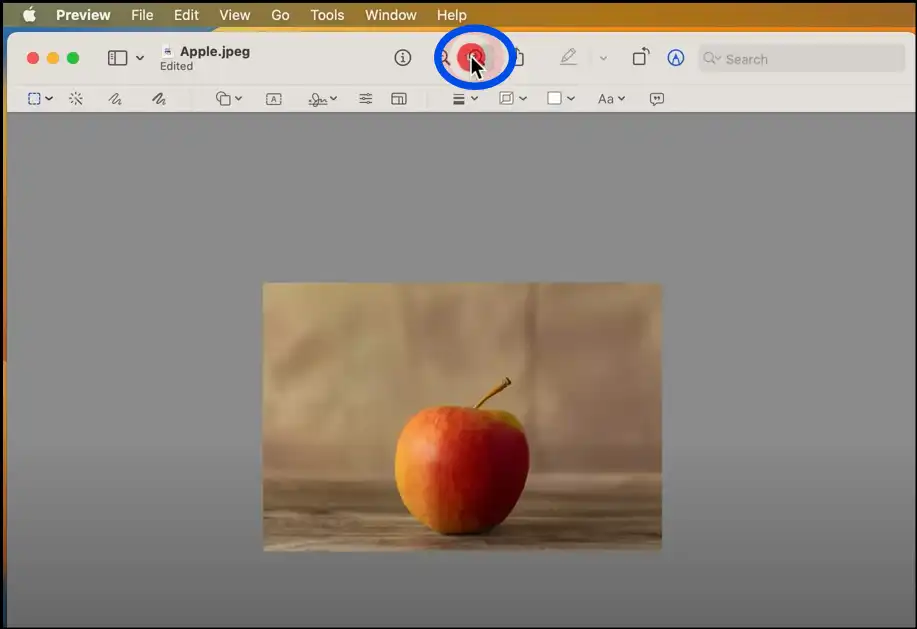
Step 4. Access the resized photo:Zoom in on the resized photo to check the image quality. You can now navigate and use the resized photo for your Instagram as desired.
Part 4: How to Resize Photos for Instagram on Android
Android users have the convenience of resizing photos with a range of apps, and one favorite among them is "InstaSize." It's totally free, super easy to use, and just right for those quick edits you need.
Steps for Resizing Photos for Instagram on Android
Step 1: Download InstaSize:Go to the Google Play Store, search for and download "InstaSize" to resize photos for Instagram. Double-tap to open the "InstaSize" app on your Android device.

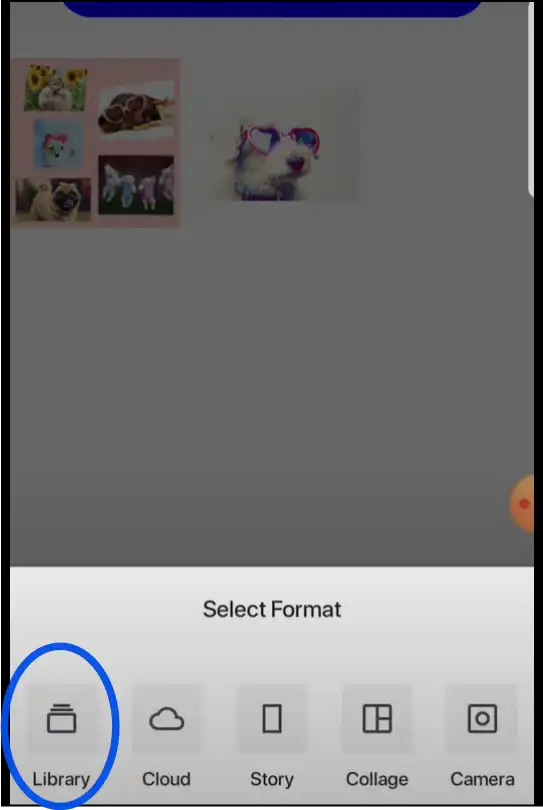
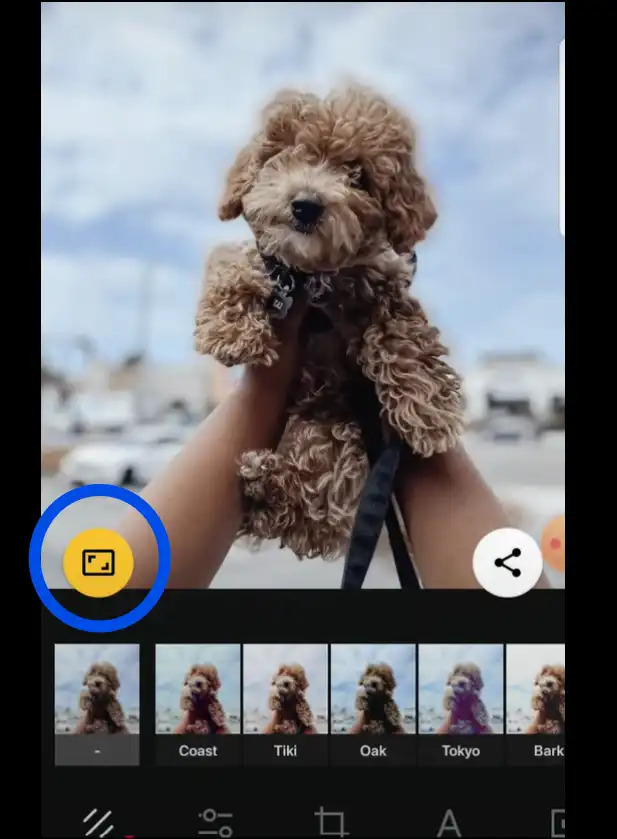
Step 2. Upload photo to resize:Click on "Library" to open your photos, and select and upload the image that you want to resize for Instagram. Now tap on the yellow icon to adjust the photo size according to the Insta post.
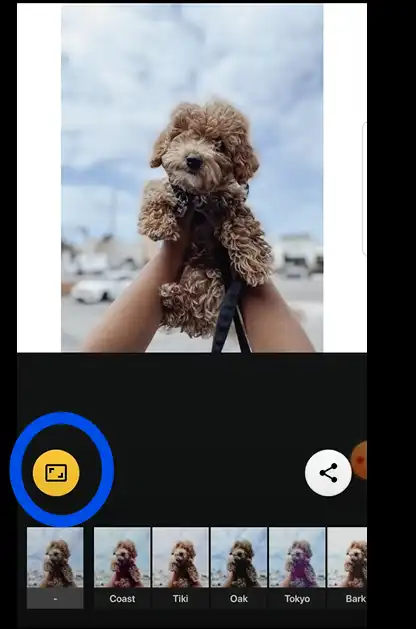
Step 3. Resize the photo:Tap on the yellow icon again to make your photo an "Insta post-sized photo". Once you see the white background on both sides of your photo, be sure that your photo is resized for the Instagram feed.
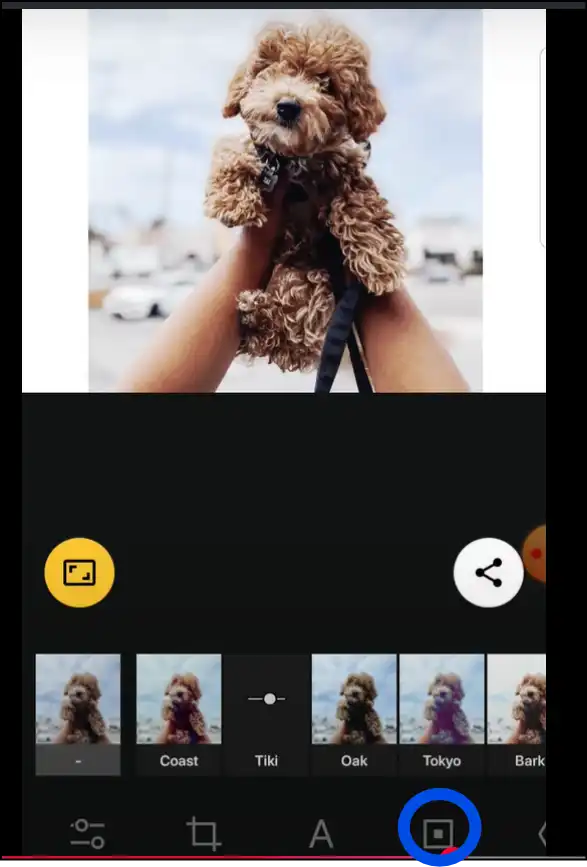
💡Tips:You can add other customization or just tap on the 5th icon (squared) and choose a beautiful background for your resized photo from multiple background options.
Step 4. Save or Share: Once you are done editing, tap on the "Share" icon to save the resized photo or share it on your Instagram.

Part 5: How to resize photos for Instagram on iPhone/iPad
Users of iPhones and iPads have the option to effortlessly resize images using the built-in Photos app or by exploring third-party apps such as "CropSize: Photo Resizer Editor
Steps to Resize Photos for Instagram on iPhone/iPad Using CropSize
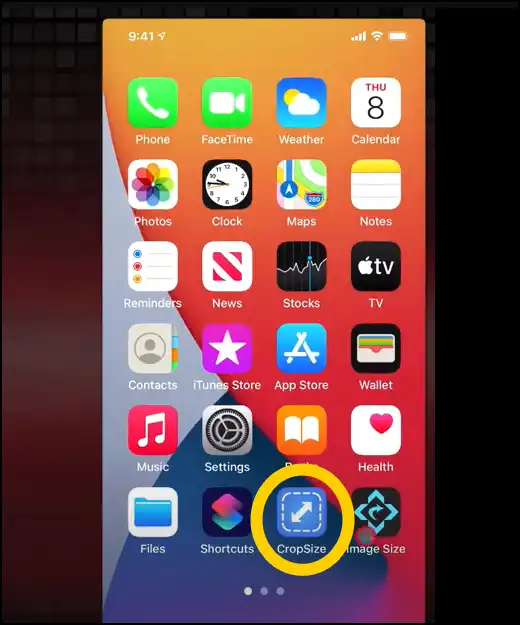
Step 1. Download CropSize:Download the "CropSize: Photo Resizer Editor" from the App Store and then double tap to open the app on your iPhone/iPad.
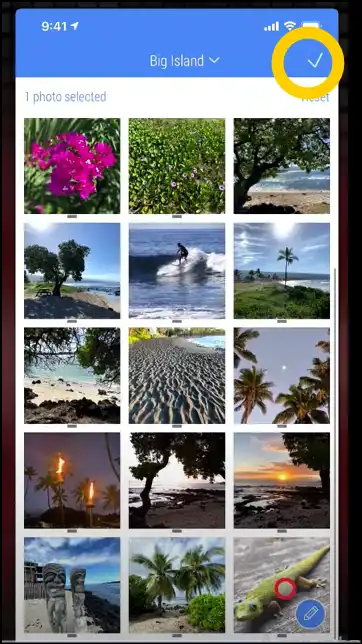
Step 2. Select photo to resize:Select single or multiple photos, navigate to the right corner, and tap on the tick mark to upload and resize them on iPhone/iPad.
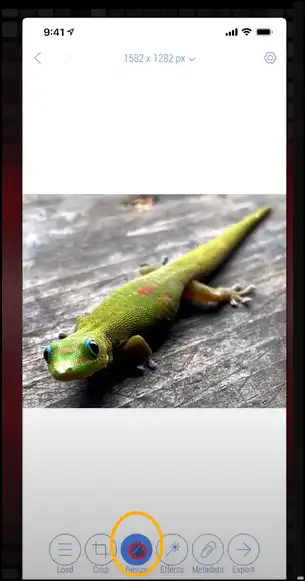
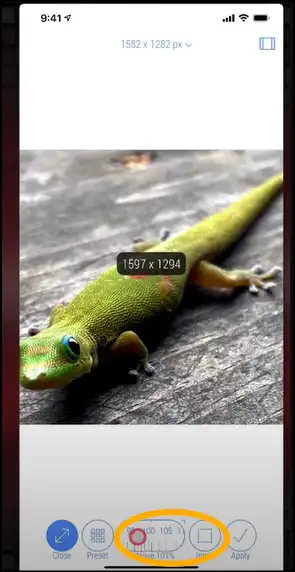
Step 3. Enter the dimensions:Once the image is uploaded, drag to select the size or tap on "input" to enter dimensions as your requirements, and then press "Apply".
💡Tips:You can also choose the preset dimensions for your resized photo by tapping on the "Preset" icon.
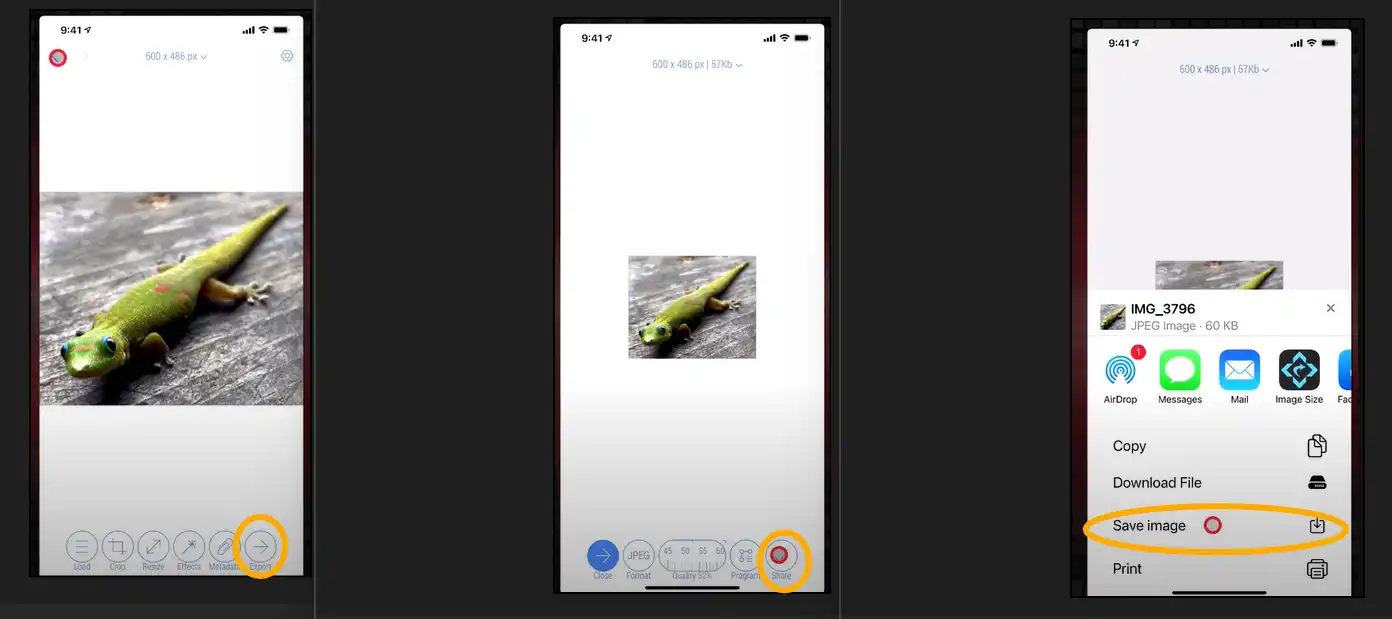
Step 4. Save or share the photo:Once you finish the editing, tap "Export," select file format if needed, and then tap "Share". Now share the resized photo directly to your Instagram or save it to your camera roll by tapping "Save Image".
Part 6: How to Resize Photos for Instagram Profile Images-Expert Tips
When your photos are resized correctly, they not only enhance the overall appearance but also boost interaction on your Instagram profile. Here are some expert tips to resize photos for Instagram:
1. Ideal Sizes: Instagram recommends a profile picture size of 320 x 320 pixels. To ensure optimal clarity across all devices, upload an image that measures at least 180 x 180 pixels, or follow the ideal size.
2. Choose Square Dimensions Given that Instagram displays profile images in a circular shape, make sure your photo is square to preserve all the essential details and keep them visible.
3. Pick out a clear picture: Go for a crisp, high-definition image to steer clear of any pixelation or quality drop during resizing photos for Instagram.
4. Look after the aspect ratio: As you resize a photo for Instagram, ensure you stick to a 1:1 (square) aspect ratio to avoid any quality loss or distortion.
5. Center Your Subject: Make sure your face, logo, or subject is right in the middle of your selected photo, making sure it stands out with clarity within the circular crop of the Instagram profile format.
6. Select the Perfect Format: To get the best quality for your photo, save your image file in either JPEG or PNG format.
7. Take a Glimpse Before You Share: Take a moment to see how your profile picture shines across different devices, ensuring it appears crisp and perfectly framed.
8. Utilize Picture Editing Tools: Know the power of platforms like Adobe Photoshop, Canva, WMaster Zipking, or free online resizers such as Pixlr to expertly crop or resize photos for Instagram perfectly.
Part 7: Hot FAQs About How to Resize Photos for Instagram
1. What's the Instagram profile image size?
The optimal size for an Instagram profile image is 320 x 320 pixels with a 1:1 aspect ratio, which means a little, flawless square. But we suggest utilizing 1080 x 1080 pixels for a clean, high-quality Instagram profile image.
2. How to resize photos for Instagram for maximum quality?
Use clear, high-resolution pictures and change their width to 1080 pixels, making sure to maintain the aspect ratio the same to keep the quality.
3. Is There Any Quality Loss When Resizing Photos for Instagram?
You can lose a little quality depending on the image editing program or the photo size you choose while resizing. But using applications like Wmaster ZipKing or Adobe Express can help you make photos smaller without losing quality or resolution.
4.What's the best app to resize my large images to fit on Instagram?
If you use Windows, Wmaster ZipKing is highly recommended because it is easy to use and very productive, especially when it comes to resizing photos for Instagram at once. Users can also use free internet tools like Adobe Express.
5. Is there best website or computer app to resize images for Instagram?
Canva, Pixlr, and Fotor are all online apps that may help you quickly resize photos for Instagram. If you want to edit offline, desktop programs like Adobe Photoshop or WMaster Zipking provide you greater control or the ability to process files in batches.
Final Thoughts
Resizing photos for Instagram is key to making sure your images shine and fit seamlessly into your profile grid. When it comes to resizing with ease and speed, Adobe Express and mobile apps like InstaSize (Android) and CropSize (iPhone/iPad) stand out as fantastic options. On the other hand, for Windows users, we highly recommend our all-in-one tool, WMaster ZipKing.
WMaster Zipking is a powerful desktop solution that makes the process easier while giving you the best quality results. The tool will let you have better control over your files and offers batch processing. Furthermore, with its beginner-friendly UI design, amazing features, and temporary free access, it stands out as an excellent option.Seize the opportunity-acquire Wmaster ZipKing immediately and elevate your Instagram feed!!
