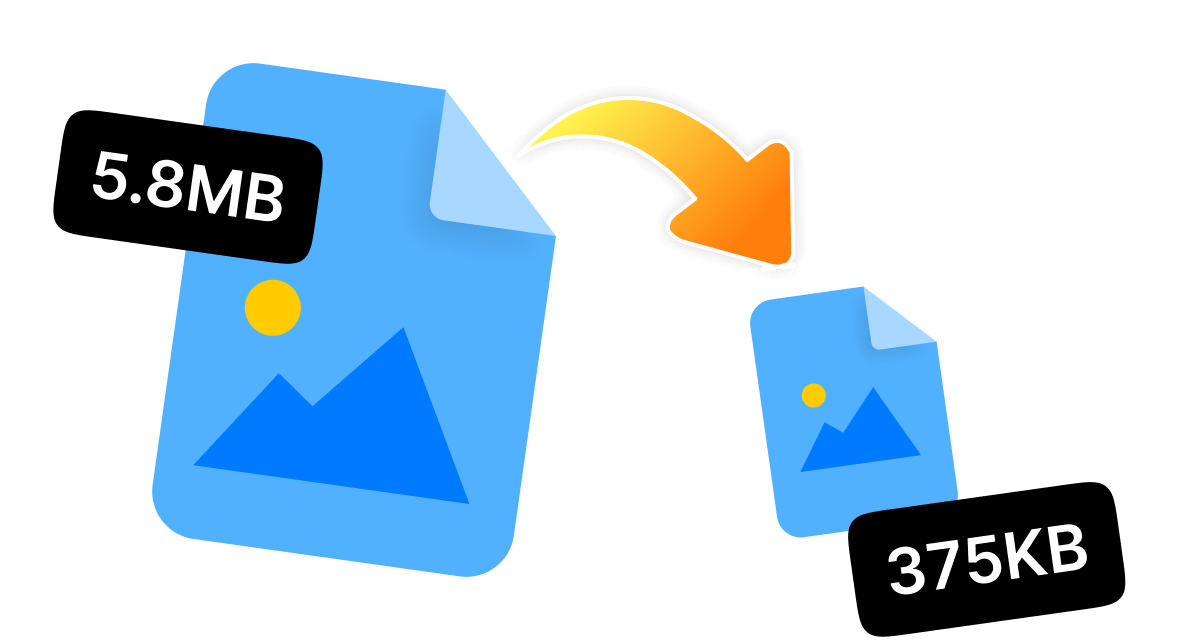

Optimizing image file sizes is the only way to improve website efficiency, loading times, and user experience in today's digital age. If you are looking for quick ways on how to decrease image file size, you have come to the right place.
Whether you are a web designer, photographer, or just someone who wants to maximize their image file management, discover six proven techniques to compress images without risking quality.
In this article
- Understanding Image File Formats and Their Best Use
- How to Decrease Image File Size in Photoshop
- The Easiest Methods to Decrease Image File Size on Windows
- How to Decrease Image File Size on Mac
- How to Decrease Image File Size Online
- How to Decrease Image File Size on Iphone
- How to Decrease Image File Size on Android
- How to Decrease Image File Size Related FAQs
Part 1: Understanding Image File Formats and Their Best Use
This simple and quick guide will help you to choose the perfect format for your needs.
JPEG: JPEG is excellent for realistic photos and pictures.
PNG: PNG is ideal for pictures needing transparency, logos, and graphics.
GIFs: GIFs are effective for creating simple animations and displaying pictures.
WebP: For websites and apps, WebP is great.
TIFF: TIFF is most suitable for professional photography and printing.
BMP: BMP is best suited for uncompressed Windows images.
Part 2: How to Decrease Image File Size in Photoshop
Though it could help you quickly shrink the size of photos, Photoshop is a powerful and one of the most famous tools for picture processing.
Tutorial to Decrease Image File Size by Photoshop
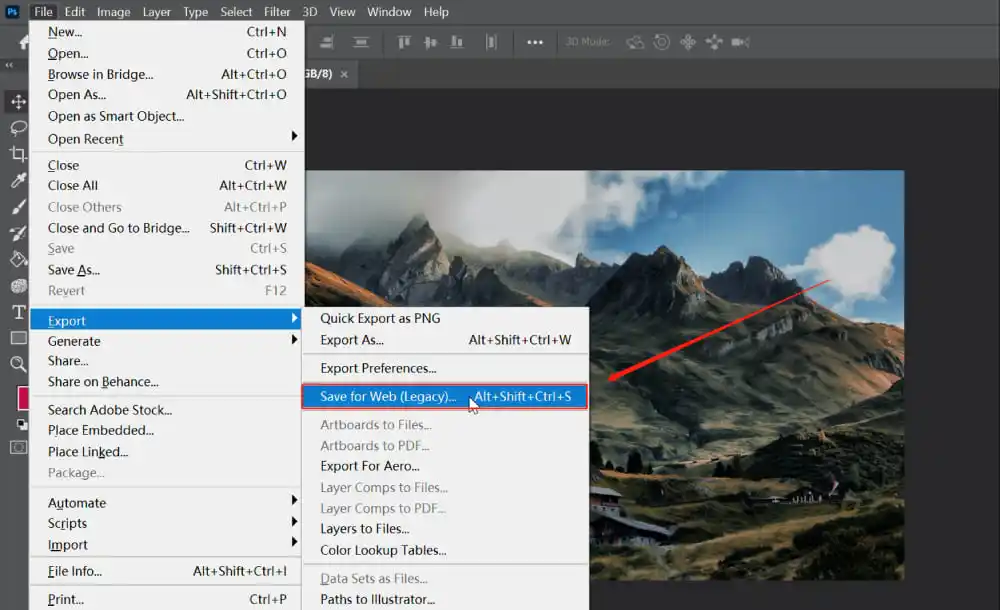
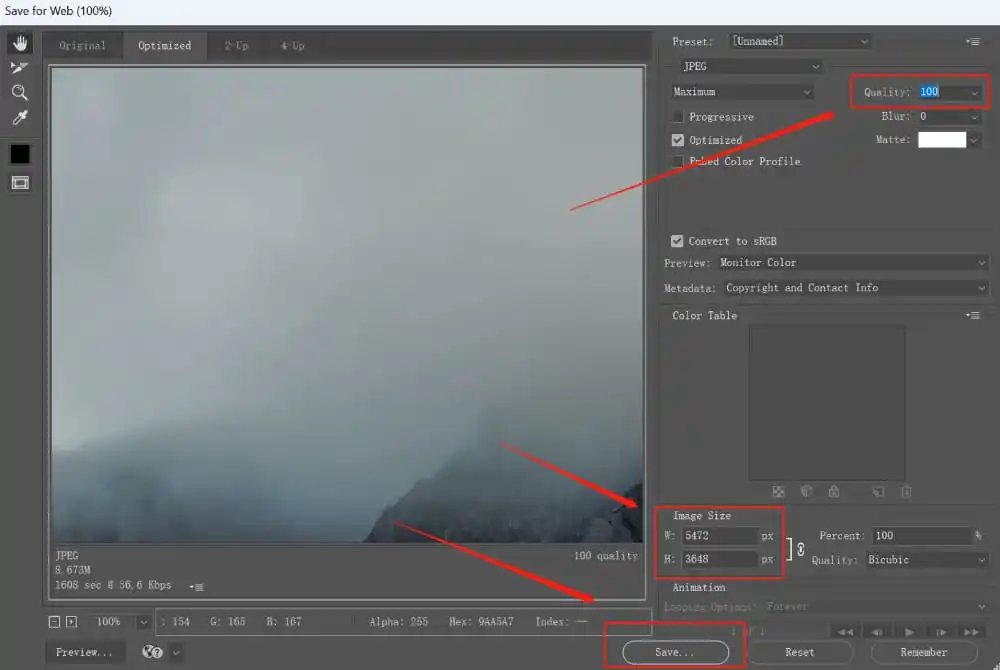
Step 1. Select "Save for Web": Open your image file in Photoshop. Click on the 'File' tab in the top left corner, tap on "Export,' and select 'Save for Web (Legacy)."
Step 2. Verify the File Size:An editing box will appear where you can see (in the lower-left corner) the size of your image after "Export."
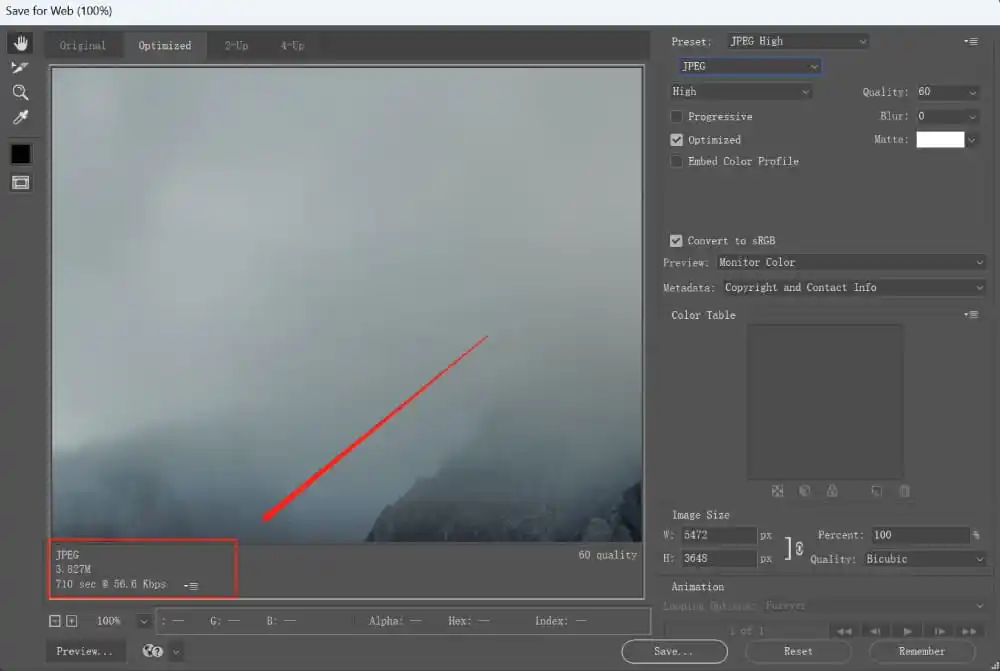
Step 3. Adjust Compression Settings:Now select the image file format (JPEG, PNG), and then custom select image size.

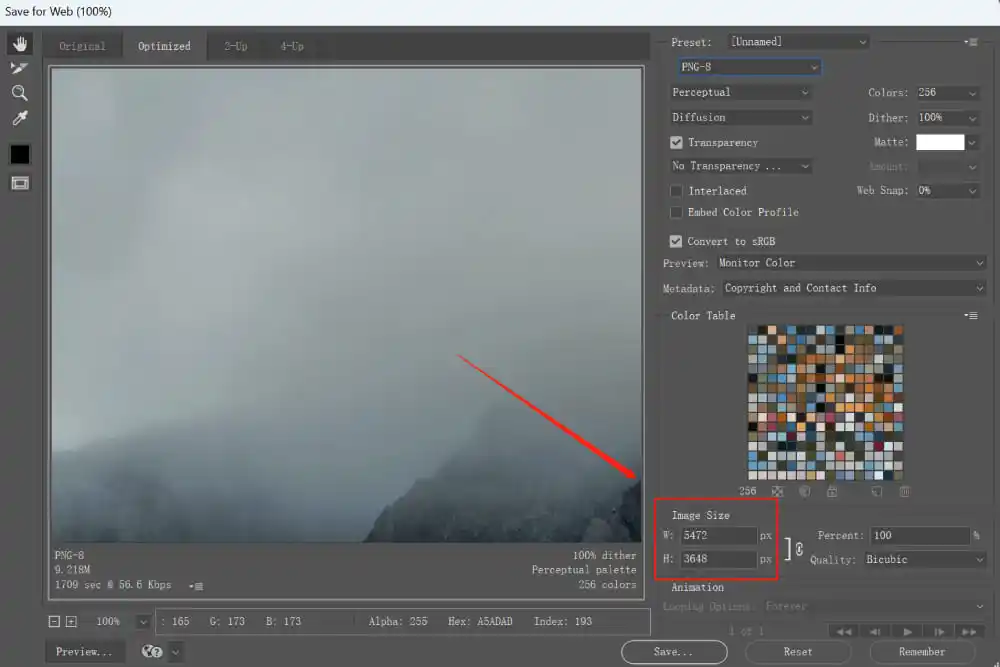
Step 4. Select Compression Level and save the file.Set the compression level for your image. Likewise, you can also set the "Quality" to adjust the image compression level. Now click "Save" to save the optimized image file.
💡Tips:The lower the number of Quality, the smaller the file size; yet, the poorer the image quality. For web use, a setting of about 60-70% generally strikes a decent balance.
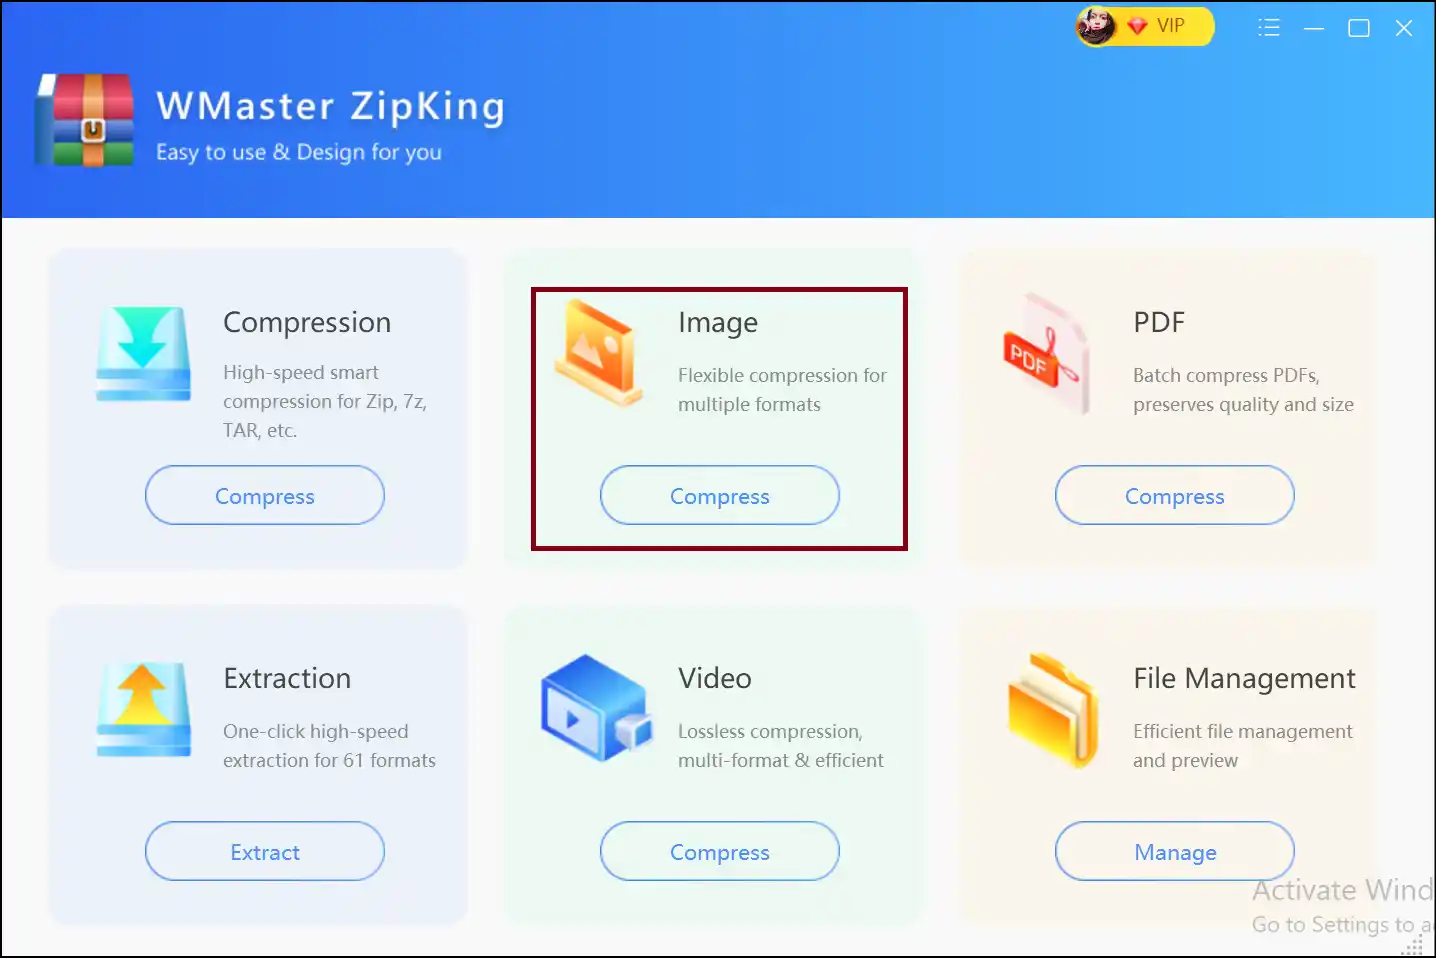
Part 3: The Easiest Methods to Decrease Image File Size on Windows
If you use Windows, WMaster ZipKing provides a fast and easy way to lower image file size. A simple approach made for both beginners and pros looking for fast results. This software not only maintains quality throughout compression but also aids in lowering image size.
5 Key Features of Decreasing Image File Size by WMaster ZipKing
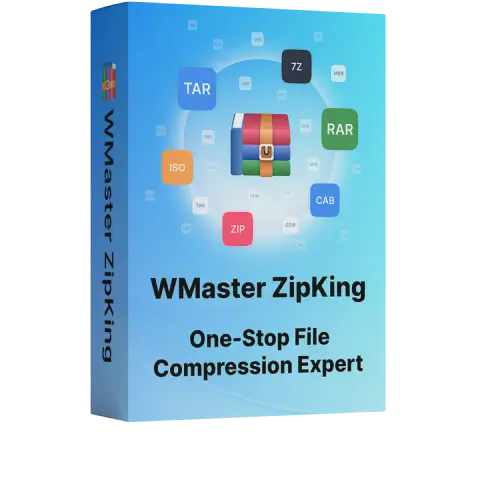
WMaster ZipKing
Free Desktop Tool to Decrease Image File Size in One Click
- User-Friendly Interface:Easy navigation and drag-and-drop user interface.
- Over 61 types of formats supported:Compress image files in various formats like JPG, PNG, GIF, and more.
- Official Image Resizer: Compress and custom select dimensions to resize images of passports, visas, and ID photos.
- Batch Processing: Quickly reduce the file size of multiple images at once with just a few clicks.
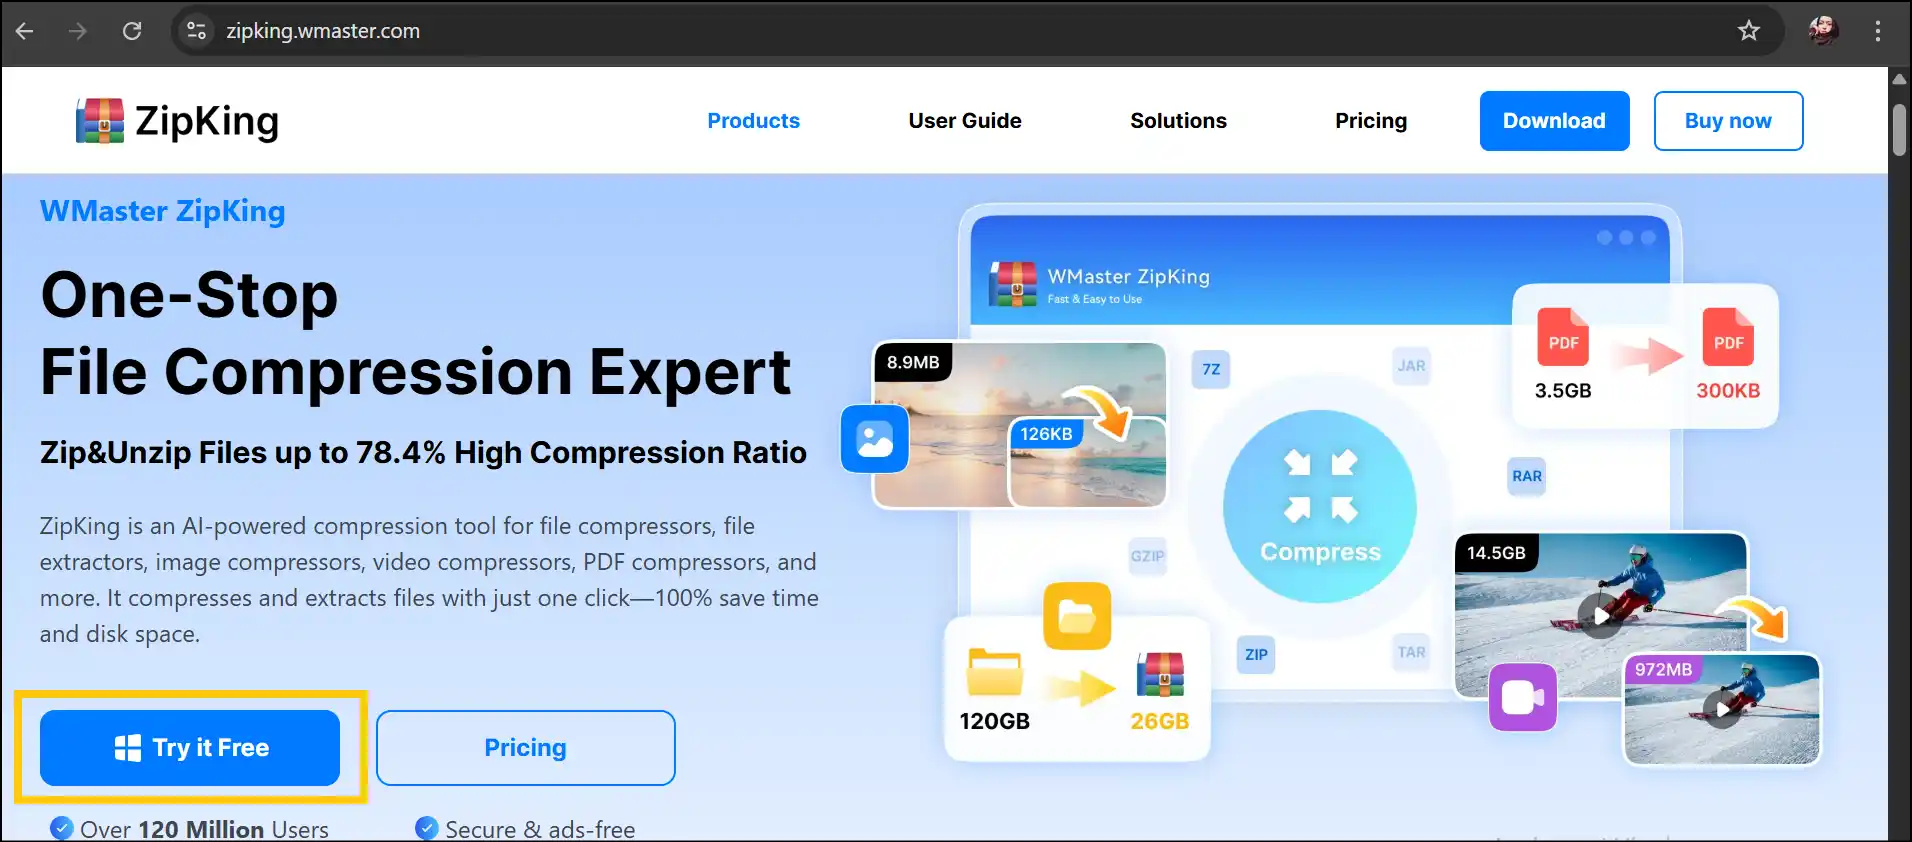
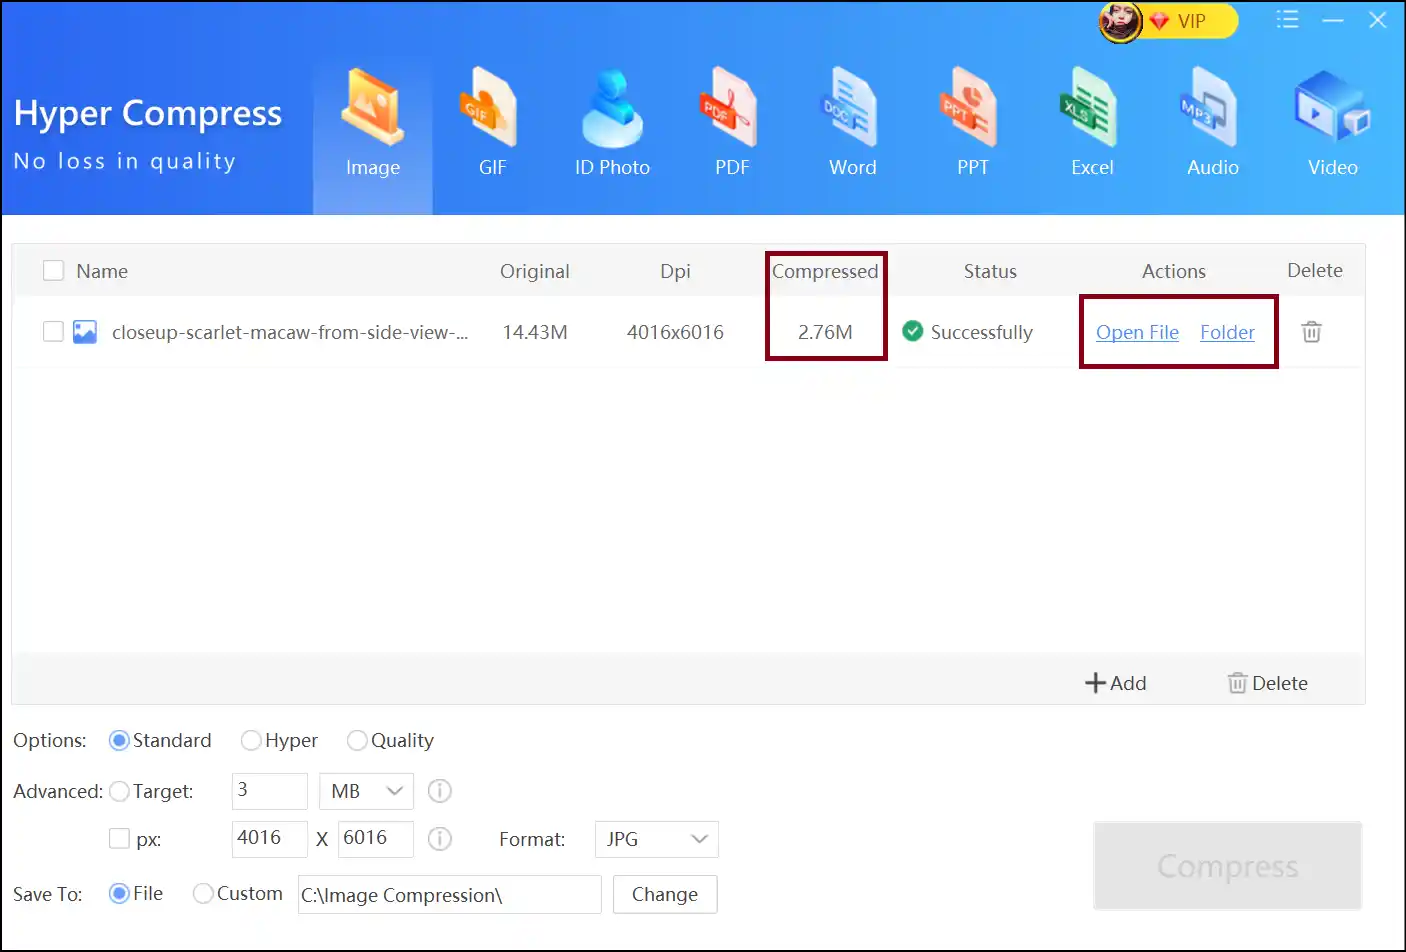
- Hyper Compression: Hyper compress image files and decrease file size up to 78.4% without dropping the image quality.
Guide to Decrease Image File Size by WMaster ZipKing
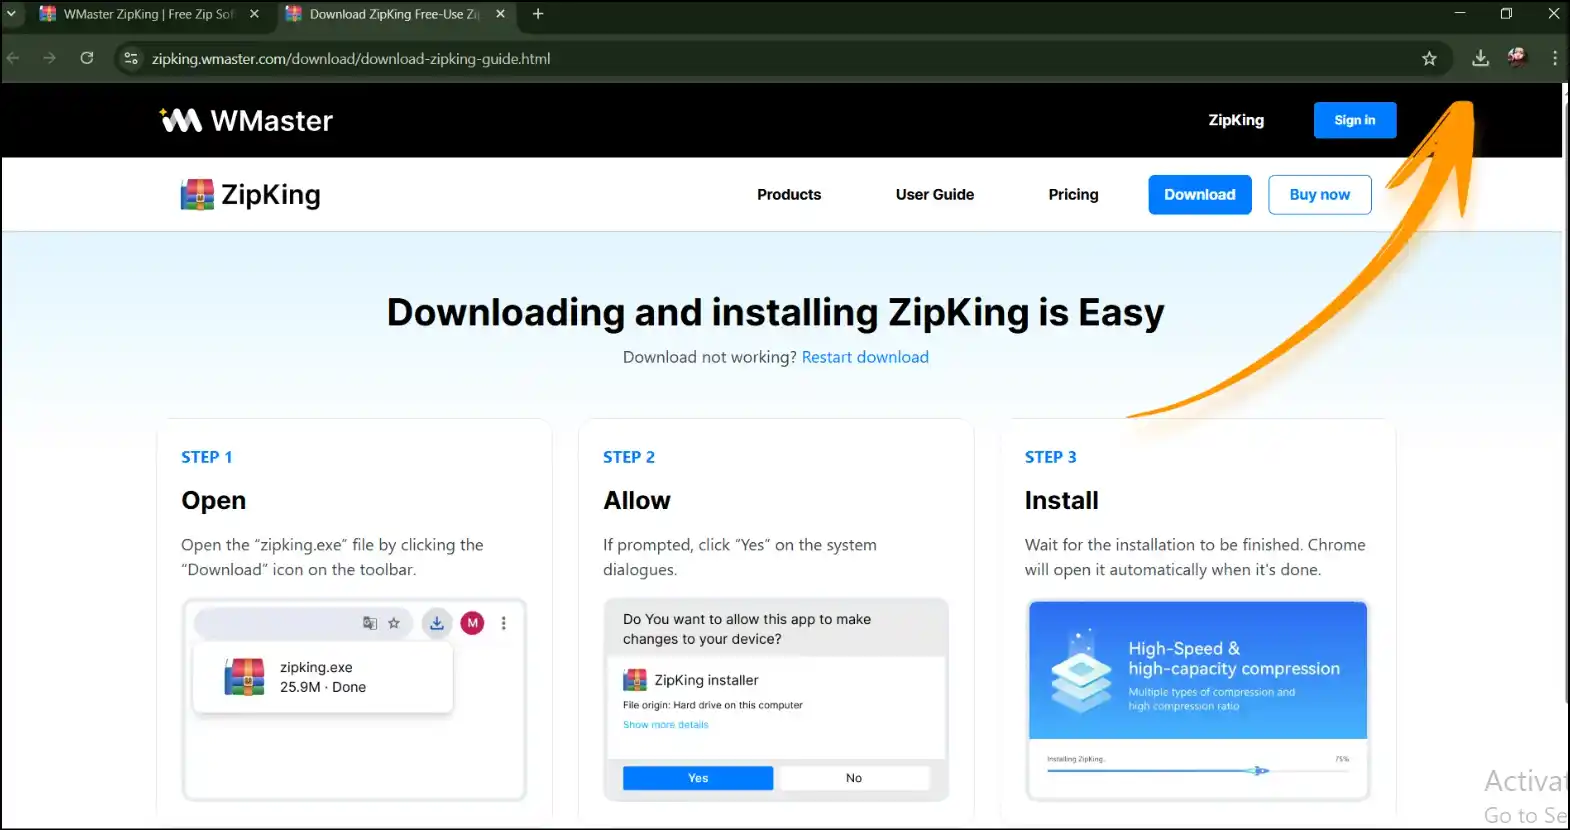
Step 1: Install and launch WMaster ZipKing. Visit WMaster ZipKing and click "Try it Free" to download the tool. Now, to install the software, follow the prompts.
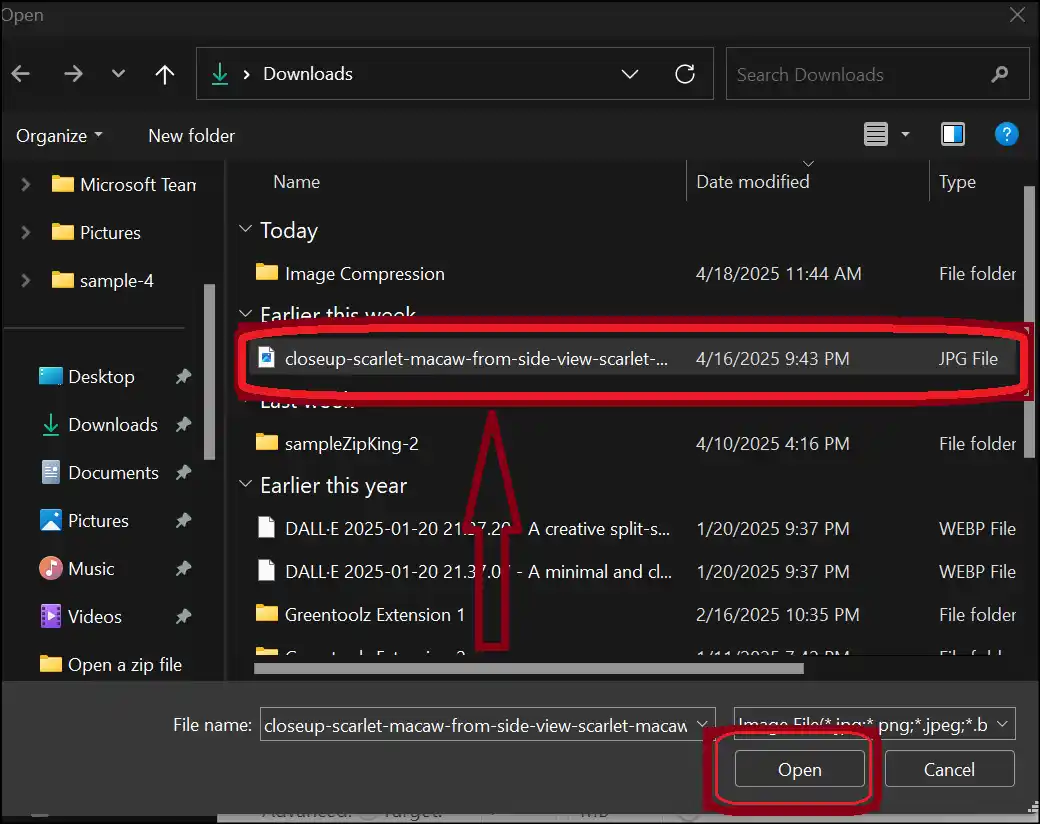
Step 2: Launch the Tool and Upload Image File: Now launch the tool on your desktop and tap on "Image Compress". Now drag and drop your image file or click "Select Image" to locate and select your image file, and tap on "Open" to upload.
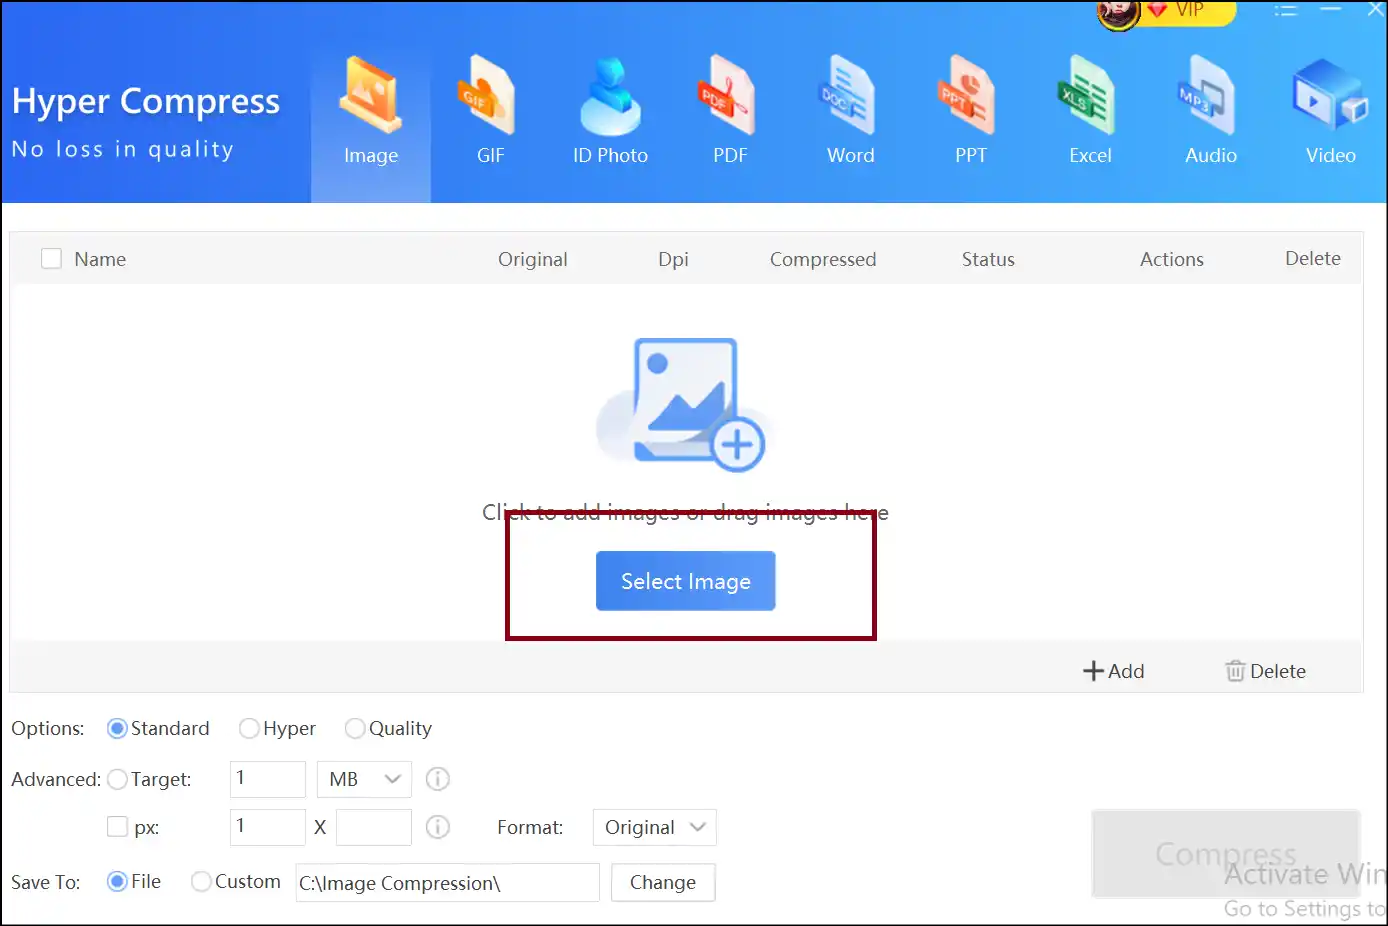
Step 3: Compression Level Customization: Choose the compression level and other target preferences for your compressed image file and press "Compress".
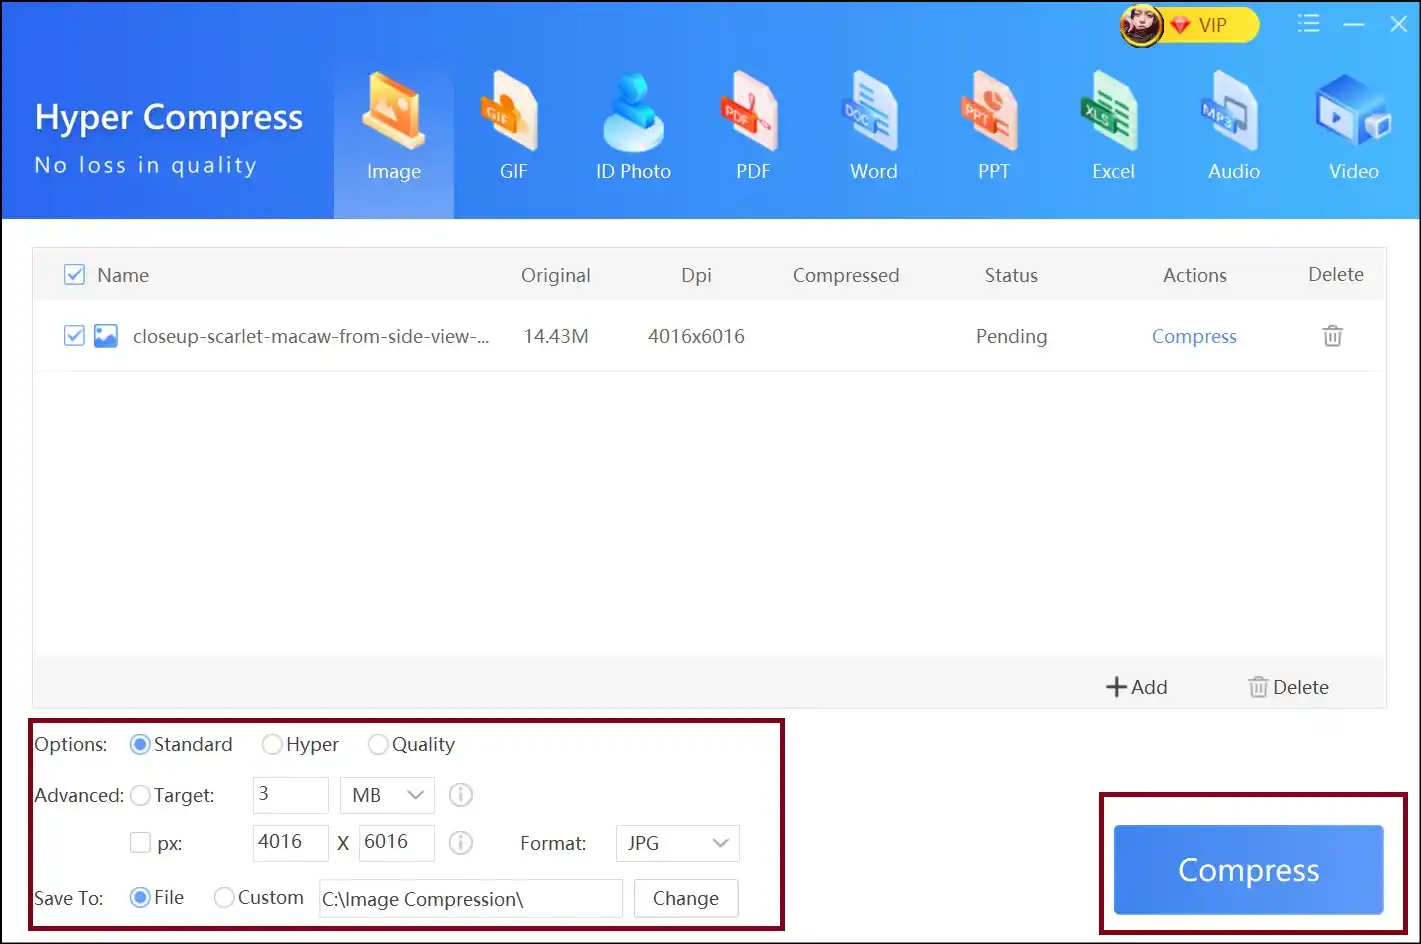
Step 4: Access Compressed Image File: After completing the compression process, click on "Open File" to access the compressed image file without its quality dropping.
💡Tips:In the current folder, you can find a folder with the name "Image Compression", where you can access and use your compressed image file anytime.
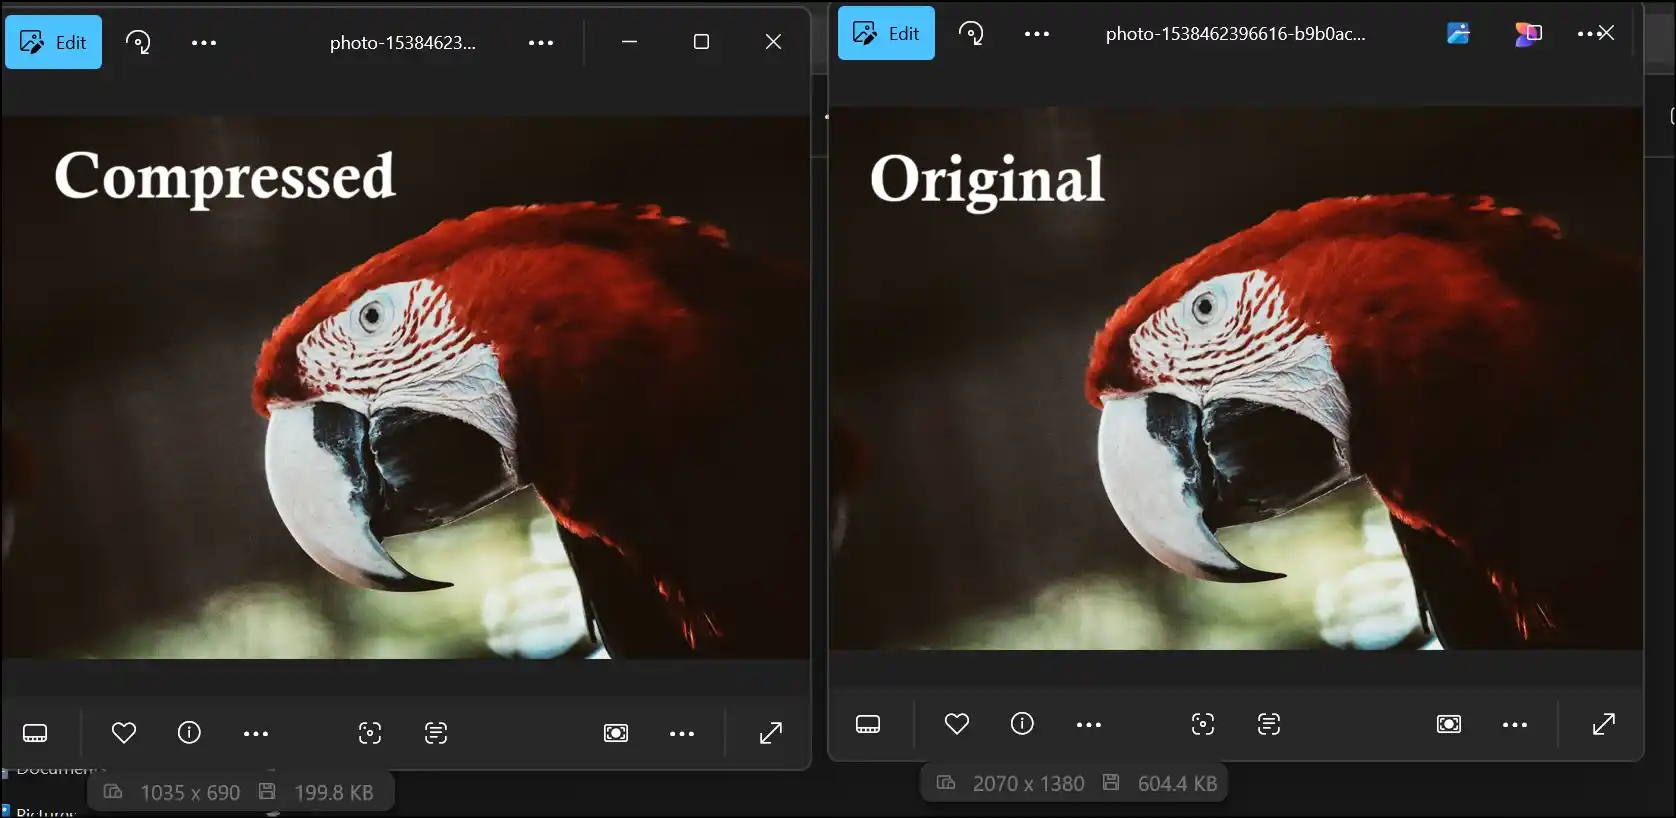
💡Tips:You can manually compare the lossless compression results by opening both the original and the compressed image file at once.
Part 4: How to Decrease Image File Size on Mac
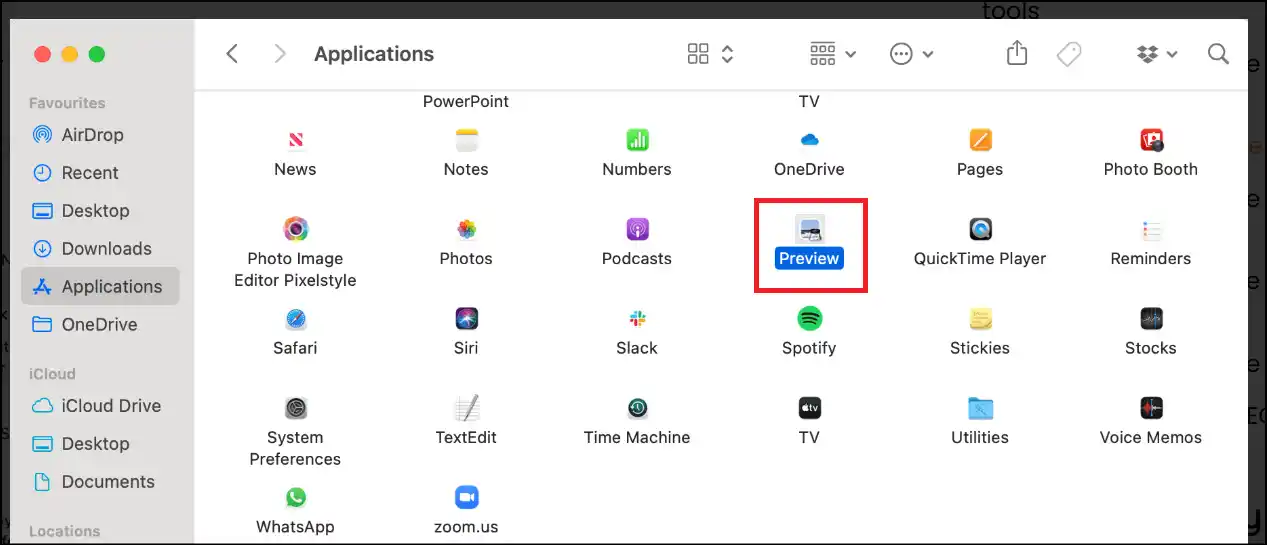
Mac users are lucky to have several built-in tools that can help in file management. Likewise, the "Preview" app lets you make image file sizes as small as possible without needing any downloads. Since it offers a seamless and quick file reduction function, Preview is one highly recommended app.
Steps to Decrease Image File Size in Preview
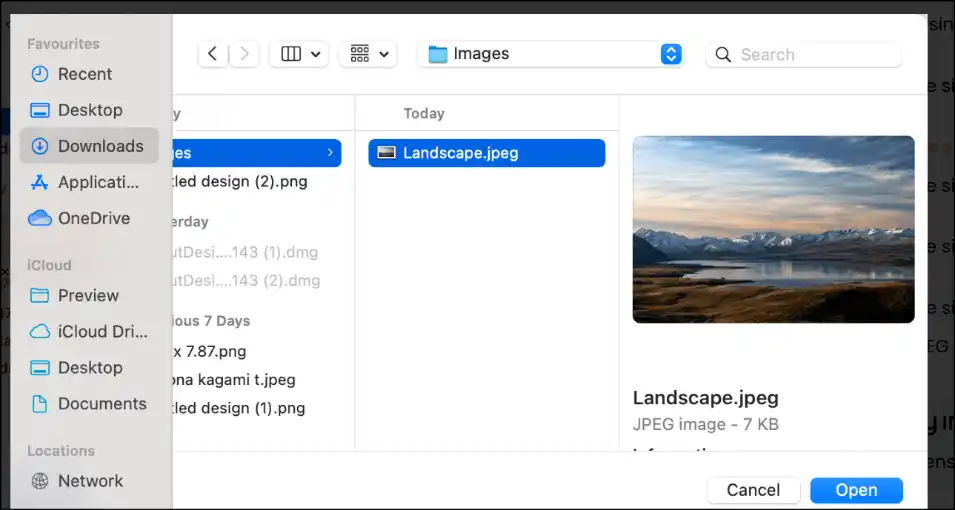
Step 1: Open the Image in Preview App:Head over to "Applications", double-tap the "Preview" app, navigate, and upload the image file from the "File Explorer Window".
Step 2: Modify Size of Image File:Now move to the title bar, tap on "Tools", and then click "Adjust Size".
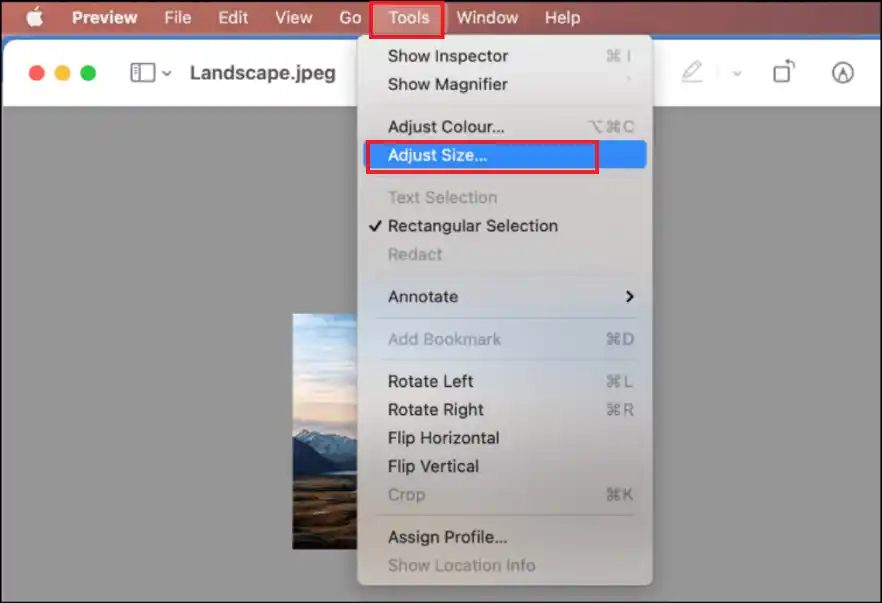
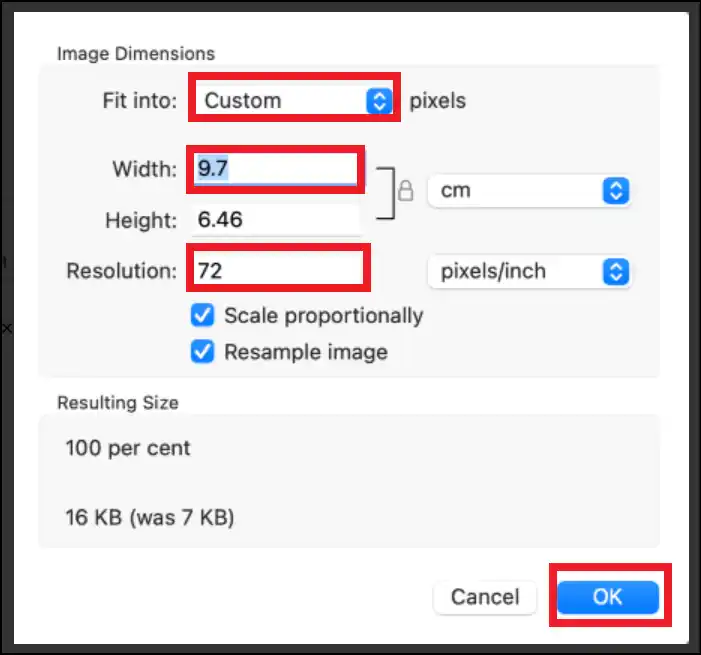
Step 3. Choose Smaller Dimensions: Now select customization settings and lesser dimensions for compression according to your target level.
💡Tips:The best selection for digital JPEG images is 72 pixels per inch, but the PPI should be higher if you want to print the images.
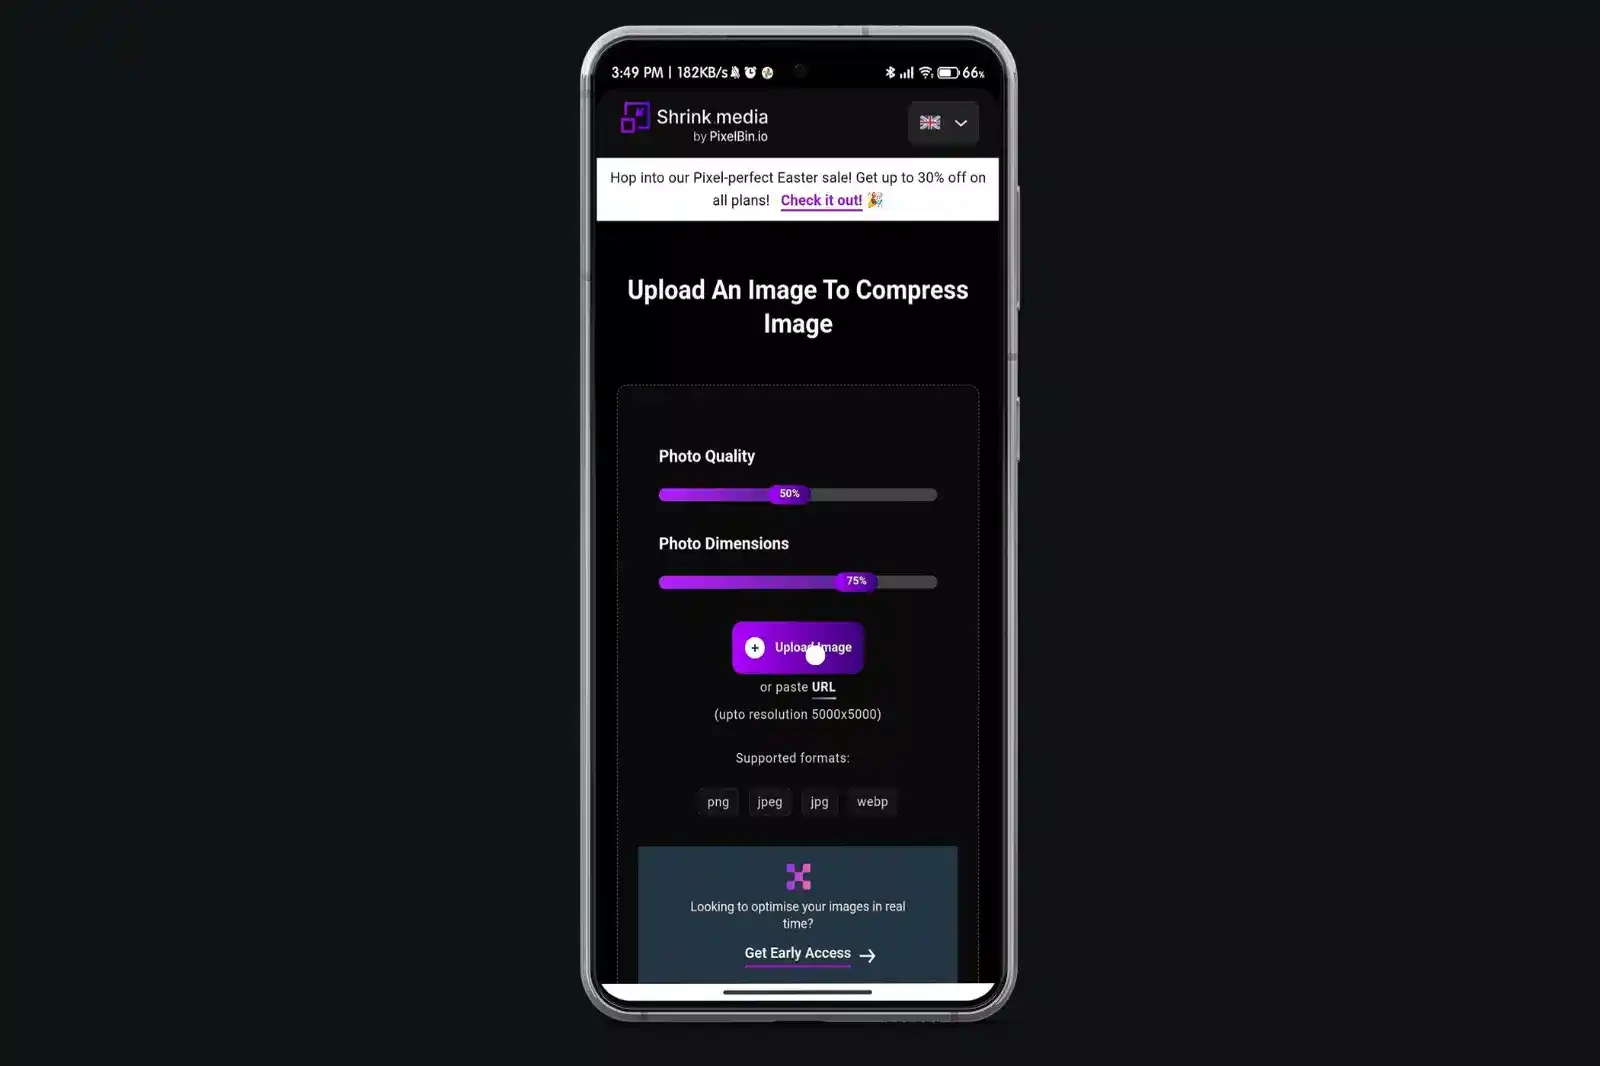
Part 5: How to Decrease Image File Size Online
If you are in a hurry and need to learn how to decrease the file size of an image without downloading any software, try Xconvert. It is an online tool to compress image files without compromising quality. It also offers batch processing and customization options where you can select the compression level and quality for your file.
Steps to Use Xconvert to Decrease Image File Size Online
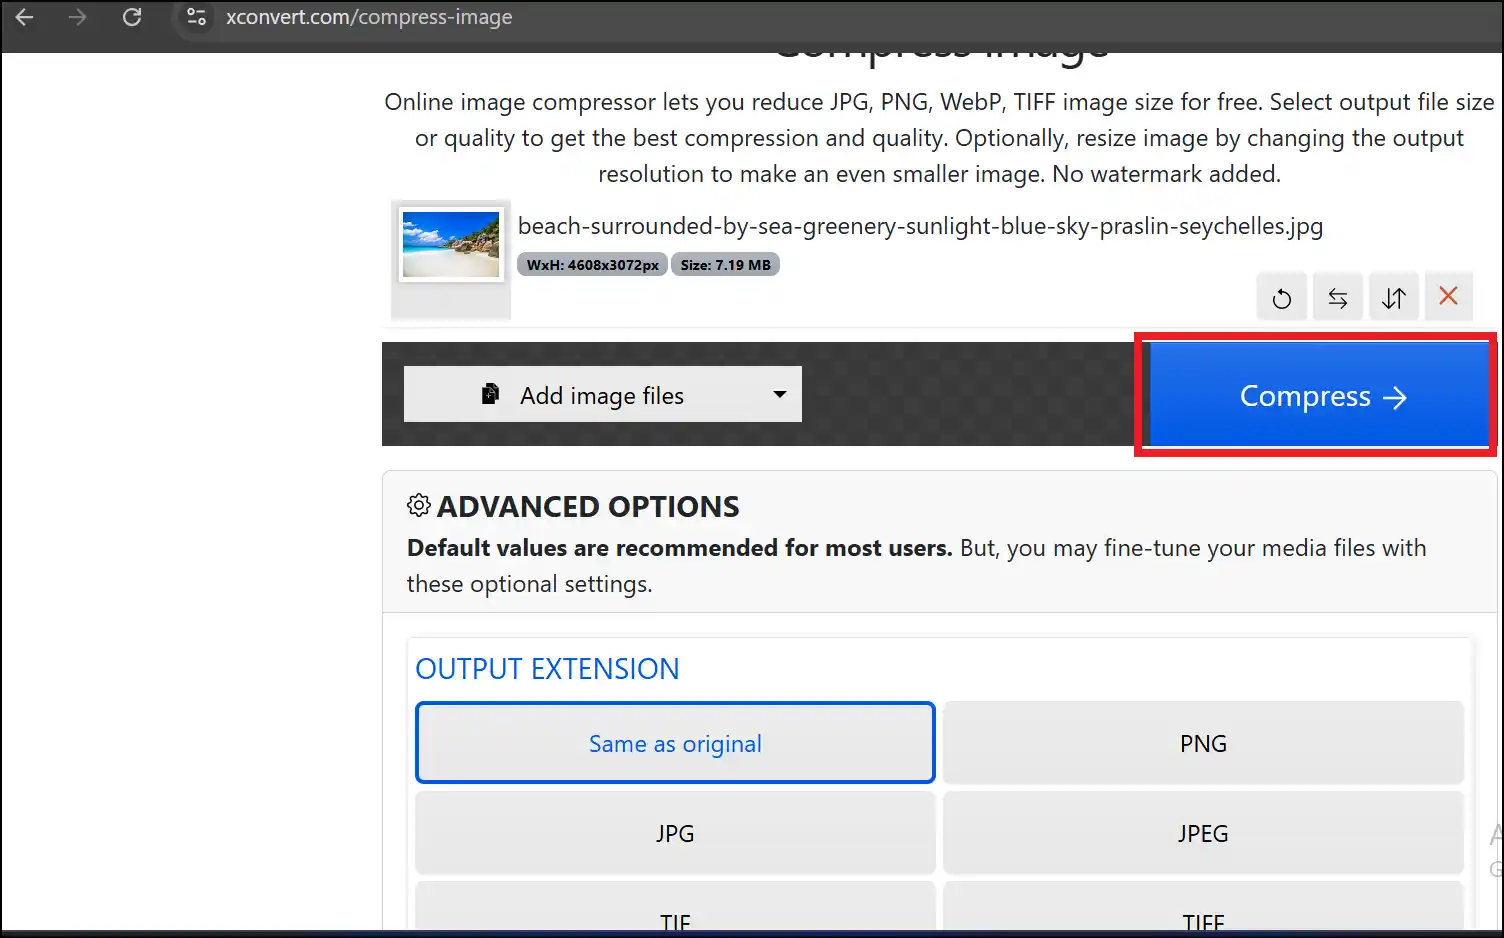
Step 1. Go to Website and Upload Image: Open Xconvert on your web browser and upload the image file that you want to compress online.
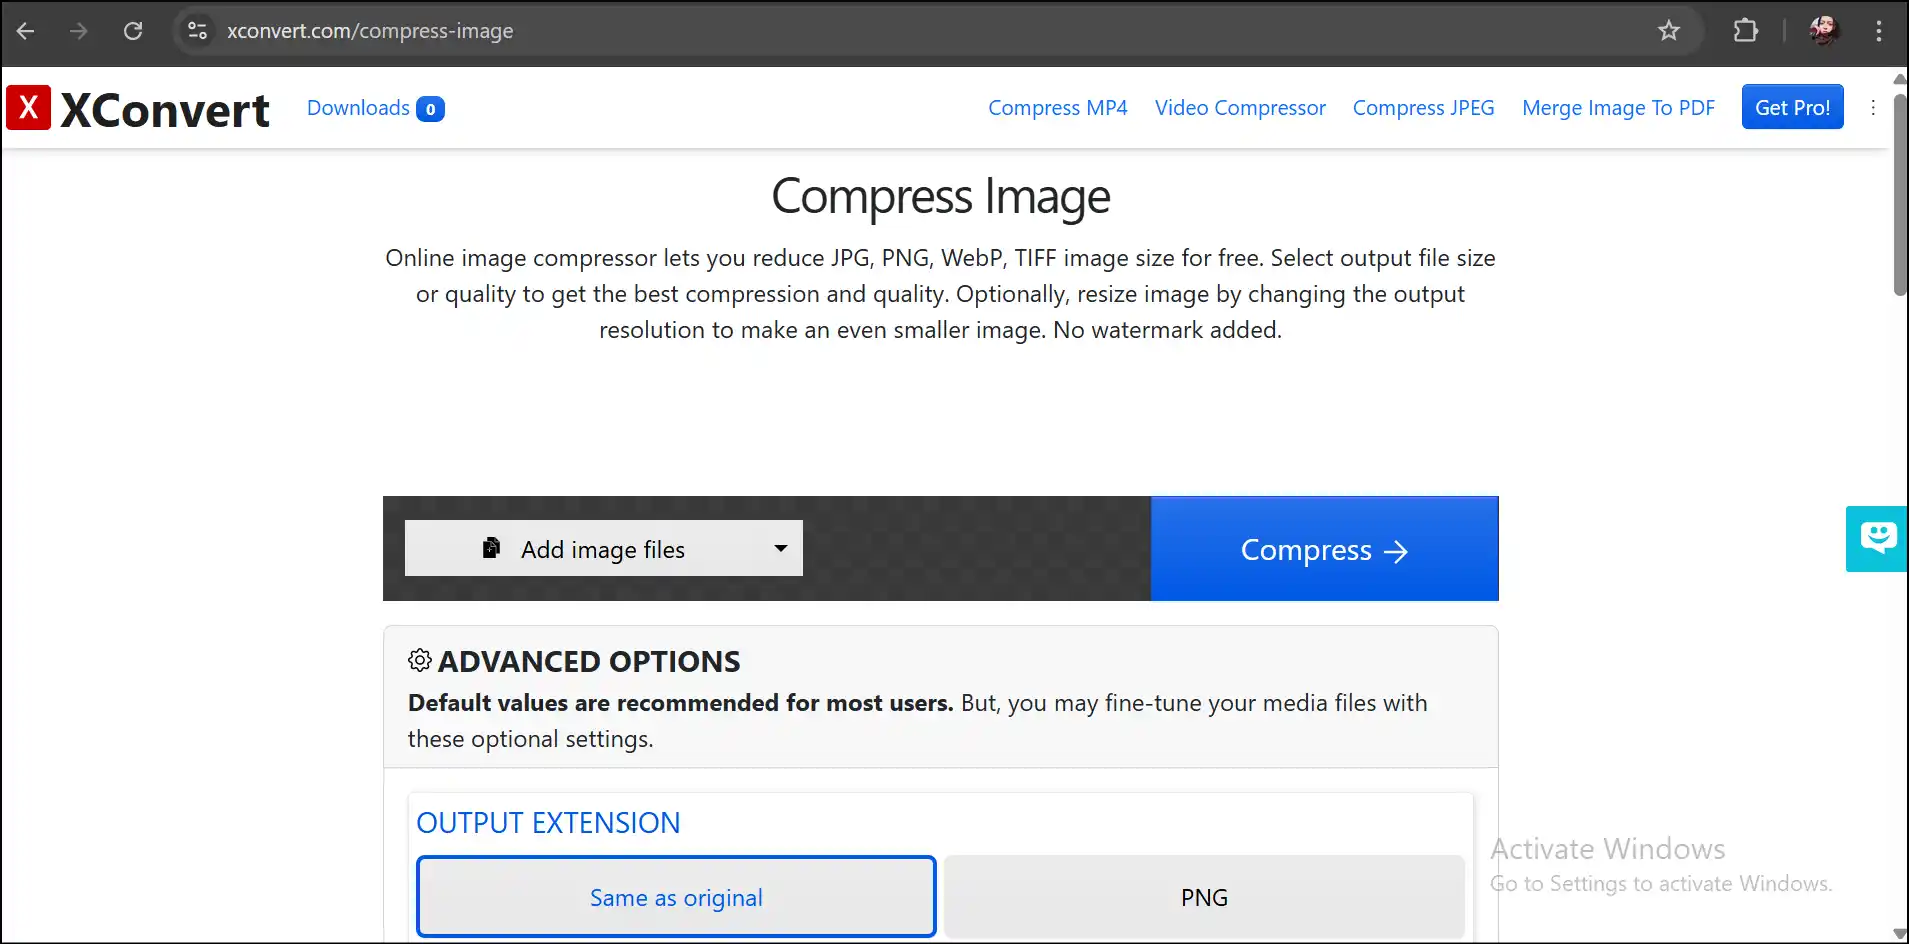
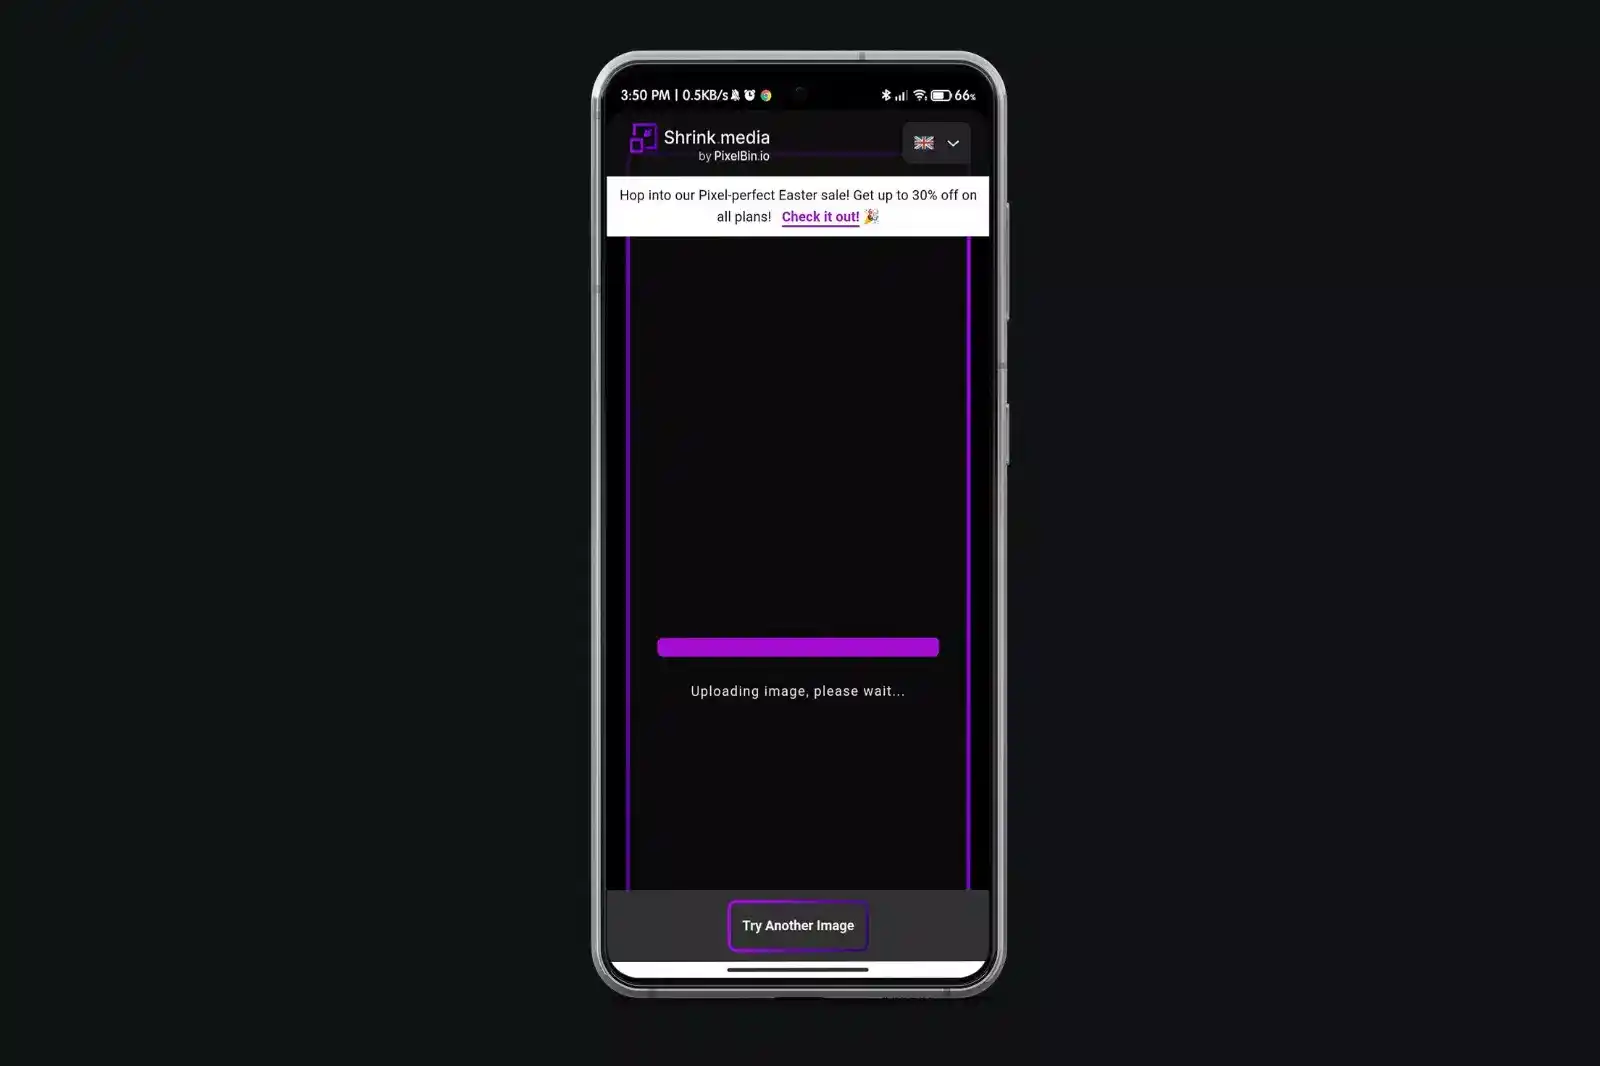
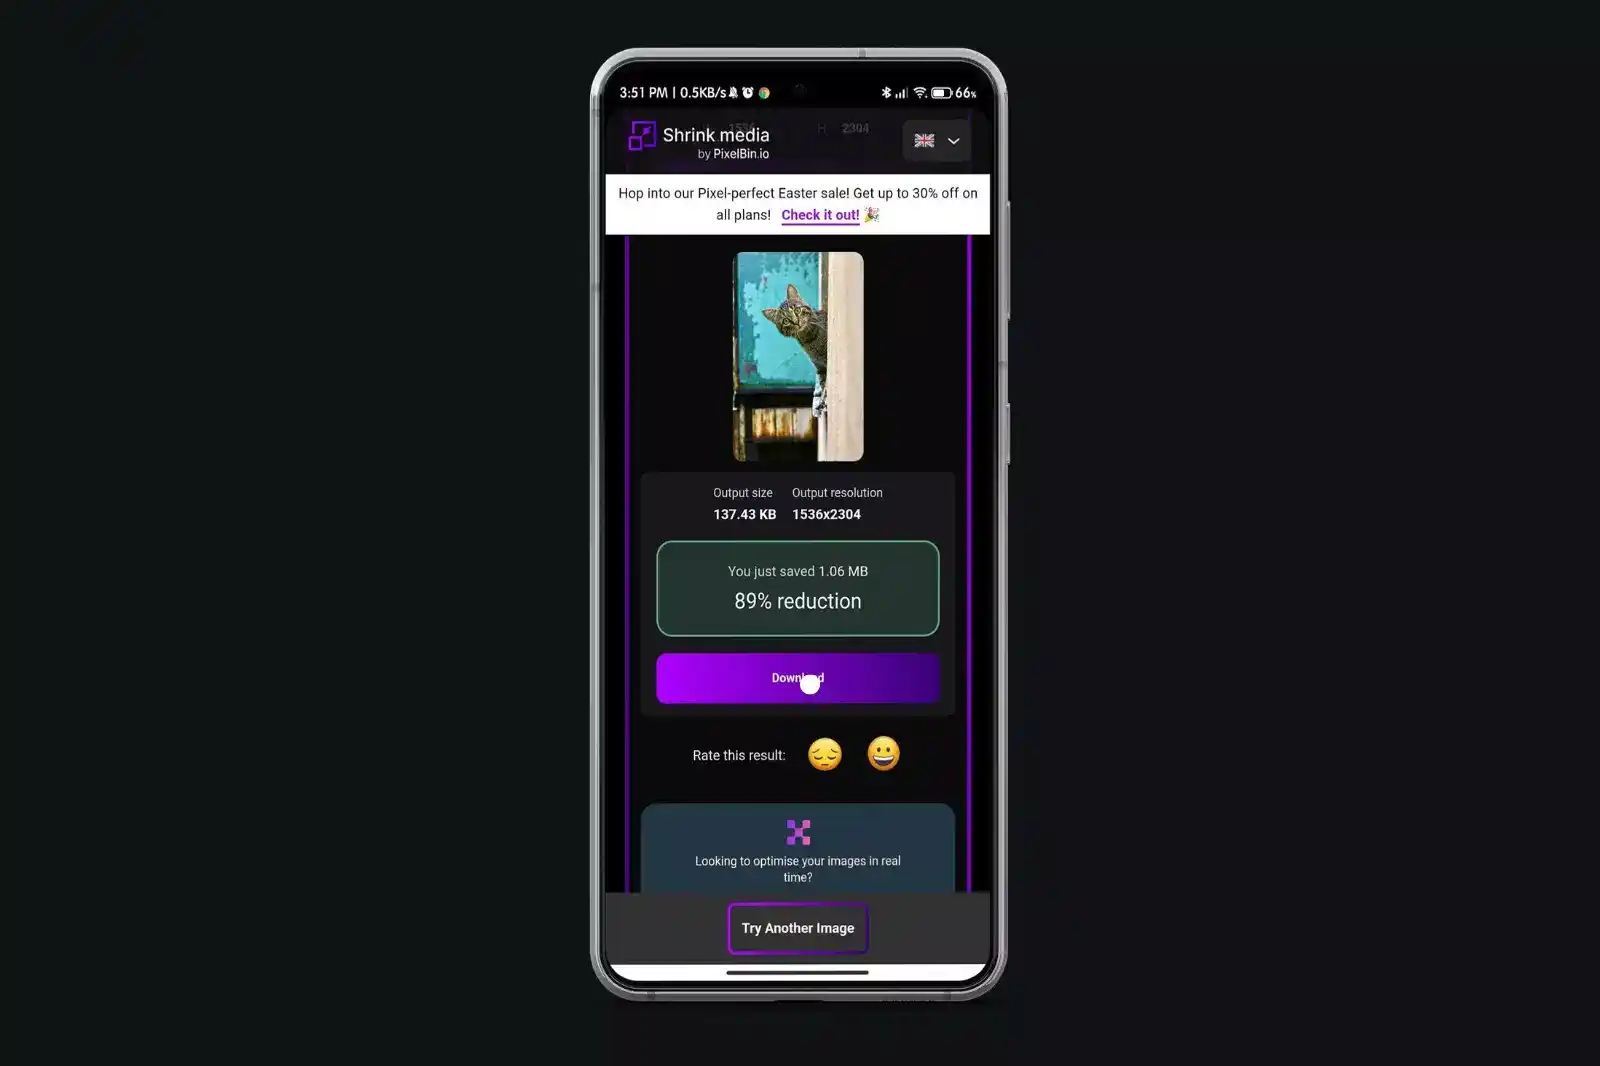
Step 2. Start the Compression Process:Once the image file is uploaded, press "Compress" and watch as Xconvert automatically starts the process to decrease your image file size.
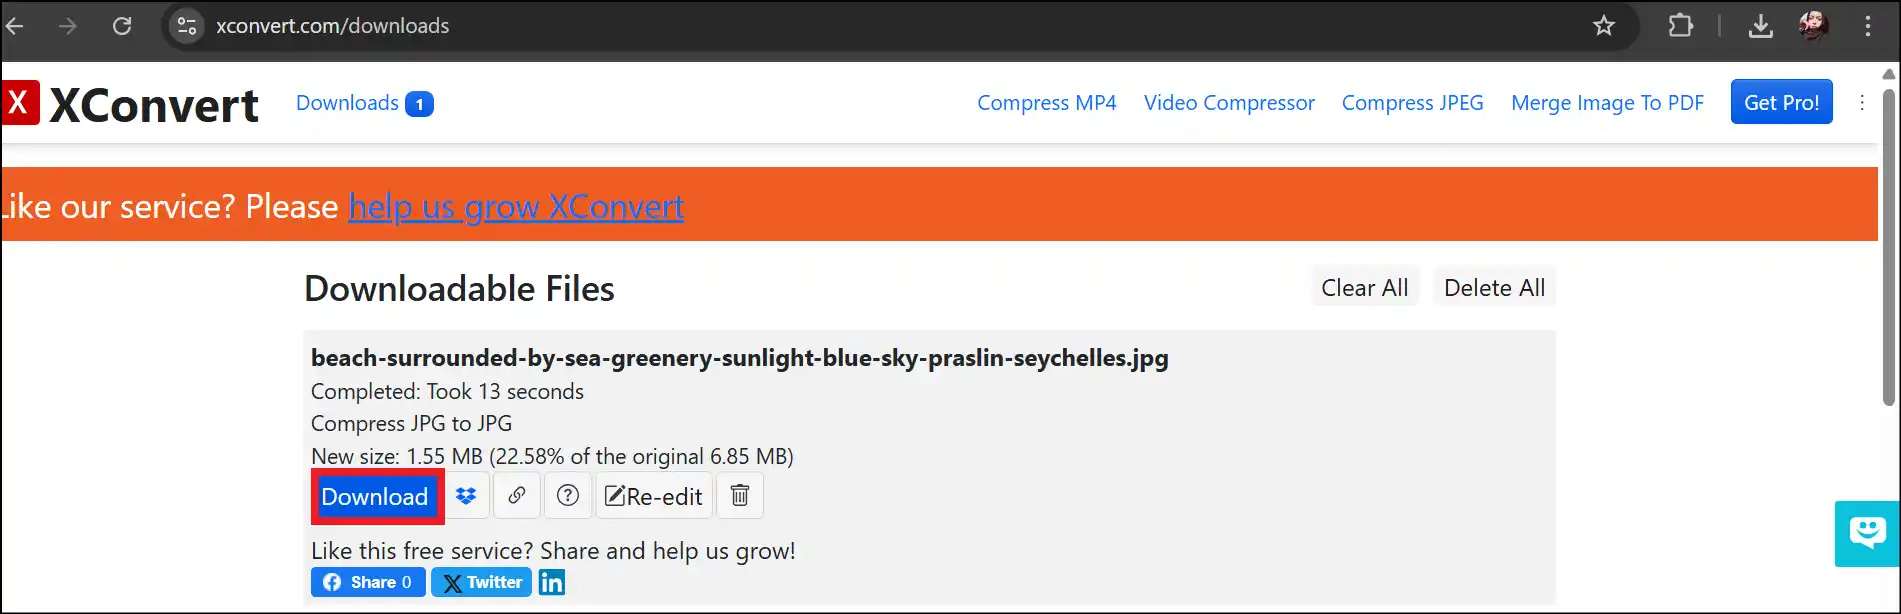
Step 3. Download the Compressed Image:Once the compression processing is complete, click on the "Download" button to download your optimized image.
Part 6: How to Decrease Image File Size on iPhone
Controlling storage space and maintaining picture quality could be challenging for iPhone users. Fortunately, by offering quick modifications, an app called &Photo Compress enables you to rapidly decrease image file size with just a few touches.
Steps to Compress Image Through Photo Compress App
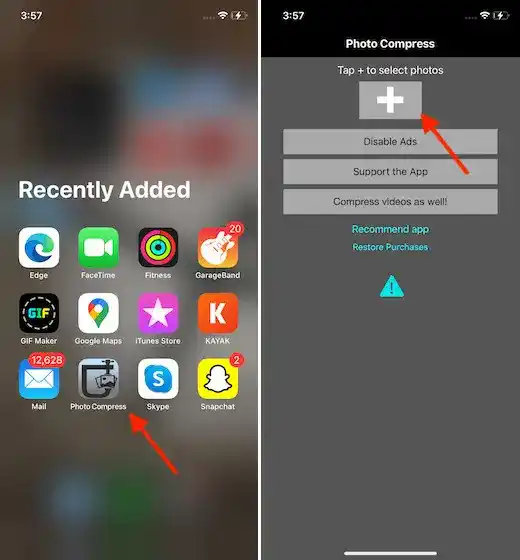
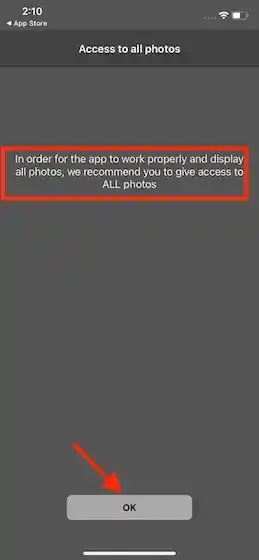
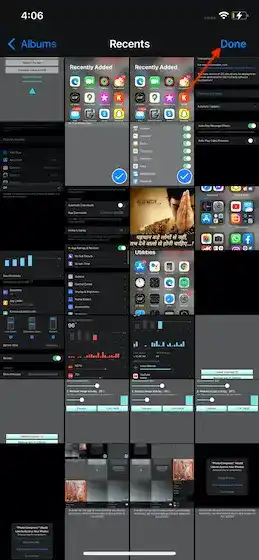
Step 1. Upload Image to the Downloaded App:Download Photo Compress from the App Store. Navigate to the app, double-click to open it, click on the "+" sign to upload your image file, and then press "OK"to give the app access to your pictures.
Step 2. Select the Image: Now select a single or multiple images that you want to compress, and then tap on "Done".
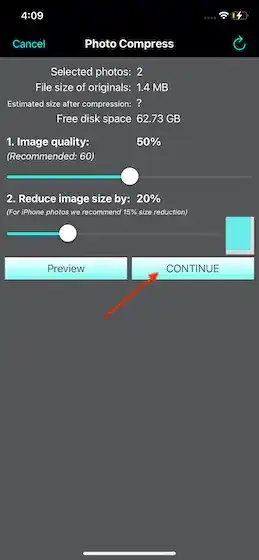
Step 3. Adjust the Compression Level: Select the compression level by adjusting "image quality" and "Reduce image size by" and press "CONTINUE".
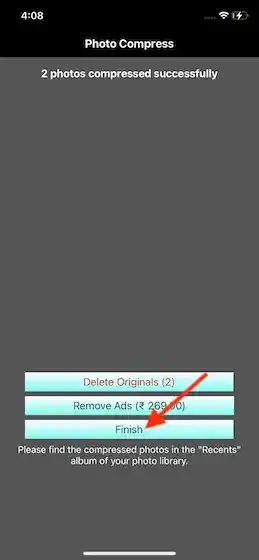
Step 4. Save and access the optimized image: After the completion of the compression process, tap on "Finish" and access your compressed images in "Recents" album folder.
Part 7: How to decrease image file size on Android
For Android users wishing to lower picture file size, Shrink.Media is recommended. With its straightforward and simple appearance, this program is ideal for quickly resizing many photographs without compromising quality.
Steps to Use Photo Resizer App to Decrease Image File Size
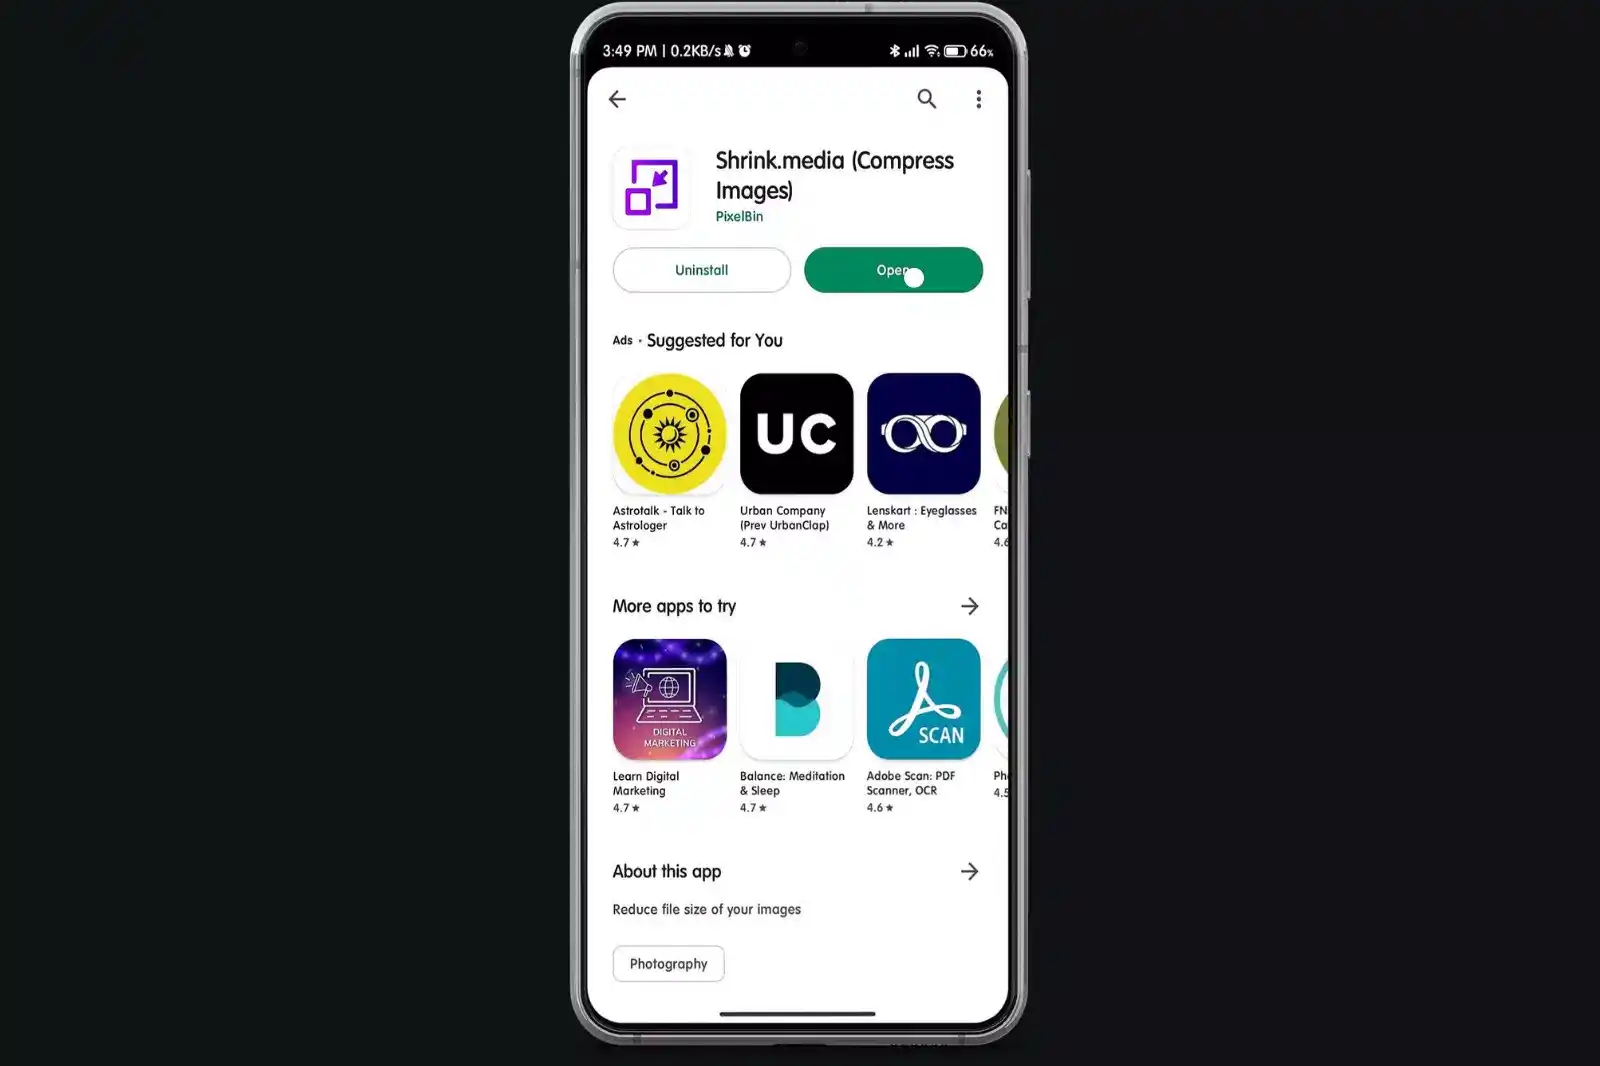
Step 1. Download the Android app: Head over to the Google App Store, search for "Shrink.media", and download and open the app.
Step 2. Set Compression Level and Upload Image:: Launch the app and adjust photo.
Step 3. Start Compression Process:Now the app will start compressing the image.
Step 4. Download the Image: After the compression process is complete, you can download and access the compressed image file.
Final Thoughts
Now you know how to decrease file size of images and how it greatly improves your digital experience, whether for personal or business use. Among the few efficient techniques we have described are Photoshop, WMaster ZipKing, Preview for Mac, Xconvert for online, Photo Compress on iPhone, and Shrink.media on Android.
Windows users should try our FREE program, WMaster ZipKing, to quickly and efficiently lower image file sizes without sacrificing quality. Supporting over 61 file types, the tool is meant to streamline compression, extraction, and file organizing. Thus, WMaster ZipKing is a new alternative to traditional zip tools like WinZip if you are searching for one in 2025.
Part 8: How to decrease image file size FAQs
1. How can I decrease a JPG file size?
You can utilize image-editing software, compression tools, and internet resources to preserve quality, all help you to reduce file size while maintaining quality.
2. How to Reduce Image Size Without Losing Quality?
Certainly, using internet tools like Xconvert or desktop tools like WMaster ZipKing can help to compress photos without obvious quality loss.
3. Which image format is the lowest in size?
While preserving reasonable quality for photos and intricate images, JPEG is often the best format for lesser file sizes.
4. How can I decrease the file size of an image on social media?
Although you can resize or apply compression techniques to prepare images before publication, many social networking sites automatically compress photos upon upload.
