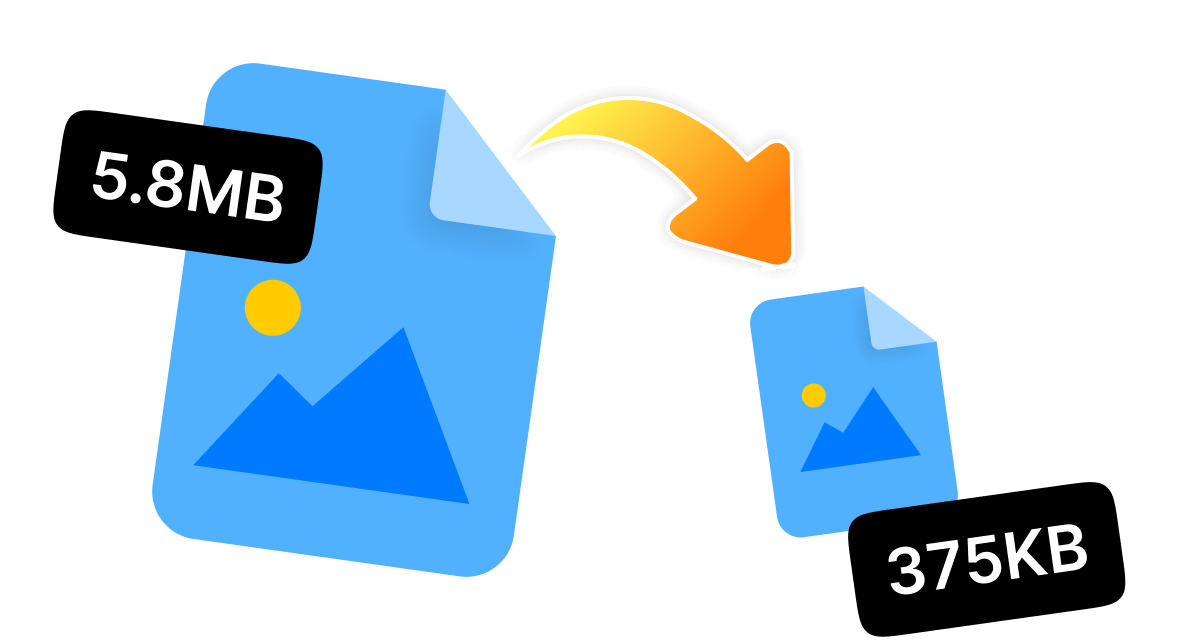

If you are stuck and looking for how to reduce dimensions of JPEG files without losing their quality, you are in the right place. Whether you want to free up some device space, speed up uploads, or just resize them for your social media accounts, shrinking JPEG file size is a must.
What's best? You don't need any complicated software or fancy skills to cut down the file size-just some amazing tools and a little know-how. This guide will let you explore some effective yet simple ways to reduce JPEG dimensions on your desktop.
From powerful tools, like WMaster Zipking for Windows and Photoshop Express for Mac, to built-in tools, like Paint, there is a suitable solution for every platform. Continue reading to find out which approach best suits your needs!
In this article
Part 1: What Are the Dimensions of JPEG?
For a JPEG file, dimensions refer to its height and width in pixels, which means when you look at the image files, these figures tell you how many pixels (or tiny dots) make up that image. The JPEG file can be up to 4.29 GB in size if it is a square or has a 1:1 aspect ratio-meaning it has a dimension limit of 65,535x65,535 pixels.
So, whether you increase or decrease the dimensions, it affects how much space it takes and how the image looks. For your reference, a small JPEG image might be 750x550 pixels, and with 1920x2080 pixels, it is considered a high-definition image.
Part 2: The Easiest Way to Reduce Dimensions of JPEG
For Windows users looking for a stress-free solution to reduce image file size , including JPEG, without even losing its quality, try WMaster ZipKing. This all-in-one tool is super easy to navigate and the best alternative to traditional tools, like WinZip. Further, it is currently free to use with all its features. So, sidestep complicated processes and download the tool to optimize JPEG images and change image aspect ratioswithin a few seconds.
5 Key Features to Choose WMaster ZipKing to Reduce Dimensions of JPEG
WMaster ZipKing
Reduce Dimensions of JPEG With Custom Selections in One Click
- The user interface is intuitive and user-friendly & perfect for non-techies.
- It can reduce the size of multiple larger JPEG image files at once.
- Assure the quality of image files, including JPEG, even after size reduction.
- It is compatible with all the Windows versions, especially Windows 10 and 11.
- With customization, users can input desired dimensions to reduce image size.
Guide to Reduce JPEG Dimensions by WMaster ZipKing
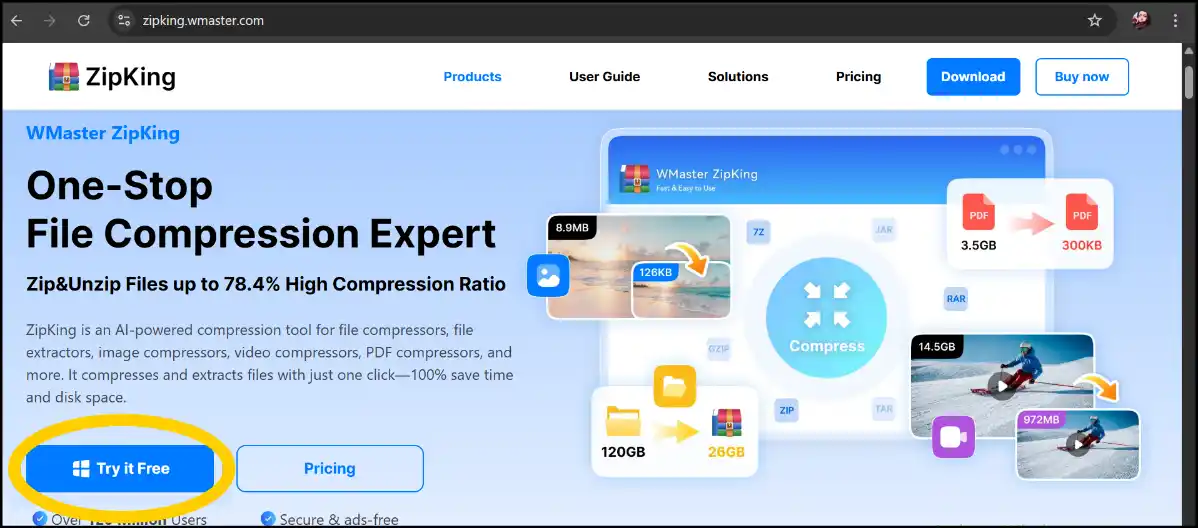
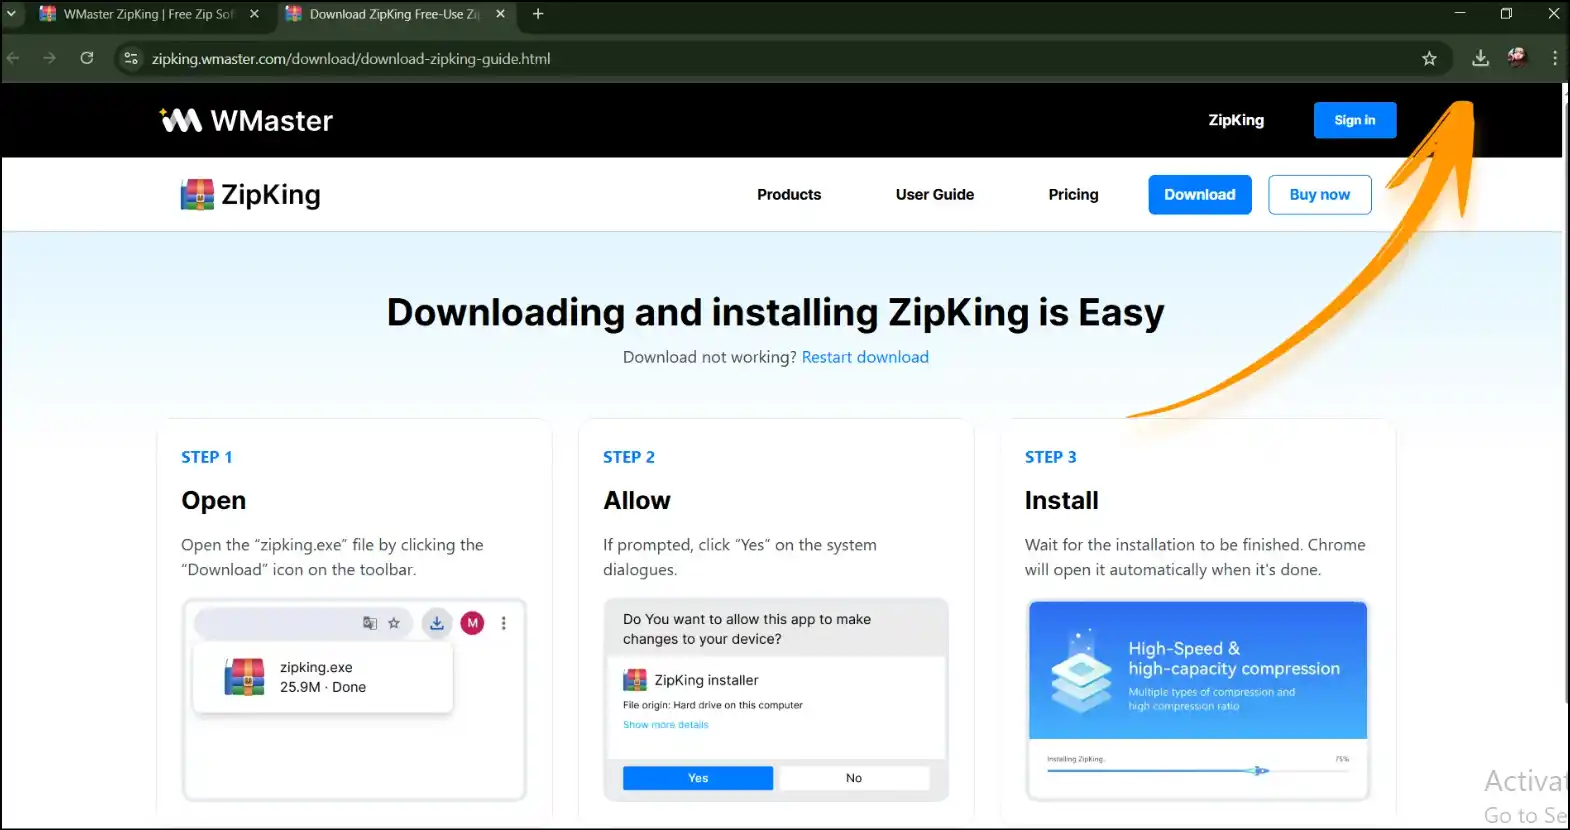
Step 1. Download and install the tool: Navigate to the website's home page and tap "Try it free" to start downloading the tool on your system, and then follow the instructions to set up the installation process.
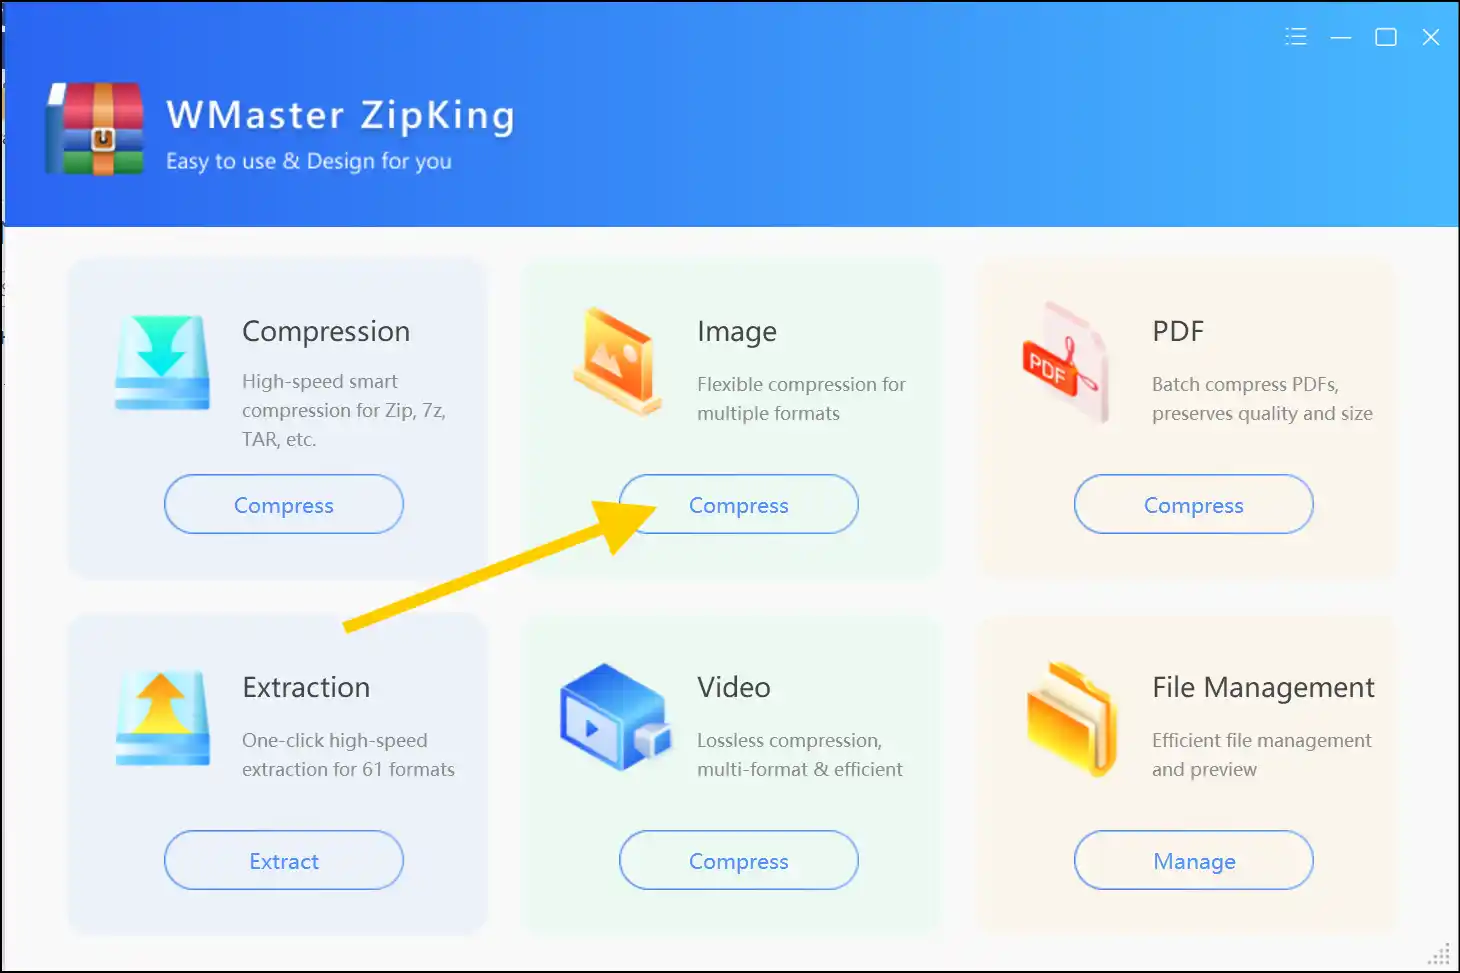
Step 2. Launch our Zipking interface:Once the installation process is over, launch our all-in-one tool on your desktop and press "Compress" as shown in the image below.
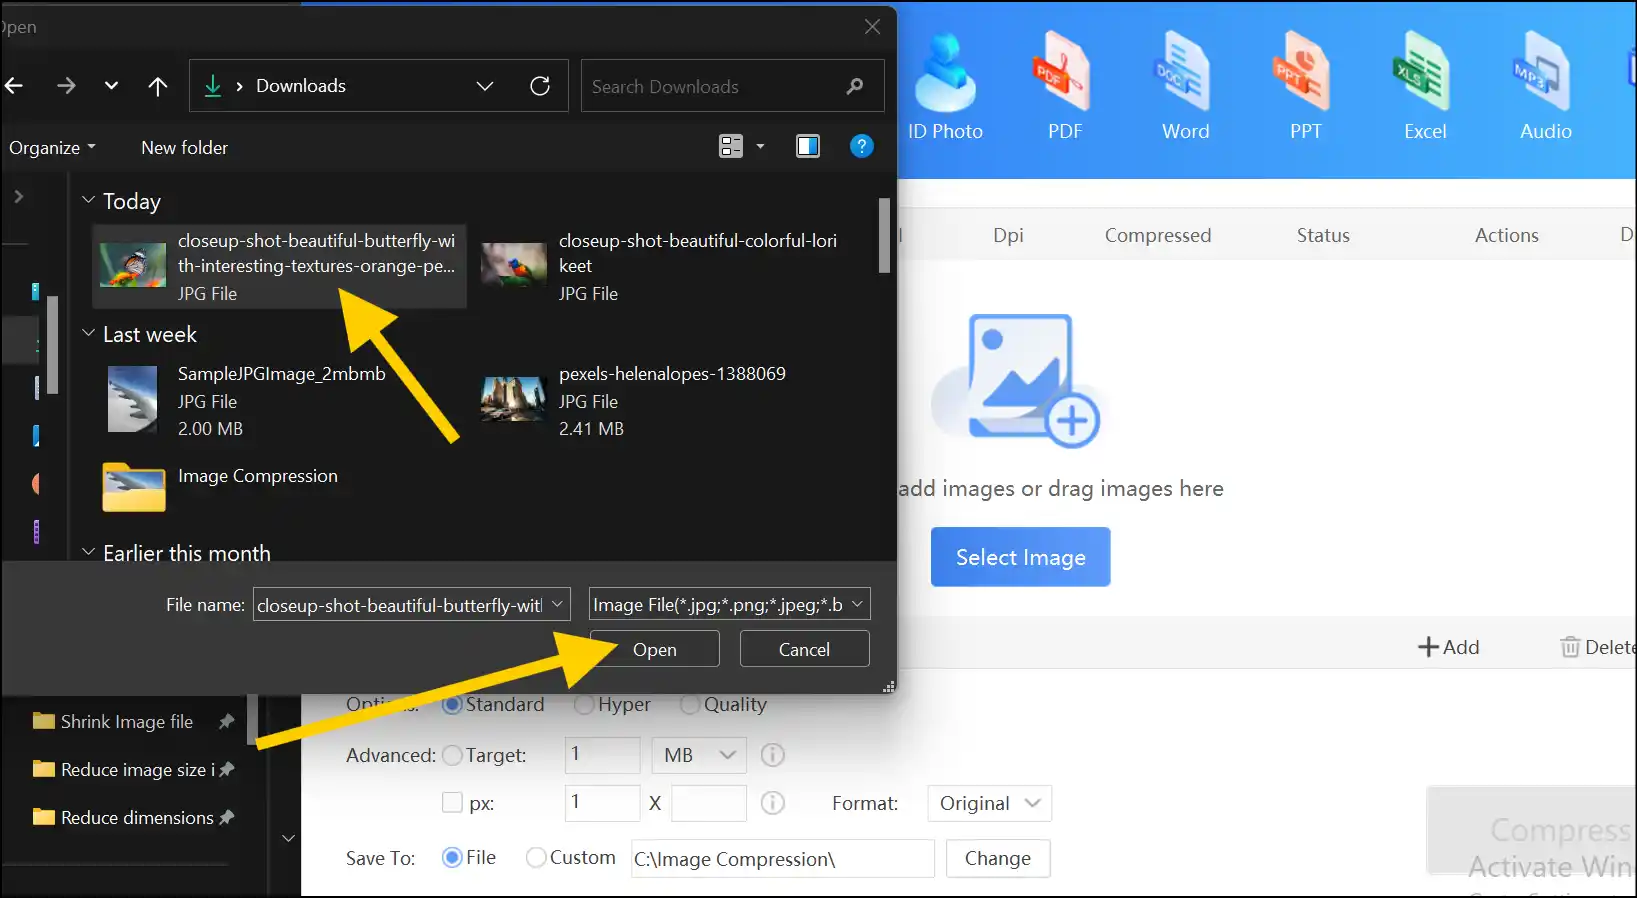
Step 3. Add your JPEG image file: Tap on "Select Image" to pick and upload your desired JPEG image file to the workspace of the tool, or just drag and drop your JPEG image.
💡Tips:With WMaster Zipking's batch processing feature, you can also select and upload multiple JPEG image files to resize them at once.
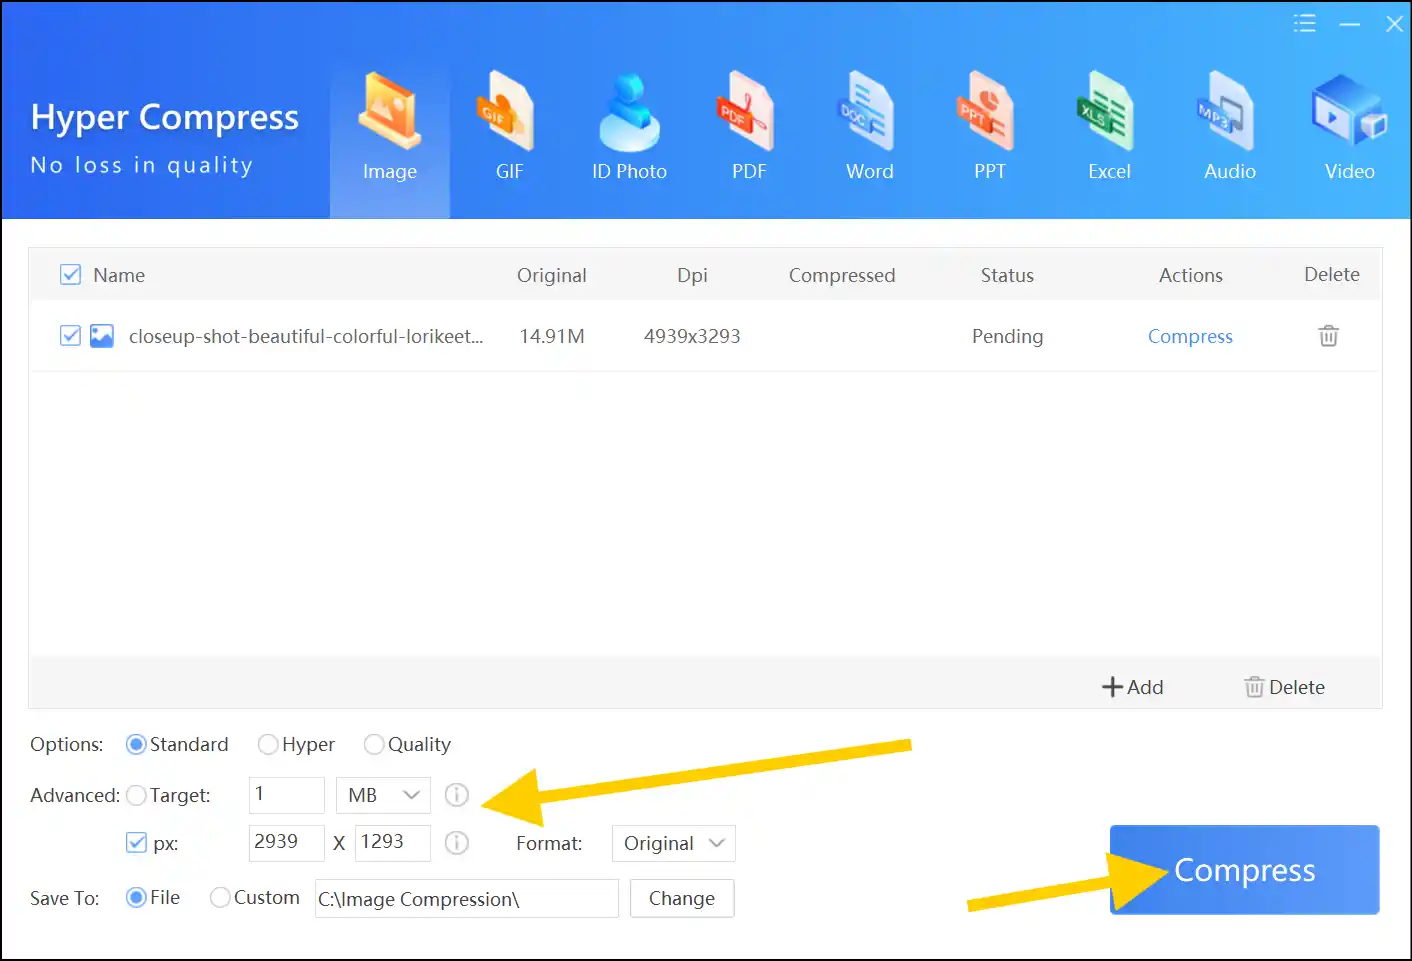
Step 4. Choose Resize Settings: Now select compression quality, input custom dimensions to resize image pixels, and then press "Compress" to reduce JPEG dimensions.
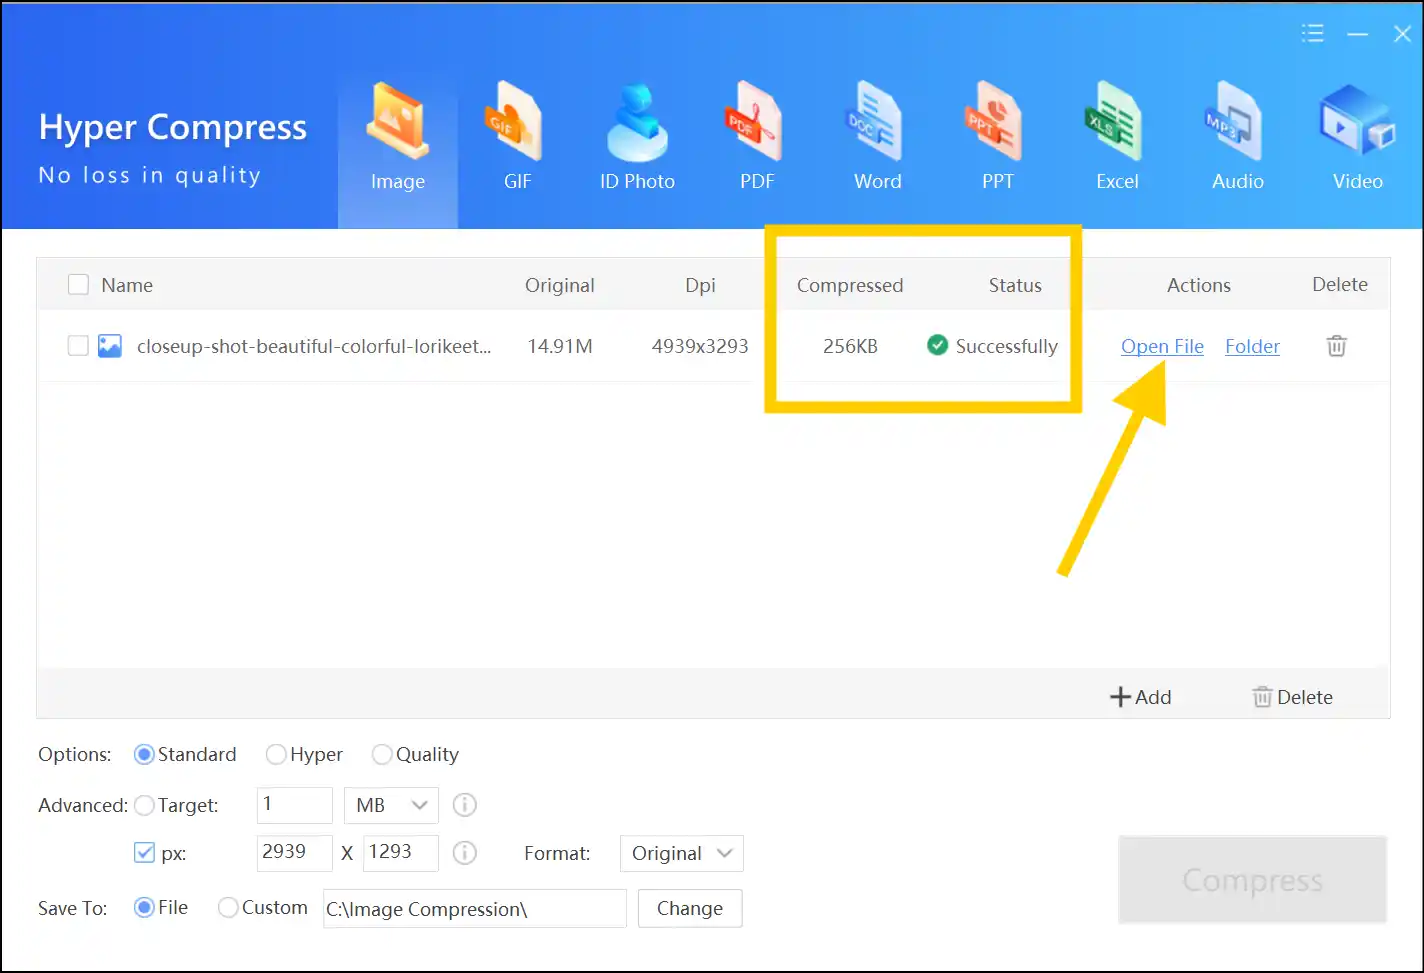
Step 5. Access the compressed JPEG: Once the compression process is completed, hit on "Open File" to instantly preview the lossless JPEG image file with significantly reduced size.
💡Tips:If you tap "Folder", it will open a folder named "Image Compression", which contains all the compressed JPEG image files that you process with Zipking -access, share, and use as you wish.
Part 3: How to Reduce JPEG Dimensions in Paint
If you are on the go or a person who does not want to install anything on your device, utilize Paint, an in-built traditional tool that can help users reduce image file sizes, including JPEG dimensions, within a few clicks. This simple tool works best when small image edits are required without even downloading any additional tool.
How to Reduce Pixel Size of Image With Paint
Step 1. Open JPEG image in Paint:Head over to your desired JPEG image file, right-click on it, tap "Open with", and then choose "Paint" to reduce JPEG dimensions.
Step 2. Open resize tool and input dimensions: Tap on the "resize" icon; this will open a resize tool. Set custom dimensions for your JPEG image file and press "OK".
💡Tips:Remember to keep "Maintain aspect ratio" checked so that you can prevent any distortion or quality loss after reducing image file size with Paint.
Step 3. Save the Resized JPEG: Now go to "File" and tap on "Save As"-"JPEG Image" to choose the destination path for your resized JPEG image file.
Step 4. Access and resize JPEG: Once you save the resized image, you can navigate to the destination path where you saved the JPEG image file-access, share, and use as you need.
Part 4: How to Reduce Dimensions of JPEG on Mac
If your Mac storage is almost full and you need to delete files to free up some space, download this tool to compress images, including JPEG. For Mac users searching for a reliable image resizer that is also free, we recommend you download "Photo Compress"-"Shrink Pics". This tool will let you compress your JPEG images one by one or many at once without even dropping their quality.
How to reduce pixel size of image with Mac tool
Step 1. Launch image resizer: Download "Photo Compress"-"Shrink Pics" from the Apple App Store and launch the tool on your device. Tap on the "+" sign to add JPEG images to the workspace.
Step 2. Select JPEG and adjust compression level: Tap to select one or more JPEG images, go to the top right corner, and press "Select". Now adjust desired compression quality and resize settings to reduce JPEG dimensions on Mac.
Step 3. Access and preview resized images: Once you adjust the resizing, tap on "CONTINUE" to save the resized JPEG images in the current folder.
If you are one of those who does not want to install anything on his device, check out our recommendations for online solutions to reduce JPEG image file size .
Part 5: Reduce JPEG Dimensions Related FAQs
Q1. How can I resize multiple JPEG images at once?
A: By using tools that are offering batch processing features, like WMaster ZipKing, you can resize multiple JPEG images by adding multiple files to the workspace and applying resize settings simultaneously.
Q2. Will resizing JPEG images affect their quality?
A: Resizing tools that ensure lossless algorithms to compress images, like WMaster ZipKing, can maintain original quality even after reducing JPEG image file size. On the other hand, an excessive image size reduction may cause some quality or clarity loss.
Q3. Is it possible to resize JPEG images without installing software?
A: Of course, online tools, like TinyJPG, or built-in programs, like Paint, can resize JPEG images without even installing any software on your operating device.
Q4. Can I restore the original JPEG image after resizing?
A: It would be a better option if you kept a backup of your original JPEG image files, as the changes you make to reduce file size are usually irreversible once it is saved.
Conclusion
Reduction of JPEG image files should not be a whole thing or time-consuming. So, regardless of what you prefer a dedicated tool, like WMaster ZipKing for Windows or Photo Compress for Mac, or a simple in-built program, like Paint-there is an easy way out that works best for everyone. Thus, these lightweight and straightforward tools help you to resize image pixels efficiently, ensuring image optimization for your desired needs.
For Windows users, we highly recommend our dedicated tool, WMaster Zipking, which stands out when it comes to selecting a quick, reliable, and easily accessible compression tool. At this time, Zipking is totally free, and all its features are unlocked, making it an impeccable choice for Windows users looking to reduce JPEG dimensions with a few clicks. So, what are you waiting for? Download the tool right now and reduce multiple JPEG image files in one shot!
